

Feed Experimentation
Learn how to run experiments on your product data by splitting items into variant groups and applying different rule logic to each group.
Feed Experimentation is a feature that lets you split a defined subset of your product data into two variant groups — Variant A and Variant B — and apply different rule logic to each. This enables you to compare outcomes in a controlled and measurable way without duplicating exports or disrupting your existing feed setup.
The platform assigns items to variant groups deterministically: the same item is always assigned to the same group across all refreshes, based on its Unique Item Identifier. You can track experiment results in your analytics platform using UTM parameters that the platform appends automatically.
You can use all rule boxes within Feed Experimentation. See Find the needed rule box category for information on available rule boxes.
Beta feature
Feed Experimentation is currently available as a beta feature. If you encounter any issues while using it, contact support@productsup.com.
Prerequisites
Before setting up an experiment, make sure the following conditions are met:
- A Unique Item Identifier is configured for your site. The platform uses this to assign items to variant groups consistently. See Set a unique item identifier for more information.
- At least one export channel is set up in your site.
- You are familiar with how Rulebox Conditions work. See Apply rule boxes based on conditions for more information.
Set up Feed Experimentation
Go to Dataflow or Data View from your site's main menu.
Select Rule box conditions in the top ribbon.
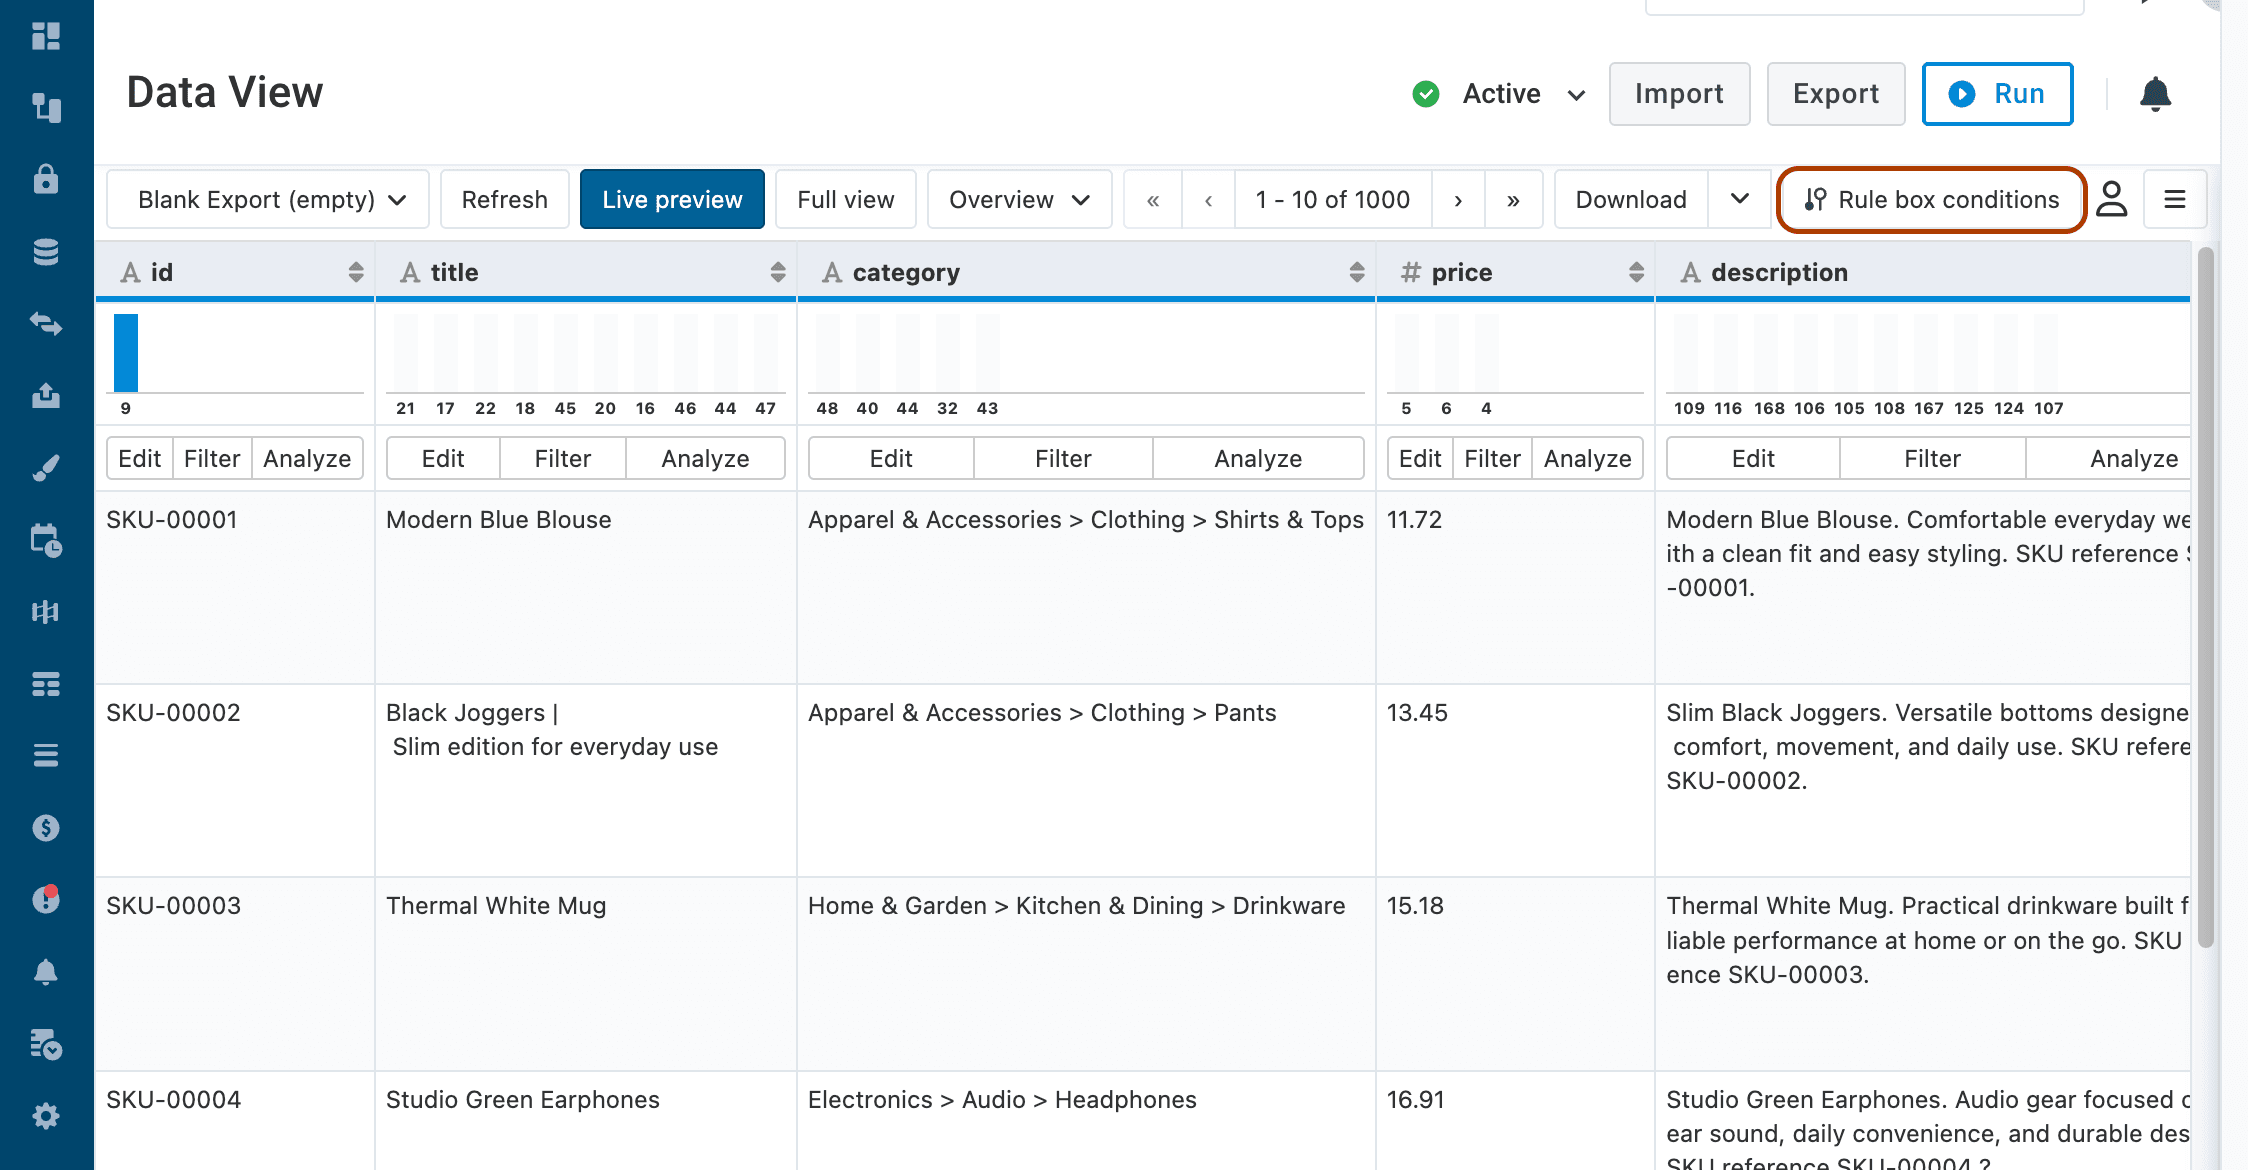
Select the stage where you want to create the condition:
- Select Intermediate to run the experiment across all export channels in the site.
- Select Export to run the experiment on a specific export channel only.
Tip
We recommend creating experiments at the Export stage so that the experiment scope is limited to the intended channel.
Select Add a condition, give it a name and description as desired, and select Create.
In the condition editor, activate the Feed Experimentation toggle. The THEN panel splits into Variant A and Variant B, where you apply the rule logic you want to test for each group.
The ELSE panel remains available: any rule boxes you add there apply to items that do not satisfy the condition statements. If you leave the ELSE panel empty, those items keep their current attribute value unchanged.
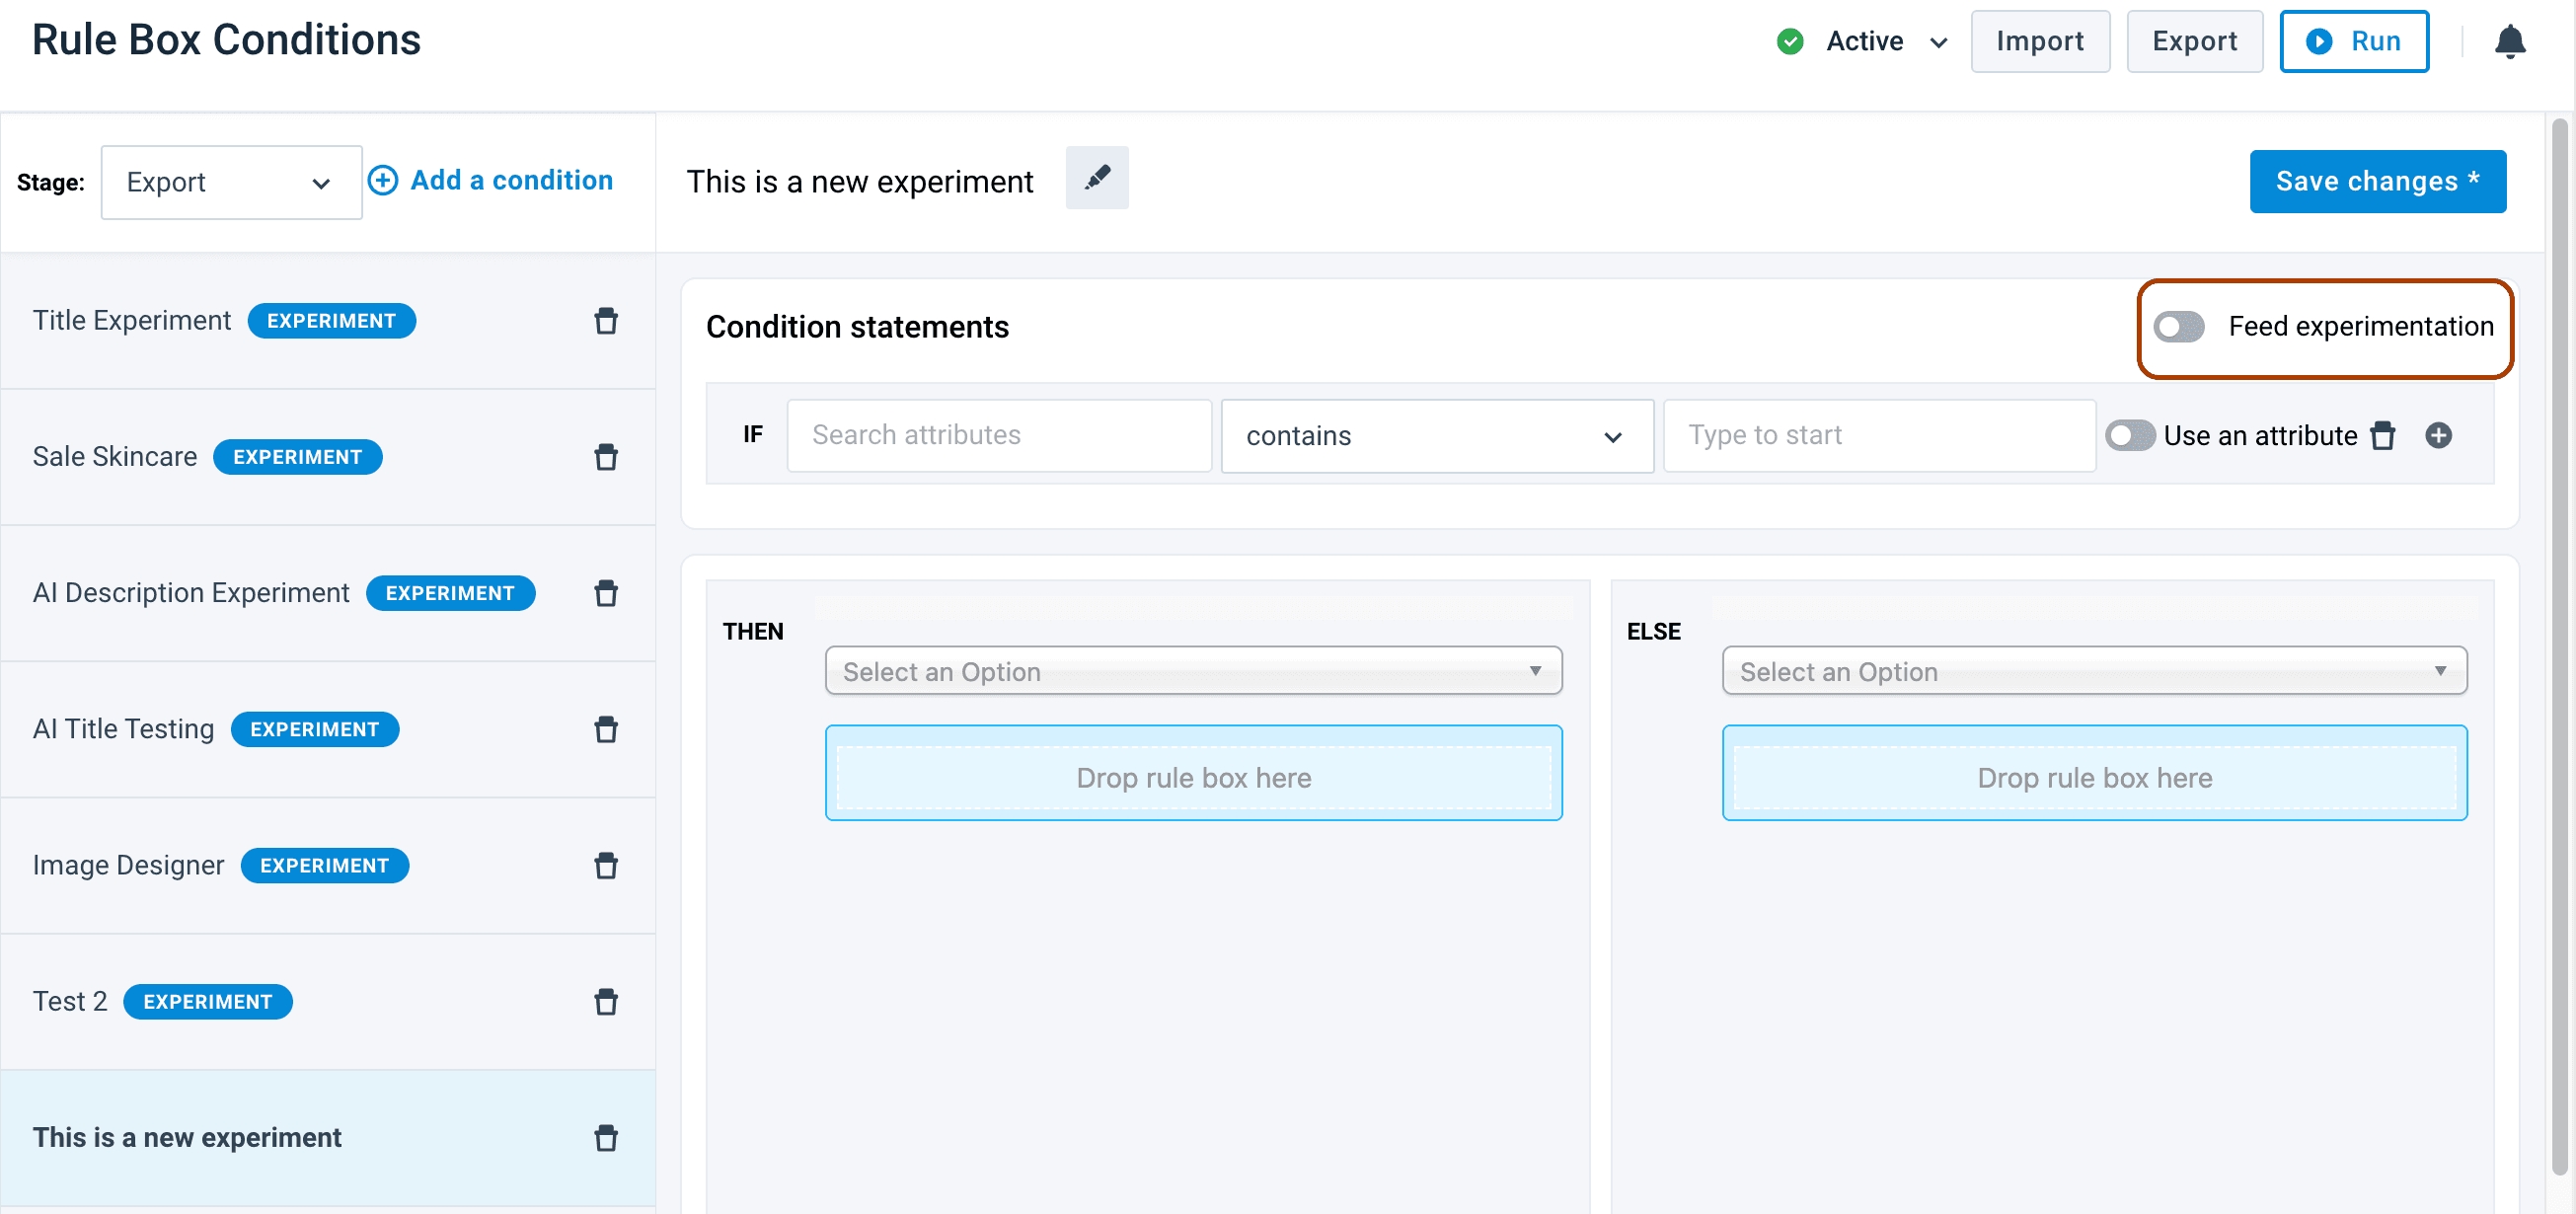
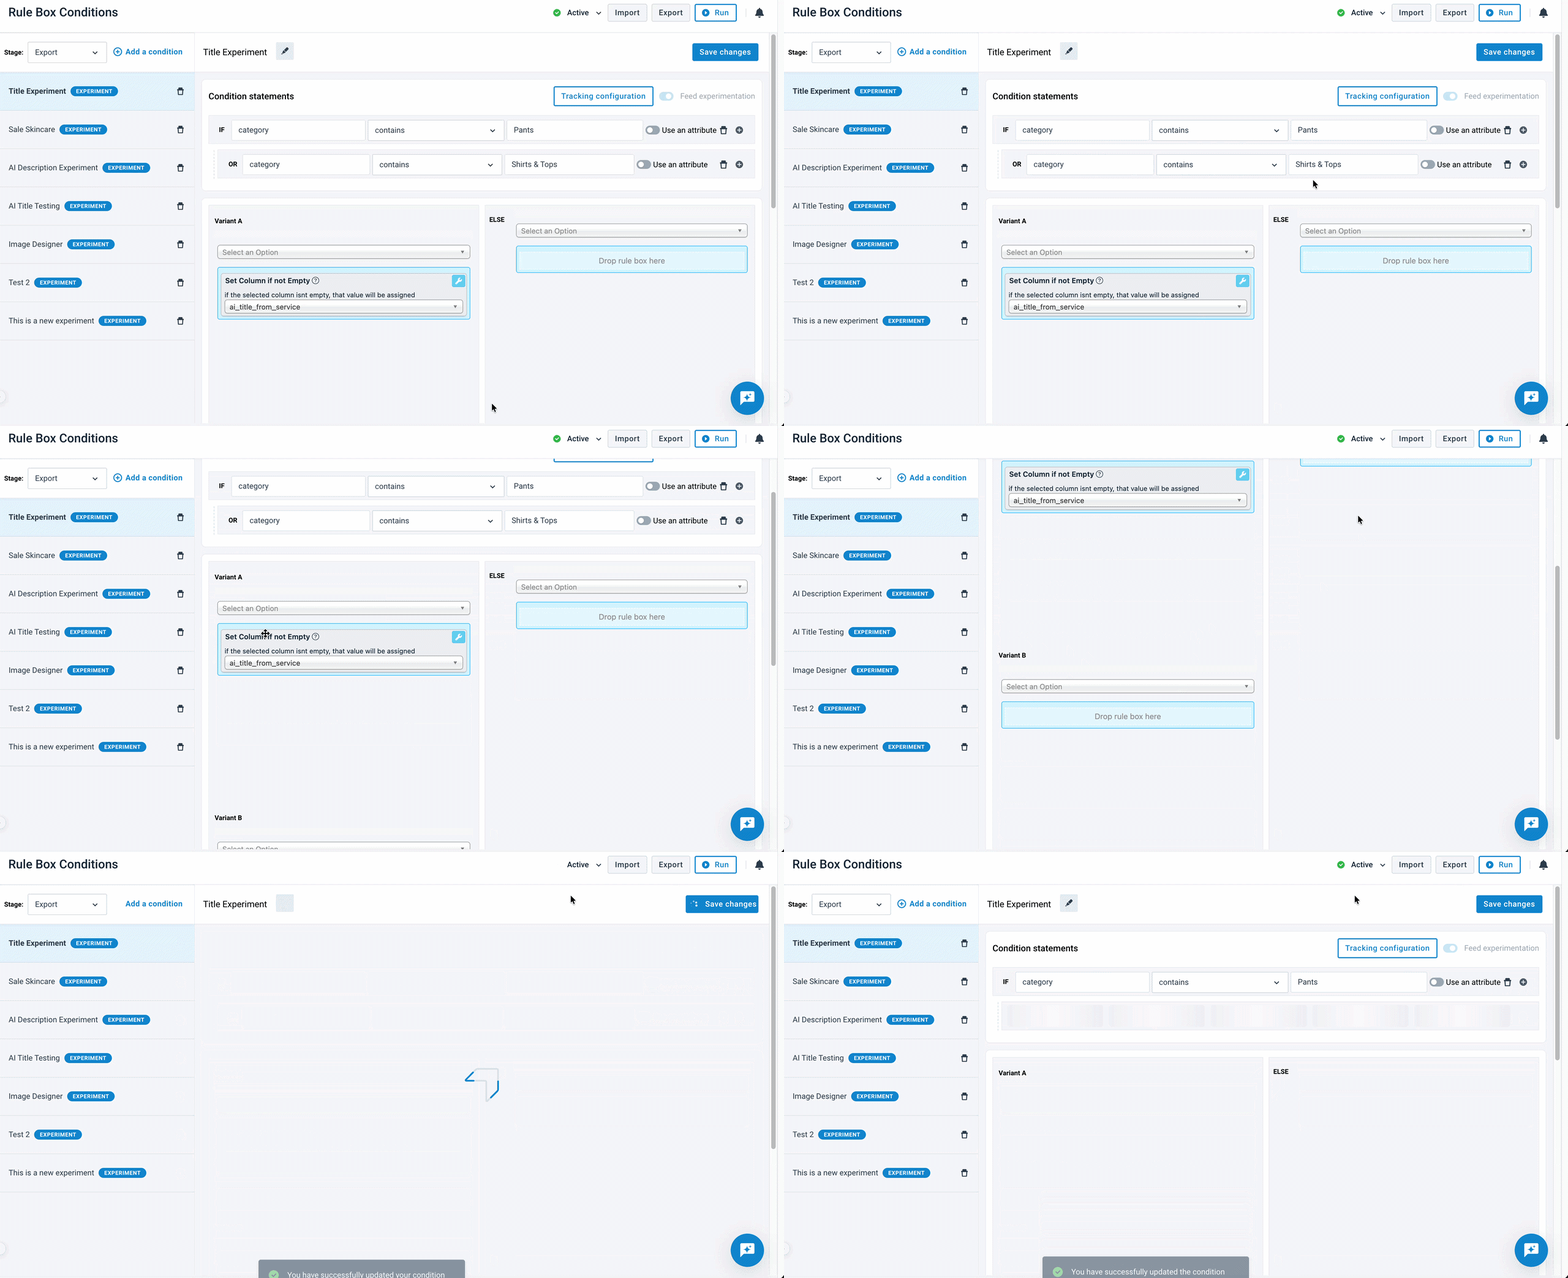
Use condition statements to define which products the experiment will run on. Only products that match the condition statements are split into variant groups. Products that do not match any condition receive no variant assignment.
For example, you can target all products whose category attribute contains Pants or Shirts & Tops.
The platform automatically distributes matched products evenly: 50% to Variant A and 50% to Variant B.
Feed Experimentation does not split traffic 50/50 on the same SKU. Each item is assigned to exactly one variant group.
Tip
To use Variant B as a control group, leave it empty — that is, apply no rule boxes to it. Variant A then receives the changes you want to test against the unchanged control.
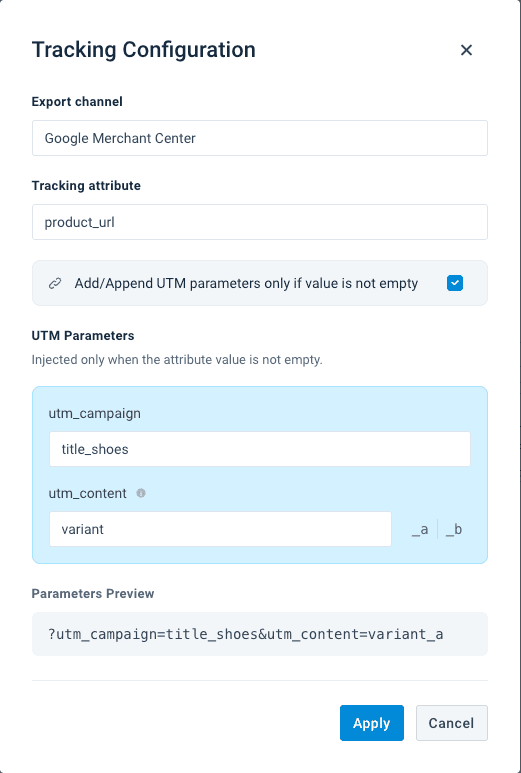
To measure results in an external analytics platform, use Tracking Configuration:
- If the condition was created on Export stage:
- Select Export Channel from which the list of attributes will be loaded.
- In Tracking attribute, select the attribute on which the UTM parameters will be injected.
- You can select whether the UTM parameters should always be added or appended to the attribute value, or only when the attribute value is currently not empty (e.g. attributes containing links)
- In UTM Parameters, enter the values for
utm_campaignandutm_content.
Tip
Configuring tracking parameters correctly ensures you can distinguish Variant A from Variant B in your analytics platform. If UTM parameters are not configured, the results of the two variants cannot be separately attributed in your external reports.
Add the Rulebox Condition to the attribute where you want the variant logic to run — for example, the title, description, or image_link attribute.
See Apply rule boxes based on conditions for the full steps.
Select Full View and trigger a Refresh. This processes your feed without re-importing data or exporting to any channel, so you can safely preview the experiment output before it goes live.
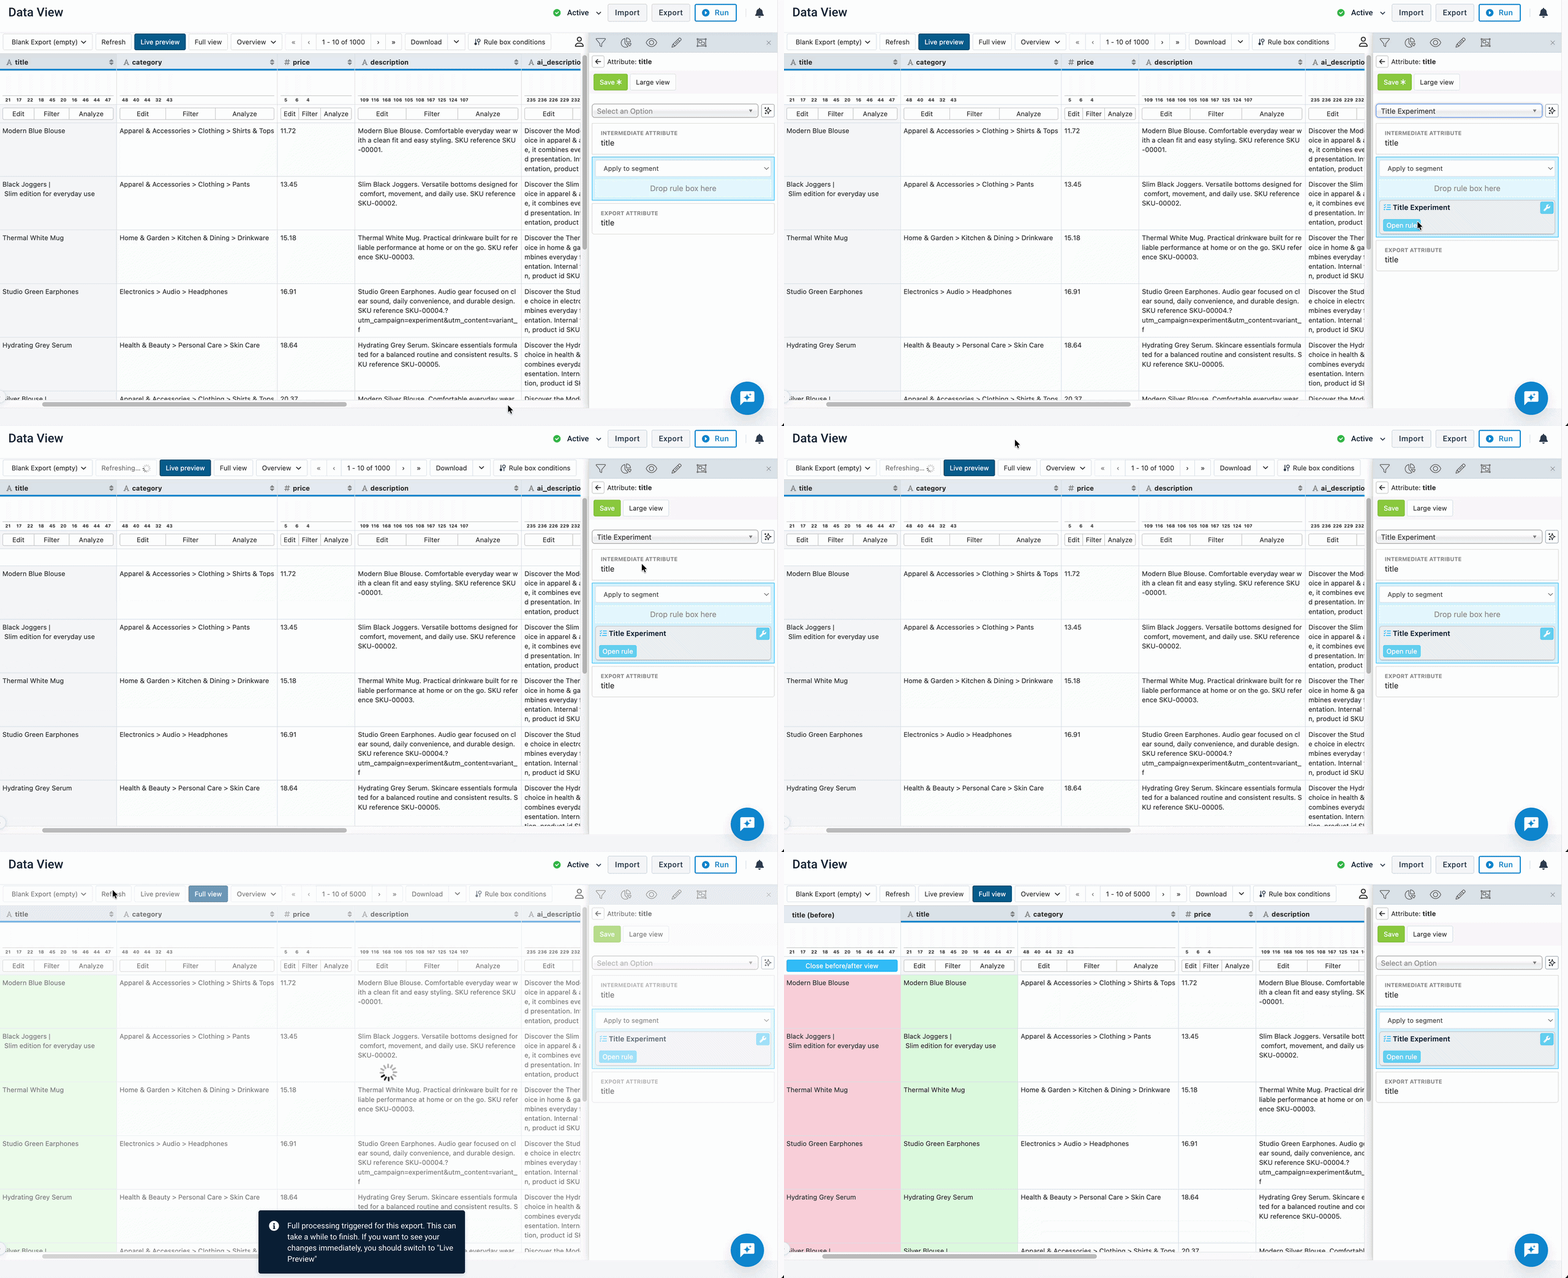
After the refresh, verify the following in Data View:
- Products are split correctly between Variant A and Variant B.
- The rule logic for each variant is applied as expected.
- UTM parameters are appended correctly to the configured attribute.
- The system attribute
___experiment_condition_groupshows the correct variant assignment for each row.
See The ___experiment_condition_group attribute for more information on how to interpret the values.
The ___experiment_condition_group attribute
When Feed Experimentation is active on a site, the platform automatically generates a system attribute called ___experiment_condition_group. This attribute shows which variant group each item has been assigned to.
Variant groups are assigned in alphabetical letter pairs, one pair per experiment:
| Experiment | Variant A group | Variant B group |
|---|---|---|
| 1st | A | B |
| 2nd | C | D |
| 3rd | E | F |
| … | … | … |
Items that do not match any experiment condition have an empty value in this attribute.
You can inspect this attribute in Data View to verify the distribution of items across variants, or use it as a condition in other rule logic elsewhere in your feed.
A site can run a maximum of 13 simultaneous experiments (covering all 26 letters of the alphabet). Once this limit is reached, no further experiments can be added until an existing one is removed.
Important considerations
- Non-overlapping conditions are recommended. Multiple experiments can run simultaneously. If a product satisfies the condition statements of more than one experiment, the platform assigns it to the first experiment whose conditions it matches. To ensure predictable results, design your condition statements so that the product subsets of different experiments do not overlap.
- Variant assignment is stable. As long as the Unique Item Identifier of an item remains unchanged, the item is always assigned to the same variant group for the lifetime of that experiment.
- Results must be measured externally. Productsup does not natively support in-platform analysis of experiment results yet. Use your analytics or advertising platform to evaluate the performance of each variant. If you use Google Analytics, you can import your tracking data back into Productsup via the GA4 data source to enrich your feed with performance signals. See Import tracking data from Google Analytics 4 for more information.
Use cases
Feed Experimentation can be applied to many areas of feed optimization. The following are common use cases:
| Area | Examples |
|---|---|
| Title variations | Prepend brand name vs. no brand; AI-generated title vs. original title |
| Description variations | AI-generated description vs. original description |
| Product highlights | AI-generated highlights vs. manually curated highlights |
| Image and template | Product image vs. lifestyle image; different Image Designer templates |
| Label enrichment | Custom label A vs. custom label B for Smart Bidding signals |
| Attribute completeness strategies | Test fallback logic for missing attributes — for example, use a generated colour value vs. leave the field empty — to measure the impact on downstream approval rates |
| Channel-specific data formatting | Test different title or description length caps, character sets, or formatting conventions to identify which variant performs better on a specific channel |
Related articles
How is this guide?