

Optimize your data in Data View with rule boxes
Optimize your product data in Data View using rule boxes in Productsup.
Rule boxes allow you to transform, clean, and enrich your product data directly within Productsup without altering your raw source data. Adding rule boxes directly in Data View gives you real-time visual feedback so you can verify changes before exporting.
Rule boxes can only be added to the Intermediate or Export stages. They cannot be applied directly to the initial Import stage.
1. Add a rule box in Data View
For example, you may want to use the Static Value rule box to add the US dollar sign ($) to a Price attribute, if it holds numeric values only.
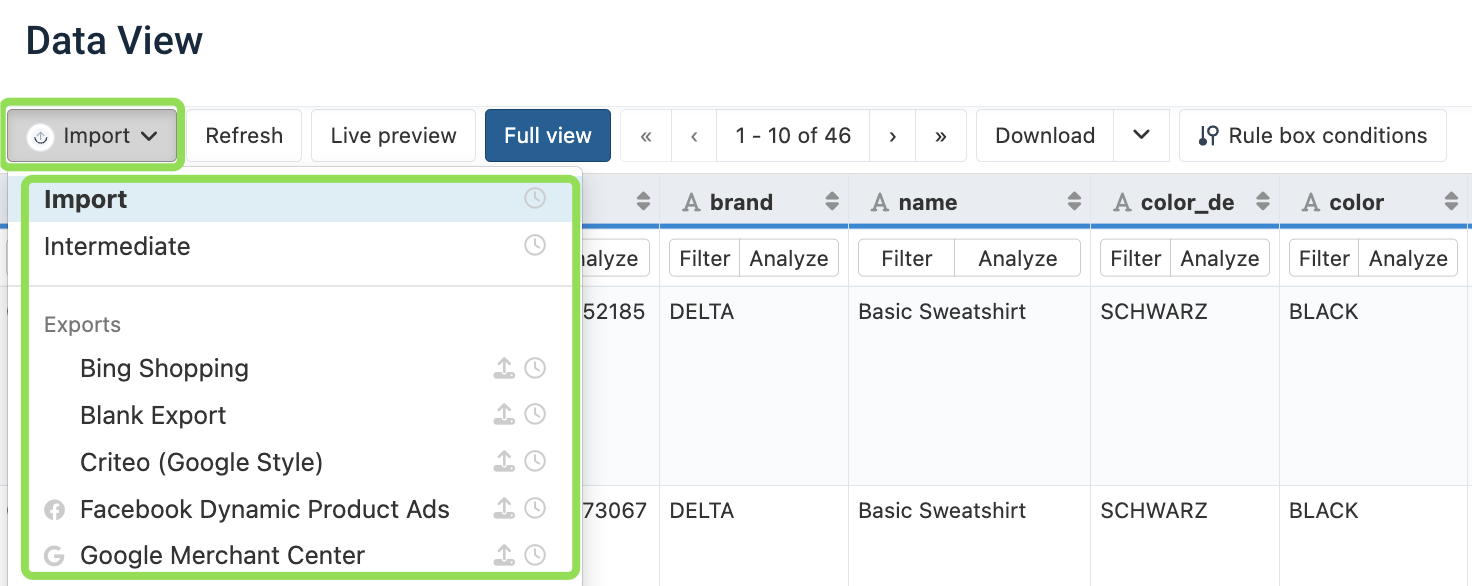
Go to Data View from your site's main menu and select Intermediate or the desired export from the dropdown.
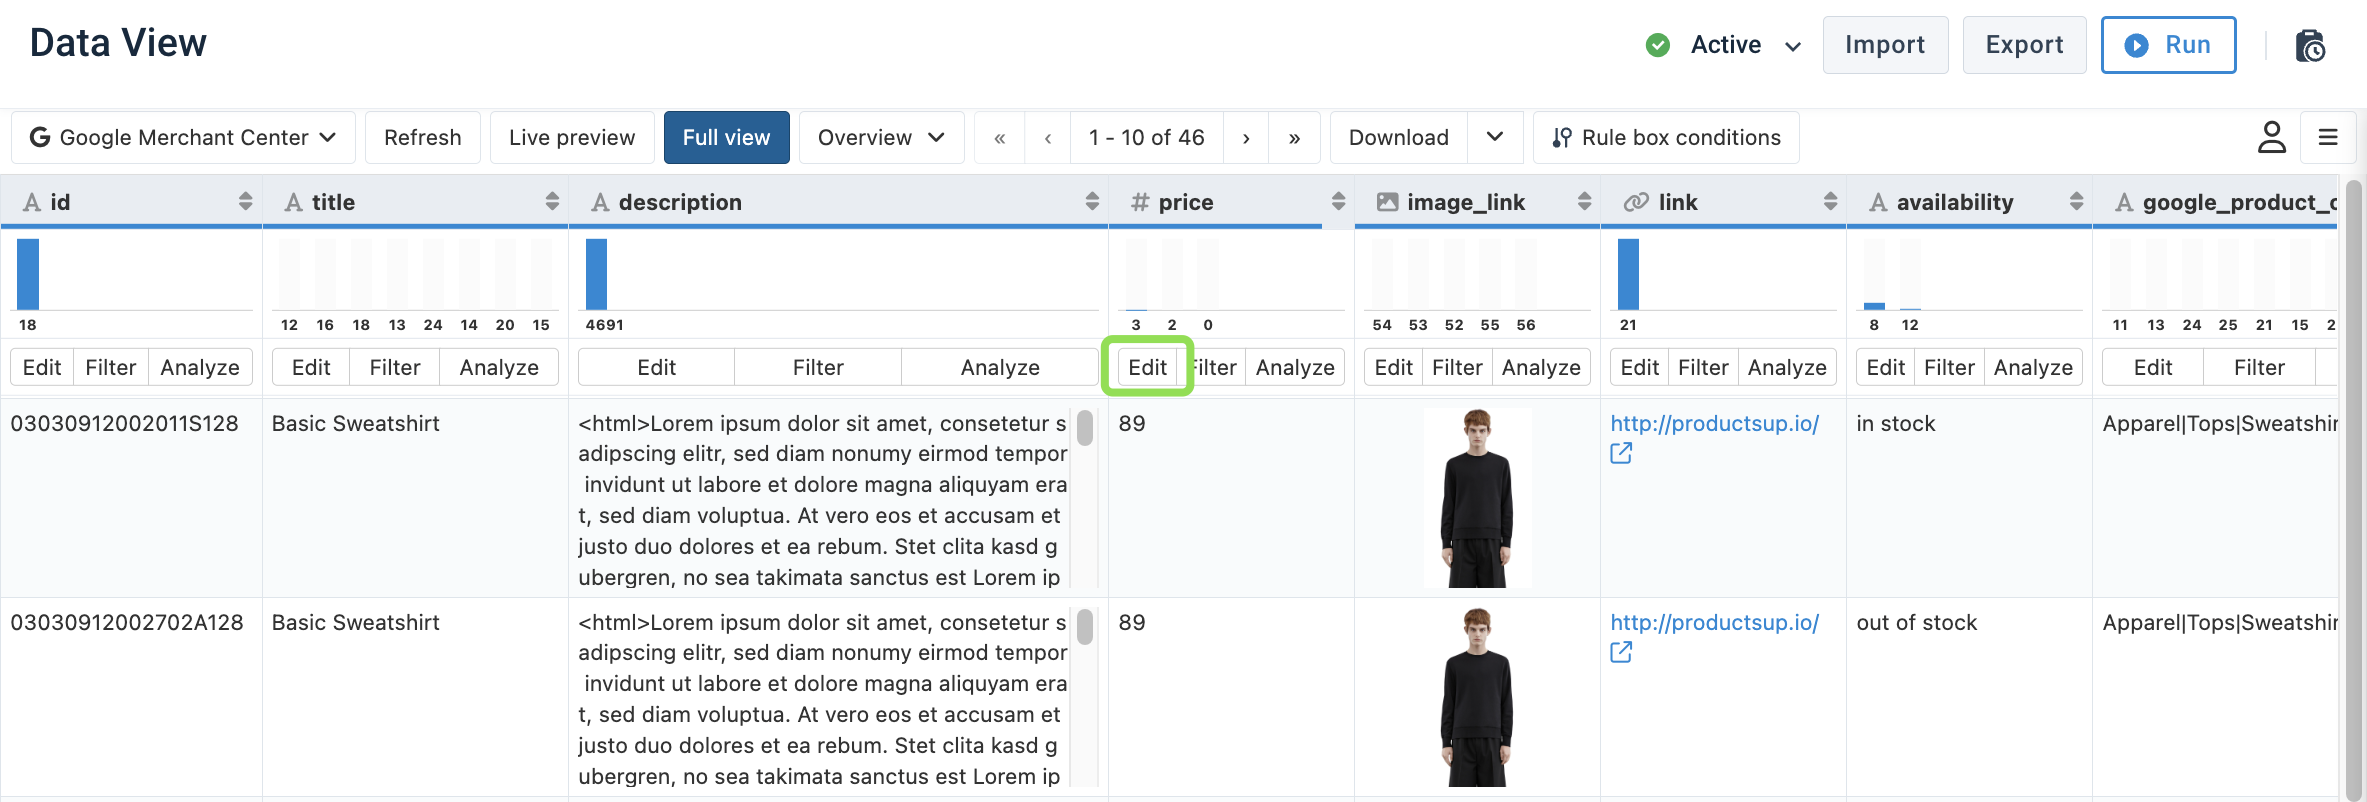
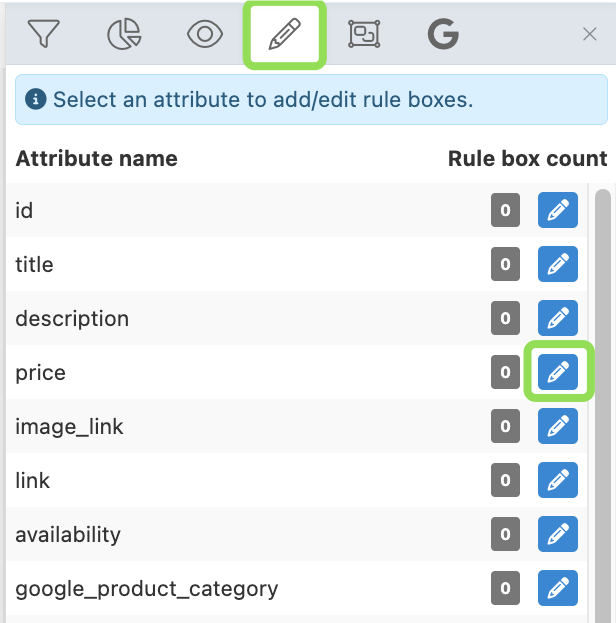
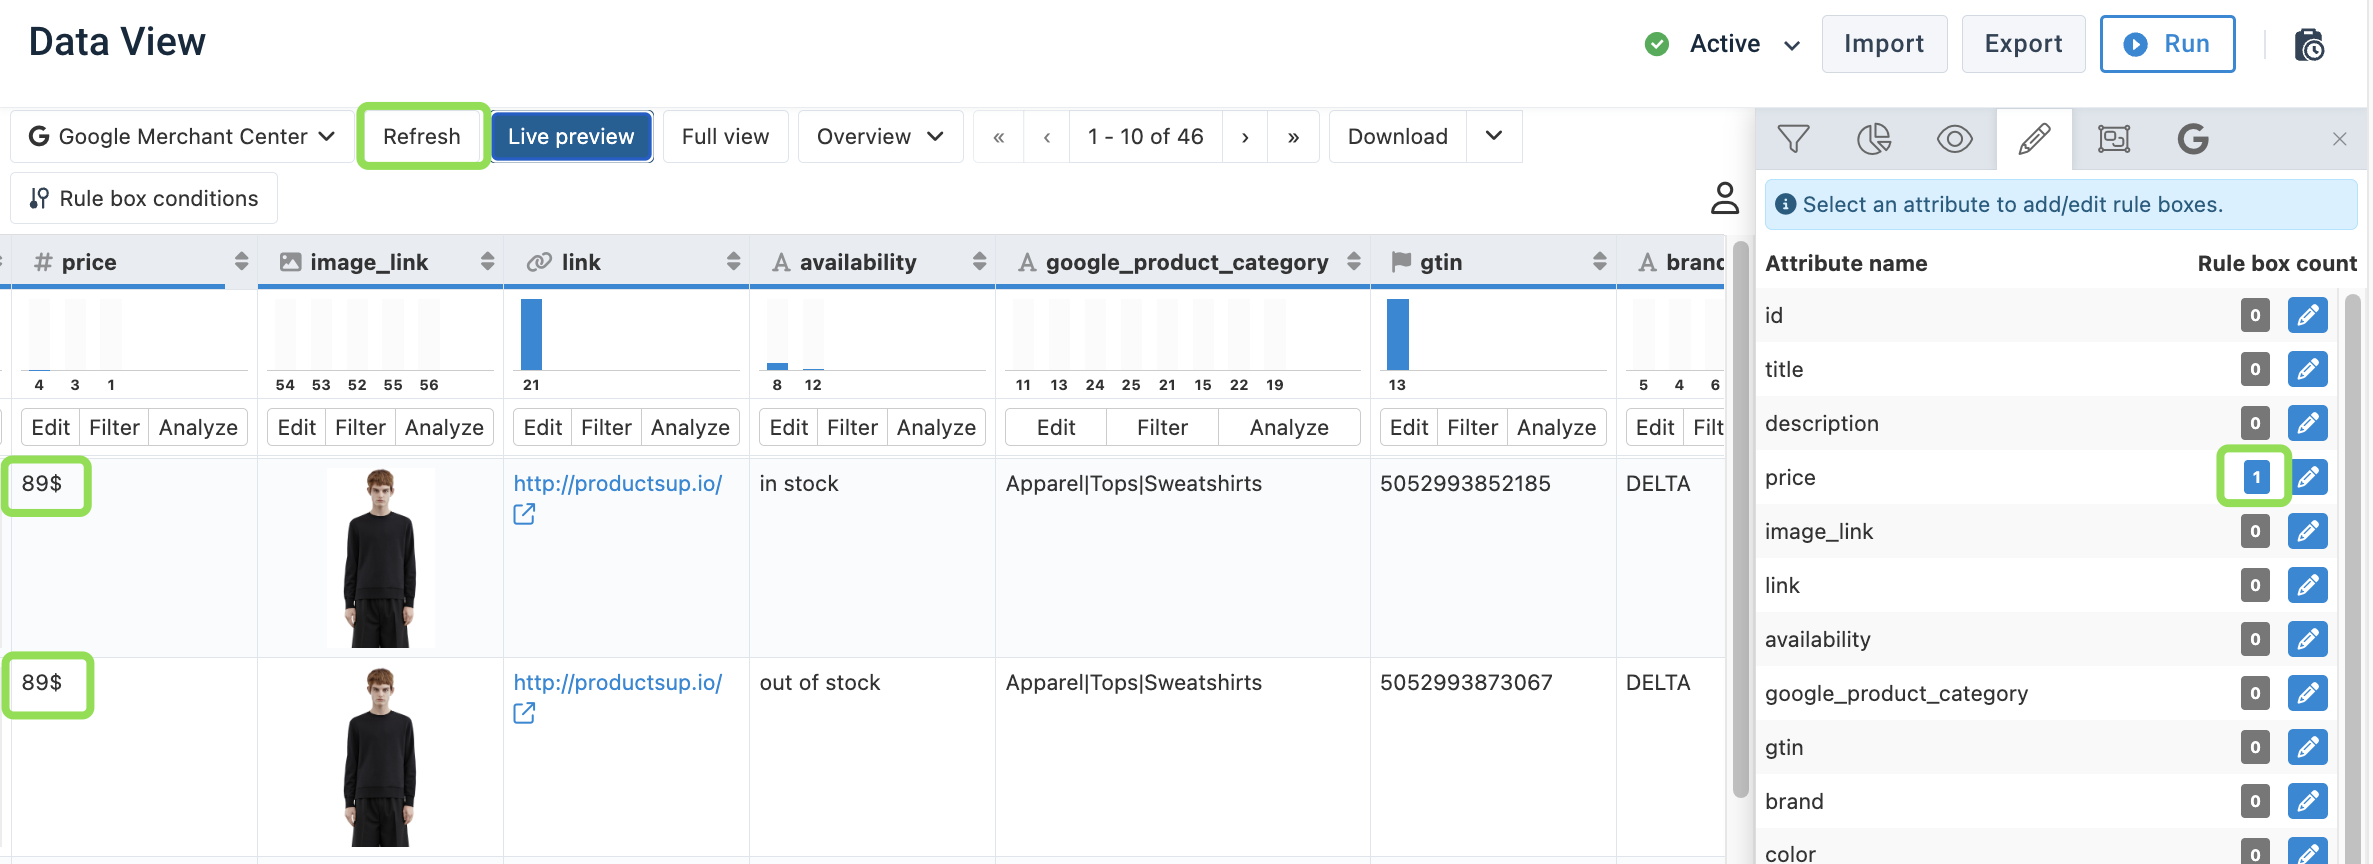
Select Edit for the Price attribute. The panel on the right opens the rule box settings for the Price attribute.
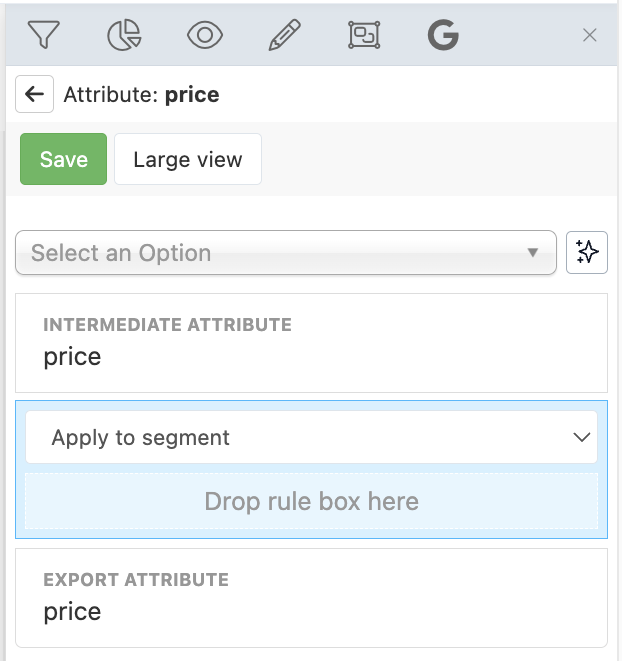
Alternatively, you can apply rule boxes directly in Menu. Select Menu, then select the pencil icon to open the Edit menu. Then select the pencil icon next to the Price attribute.
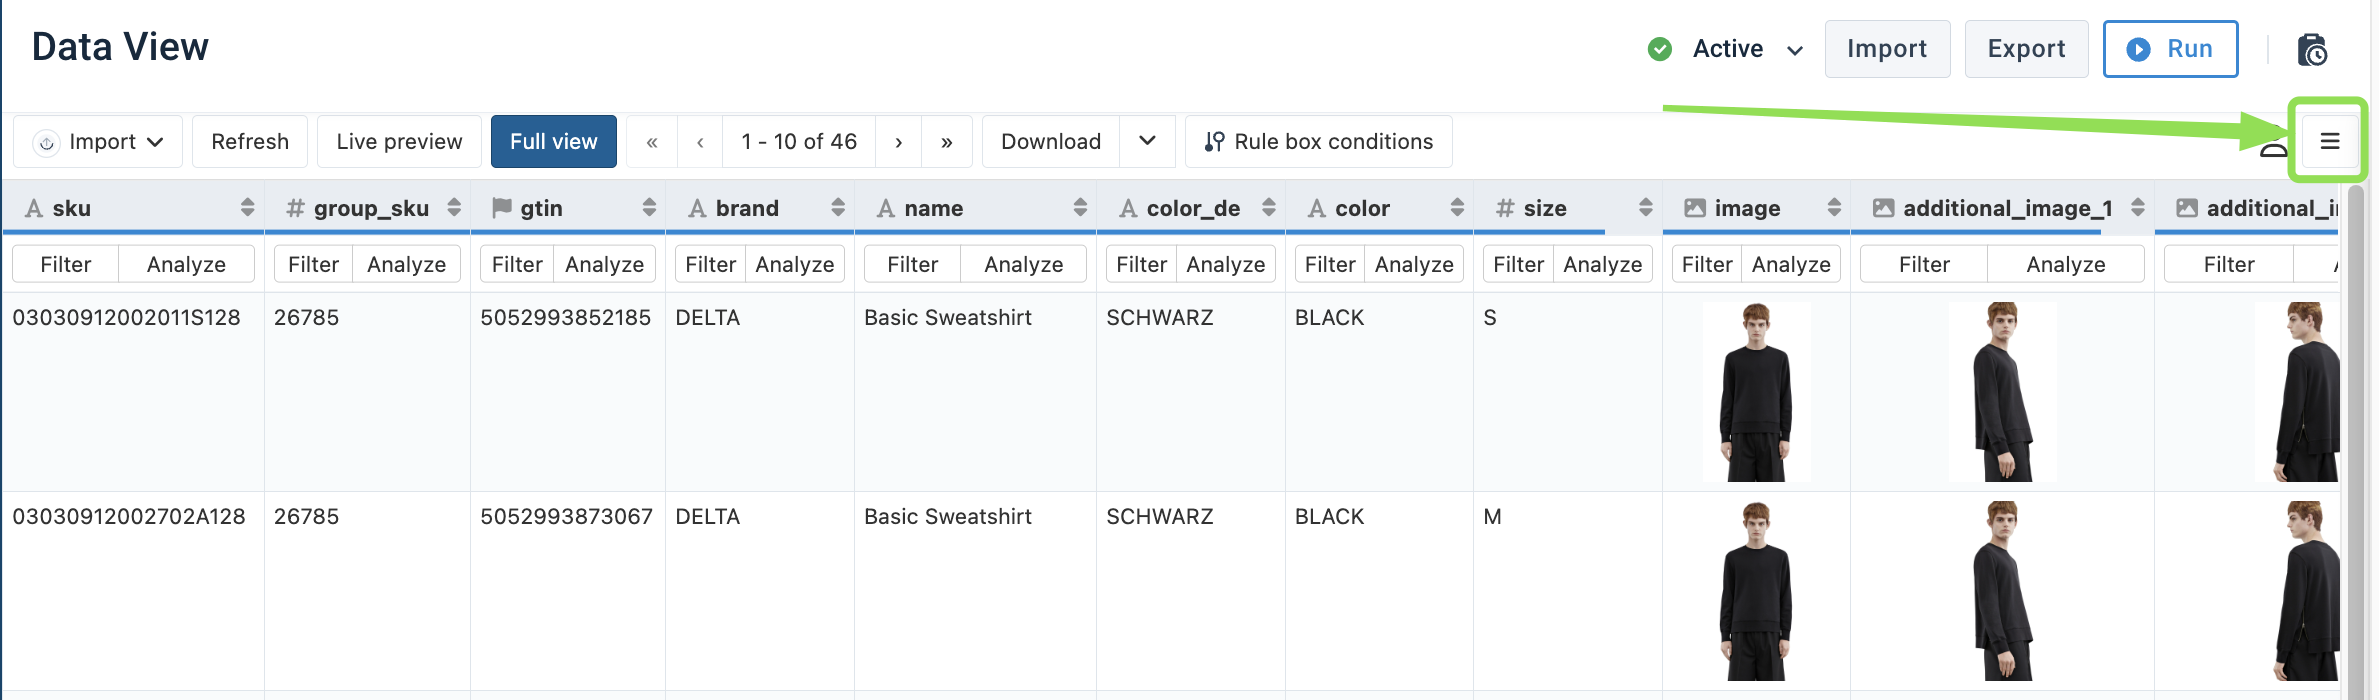
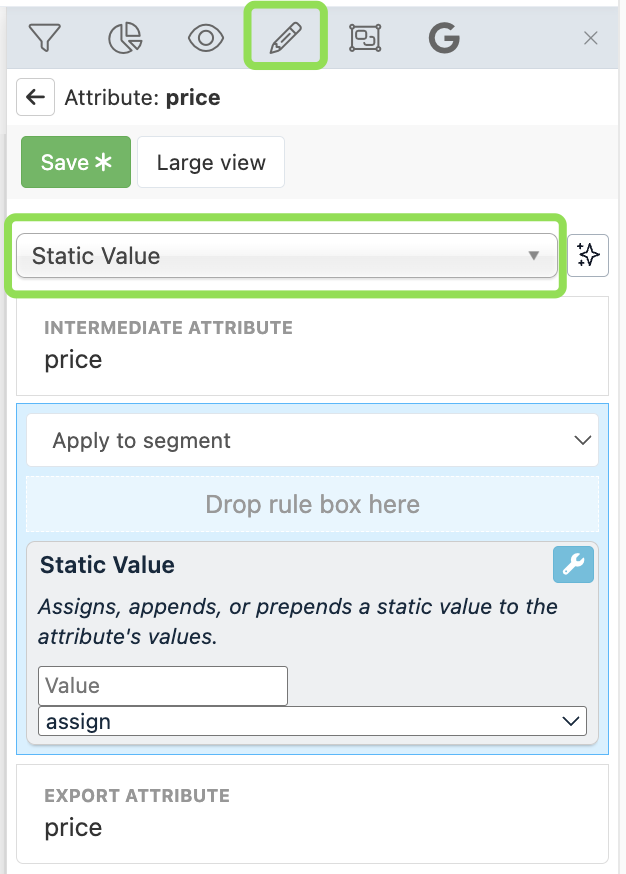
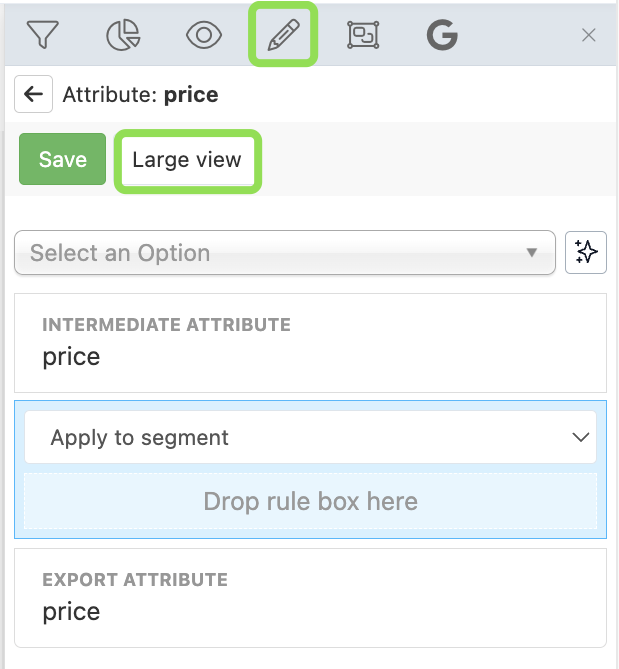
Search for the rule box name in the Select an Option dropdown. In this example, the Static Value rule box.
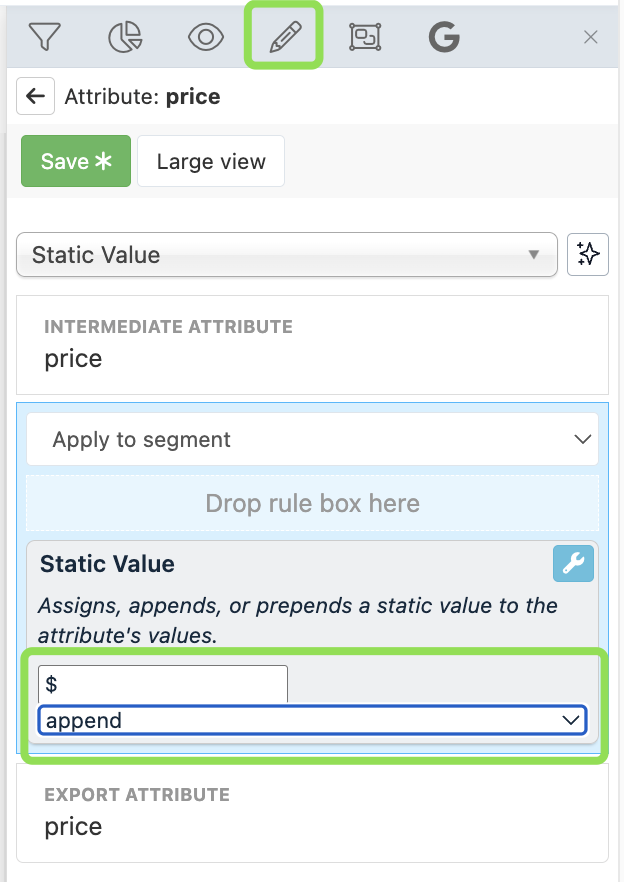
Configure the rule box. Set Value to $ and choose the append option, so the US dollar sign appears after the numeric value.
Tip
Select the wrench icon 🔧 in the top-right corner to open advanced options, such as pausing, duplicating, removing, or applying the rule box to a segment.
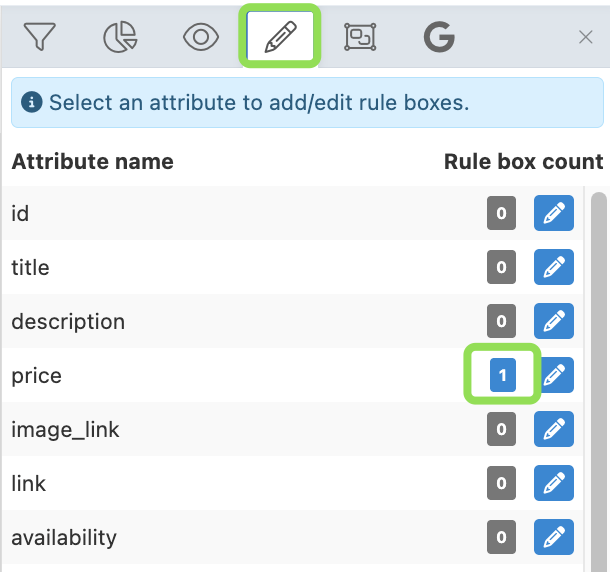
Select Save. Select the pencil icon to return to the Edit menu. The saved rule box appears for the Price attribute.
Verify that the Price attribute values now include the US dollar sign.
Tip
Select Full View and Refresh (in this order) to force-refresh the values in Data View. This button combination triggers a processing run, but it does not trigger a data import or a data export.
How to use Large View
Large View opens an extended menu to configure several rule boxes at once. You can drag and drop the rule boxes from the list on the right to one of the stages on the left:
- Import stage: transformations apply to the Intermediate stage.
- Intermediate stage: transformations apply to the Export stage.
In the Edit menu, select the Large View button.
Drag and drop the desired rule boxes from right to left. For example, apply the Static Value rule box to Import-stage data (transformations apply to the Intermediate stage) and the Skip Row if Value In rule box to the Intermediate stage (transformations apply to the Export stage).
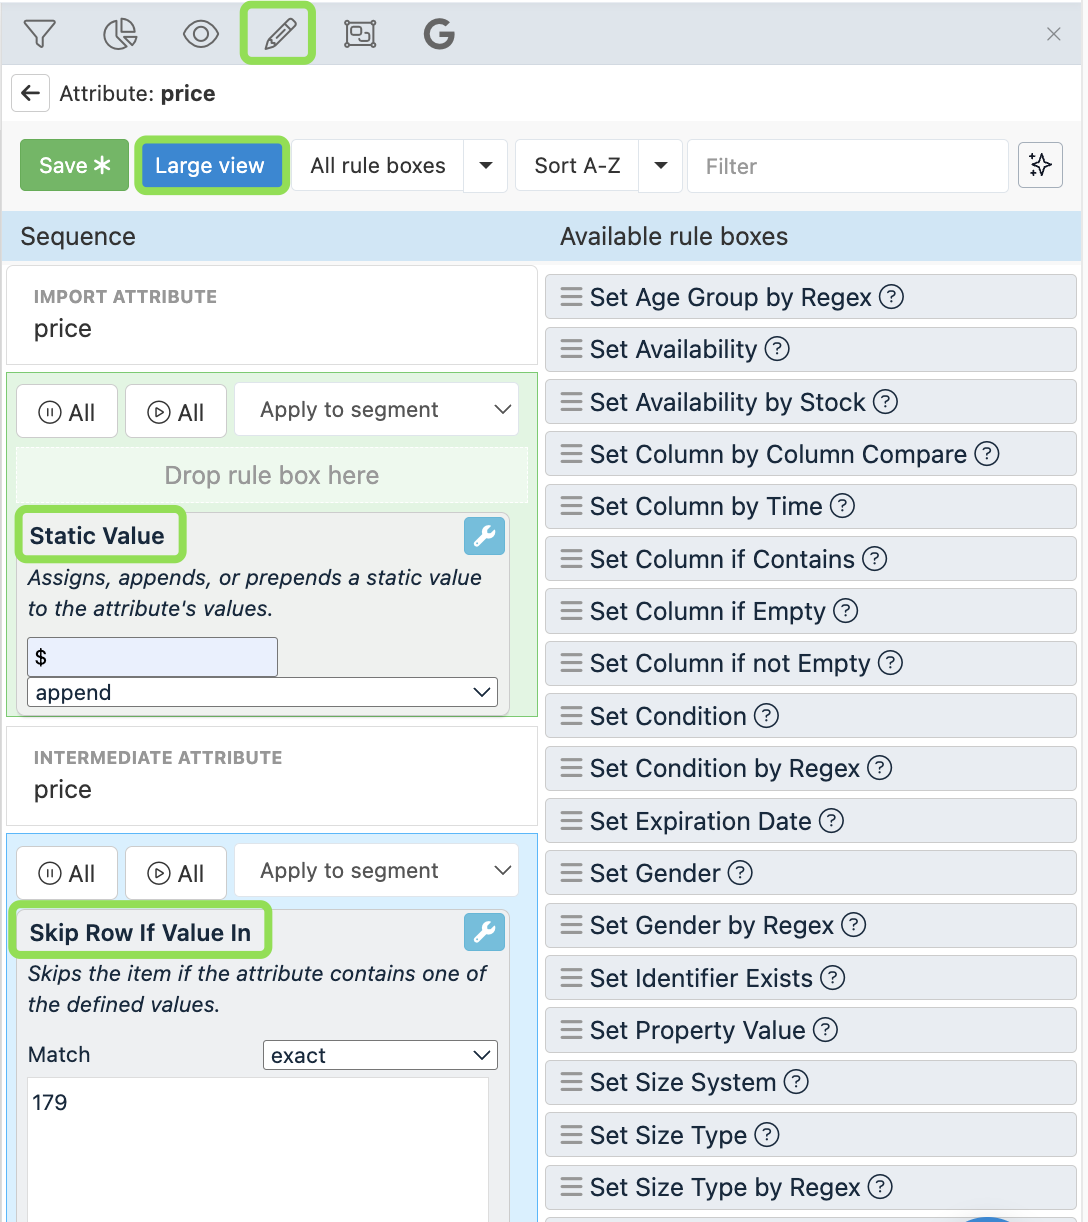
Configure the rule box and select Save.
2. Add rule boxes in bulk across multiple sites
If you need to add the same rule boxes to multiple sites, you can use the Bulk Option feature to save time. See Apply rule boxes in bulk across multiple sites for more information.
How is this guide?