

Use segments to apply rule boxes to specific product groups
Optimize specific product groups using rule boxes and product segments in Data View in Productsup.
When optimizing your catalog, you may need to transform data for a specific subset of products. For example, you may apply a 10% discount to Footwear, 20% to Eyewear, and 50% to Swimwear. Creating a segment lets you isolate a selection of products in the feed and apply rule boxes without affecting the entire data feed.
Tip
If you need to apply rule boxes to products based on the contents of multiple attributes, you can use the Rule box conditions feature available in Dataflow. See Apply rule boxes based on conditions.
Caution
Rule boxes operate between stages. To apply a rule box to a segment, create the segment at the preceding stage:
- To apply a rule box at the Intermediate stage, create the segment at the Import stage.
- To apply a rule box at an Export stage, create the segment at the Intermediate stage.
Segments created at the Export stage cannot have rule boxes applied to them.
1. Create a product segment
To create a product segment:
Go to Data View from your site's main menu and select the source stage (Import or Intermediate) from the dropdown on the left.
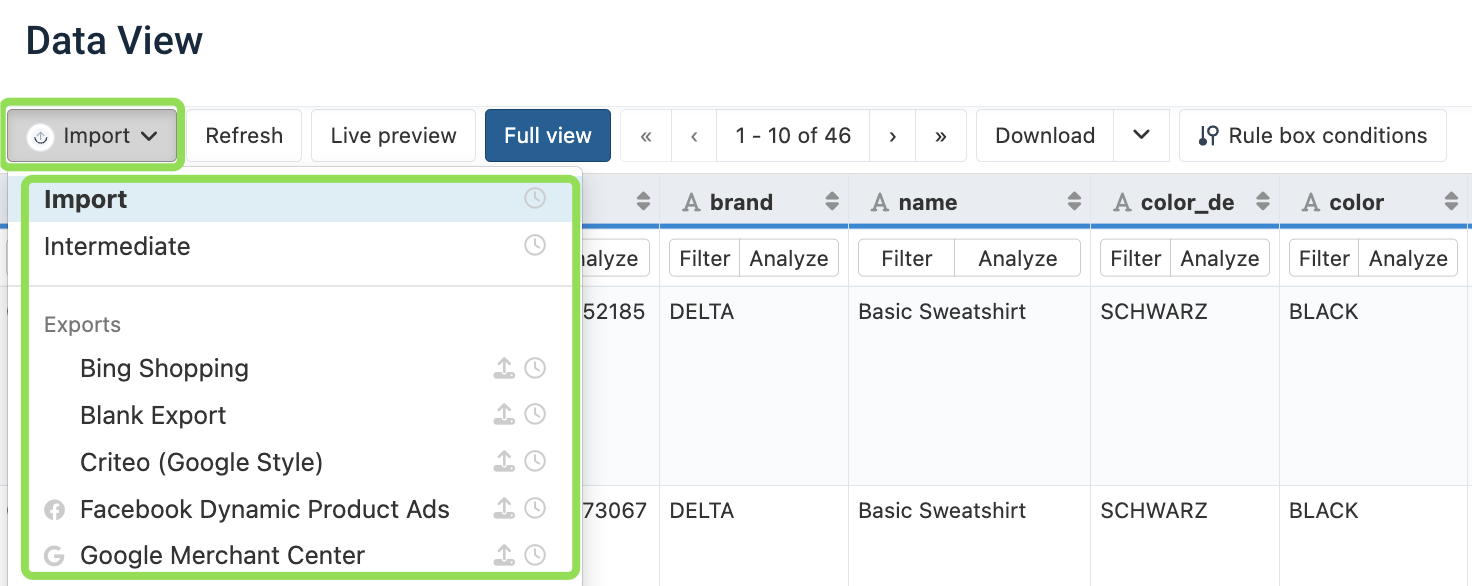
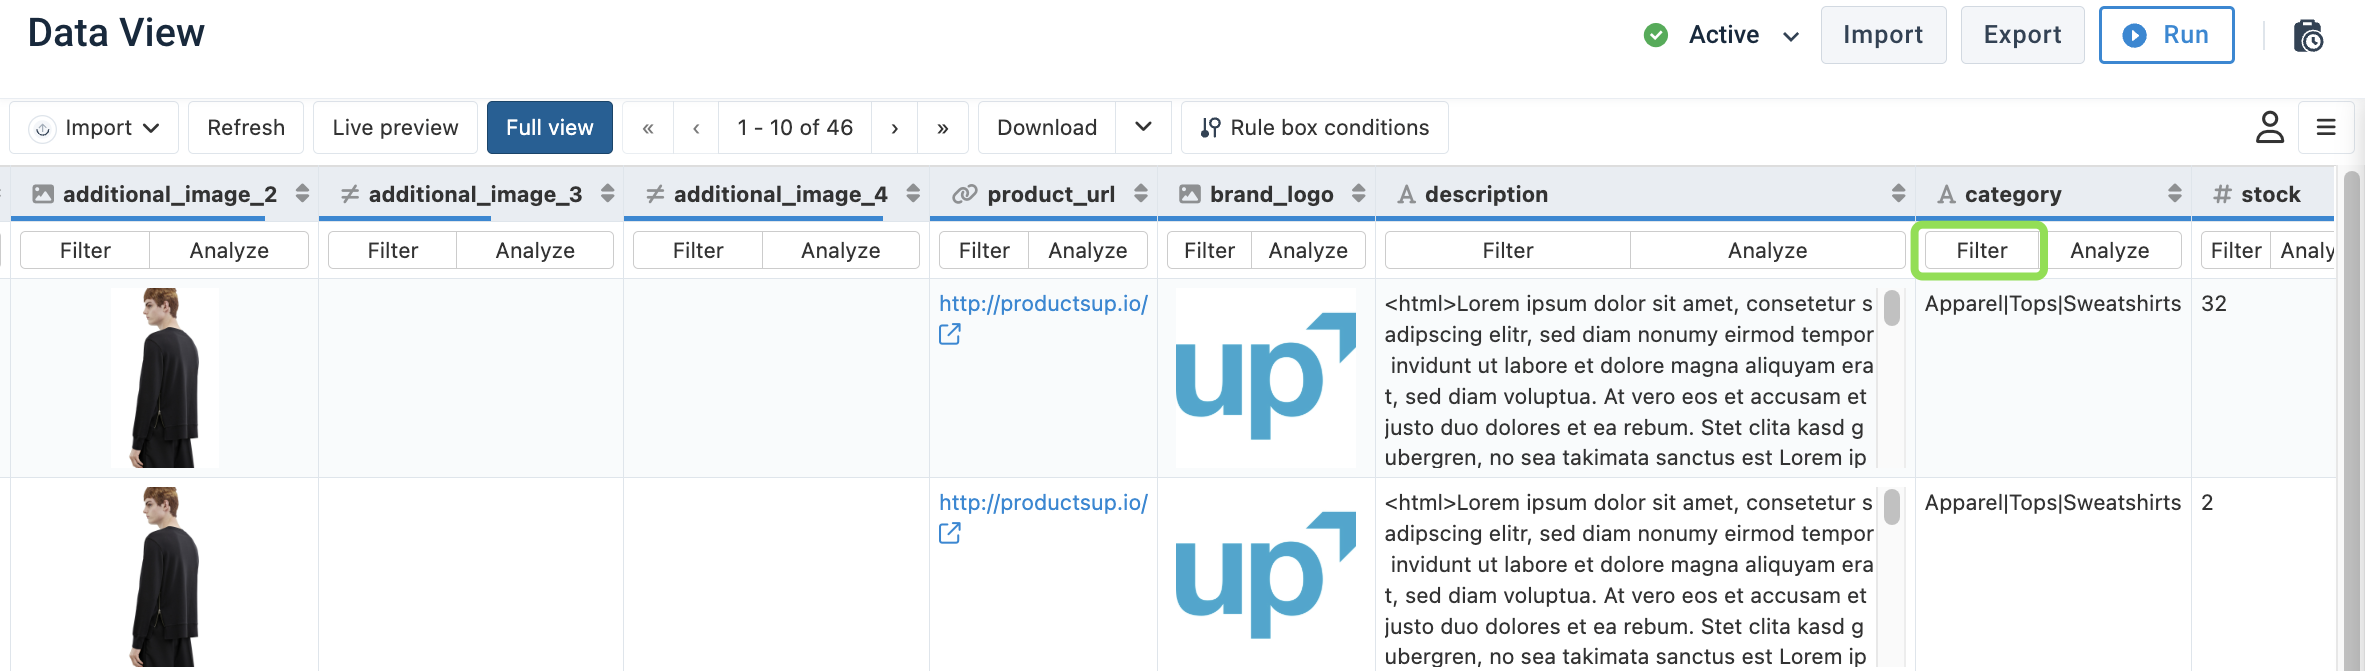
Locate the attribute column you want to segment, for example Category, and select Filter.
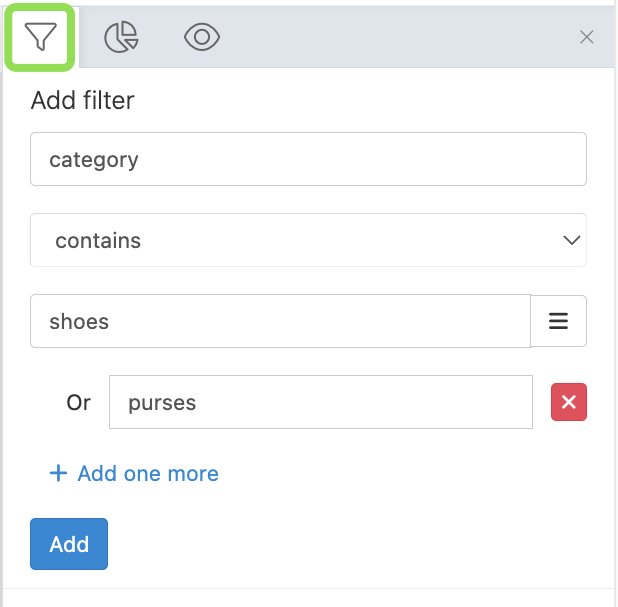
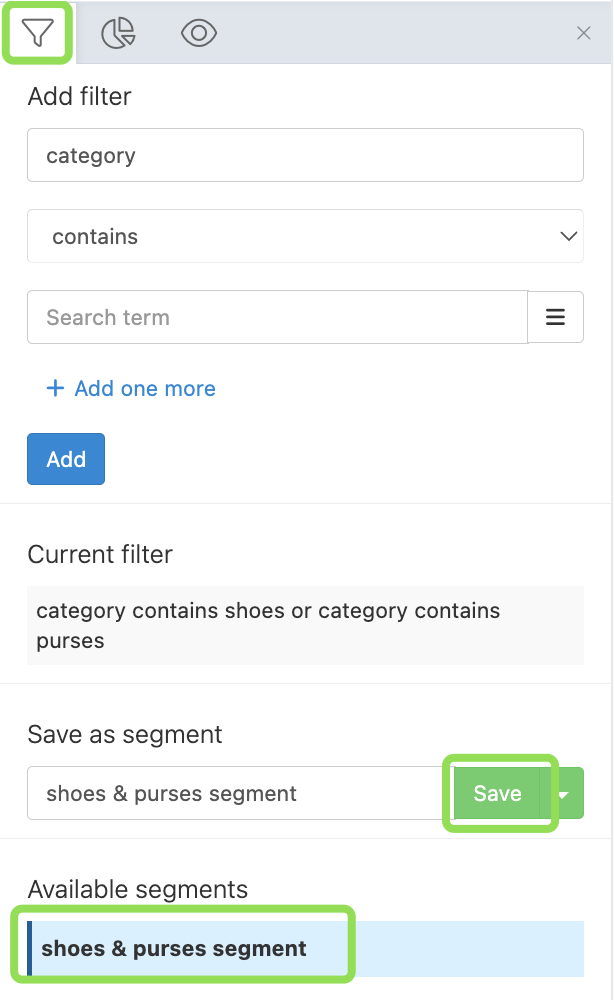
In the Add Filter menu, set the filter rules:
- Confirm that the first dropdown shows the needed attribute.
- Select the target operator (
contains,in,equals). - Enter your filtering values, for example
shoes. - (Optional) Select Add one more to add additional matching values using OR logic. In this example, enter
purses.
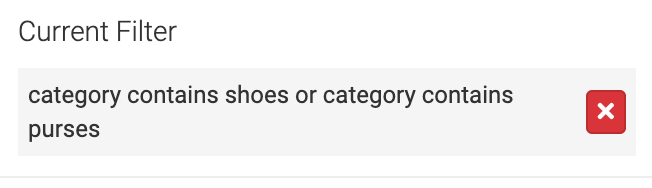
Select Add. Data View refreshes and shows only matching products. A summary of the applied filter appears in Current Filter. To display all products again, select the x icon in Current Filter.
Under Save as Segment, enter a name and select Save. The segment appears under Available Segments.
2. Apply a rule box to a product segment
To apply a rule box to a product segment:
Go to Data View from your site's main menu and select the target stage (Intermediate or an export) from the dropdown on the left.
Select Edit on the column where you want to transform data.
If you have already added the needed rule box, proceed to the next step.
If not, choose the desired rule box in Select an Option and fill out the value and condition. For example, choose the Static Value rule box, set $ as a value, and select the append option.
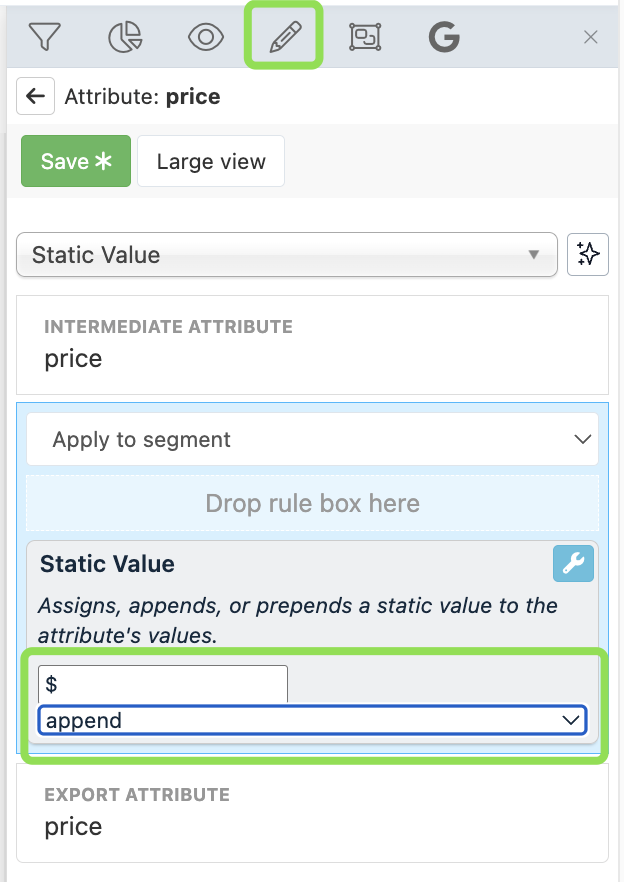
Select the wrench icon 🔧 in the top-right corner.
Select the label icon 🏷. Under Available Segments, select the plus icon + next to the desired product segment.
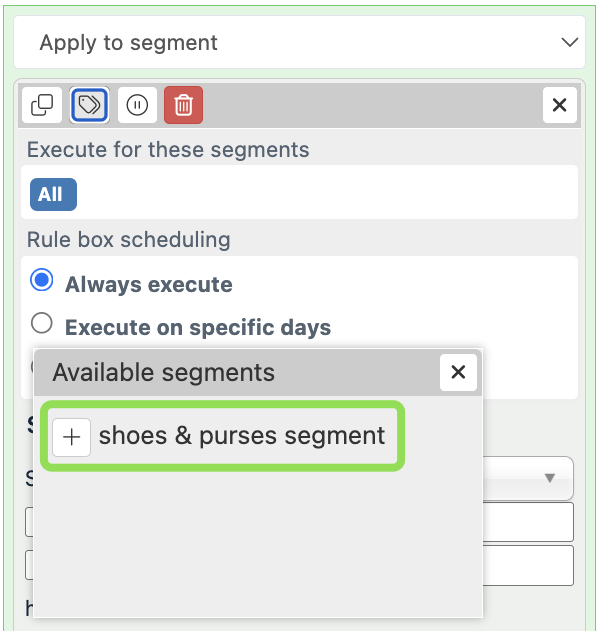
Select Save. The rule box affects the products of the selected segment only. The rest of the products remain unchanged.
Caution
Attaching multiple segments to a single rule box requires a product to match all selected segments (AND condition). If a product matches only one of the segments, the rule box does not trigger.
Tip
Learn more about applying rule boxes to segments by taking a video course Optimization: Rule boxes for platform.productsup.com on the Productsup Academy website.
3. Managing existing segments
| Action | Steps |
|---|---|
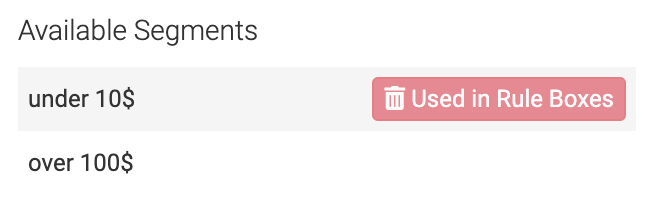
| Edit a segment | Open Data View → Select stage → Open the top-right menu icon → Choose the segment under Available Segments → Update filter parameters and select Save. |
| Delete a segment | Open Data View → Select stage → Open the top-right menu icon → Select the x icon next to the segment. |
Caution
You must unbind a segment from all active rule boxes before deleting it. If the segment is still used in a rule box, go to the relevant rule box and remove the segment from its settings first.
Platform-generated segment attributes
In most cases, you do not need to use platform-generated segment attributes as they serve a purely technical function for applying rule boxes to product segments. See the definition of platform-generated attributes in Glossary.
When you create a site, Productsup automatically adds the attribute ___segment_import at the import stage.
When you add an export in a new site, the platform automatically adds the following attributes:
___segment_importand___segment_intermediateat the intermediate stage.___segment_import,___segment_intermediate, and___segment_exportat the export stage.
When you create a segment at any stage, the platform locates the corresponding segment attributes at all stages and adds a segment ID in those attributes. For example, if you create a segment for shoes and purses at the import stage, the platform adds the ID of that segment in ___segment_import at the import, intermediate, and export stages to all shoes and purses in your feed.
If a product does not have a value in a segment attribute, it does not belong to any segment at the given stage.
Tip
When you create a segment, Data View does not immediately display segment IDs in the corresponding segment attributes. To see segment IDs, you need to run an import by selecting Import in the top-right corner of the site.
How is this guide?