

Import products from Snowflake
Learn how to import products from Snowflake into the Productsup platform using key pair authentication.
Snowflake is a cloud-based data storage company offering various solutions for enterprise clients to help you optimize supply chain planning, demand forecasting, and inventory management. To import products from your Snowflake database to Productsup, add and set up the Snowflake Import data source in Data Sources.
Snowflake is phasing out password-only logins in favor of stronger authentication, with enforcement rolling out between August and October 2026. The Snowflake Import data source now connects using key pair authentication instead of a password — you generate a key pair and assign the public key to your Snowflake user, then provide Productsup with the private key.
Prerequisites
To use Snowflake as a data source in Productsup, you need:
- A Snowflake account and a user with
ALTER USERprivileges on itself, or an admin who can assign the key on your behalf. - OpenSSL, or an equivalent tool, to generate an RSA key pair.
- Access to your Snowflake database, warehouse, and the query you want to run.
Generate a key pair
This part happens entirely on your side — Productsup never sees your Snowflake password, and you never share your private key with anyone outside your organization.
Generate a private key. Snowflake requires a minimum 2048-bit RSA key in PEM format:
openssl genrsa 2048 | openssl pkcs8 -topk8 -inform PEM -out rsa_key.p8 -nocryptThis generates an unencrypted private key, which is the format the Productsup data source expects. If your organization requires passphrase-protected keys, contact your Customer Success Manager to confirm whether this is supported before using an encrypted key.
Generate the matching public key from your private key:
openssl rsa -in rsa_key.p8 -pubout -out rsa_key.pubAssign the public key to your Snowflake user. Open the contents of rsa_key.pub, remove the PEM header and footer lines (BEGIN PUBLIC KEY / END PUBLIC KEY), and run:
ALTER USER <your_user> SET RSA_PUBLIC_KEY='<paste the key contents here>';Keep rsa_key.p8 (the private key) somewhere secure. You'll paste its contents into Productsup in the next section.
Caution
Treat the private key like a password — anyone with it can authenticate as your Snowflake user. Don't send it over email or chat; paste it directly into the Productsup data source settings.
Snowflake supports assigning a second public key (RSA_PUBLIC_KEY_2) to rotate keys without downtime: assign the new key, update the private key in Productsup, then unset the old key once the new one is confirmed working.
Add Snowflake data source
Go to Data Sources from your site's main menu and select ADD DATA SOURCE.
Search for Snowflake Import, select Add, give it a name as desired, and then select Continue.
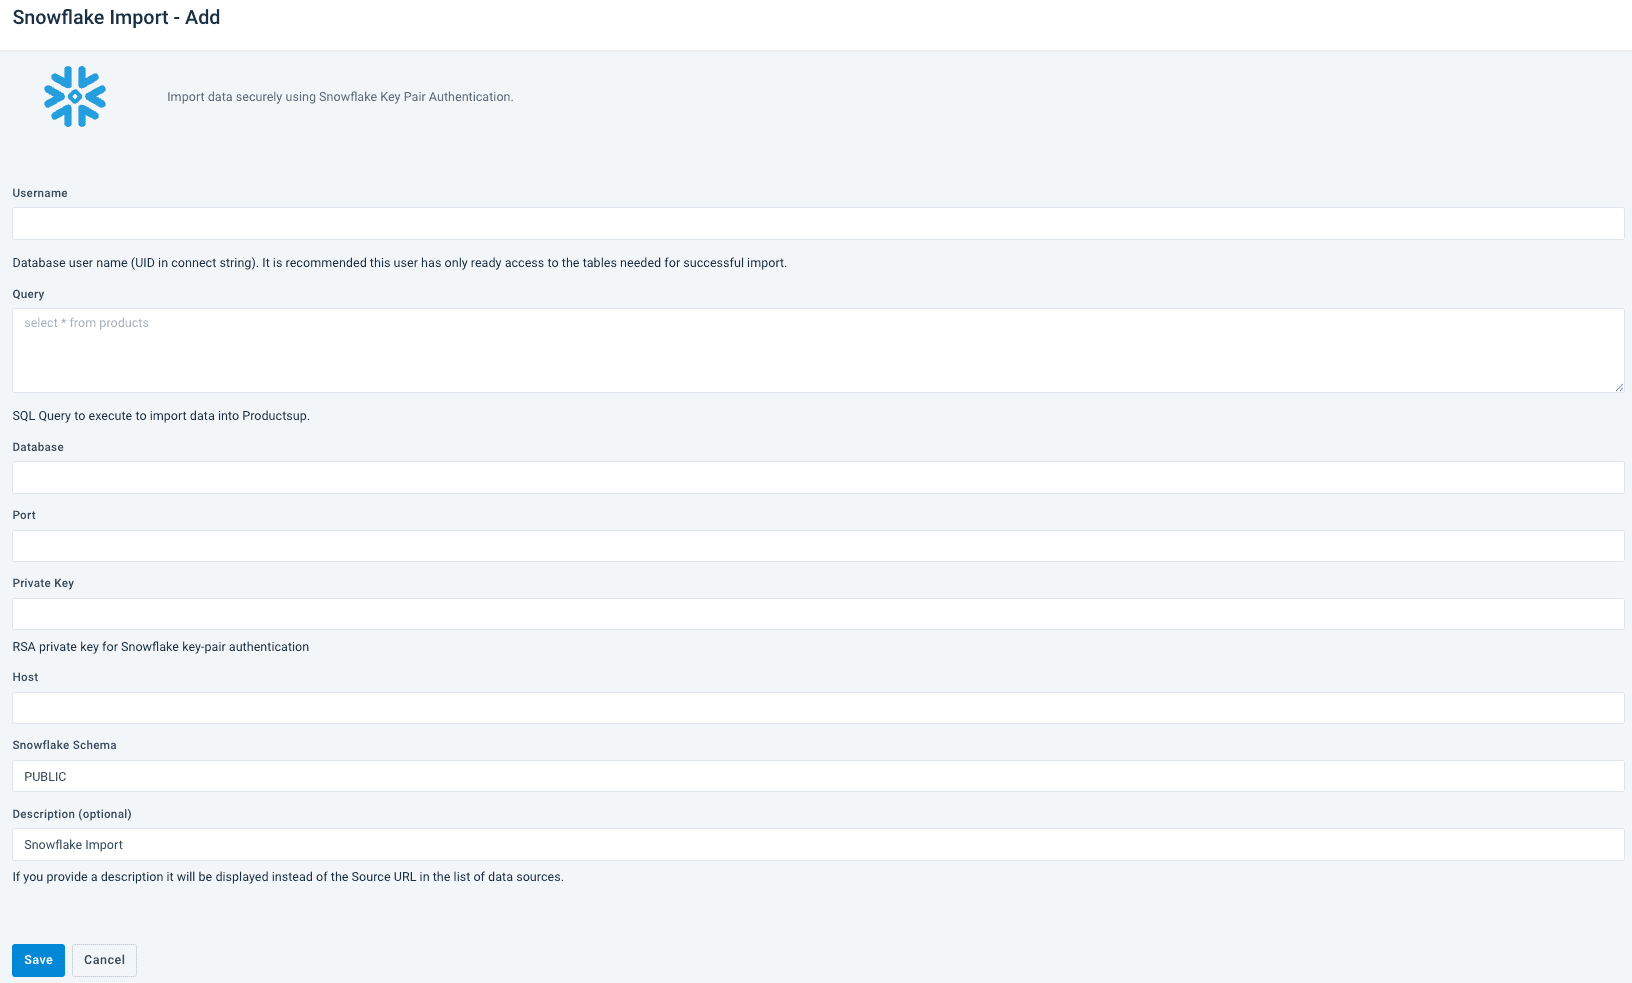
Enter your Snowflake data into the following fields:
- Username – Snowflake user id (the database user name, used as UID in the connect string). Use a user with read-only access to the tables you need for the import.
- Query – The single SQL statement to execute to import data into Productsup, for example
select * from products. - Database – Snowflake database name.
- Port – Database port to connect with Snowflake.
- Private Key – The full contents of your unencrypted private key file (
rsa_key.p8), including its PEM header and footer lines. - Host – Database host to connect with Snowflake.
- Snowflake Schema – The schema to query. Defaults to PUBLIC.
Query accepts a single SQL statement, not multiple statements chained together with semicolons. That single statement can still be as complex as you need, including joins and unions, for example:
select p.id, p.title, c.category_name from products p join categories c on p.category_id = c.idSpecify the desired name of the data source in Description (optional). If left blank, the source URL is shown instead in the list of data sources.
Select Save.
To start the import, select Import in the top-right corner of your site's view.
How is this guide?