Merge multiple columns with the Implode Columns service
Merge multiple columns with the Implode Columns data service in Productsup.
Introduction
If you wish to unite multiple columns with corresponding values into one column, you can merge these columns using the Implode Columns data service.
For example, you can merge the varying color columns in the following data source:
id | color_1 | color_2 | color_3 |
|---|---|---|---|
|
|
|
|
|
|
|
|
After applying the Implode Columns data service, your data may look similar to the following:
id | color_1 | color_2 | color_3 | ___imploded_all_colors |
|---|---|---|---|---|
|
|
|
|
|
|
|
|
|
|
Note
The Implode Columns data service is available for the import and intermediate stages.
Prerequisites
To set up the Implode Columns data service, you need:
A unique item identifier. See Set a unique item identifier for more information.
A number of relevant columns in your feed that you want to merge.
Add the Implode Columns data service
Go to Data Services from your site's main menu, and select Add data service.
Search for Implode Columns, select Add, and give it a desired name and column prefix.
By default,
___implodedis the column prefix.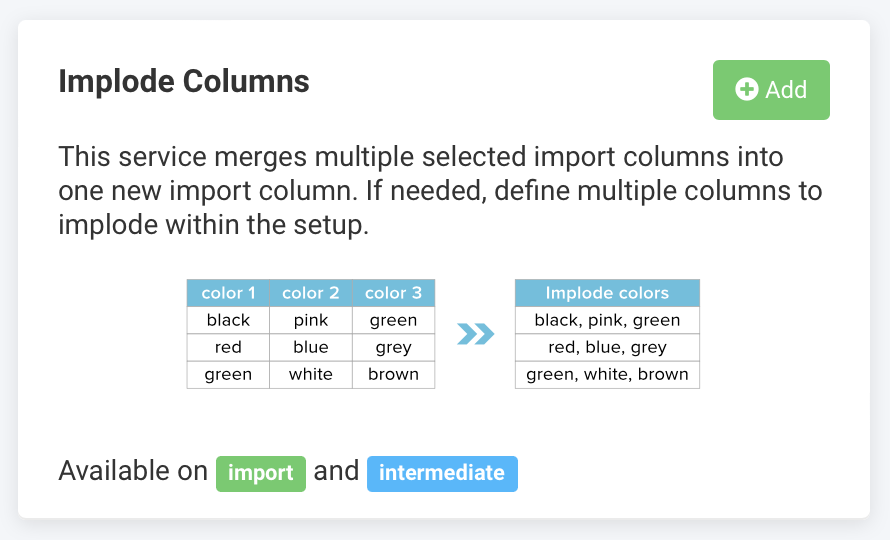
Choose the stage containing the columns you want to merge in Service Data Level and select Add.
Select the columns you want to implode from the Columns that you want to use as input drop-down list or write the column names directly into the input text field.
If you chose Import in Step 3, the drop-down list Columns that you want to use as input displays the columns of your import stage. If you chose Intermediate in that field, the drop-down list contains your intermediate-stage columns.
Alternatively, you can check the Use regex box and enter a valid PHP regex into the input text field. See Rule box category Use regular expressions and Pattern Syntax for more information.
In the field Column that will be created and populated with the selected columns above, enter a name for your merged output column.
Note
The platform uses the column prefix and the name you specify in this step to produce the full name of the new column. For example, if you use the default column prefix
___implodedand the output column name isall_colors, the full name of the new imploded column is___imploded_all_colors.In Delimiter, select the delimiter that separates the values of different columns once you merge them.
You can choose from a list of popular delimiters or enter a custom delimiter in the input text field that appears after selecting Custom.
Select Save.
For the platform to process a new data service, select Import or Run in the top-right corner of your site's view.
Note
If you can't see the columns that the Implode Columns data service added to your feed in Data View, ensure the platform hasn't hidden them:
Go to Data View from your site's main menu and choose the relevant stage or export in the drop-down list on your left.
Select the menu icon on the right and then select the eye icon.
Find the attributes in the list that use the custom prefix
___implodedand select the eye icon next to each attribute you want Data View to display.Close the pop-up menu.
The naming of the attributes created by the Implode Columns data service depends on the column prefix you chose in Step 2. The attribute names the data service generates always start with three underscores (
___), which means the platform doesn't send those attributes to your export channels.
You can add multiple instances of this data service by repeating these steps. The platform shows all imploded columns and their source columns in a table at the bottom of the data service setup page.

Edit the Implode Columns data service
Go to Data Services from your site's main menu.
Search for your data service.
Select the cogwheel icon (⚙) next to the desired data service to edit settings.
Select Save.
Delete the Implode Columns data service
Go to Data Services from your site's main menu.
Select the cogwheel icon
 next to the desired data service.
In the Danger Area panel, select Remove this service.
Select Yes.