Add Kaufland exports and import order data from Kaufland
Send your product and order data to Kaufland and import order data from Kaufland into Productsup.
Introduction
Kaufland is a large marketplace that offers a wide variety of products. It is very popular in Germany, with Kaufland.de attracting over 30 million visitors monthly. The marketplace is expanding to Czechia, Slovakia, Poland, Austria, Italy, and France with country-specific storefronts.
To let you sell your products on Kaufland, Productsup has built an ecosystem that sends product and order data to Kaufland and imports order data from Kaufland into Productsup:
Kaufland Product Creation
This API-based export lets you create and update products on Kaufland and contains the attributes relevant to products of all categories. When setting up this export, you also use multiple category-specific exports that contain category-specific product attributes. The product creation export is a delta-based export that sends only the new, changed, or deleted products to Kaufland instead of exporting the entire product catalog during every site run.
Kaufland Inventory Export
This API-based export lets you create and update your product listings on Kaufland. It is a delta-based export that sends only the new, changed, or deleted product listings to Kaufland instead of exporting the entire catalog during every site run.
Kaufland Orders Fulfilment Export
This API-based export sends order fulfillment updates to Kaufland to let you inform customers on Kaufland about the status of their orders. This is a delta-based export that sends only new order fulfillment data to Kaufland instead of sending the entire order catalog during every site run.
Kaufland Order Units
This API-based data source imports orders from Kaufland into Productsup to let you send the order data to your order management system.
Prerequisites
To set up the Kaufland ecosystem in Productsup, you need:
A project in your Productsup organization. In this separate project, you need to create separate sites for each of the following types of data that you send to and receive from Kaufland:
Products
Inventories
Orders
Order fulfillment details
Note
This is a recommended option. If a separate Kaufland project doesn't fit your overall organization structure, you can ignore this recommendation.
A Kaufland Seller Center account. See Become a seller on the Kaufland online marketplaces! for more information on registering as a seller on Kaufland.
An API key and API secret that you can find in your Kaufland Seller Center account.
A list of all Kaufland categories you want to sell products in.
Note
These integrations use category-specific attributes. Productsup supports only some categories by default. But we can add missing categories on request. It may take around two weeks to support your request. To request the necessary categories for Kaufland, contact your Customer Success Manager or support@productsup.com and provide a list of categories.
Decide which Kaufland export you should set up first
The Kaufland data schema distinguishes between a product and an inventory.
In Kaufland terms, a product is a set of metadata about an item that sellers offer on Kaufland. A collection of such products on Kaufland is equivalent to a catalog of all items sold on the platform.
An inventory is your individual product listing, or offer, on Kaufland. You offer a certain product for a certain price with certain shipment conditions. Every seller has an inventory per each product they sell on Kaufland.
Here is a diagram to help you identify what Kaufland export you need to set up first based on what data you want to send:

Your next steps depend on the option recommended by the diagram:
See Send products to Kaufland to set up the Kaufland Product Creation export. Once done, you can move on to setting up Kaufland Inventory Export.
See Send inventories to Kaufland to set up Kaufland Inventory Export. If your products are already available on Kaufland, you can skip setting up the product creation export.
Send products to Kaufland
In the site dedicated to sending your products to Kaufland, add and set up the Kaufland Product Creation export:
Go to Exports from your site's main menu and select ADD EXPORT.
Search for Kaufland Product Creation, hover over it, and select Add.

On the Exports page, select the name of the added export to set it up.
Select Add Destination, choose Kaufland Product Export from the drop-down list, give it a name, and then select Save.
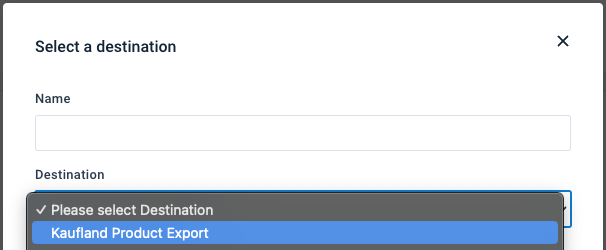
In Client Key and Secret Key, enter the API key and secret you got in your Kaufland Seller Center to let the Productsup platform authenticate in your Kaufland account.
In Locale, choose the market where you plan to sell products:
de-DE – German storefront in the German language.
cs-CZ – Czech storefront in the Czech language.
sk-SK – Slovakian storefront in the Slovakian language.
pl-PL – Polish storefront in the Polish language.
de-AT – Austrian storefront in the German language.
it-IT – Italian storefront in the Italian language.
fr-FR – French storefront in the French language.
Leave the Feedback Import toggle On to let the platform receive feedback files from the Kaufland API in case of export errors. This helps to troubleshoot the setup.
Leave the Category Specific Attributes toggle On to map category-specific attributes in Dataflow.
Toggle the Active button to On to activate the destination.
Select Save.
See Map category-specific attributes for Kaufland to proceed.
Map category-specific attributes for Kaufland
To proceed with setting up your Kaufland Product Creation export, you need to create a Classification Mapping list for your categories and map all relevant category-specific attributes:
Go to Lists from your site's main menu and select ADD LIST.
Choose Classification Mapping and select Continue.
Give the list a desired name and select Kaufland Product Creation in Classification.
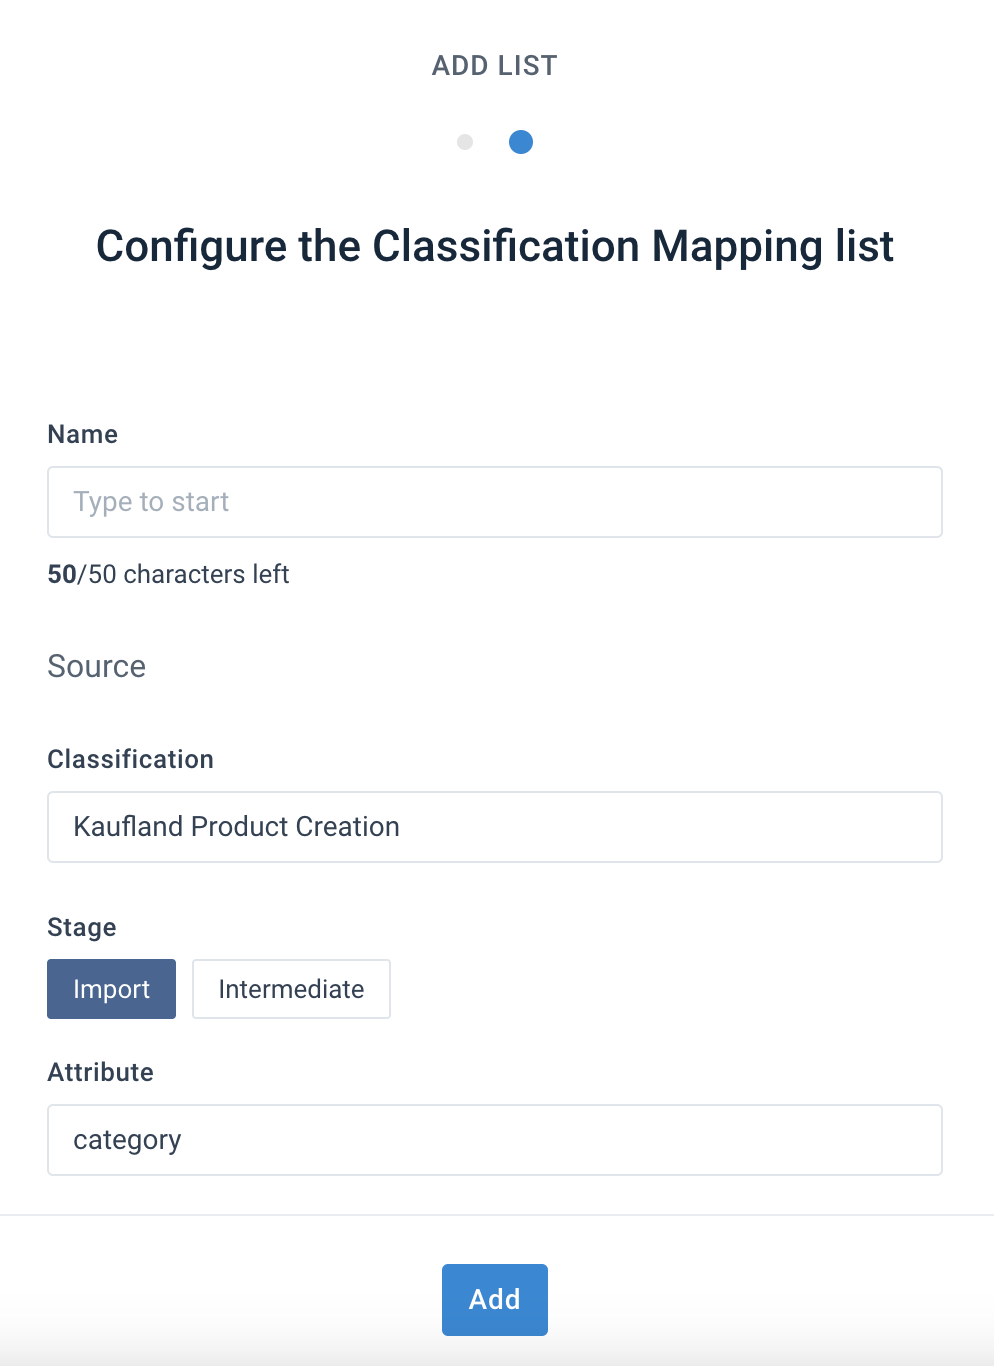
Choose Import in Stage and select the Attribute field to find the attribute in your import stage that contains your products' category data. Then, select Add at the bottom of the page to add the list.
Map your categories to the corresponding Kaufland categories in the Replace term column.

Note
You must create and set up a new Classification Mapping list every time you modify the chosen category attribute in your data source and import its new values into your site. Otherwise, the already existing list can't upload your new values, and you can't map them to the corresponding Kaufland categories. Once you create a new Classification Mapping list, you need to choose it in the related rule box.
Go to Dataflow and select Kaufland Product Creation from the drop-down menu on the left.
Map all the needed attributes from import to export. The attributes you see in the export stage are relevant for products of all your Kaufland categories.
Tip
Map your import-stage category attribute to
categoryin the intermediate stage. Then, map it to bothcategoryand___category_pathin the export stage to add the needed rule boxes and apply the Classification Mapping list.Select
categoryin the intermediate stage and open the Select an Option drop-down menu on the right.Search for and select Classification Mapping. Choose your category list in List and select Save.
To let the site display your category-specific attributes in Dataflow, select Run or Import in the top-right corner of your view.
Warning
This run will fail because you haven't yet mapped all the mandatory attributes, so no data export occurs at this stage. The aim of the run is to import the needed categories and attributes into Dataflow.
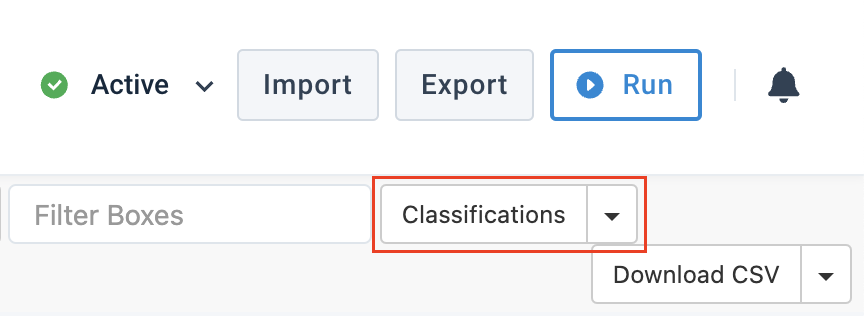
Once the site run finishes, the Classifications drop-down menu appears in the upper ribbon in Dataflow. Select each category in this drop-down menu to let Dataflow display the relevant category-specific attributes in the export stage. Map all the needed attributes from import to export.
Tip
If you can't see the Classifications drop-down menu when the site run finishes, try refreshing your page.
Once your data is ready, select Run in the top-right corner of your view to send your products to Kaufland.
Product safety attributes
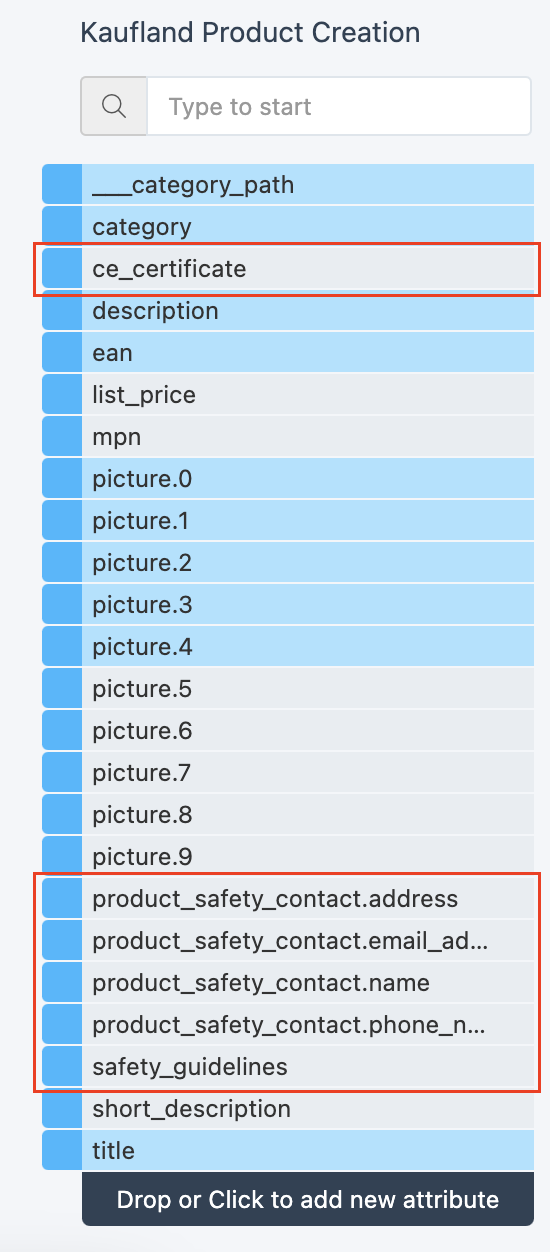
The export Kaufland Product Creation has the following attributes dedicated to help you comply with the General Product Safety Regulation (GPSR):
ce_certificate
product_safety_contact.address
product_safety_contact.email_address
product_safety_contact.name
product_safety_contact.phone_number
safety_guidelines
Although these attributes are optional, we highly recommend populating them with relevant values and sending them to your Kaufland account to be GPSR-compliant.
Send inventories to Kaufland
You can send your inventories to Kaufland only when your products already exist there.
In the site dedicated to sending your inventories to Kaufland, add and set up Kaufland Inventory Export:
Go to Exports from your site's main menu and select ADD EXPORT.
Search for Kaufland Inventory Export, hover over it, and select Add.

On the Exports page, select the name of the added export to set it up.
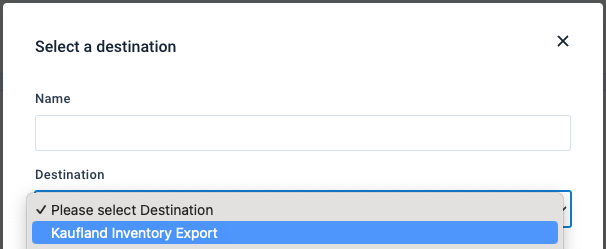
Select Add Destination, choose Kaufland Inventory Export from the drop-down list, give it a name as desired, and then select Save.
In Client Key and Secret Key, enter the API key and secret you got in your Kaufland Seller Center to let the Productsup platform authenticate in your Kaufland account.
In Storefront, enter the market where you plan to send your product listings:
de – Germany.
cz – Czechia.
sk – Slovakia.
pl – Poland.
at – Austria.
it – Italy.
fr – France.
Leave the Feedback Import toggle On to let the platform receive feedback files from the Kaufland API in case of export errors. This helps to troubleshoot the setup.
Toggle the Active button to On to activate the destination.
Select Save.
Go to Dataflow and select Kaufland Inventory Export from the drop-down menu on the left.
Map all the needed attributes from import to export. See Inventory CSV Files for more information on attribute requirements.
Note
The
eanattribute contains the ID of the product from the Kaufland Product Creation export, while theidattribute uniquely identifies each inventory.Once your data is ready, select Run in the top-right corner of your view to send your inventories to Kaufland.
Import orders from Kaufland
To let Productsup import your orders from Kaufland, do the following in the site dedicated to the Kaufland data source:
Go to Data Sources from your site's main menu and select ADD DATA SOURCE.
Search for Kaufland Order Units, select Add, give it a name as desired, and then choose Continue.
In Client Key and Secret key, enter the API key and secret you got in your Kaufland Seller Center to let the Productsup platform authenticate in your Kaufland account.
In Storefront, choose the market where you want to import your order data from:
de – Germany.
cz – Czechia.
sk – Slovakia.
pl – Poland.
at – Austria.
it – Italy.
fr – France.
In Status, select the status that orders should have for Productsup to import them. The default option is open.
open – A customer created a new order on Kaufland. Customers can still cancel orders with this state within 15 minutes after placing them.
need_to_be_sent – You received the order and need to dispatch it to the customer.
Tip
Use this order status to import only the orders you haven't yet sent to your customers.
sent – You dispatched the order to the customer.
received – The customer received your order. This order status is only available if you provide tracking information.
cancelled – You or the customer canceled the order.
sent_and_autopaid – You dispatched the order that the customer has paid for, but you haven't provided any tracking information. The 21-day period until payout has ended, and you can now receive payment for this order unit.
returned – You received a return from the customer.
returned_paid – You received a return and refunded the cost of the related order items to the customer.
See Managing orders for more information on managing orders on Kaufland.
If you want to import orders created within a specific timeframe only, choose the suitable options in Updated Since or Created from.
For example, if you choose 24 hours in Created from, the platform imports only the orders created within the last 24 hours. To import orders updated within the past seven (7) days, choose 7 days ago in Updated Since.
Specify the desired name of the data source in Description (optional).
Select Save.
Go to Exports from your site's main menu and select Add export to find and add your order management system. Set up the added export and map its relevant attributes in Dataflow.
Choose Run in the top-right corner of the page to let the site import your order data from Kaufland and send it to your order management system.
Send order fulfillment updates to Kaufland
To change the status of your orders on Kaufland and inform your customers about order status changes, do the following in the site dedicated to the Kaufland order fulfillment export:
Go to Exports from your site's main menu and select ADD EXPORT.
Search for Kaufland Orders Fulfilment Export, hover over it, and select Add.

On the Exports page, select the name of the added export to set it up.
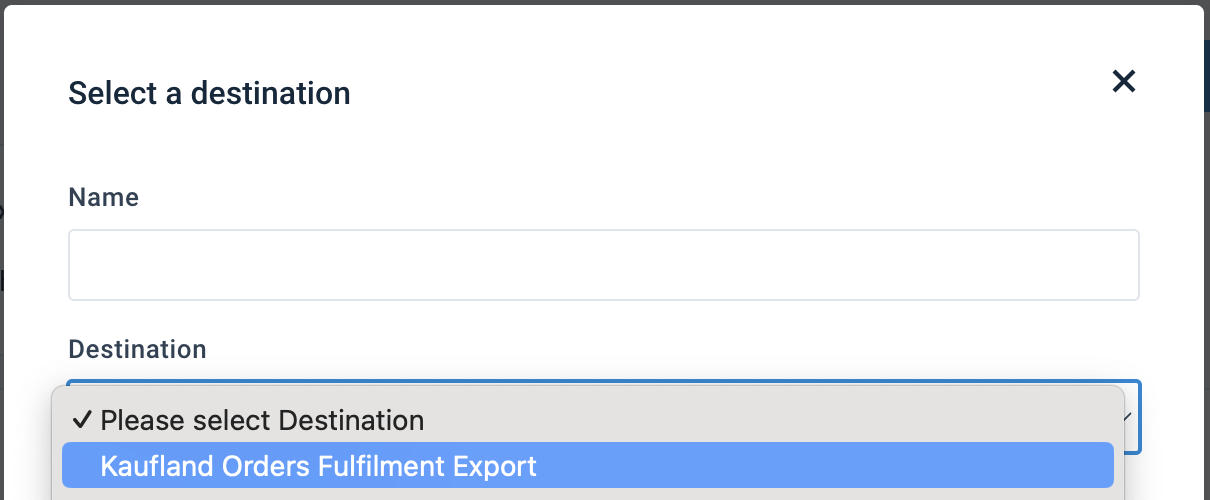
Select Add Destination, choose Kaufland Orders Fulfilment Export from the drop-down list, give it a name as desired, and then select Save.
In Client Key and Secret Key, enter the API key and secret you got in your Kaufland Seller Center to let the Productsup platform authenticate in your Kaufland account.
Leave the Feedback Import toggle On to let the platform receive feedback files from the Kaufland API in case of export errors. This helps to troubleshoot the setup.
Toggle the Active button to On to activate the destination.
Select Save.
Go to Dataflow and select Kaufland Orders Fulfilment Export from the drop-down menu on the left.
Map all the needed attributes from import to export:
item_order_unitcontains the ID of the order unit. See Managing orders for the explanation of the order unit term.fulfilment_actioncontains the action you are taking regarding the order. The accepted values are fulfil, send, and cancel.Tip
If the value is send, you should provide tracking information in
tracking_numberandcarrier_code. It isn't mandatory, but it is a best practice. See Carrier Codes or check the analyzer tests for a full list of accepted carrier codes.If the value is cancel, you must provide a reason for cancellation in
cancel_reason. This is mandatory. See Cancellation Reasons or check the analyzer tests for a full list of accepted values.
Once all the settings are ready, you can send your order fulfillment updates to Kaufland. Select Run in the top-right corner of your view to send the data.