Import from APIs
Import product feed data from APIs in Productsup.
An Application Programming Interface (API) is a method for transporting data by sending responses and receiving requests. It lets two systems talk directly with each other and, in this case, send product data.
Importing data via API is a popular choice for product data. It typically allows for dynamic and quick data handling.
Productsup has several API connections directly to external systems. See Import data from third-party external systems.
Productsup offers Stream API as a high-performance product upload or content API.
Import data via the Productsup Platform API
Note
The Platform API's product upload endpoints will sunset on March 31, 2025. Use Stream API to upload your product data.
To import data via the outgoing Productsup Platform API:
Go to Data Sources from your site's main menu and select ADD DATA SOURCE.
Select Add for the Productsup Platform API data source.
Optionally, give your data source a custom name. This custom name replaces the name of the data source on the Data Sources Overview page. Then, select Continue.
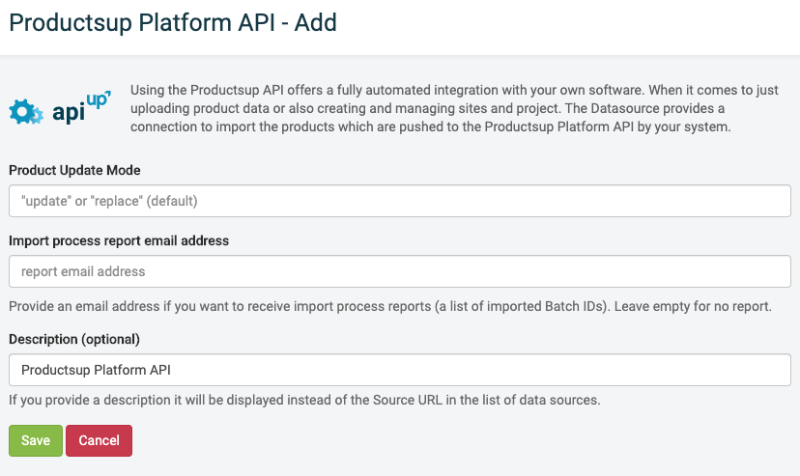
Enter one of the following settings in Product Update Mode:
replace: Uploads an entire file of all product information during each run.
update: Only uploads fields where you modified data, known as a delta update.
Optionally, in Import process report email address, enter an email address to receive a report for each import run: a list of imported Batch IDs.
Leave empty for no report.
Use a comma for concatenating multiple email addresses.
Select Save.
See the Productsup Introduction into our APIs website to explore this topic more deeply.
Import data via the Productsup Stream API
To import data via the Productsup Stream API:
Go to Data Sources from your site's main menu and select ADD DATA SOURCE.
Select Add for the Productsup Stream API data source.
Optionally, give your data source a custom name. This custom name replaces the name of the data source on the Data Sources Overview page. Then, select Continue.
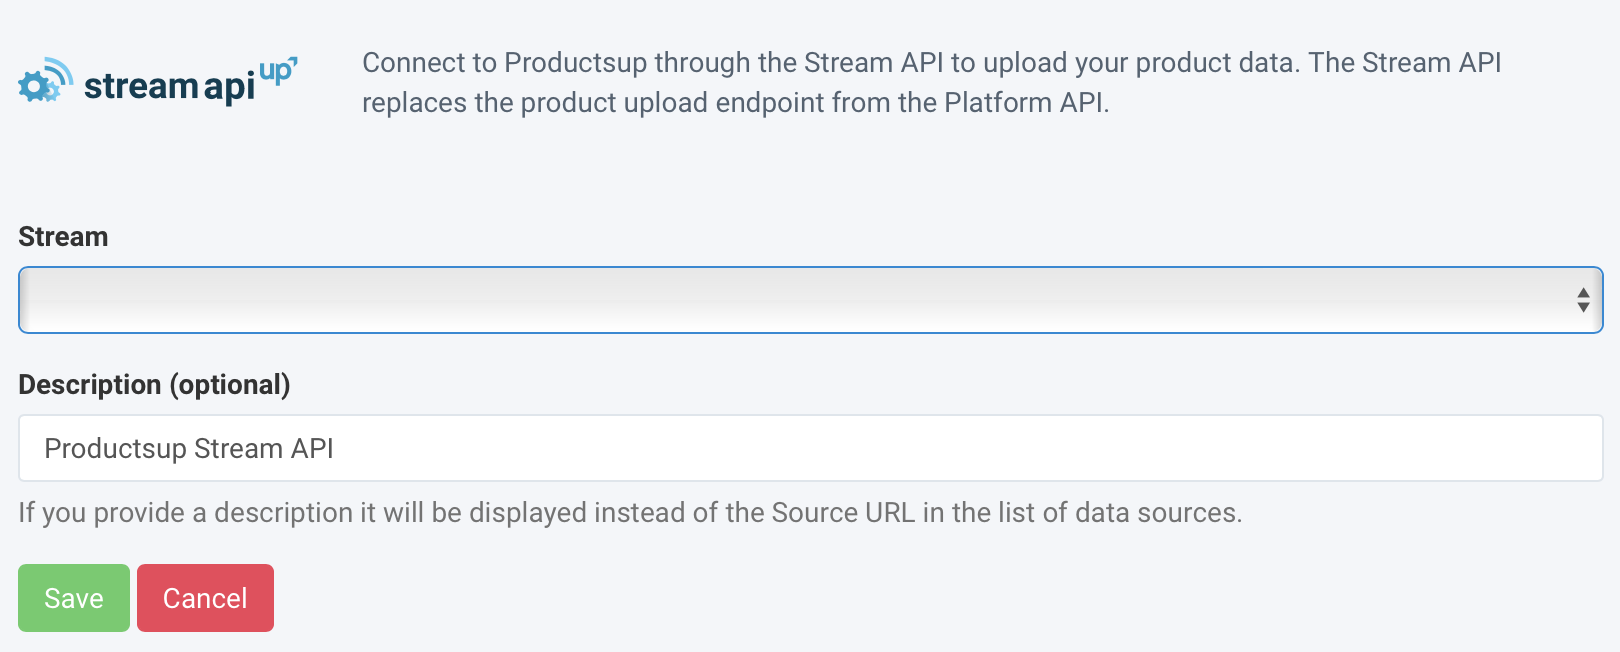
In Stream, choose the Stream ID you want to import data from in the drop-down list.
Select Save.
Import from a SOAP service with Basic SOAP Request
To import XML data from a SOAP Service:
Go to Data Sources from your site's main menu and select ADD DATA SOURCE.
Select Add for the Basic SOAP Request data source.
Optionally, give your data source a custom name. This custom name replaces the name of the data source on the Data Sources Overview page. Then, select Continue.
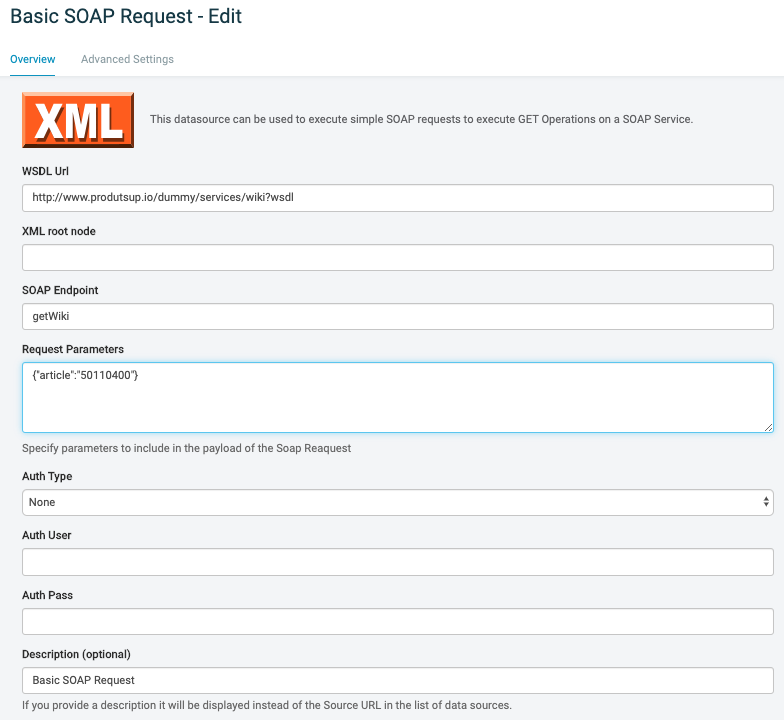
Add your data URL in WSDL Url.
In XML root node, define your file's root node.
Add your endpoint in SOAP Endpoint.
Optionally, use Request Parameters to import the products you specified in the parameters only.
Optionally, select authentication in the Auth Type drop-down list. You can select None or Basic authentication. Next, add your credentials in Auth User and Auth Pass.
Select Save.
Import paginated with Basic API Request with JSON Response
This data source is for APIs that return a JSON response and authenticate with a token. To import paginated product data in a JSON format through a basic REST API:
Go to Data Sources from your site's main menu and select ADD DATA SOURCE.
Select Add for the Basic API Request with JSON Response data source.
Optionally, give your data source a custom name. This custom name replaces the name of the data source on the Data Sources Overview page. Then, select Continue.
Add your data URL in Source.
Optionally, if the URL contains any parameters, except the page parameter, add them in Parameter (optional).
Optionally, if you require authentication, add your credentials in Username (optional) and Password (optional).
Optionally, if a JSON file contains a root node, which defines the key that your product data falls under, add the node in Root Node (optional). See Import JSON files - advanced settings for more information.
Optionally, enter the product variants from the JSON file you want to import in Variant Node (optional).
Optionally, enter the variable that defines the page in Page Variable.
For example, the page variable would be
pagelocated inwww.myonlineshop.com/export.json?page=1.
Establish the first page in Start Page (optional, default: 1), and set the page interval in Next Page Interval (optional).
This is necessary if the pages do not increase by one (1) each time, for example, if not
page=1, page=2,...
Switch Bundle Elements to On if you want to activate bundle elements, and add a delimiter in Bundle Delimeter. See Import JSON files - advanced settings for more information.
In Notifications, set a notification to inform you how many products you imported. You can specify the notification interval.
In Concurrency (how many requests at once), define how many requests occur simultaneously.
Select Save.
Import paginated with Basic API Request with JSON Response (Cursors)
This data source is specifically for APIs that return a JSON response, authenticate with a token, and use cursors to page larger result sets. If you need to use cursors instead of pagination:
Go to Data Sources from your site's main menu and select ADD DATA SOURCE.
Select Add for the Basic API Request with JSON Response (Cursors) data source.
Optionally, give your data source a custom name. This custom name replaces the name of the data source on the Data Sources Overview page. Then, select Continue.
Add your data URL in Source.
Optionally, if the URL contains any parameters, except the page parameter, add them in Parameter (optional).
Optionally, if you require authentication, add your credentials in Username (optional) and Password (optional).
Optionally, if a JSON file contains a root node, which defines the key that your product data falls under, add the node in Root Node (optional). See Import JSON files - advanced settings for more information.
Optionally, enter the product variants from the JSON file you want to import in Variant Node (optional).
Switch Bundle Elements to On if you want to activate bundle elements, and add a delimiter in Bundle Delimeter. See Import JSON files - advanced settings for more information.
In Notifications, set a notification to inform you how many products you imported. You can specify the notification interval.
In Cursor Location, choose None or Header regarding the cursor from the drop-down list. If you've selected Header, enter the appropriate information in Cursor Response Header and the Cursor Request Header.
Define the columns you want to exclude in Excluded Columns. For example,
column_1,column_value*,column_*_name.Select Save.