Add a main data source to import your products
Add a main data source to import your products into your site in Productsup.
You can import your product data into Productsup using the Data Sources feature. To add new products to your site, add a main data source. See Add a main data source.
To add more attributes to the already existing products, set up an additional data source. See Enhance your data with additional data sources.
Add a main data source
To add a main data source and import your products into the site, you need to:
Go to Data Sources from your site's main menu and select ADD DATA SOURCE.
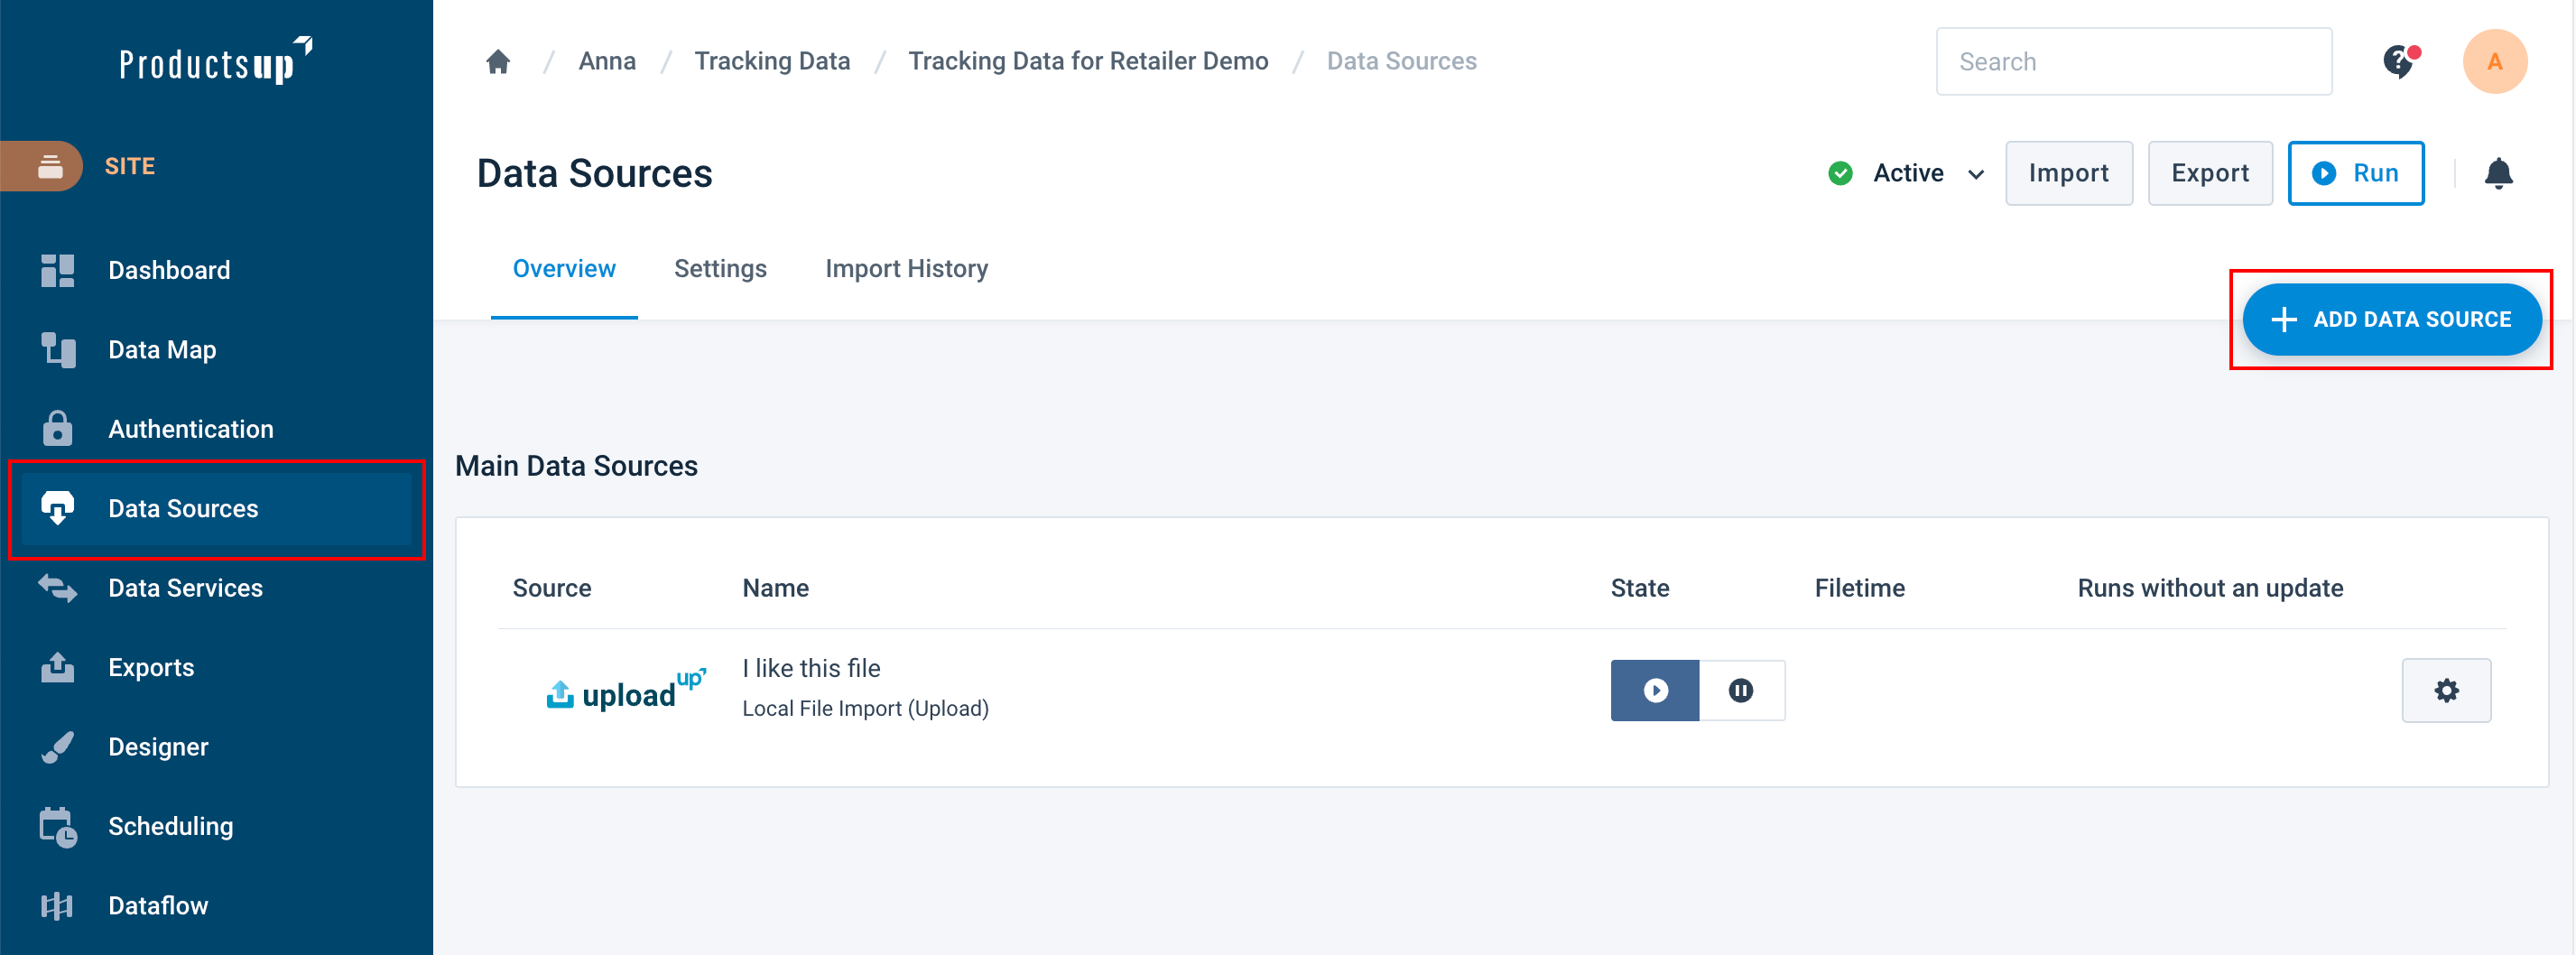
Search for your desired data source and select Add. Give it a custom name as desired and select Continue.
Set up the data source.
For more information on which options are available and how to import different data types, see Import data from internal systems.
For more information on which options are available for importing data from external systems, see Import data from third-party external systems.
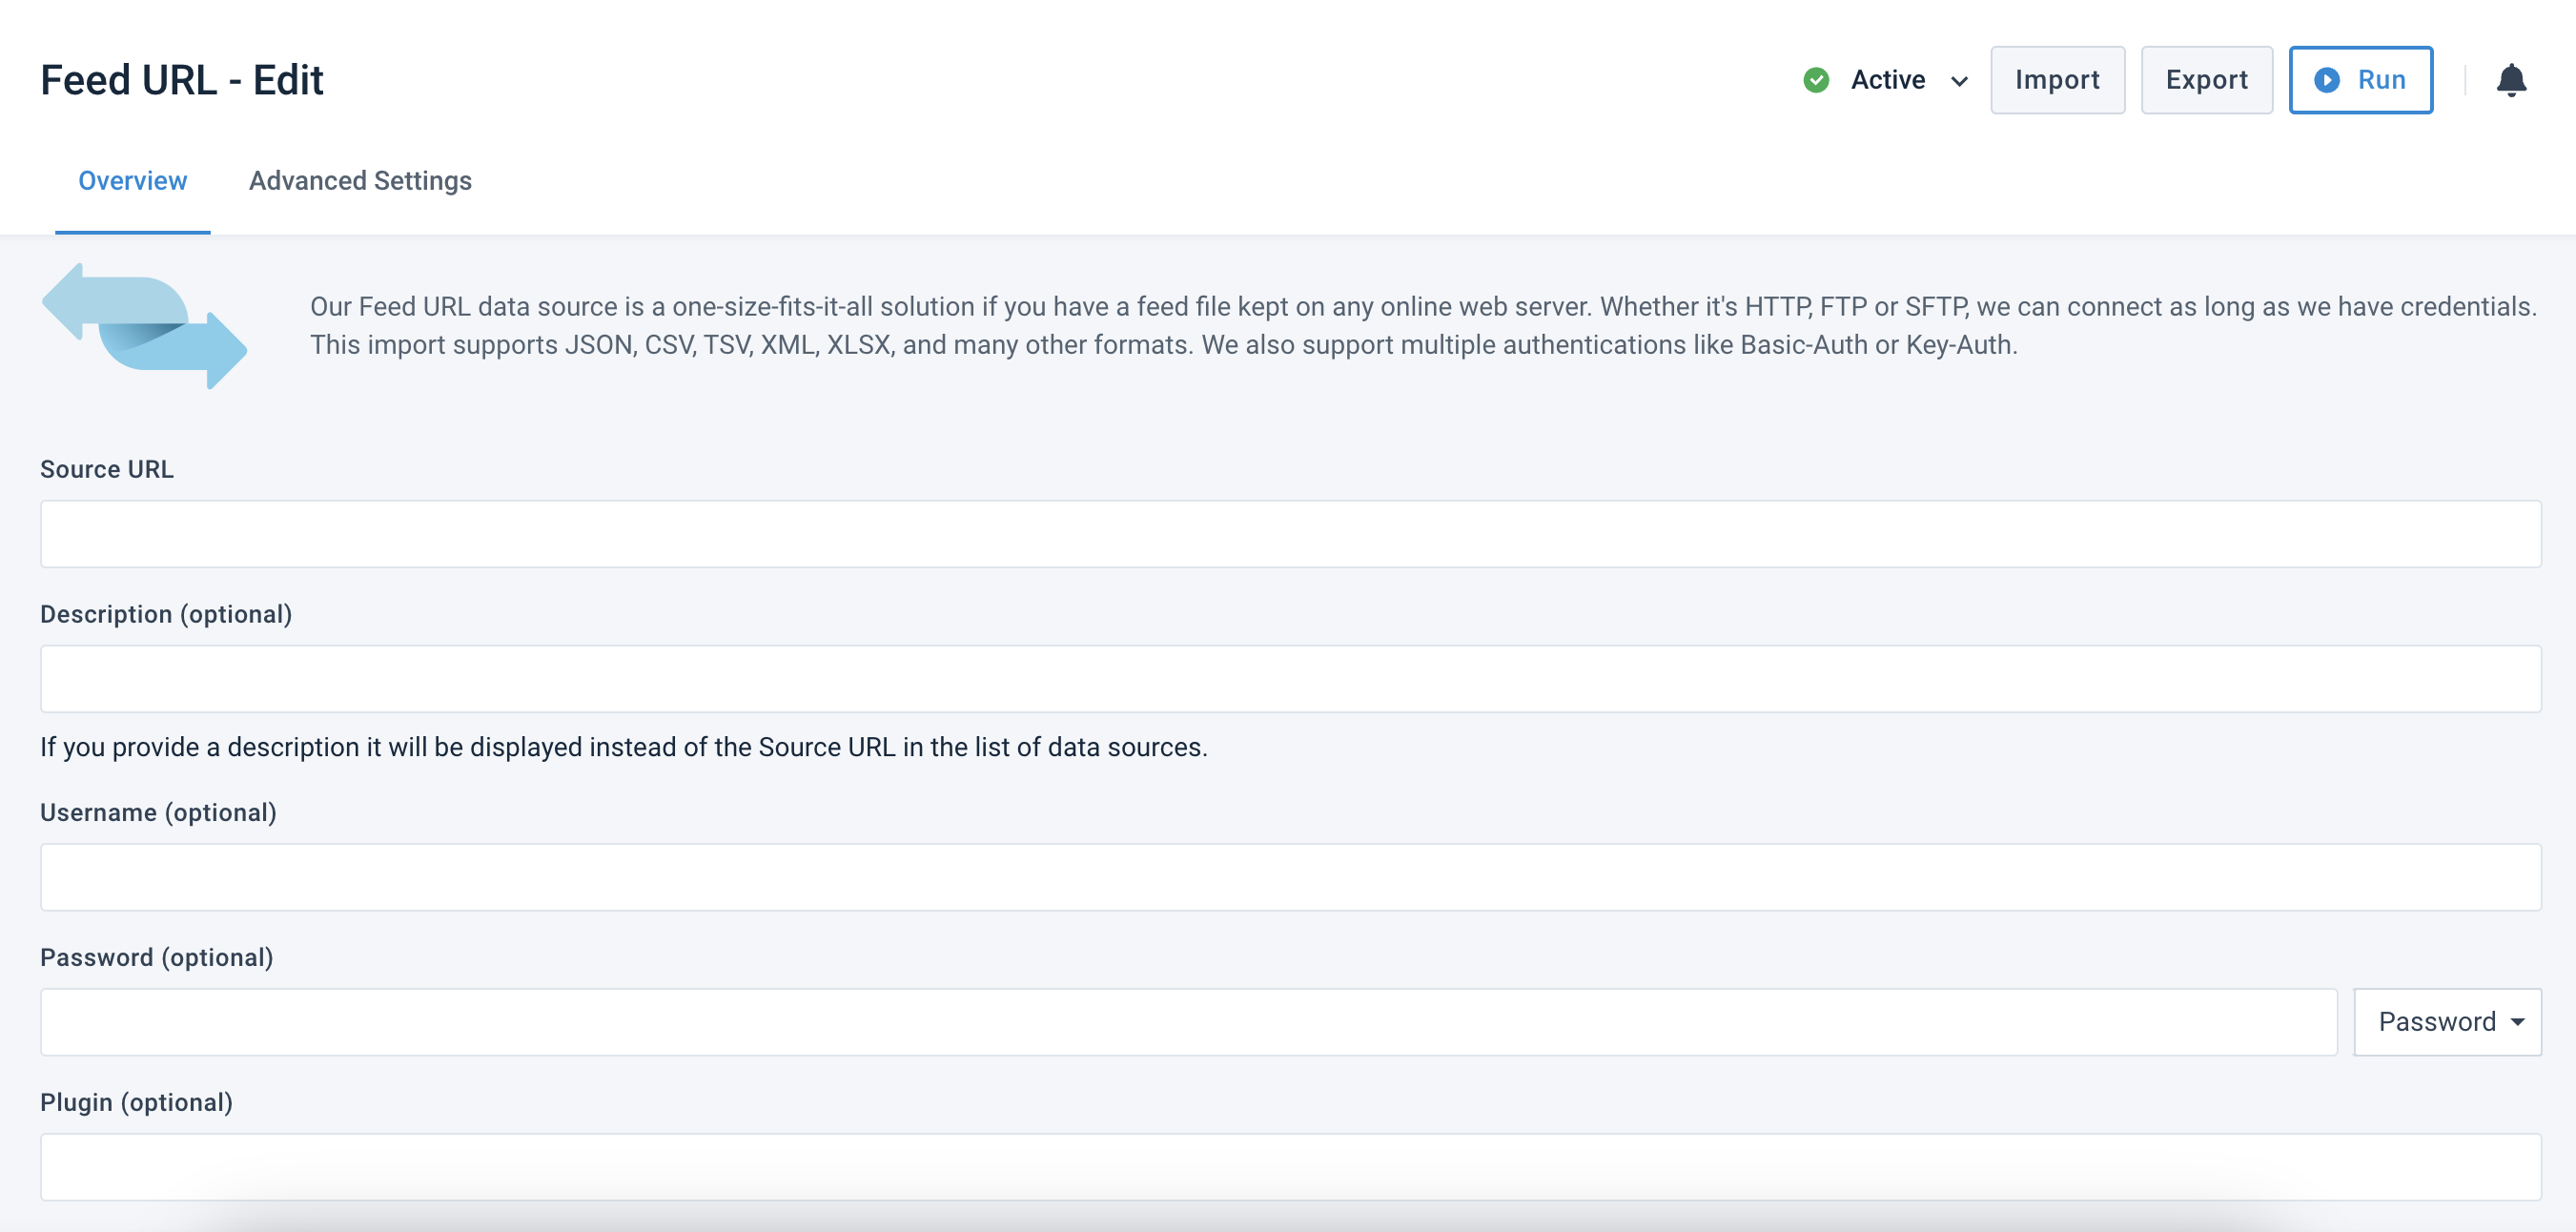
Enter any advanced settings if required and select Save.
You have now set up your main data source and can view it in Data Sources.
Add multiple main data sources
If you have product data hosted in different places, you can add more than one main data source. Adding several main data sources means you can work with all your product data in one site.
Arrange import order for main data sources
If you have more than one main data source in a site, you can arrange a desired import order to let the platform import products as needed. This affects the order of products in your site and export destination unless you apply specific settings to change the product order during export.
To change the import order of the main data sources, you should:
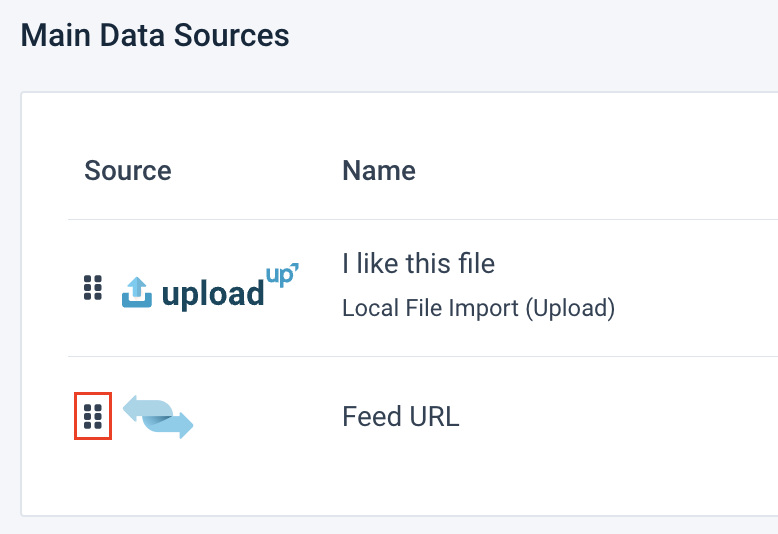
Go to Data Sources from your site's main menu.
Select the grip icon next to one of your main data sources and drag and drop your data source to a position suitable for the desired import order.
A notification appears at the bottom of your view confirming the platform has saved the new order successfully.
Get an overview of your data sources
To see all data sources in a site, you should:
Go to Data Sources from your site's main menu.
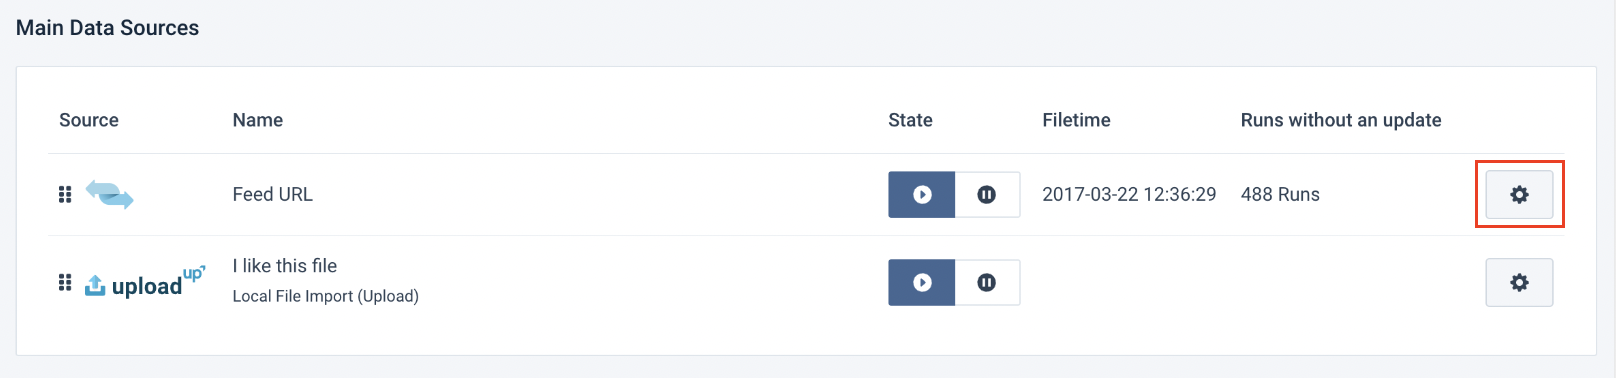
View the Main Data Sources and Additional Data Sources sections to get the following details:
Source - The type of the data source.
Name - The name of the data source. It can be the same as the type of the data source, or it can be the name you specify on the data source setup page.
State - The state of the data source that determines whether the data source imports data during site runs.
Filetime - The date and time when your source file or system was last updated. This information comes from the metadata of your data source, where Productsup checks when you last added more products or edited product data in your data source file or system. The platform updates the Filetime column during every site run. An older date and time here may not mean that your data source is out-of-date. If it seems so, check whether this data source has run recently to determine whether the date and time in Filetime are up-to-date.
Note
The Filetime column doesn't display the time of the last import. To check the time when a data source last imported data into the site, open the Import History tab.
Runs without an update - The number of consecutive site runs up until the most recent site run showing how many times this data source has imported the same data.
Import your data from data sources
Once you have set up your data sources, you can import their data into the platform.
If you have both main and additional data sources, the platform first imports data from main data sources and then augments it with data from your additional data.
Import via scheduling or triggers
You can automatically enable your site to import data by setting up a trigger or a schedule.
See Set up scheduling and triggering processes in Scheduling.
Manually import your data
To manually import data from all your active data sources, you need to:
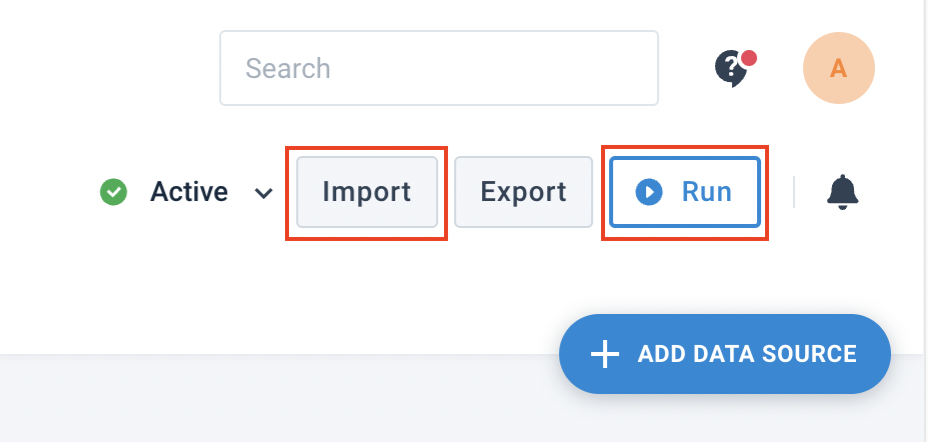
Go to Data Sources from your site's main menu.
Select the Import or Run button.
Note
These buttons are available on most pages at the site level.
Manually importing multiple sites in bulk
To manually import multiple sites at once, you can use a bulk action:
Go to the organization or project level and select Bulk Option.

Choose the site or sites where you wish to start an import and select Next Step.
Select Import and choose Next Step. If you want the sites to import, process, and export data, select the option Import & Export All.
Select Execute to begin the process.
A final confirmation screen shows whether the bulk action was successful.
You can leave this screen by selecting Return to organization page. You can also go to one of the sites where you performed the changes by selecting the name of the needed site.
Remove a data source
To delete a data source, you need to:
Go to Data Sources from your site's main menu and select the cog wheel icon (⚙) to edit a data source.
Open the Advanced Settings tab, choose Delete this Import, select Delete, and then confirm your action by again selecting Delete.
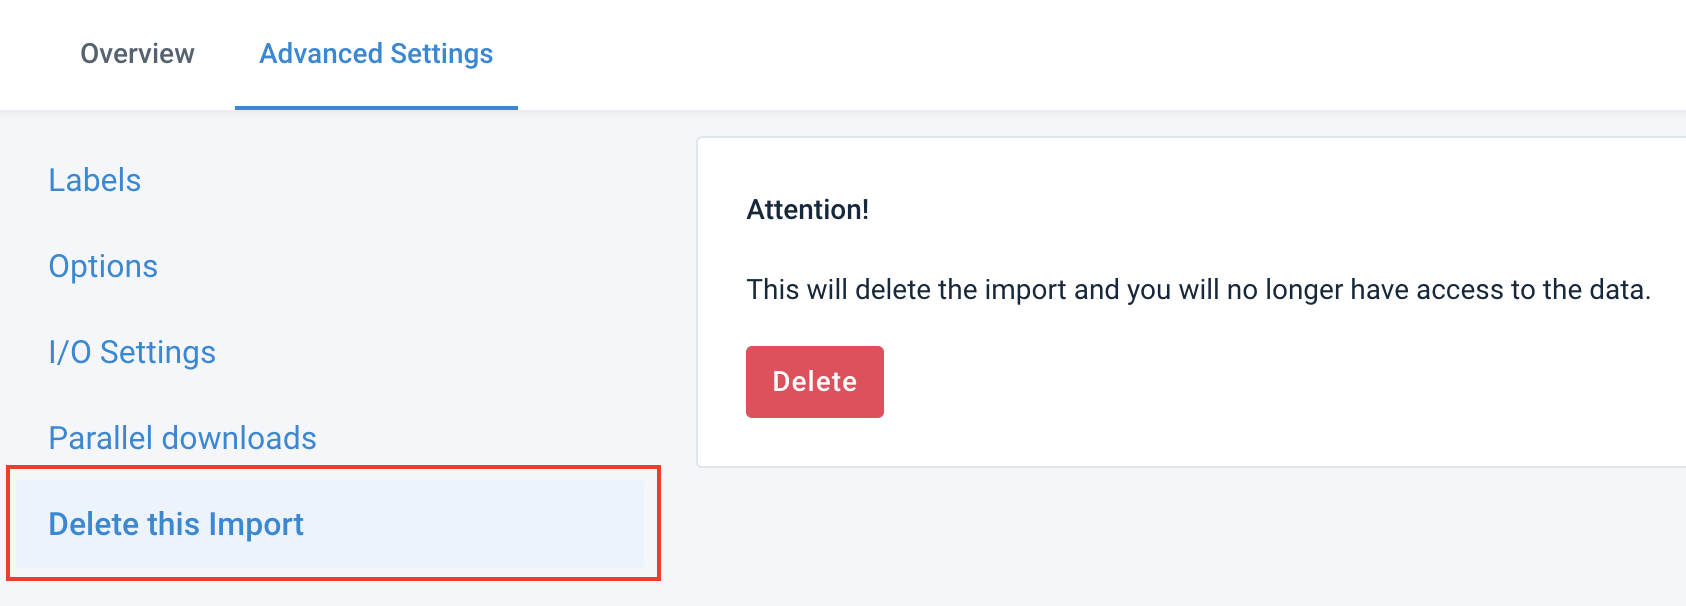
See Import your data into Productsup - Advanced Settings for more information on the actions available in the Advanced Settings tab.
Pause a data source
To pause a data source to make it stop importing data during site runs, you should:
Go to Data Sources from your site's main menu and select the pause icon (⏸) in the State column of the needed data source.

You can reactivate the data source by selecting the play icon (▶︎), which makes the data source import data during the next site run.