Export data feeds
Add and manage exports to send your product data to the relevant channels via Productsup.
The Exports feature in Productsup lets you add and set up new exports, view the list of added exports, track your export history, and check the number of exported items.
The Exports page consists of two (2) tabs:

- Overview lets you view and manage all exports.
- Export history lets you view the history of exports and delta updates.
Locate the Exports feature
To locate the Exports feature, do the following:
Go to a desired site in your Productsup organization.
Open the site's main menu on the left.
Select Exports.
Overview tab
In the Overview tab, you can briefly overview each export added to your site. You can perform the following actions:
- Add a new export using the Add export button. See Add export.
- Set up a new export or edit existing exports. See Add export.
- Search for a necessary export using keywords or filters.
- Run a specific export.
- Activate or deactivate an export.
- Copy an export.
- Delete an export.
If you have at least one (1) export added, the Overview tab shows the following information on each export:

- Export name shows the name of an added export. You can select the name to get to the export setup page.
- Last export shows the date and time of the previous export run.The icon on the left-hand side from the date shows the run type for this export. You can hover over an icon to see whether the run was Scheduled, Manual, or Triggered by another site.
- Exported items shows the number of exported items during the last export and the change in the number of exported items compared to the previous run.
- Created on show the export creation date.
- Status shows the active or inactive state of an export.
You can select the arrows next to the Export name and Created on columns to sort the exports list.
Set up a new export or edit existing exports
To set up a newly added export or edit an existing one:
In the Overview tab, search for a necessary export using keywords or filters.
Select the name of the export in the Export name column.

Set up the export or edit the settings on the setup page. See Add export for more information.
Search for a necessary export using keywords or filters
To find a necessary export in the Overview tab, use the Search for exports field or the filters:

- Export type lets you view the list of all added exports of the necessary types and select the needed:
Select Export type.
Choose the necessary types from the list.
Select Apply.

Unselect the checked boxes or use the Clear button to clear the Export type filter.
- Labels lets you view a list of all added exports with the labels and select the needed ones.
Select Labels in the top ribbon.
Choose the necessary labels from the list.
Select Apply.

Unselect the checked boxes or use the Clear button to clear the Labels filter.You must add labels in the export settings before any labels appear in the Labels dropdown.
- Status lets you view a list of all added exports with the necessary status.
Select the Active or Inactive button next to Status.
To clear the Status filter, unselect the chosen buttons.
To clear all filters and see the whole list of added exports, select Clear filters.
Export your items to the target channel
Selecting Export or Run in the top-right corner of the page sends data to all channels with active exports.
If you want to send data to a specific channel only, take the following steps:
Search for a necessary export. See Search for a necessary export using keywords or filters.
Hover over the necessary export and select the Export button that appears in the export's row.

When the run is successful, you can see Exported instead of the Export button.
Activate or deactivate an export
If you want to pause an export to change its settings or prevent it from uploading data to its destination for a while, you can deactivate an export instead of deleting it. You can reactivate the export whenever you are ready to continue exporting to the channel again.
Search for a necessary export. See Search for a necessary export using keywords or filters.
In the Status column, toggle the status to Active or Inactive, depending on your needs.

After reactivating your export, run the export manually to send the data to the channel.
Copy the export
You can create a copy of the export if you plan to use it multiple times without having to start from scratch. After duplicating your export, decide if you want to copy it with or without destination settings.
Go to Exports from your site's main menu and select the three dots icon
![]() next to the export you want to copy.
next to the export you want to copy.
Select Duplicate.
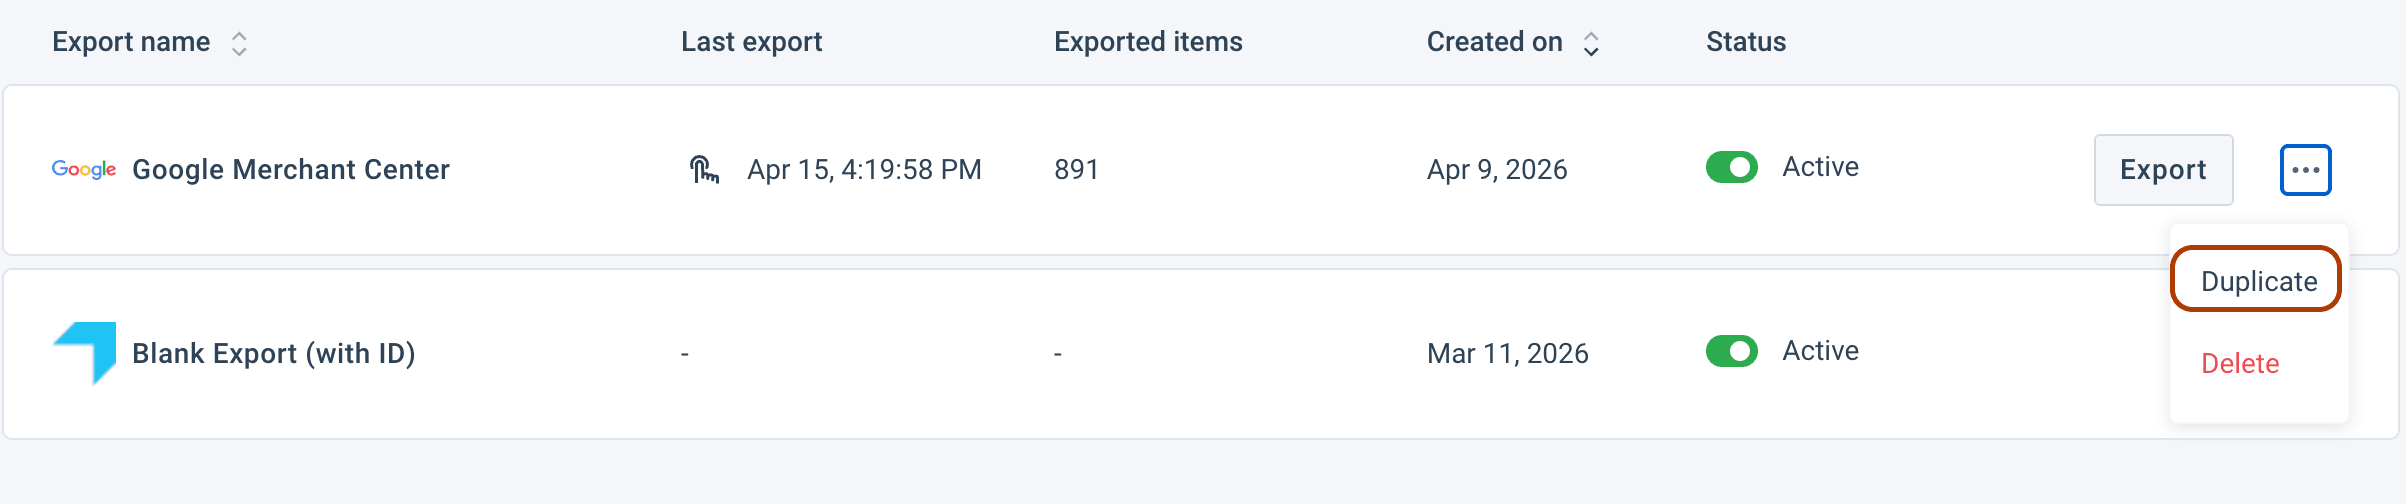
In the opened pop-up, select Duplicate to copy the export's destination settings to the newly created export template. Or select Duplicate without destination settings to copy an export without destination settings.
Alternatively, you can copy the export from the export's Overview tab, by selecting the Duplicate button.

Delete an export
Search for a necessary export. See Search for a necessary export using keywords or filters.
Go to Exports from your site's main menu and select the three dots icon
![]() next to the export you want to copy.
next to the export you want to copy.
Select Delete.
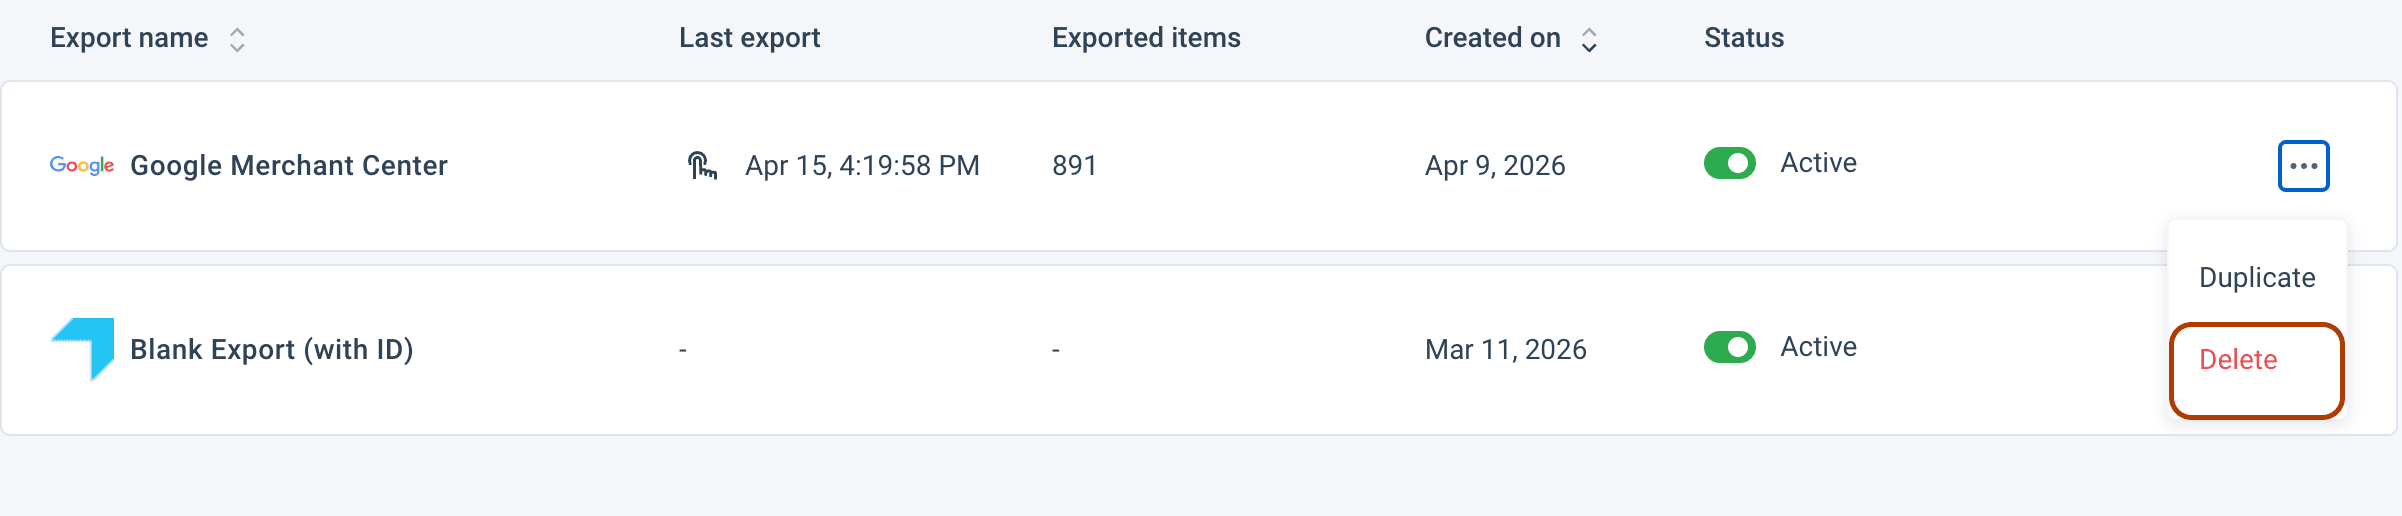
In the Delete Export? pop-up, select Delete.
The export disappears from the exports list in the Overview tab.
Export history tab
The Export history tab shows the log of all export runs.
To find a necessary export history record in the Export history tab, use the Search for exports field or the following filters:

- Export type lets you view the list of all added exports of the necessary types and select the needed:
Select Export type.
Choose the necessary types from the list.
Select Apply.
Unselect the checked boxes or use the Clear button to clear the Export type filter.
- Labels lets you view a list of all added exports with the labels and select the needed ones.
Select Labels in the top ribbon.
Choose the necessary labels from the list.
Select Apply.
Unselect the checked boxes or use the Clear button to clear the Labels filter. You need to add labels to exports in the export settings before any labels appear in Labels.
- Select a date lets you select a date when the necessary export was run.
The dots next to a date in the calendar indicate the dates of the export runs.
- Run type lets you view a list of all exports with a specific run type by selecting Scheduled, Manual, Triggered by another site, or Triggered by API.
To clear all filters and see the whole list of added exports, select Clear filters.
View the delta updates
The table in the Export history tab lets you see exports with delta updates: New, Changed, Deleted, and Unchanged. See Build your exports from scratch to learn about delta updates.
All exports with delta updates have the DELTA label next to their names in the Overview and Export history tabs.

To show or hide the delta updates columns, do the following:
In the Export history tab, toggle Show delta updates to the active position.

How is this guide?