Add TikTok Shop exports
Send your product and order data to TikTok Shop and import order data from TikTok into Productsup.
TikTok Shop provides a new, native checkout experience for TikTok users and lets them shop, order, and pay without leaving the TikTok app. This leads to a smoother shopping experience, higher conversion rates, and more transparent ad performance, which yields a higher return on ad spend. TikTok Shop is currently available in the United States, the United Kingdom, Spain, France, Germany, and Italy.
Note
Currently, Productsup can support you in selling your products on TikTok Shop only in the UK, Germany, and the US.
To let you sell your products on TikTok Shop, Productsup has built an ecosystem that sends product and order data to TikTok Shop and imports order data from TikTok Shop into Productsup:
TikTok Shop - Product Catalog API (US)
This export creates, updates, and deletes products on TikTok Shop via API for the US market and contains the attributes relevant to products of all product categories. When setting up this export, you also use multiple category-specific attributes that let you send products of relevant product categories to TikTok Shop. This export sends only delta updates to TikTok Shop instead of exporting the entire product catalog during every site run.
TikTok Shop - Product Catalog API (UK)
This export creates, updates, and deletes products on TikTok Shop via API for the UK market and contains the attributes relevant to products of all categories. When setting up this export, you also use multiple category-specific attributes that let you send products of relevant product categories to TikTok Shop. This export sends only delta updates to TikTok Shop instead of exporting the entire product catalog during every site run.
TikTok Shop - Product Catalog API (DE)
This export creates, updates, and deletes products on TikTok Shop via API for the German market. When setting up this export, you also use multiple category-specific attributes that let you send products of relevant product categories to TikTok Shop. Currently, it supports only a limited number of categories under Health & Beauty. Contact your Customer Success Manager or support@productsup.com to request the necessary categories. This export sends only delta updates to TikTok Shop instead of exporting the entire product catalog during every site run.
TikTok Shop - Shipment Notifications API
This export sends shipping updates to TikTok Shop via API to let you send tracking information to TikTok and inform customers on TikTok that you shipped their orders. This export sends only new shipment data to TikTok Shop instead of sending the entire product catalog during every site run.
TikTok Shop Order Import
This API-based data source imports orders from TikTok Shop into Productsup to let you send the order data to your order management system.
Prerequisites
To set up the TikTok Shop ecosystem in Productsup, you need:
Product variants in your product data.
Your data should support product variants, which means multiple rows in your data source can represent one main product that varies in size, color, model, etc.
All products in your data feed must have product_id and parent_id. The product_id attribute uniquely identifies product variants, and the parent_id attribute links all product variants to their main product.
If a product doesn't have variants, it still must have the parent_id attribute. It can just have the same value as the product_id attribute.
See Mind product variants and their attributes for more information.
Caution
If your data doesn't support product variants and doesn't have the needed main product and variant IDs, you need to optimize your data in Productsup to ensure that it meets the TikTok Shop requirements.
A project in your Productsup organization where you are going to create three (3) sites, pushing and pulling data from TikTok Shop. In this separate project, you need to create a separate site for each TikTok Shop export and data source.
Note
This is a recommended option. If a separate TikTok Shop project doesn't fit your overall organization structure, you can ignore this advice.
A TikTok seller account and a shop set up on TikTok Shop. See Set Up TikTok Shop Using TikTok Seller Center for more information.
A list of all TikTok categories you want to sell products in.
Note
This integration has category-specific attributes exports. Productsup supports only some categories by default. But we can add missing categories upon request. It may take around two weeks to add support for your request. To request the necessary categories or countries for this integration, contact your Customer Success Manager or support@productsup.com and provide the following information:
List of categories. See Product Categorisation for more information on choosing the right TikTok Shop product categories.
List of countries. Now, we only support the UK, Germany, and the US.
An approval from TikTok to sell products of specific categories and brands. Some brands and categories on TikTok Shop are invite-only, so you need to reach out to TikTok to get their approval to work with the categories and brands that aren't publicly available.
A TikTok Shop authentication created on the project or organization level to use across all TikTok Shop sites. See Add OAuth authentication to external systems for more information.
Add this authentication as follows:
Go to Authentication from your organization's or project's menu and select ADD AUTHENTICATION.
In Type, select the needed authentication type based on your country of interest, give it a custom name as desired, and select Next:
Select TikTok Shop US Authentication if you want to sell products on the US market.
Select TikTok Shop Non-US Authentication if you want to sell products on the UK or German markets.
Select Connect for Productsup to redirect you to a TikTok account page where you can give Productsup access to your account. Follow the instructions on TikTok to connect the systems.
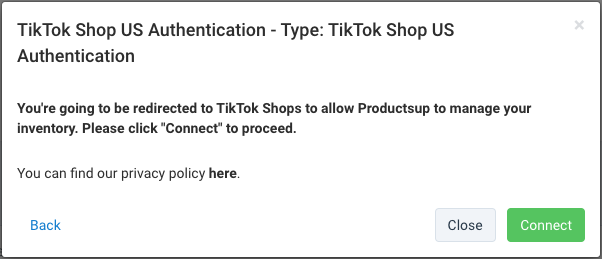
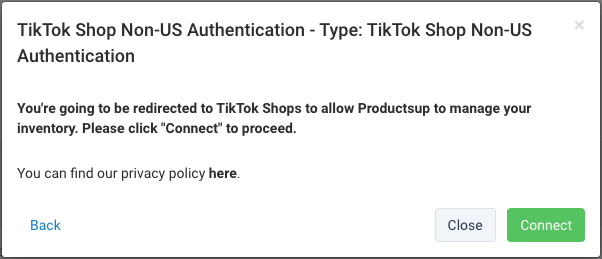
Once ready, TikTok redirects you back to Productsup to finish the authentication process. Close the confirmation window in Productsup to proceed.
Send products to TikTok Shop
To send your products to TikTok Shop in the US, Germany, or the UK, you first need to add and set up the export TikTok Shop - Product Catalog API (US), TikTok Shop - Product Catalog API (DE), or TikTok Shop - Product Catalog API (UK) and create a Partner Taxonomy Mapping list for your category attribute.
Your next steps depend on what attributes you want to send to TikTok Shop. If you plan to send any of the following attribute types, you need to take additional steps to set them up:
The brand attribute
Attributes that require predefined values
Multi-value attributes
Product variant attributes
See the following sections for information on setting up the export itself and working with each attribute type listed above.
Tip
To see what data in your feed doesn't meet the export channel requirements, you can use the Analyzer feature. See Analyze your data in Data View for more information on identifying the data that needs optimization.
See TikTok Shop Partner Center API Documents for reference on TikTok Shop's requirements for each attribute.
Add and set up your TikTok Shop export
In the site dedicated to the TikTok Shop export, add and set up the needed export as follows:
Go to Exports from your site's main menu and select ADD EXPORT.
Search for the needed export based on your country of interest, hover over it, and select Add:
Search for and add TikTok Shop - Product Catalog API (US) if you want to sell products on the US market.

Search for and add TikTok Shop - Product Catalog API (UK) if you want to sell products on the UK market.

Search for and add TikTok Shop - Product Catalog API (DE) if you want to sell products on the German market.

On the Exports page, select the name of the added export.
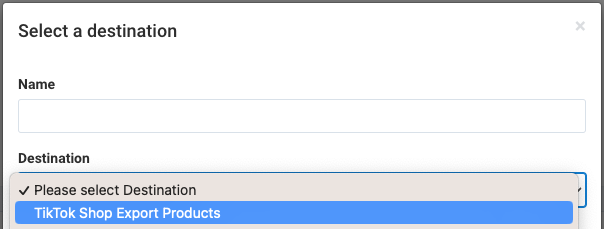
Select Add Destination, choose TikTok Shop Export Products from the dropdown, give it a name as desired, and then select Save.
In Authentication, select the TikTok Shop authentication you have added to your Productsup organization or project.
To let the platform create a file and log all calls to the TikTok Shop API, toggle the Log API calls button to On. You can also toggle Log headers of API calls to On to let the logs feature request and response headers.
Tip
You can use these settings to troubleshoot your export setup on demand, but you shouldn't use them permanently because they slow down the export process.
Toggle the Enable Feedback File button to Off if you don't want the platform to receive feedback files from TikTok.
This feature is active by default to let Productsup receive a feedback file from the TikTok Shop API in case of export errors. This helps to troubleshoot the setup.
Toggle the Active button to On to activate the destination.
Select Save.
Go to Lists from your site's main menu and select ADD LIST.
Choose Partner Taxonomy Mapping and select Continue.
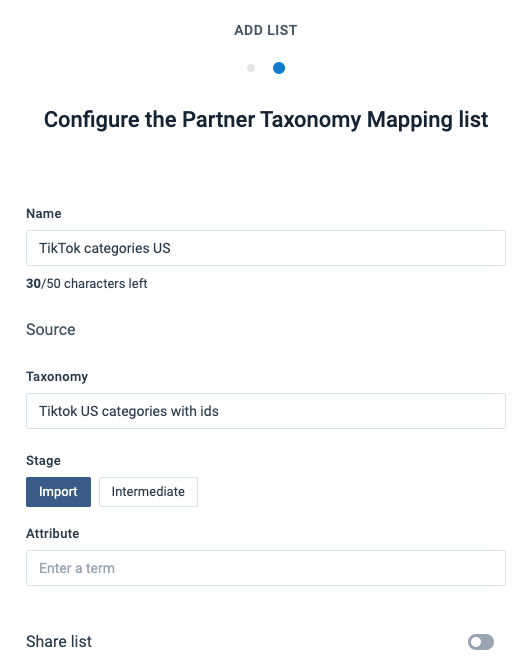
Give the list a desired name, select the needed taxonomy in Taxonomy, and choose Import in Stage:
Search for and add the taxonomy Tiktok US categories with ids if you want to sell products on the US market.
Search for and add the taxonomy Tiktok UK categories with ids if you want to sell products on the UK market.
Search for and add the taxonomy Tiktok DE categories with ids if you want to sell products on the German market.
Select the Attribute field to choose the attribute in your import stage that contains your products' category data. Then, select Add at the bottom of the page to add the list.
Go through all the values of your category attribute in the column on the left and select the corresponding TikTok Shop categories in the Replace term column.

Note
You must create and set up a new Partner Taxonomy Mapping list every time you modify the chosen category attribute in your data source and import its new values into your site. Otherwise, the already existing list can't upload your new values, and you can't map them to the corresponding TikTok Shop categories. Once you create a new Classification Mapping list, you need to choose it in the related rule box.
Go to Dataflow and select the added export from the dropdown on the left.
Map all the needed attributes from import to export. The attributes you see in the export stage are relevant for products of all your TikTok categories.
Tip
Map your import-stage category attribute to both category_id and category_path in the intermediate stage to add the needed rule boxes and apply the Partner Taxonomy Mapping list.
Select category_id in the intermediate stage and open the Select an Option dropdown on the right to find and add the rule boxes:
Search for and select Taxonomy Mapping. Choose your category list in List.
Search for and select Split String. Enter
|in Splitter,0in From, and1in Items. Select Save.This way, the category_id attribute contains only the ID of the needed category.
Select category_path in the intermediate stage and open the Select an Option dropdown on the right to find and add the rule boxes:
Search for and select Taxonomy Mapping. Choose your category list in List.
Search for and select Split String. Enter
|in Splitter,1in From, and1in Items. Select Save.This way, the category_path attribute contains only the path of the needed category.
To let the site display your category-specific attributes in Dataflow, select Run in the top-right corner of your view.
Warning
This run will fail because you haven't yet mapped all the mandatory attributes, so no data export occurs at this stage. The aim of the run is to import the needed categories and attributes in Dataflow.
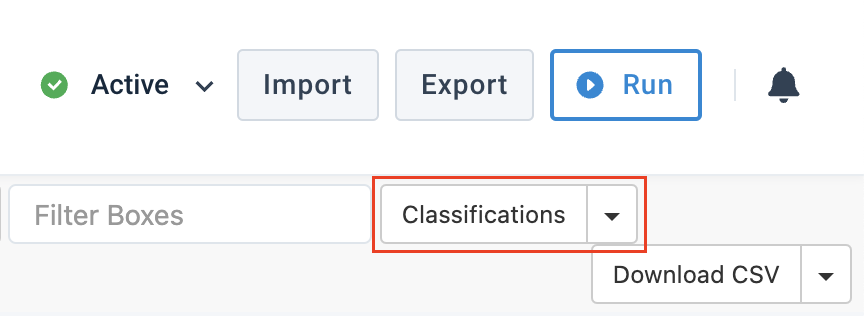
Once the site run finishes, the Classifications dropdown appears in the top ribbon in Dataflow. Select each category in this dropdown to let Dataflow display the relevant category-specific attributes in the export stage. Map all the needed attributes from import to export.
Tip
If you can't see the Classifications dropdown when the site run finishes, try refreshing your page.
Set up the brand attribute
When receiving brand information about a product, TikTok Shop requires the ID of that brand. To satisfy this requirement, you need to create a Partner Taxonomy Mapping list in your site and map your current brand attribute with the brand IDs expected by TikTok:
Go to Lists from your site's main menu and select ADD LIST.
Choose Partner Taxonomy Mapping and select Continue.
Give the list a desired name, select Tiktok brands with ids in Taxonomy, and choose Import in Stage.
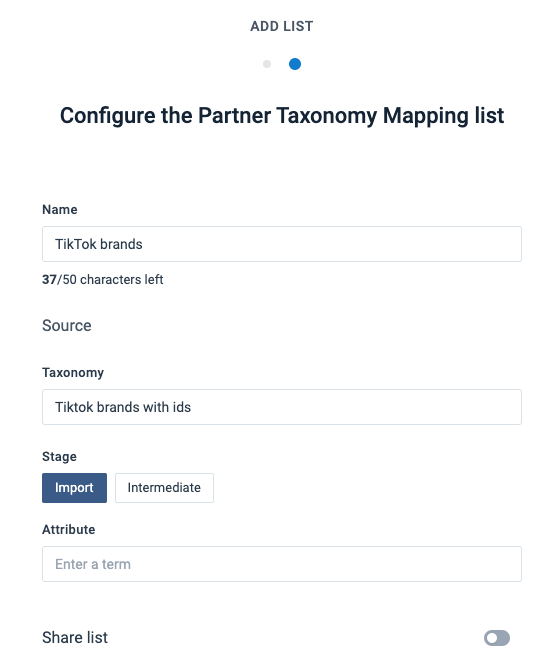
Select the Attribute field to choose the attribute in your import stage that contains your products' brand data. Then, select Add at the bottom of the page to add the list.
Go through all the values of your brand attribute in the column on the left and select the corresponding TikTok-recognized brands and brand IDs in the Replace term column.

Note
You must create and set up a new Partner Taxonomy Mapping list every time you modify the chosen brand attribute in your data source and import its new values into your site. Otherwise, the already existing list can't upload your new values, and you can't map them to the corresponding brands and brand IDs recognized by TikTok Shop.
Go to Dataflow and select TikTok Shop Product Export API Main from the dropdown on the left.
To apply the brand-mapping list to your attributes and extract the needed data from it, select brand_id in the export stage and open the Select an Option dropdown on the right to find and add the rule boxes:
Search for and select Taxonomy Mapping. Choose your brand-mapping list in List.
Search for and select Split String. Enter
|in Splitter,0in From, and1in Items. Select Save.This way, the brand_id attribute contains only the IDs of the needed brands, as required by TikTok Shop.
Set up attributes that require predefined values
For some attributes, TikTok Shop accepts predefined values only and requires receiving the IDs of those values together with the values themselves. For example, TikTok Shop accepts only the values Foldable and Non-Foldable for the attribute product_attribute. Foldable Furniture#100887 and also expects to receive those values' IDs 1002263 and 1002263 in this attribute. You thus need to send the values as follows: Foldable:::::1002263 and Non-Foldable:::::1004668.
To check which attributes in your feed require predefined values with value IDs:
Go to Dataflow and select your export from the dropdown on the left.
Tip
For category-specific values, open the Classification dropdown and select the needed category.
In the Overview dropdown, select Readiness.
The platform highlights problematic attributes in orange or red. Select the readiness percentage under the name of each problematic attribute. If the attribute supports only predefined values, you will see a similar pie chart in the Analyzer tests section and a list of the supported values for this attribute.
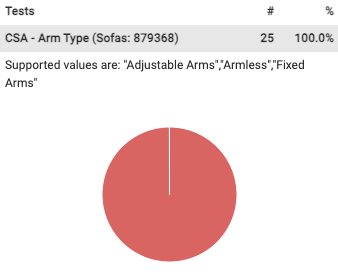
See Analyze your data in Data View for more information on the Analyzer and export readiness scores.
To provide the right values and the relevant value IDs in the attributes that support only predefined values, do the following for each of these attributes:
Go to Lists from your site's main menu and select ADD LIST.
Choose Partner Taxonomy Mapping and select Continue.
Give the list a desired name, select Tiktok non-customized with ids in Taxonomy, and choose Import in Stage.
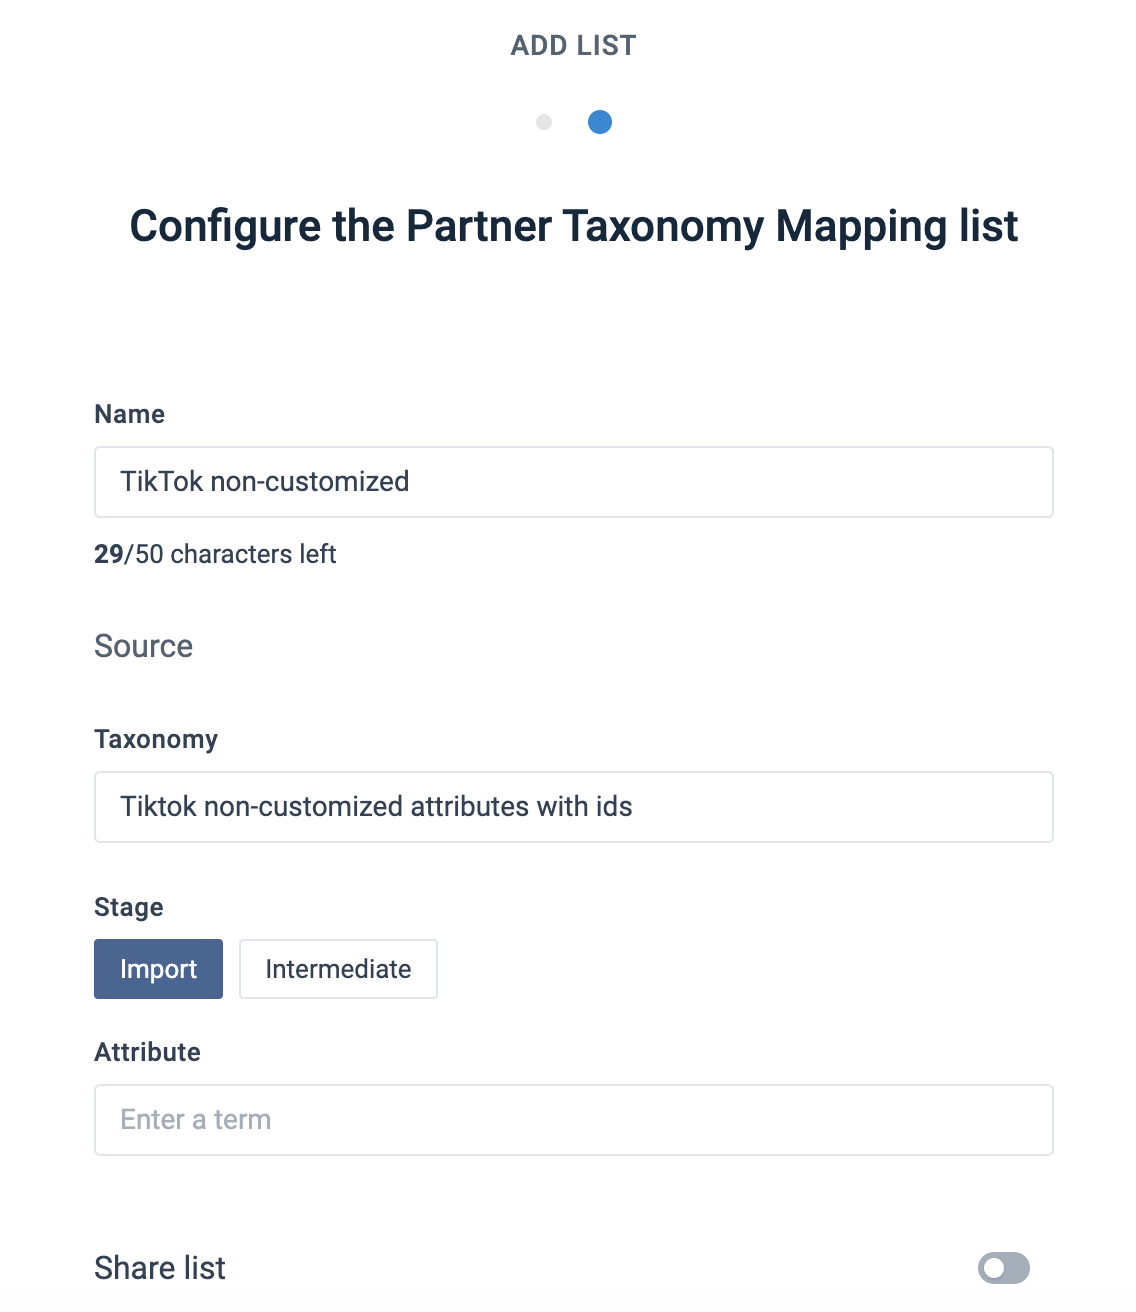
Select the Attribute field to choose the attribute in your import stage that should contain predefined values. Then, select Add at the bottom of the page to add the list.
Go through all the values of your chosen attribute in the column on the left and select the corresponding values supported by TikTok Shop in the Replace term column.

Note
You must create and set up a new Partner Taxonomy Mapping list every time you modify the chosen attribute in your data source and import its new values into your site. Otherwise, the already existing list can't upload your new values, and you can't map them to the corresponding predefined TikTok Shop values with IDs.
Go to Dataflow and select your export from the dropdown on the left.
To apply the list to the chosen attribute and extract the needed data from it, select the relevant attribute in the export stage and open the Select an Option dropdown on the right to find and add the rule boxes:
Search for and select Taxonomy Mapping. Choose your list in List.
Search for and select Split String. Enter
|in Splitter,1in From, and1in Items. Select Save.
Set up multi-value attributes
TikTok Shop allows some attributes to contain multiple values. Here are some of these attributes:
Images
Material
Delivery service IDs
To see if an attribute can send multiple values to TikTok Shop, you can use the Analyzer feature. If an attribute doesn't have analyzer tests at the export stage in the Analyzer, the attribute is likely to support multiple values. See Analyze your data in Data View for more information on the Analyzer feature.
Tip
You can also see which attributes support multiple values in your TikTok account.
Most multi-value attributes are category-specific.
For all the attributes that should send multiple values to your TikTok Shop account, do the following:
Go to Dataflow and select your export from the dropdown on the left.
Map an attribute from the import stage to the corresponding multi-value attribute in the intermediate stage.
Select the attribute in the intermediate stage and open the Select an Option dropdown on the right to find and add the rule boxes.
Search for and select Append/Prepend Column.
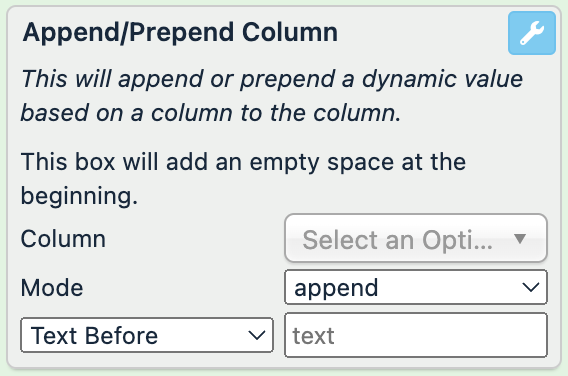
In Column, choose another attribute that should add its value to the multi-value attribute. Then, select append in Mode.
In the text field, enter
#to separate the value of the added attribute from the current value.Open the Select an Option dropdown to search for and select Text Replace.
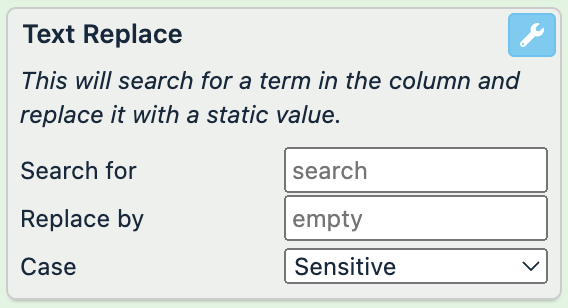
Enter
#in Search for and#in Replace by.Note
With the suggested settings, the Append/Prepend Column rule box adds the value of your chosen attribute to the current value in your edited multi-value attribute by using the number sign (
#) and a space before it as a delimiter.Don't forget to enter the space before
#in Search for to let the Text Replace rule box remove the space.Select Save.
Tip
If you want to add more than one (1) attribute to a multi-value attribute in the intermediate stage, you need to add as many Append/Prepend Column rule boxes as necessary to append all the desired values.
Mind that the order of the rule boxes matters. The higher a rule box is in the list of added rule boxes, the earlier a site processes and applies it to the data. So the order of the Append/Prepend Column rule boxes from top to bottom should be the same as your desired order of values in the attribute.
You should add the Text Replace rule box only once, and it should be at the bottom of the rule box list.
Mind product variants and their attributes
The TikTok Shop product data scheme uses main products and product variants. All products in your feed must have product_id and parent_id. The product_id attribute uniquely identifies product variants, and the parent_id attribute links all product variants to their main product. The platform considers the first product variant with a new parent_id as both a product variant and the main product.
All product variants have the same values as their main products in such attributes as parent_id, product_name, images, category_id, description, etc. However, some attributes can contain values individual to each product variant. The names of these varying attributes start with sku., except for product_id.
When modifying the data in your feed, you shouldn't let product variants with the same parent_id have different values in the shared attributes. But the values in product_id and the sku. attributes can differ per product variant.
Import orders from TikTok Shop
To let Productsup import your orders from TikTok Shop, do the following in the site dedicated to the TikTok Shop data source:
Note
TikTok users can cancel orders within one (1) hour after placing an order. You can import orders created within the last hour, but you shouldn't ship them right away.
Go to Data Sources from your site's main menu and select ADD DATA SOURCE.
Search for TikTok Shop Order Import, select Add, give it a name as desired, and then choose Continue.
In the Order Status Filter area, select the statuses that orders should have for Productsup to import them. If you don't select any order statuses, the platform imports orders of all statuses.
Tip
Hold the Ctrl or Cmd key to select multiple order statuses. Shift helps to select a range of statuses.
See Fulfillment Process Integration Design for more information on the TikTok Shop order status flow.
If you want to import orders created within a specific timeframe only, enter the needed number of days in Earliest Order Creation Time or Earliest Order Update Time. The expected input format is a digit in both fields.
For example, if you enter
7in Earliest Order Creation Time, the platform imports only the orders created within the last seven (7) days. To import orders updated within the past three (3) days, enter3in Earliest Order Update Time.In Authentication selection, select the TikTok Shop authentication you have added to your Productsup organization or project.
Specify the desired name of the data source in Description (optional).
Select Save.
Go to Exports from your site's main menu and select ADD EXPORT.
Find your order management system, add it as an export, set it up, and map the needed attributes in Dataflow.
Choose Run in the top-right corner of the page to let the site import your order data and send it to your order management system.
Send shipment updates to TikTok Shop
There are two (2) types of shipping methods available on TikTok Shop:
Self-shipping, which you manage yourself.
Shipping managed by TikTok.
Note
Currently, Productsup supports only self-shipping and doesn't allow splitting and batching packages.
TikTok users can cancel orders within one (1) hour after placing an order. You shouldn't ship orders created within the last hour because there is a cancellation risk.
To send shipment updates to TikTok Shop and notify your customers of the shipment process, do the following in the site dedicated to the TikTok Shop shipment export:
Go to Exports from your site's main menu and select ADD EXPORT.
Search for TikTok Shop - Shipment Notifications API, hover over it, and select Add.

On the Exports page, select the name of the added export to set it up.
Select Add Destination, choose TikTok Shop Shipment Notification Export from the dropdown, give it a name as desired, and then select Save.
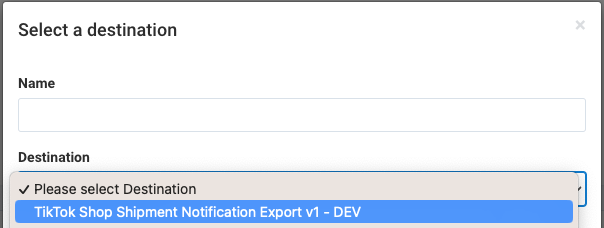
In Authentication selection, select the TikTok Shop authentication you have added to your Productsup organization or project.
Toggle the Feedback Import button to Off if you don't want the platform to receive feedback files from TikTok.
This feature is active by default to let Productsup receive a feedback file from the TikTok Shop API in case of export errors. This helps to troubleshoot the setup.
Toggle the Active button to On to activate the destination.
Select Save.
Go to Dataflow and select your TikTok Shop - Shipment Notifications API export from the dropdown on the left.
Map all the needed attributes from import to export.
Once all the settings are ready, you can send your shipment updates to TikTok Shop. Select Run in the top-right corner of your view to send the data.