Remove image background with the Image Background Removal service
Remove image backgrounds from your product images using the Image Background Removal service in Productsup.
Introduction
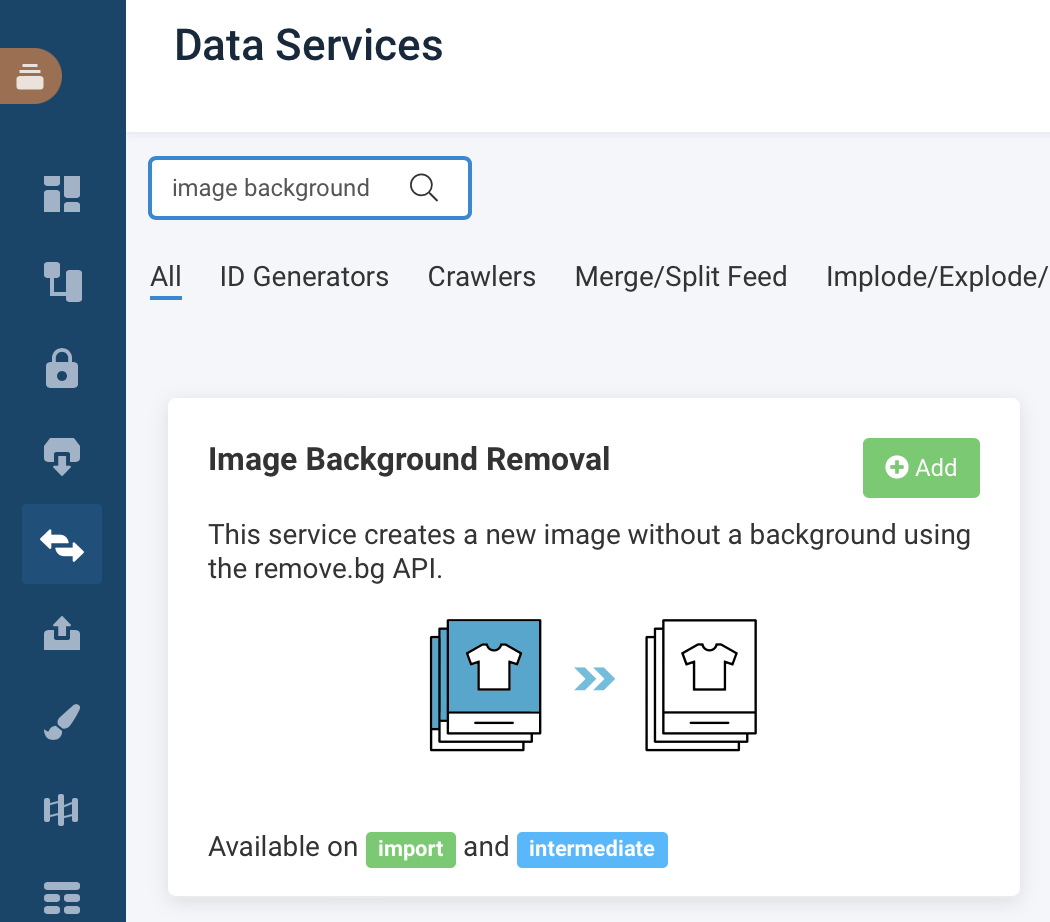
If you want transparent backgrounds in your product images to make your product stand out, you can isolate the product using the Image Background Removal service in the platform. This service removes unwanted image backgrounds to create transparent backgrounds using the remove.bg API.
Productsup shares your product image URLs with remove.bg for removing image backgrounds. The remove.bg service then downloads your images, removes the backgrounds, and sends the edited images to your Amazon S3 bucket account. From there, Productsup retrieves the newly revised images from your S3 account.
Note
After Productsup receives your newly edited images, the image URLs are publicly accessible again.
Requirements
You must have a paid Kaleido account to use the Image Background Removal service. See Create a new Kaleido Account and Kaleido Pricing. You also need to provide your Amazon S3 credentials, so that Productsup can access the uploaded images.
Ensure you have set a unique item identifier to use this service.
Add the Image Background Removal service
To add the Image Background Removal service:
Go to Data Services from your site's main menu, and select ADD SERVICE.
Search for Image Background Removal and select Add.

(Optional) Enter a custom name for the new service in Name.
This custom name replaces the default name of the service on the Data Services overview page.
(Optional) Enter a custom column prefix in Column prefix. When the platform creates multiple columns from one service, it adds a prefix to all new columns. You can add a custom prefix that helps you identify newly created columns using a particular service. For example, enter any text you want to prepend to your new columns, such as
hero_images.Choose the attribute column level you want to apply the Image Background Service to in Service Data Level: Import or Intermediate. Select the attribute column level that contains the image links, as necessary.
Select Add.
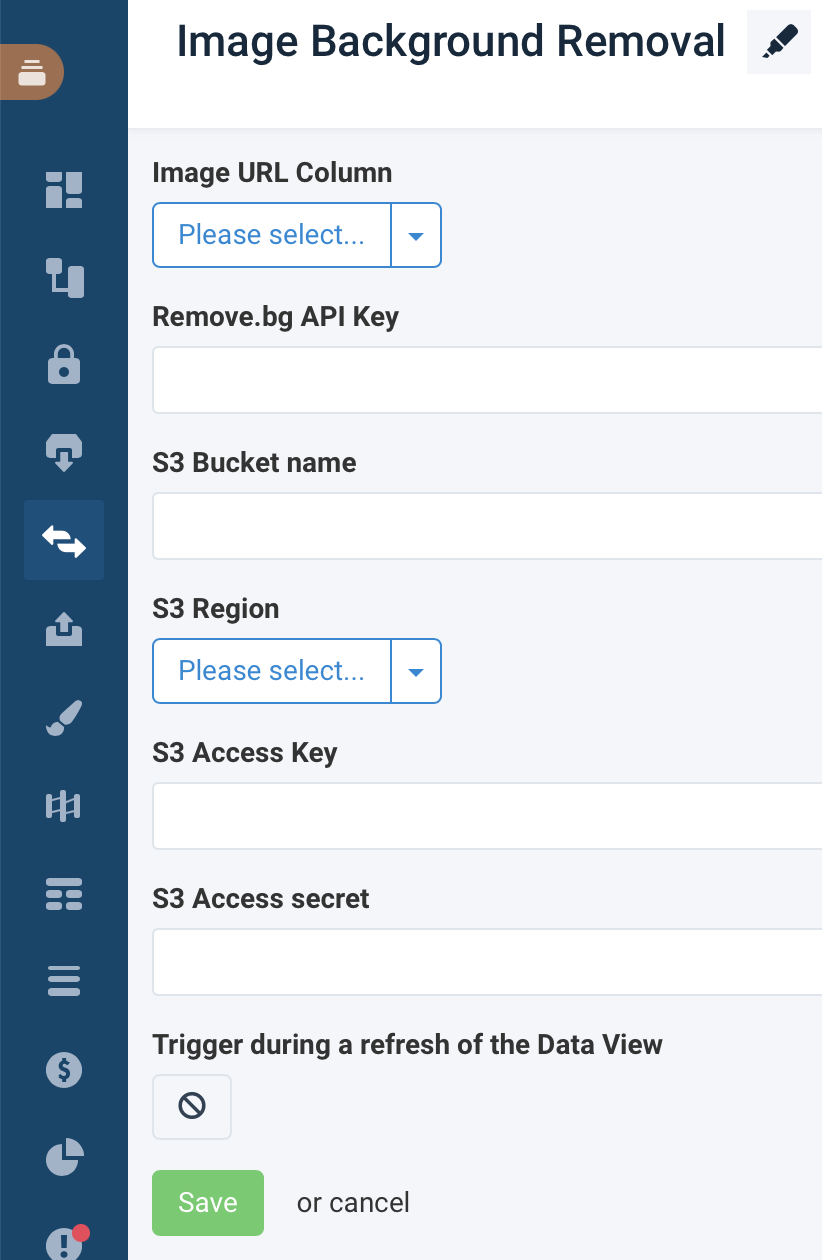
Choose the column containing the image URL from the Image URL attribute drop-down menu.
Enter the appropriate API key in Remove.bg API Key.
Enter your object's bucket name in S3 Bucket name.
Note
The URL you paste in this field shouldn't have the prefix
s3://. If your URL has this prefix, make sure to trim it.Select the region for your bucket in S3 Region.
Enter your Amazon S3 credentials in S3 Access Key and S3 Access secret.
Set a trigger for the Image Background Removal service to run when you refresh Data View by selecting the prohibition sign or no symbol button icon under Trigger during a refresh in Data View. You can now see a checkmark symbol button icon indicating that it is active.
Select Save.

Once you have successfully set up the Image Background Removal service, the platform creates two (2) new columns, including any custom prefixes you earlier defined. See the following:
___service_background_remover_image_url
___service_background_remover_image_name
Edit an existing Image Background Removal service
To edit settings for your Image Background Removal service:
Go to Data Services from your site's main menu, and in your chosen service, select the Settings cogwheel icon.
Select Save after making edits.
Delete an existing Image Background Removal service
To delete your Image Background Removal service:
Go to Data Services from your site's main menu, and in your chosen service, select the settings cogwheel icon.
Scroll to the bottom of the Settings page and select Remove this service.