Add static or dynamic text to your image template
Add text to your image template in Image Designer in Productsup.
Introduction
In Image Designer, you can add static or dynamic text to your image template.
Note
Dynamic text is the value that the platform takes from an assigned column in your feed.
Add a static text
Go to Designer from your site's main menu.
Select the Insert tab.
Open the Elements section.
Drag the Text element from the Elements section to the image preview area.
Customize the corresponding Text layer in the Layers tab as desired. See Static text layer settings.
Select the floppy disk icon in the upper toolbar to save your template.
Add a dynamic text
Go to Designer from your site's main menu.
Select the Insert tab.
Open the Elements section.
Drag the Dynamic Text element into the image preview area.
Customize the corresponding DynamicText layer in the Layers tab as desired. See Dynamic Text layer settings.
Select the floppy disk icon in the upper toolbar to save changes.
Text settings
Static text layer settings
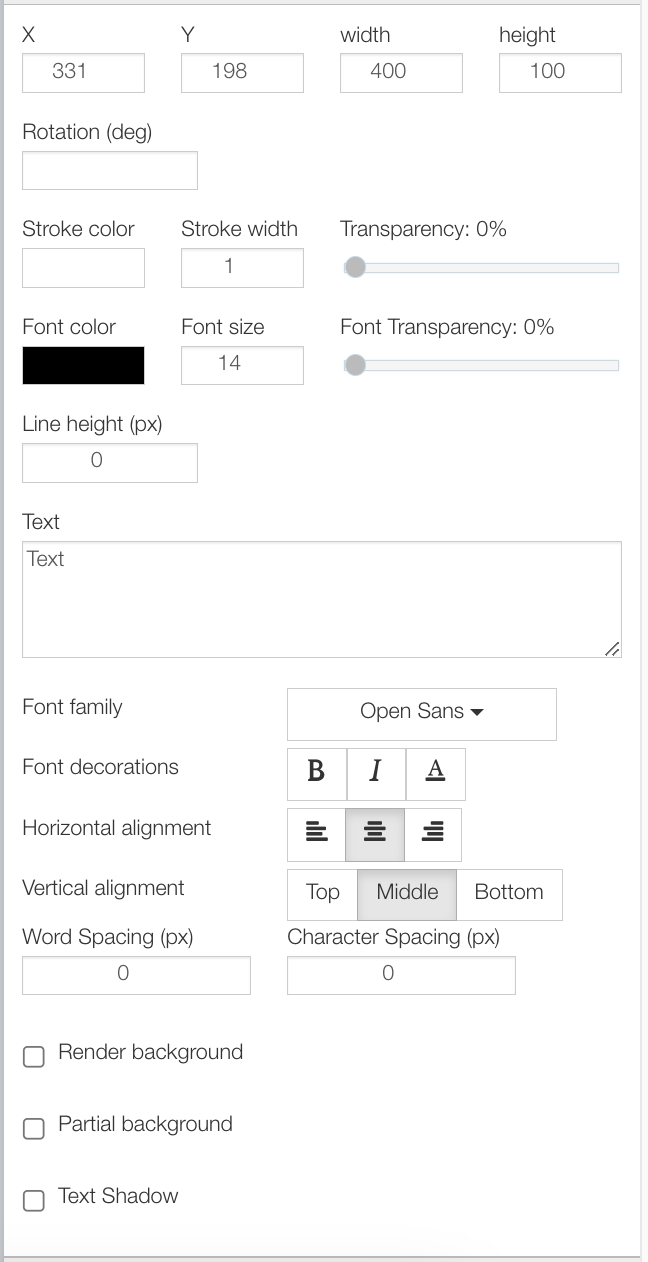
The Image Designer adds a static text as Text layer in the Layers tab. You can edit the static text with the following settings:
X and Y: Set text area coordinates to place your text on the image template. You can also drag the layer in the image preview area to achieve the same result.
width: Define the width of the text.
height: Define the height of the text.
Rotation (deg): Define the rotation degree of the text.
Stroke color: Choose the color of the text borders in the color picker.
Stroke width: Define the width of the text borders.
Transparency: Select the transparency of the text borders on a scale from 0% to 100%, where 0% means no transparency and 100% means fully transparent text borders.
Font color: Define the text color in the color picker.
Font size: Define the text size in pixels.
Font Transparency: Select the transparency of the text on a scale from 0% to 100%, where 0% means no transparency and 100% means fully transparent text.
Line height (px): Define the line height in pixels.
Text: Add the static text.
Superscript currency symbol and fractional checkbox lets you superscript the currency symbol preceding the price and the fractional part of the price. You can use it only for the price attributes.
Font family: Choose between 800 different fonts from the Google Fonts project or Add custom text fonts.
Font decorations: Define the font decorations such as bold, italics, underline, or strikethrough.
The strikethrough font decoration applies to the entire value rather than a part of it, such as "This is value".
Horizontal alignment: Choose the type of horizontal alignment.
Vertical alignment: Choose the type of vertical alignment.
Word Spacing (px): Change the spacing between the words by filling in the number of pixels.
Character Spacing (px): Change the spacing between the characters by filling in the number of pixels.
Render background: Add a background color to the whole text area.
Partial background: Add a background color to the inserted text only.
Text Shadow: Add a shadow to your text.
Dynamic Text layer settings
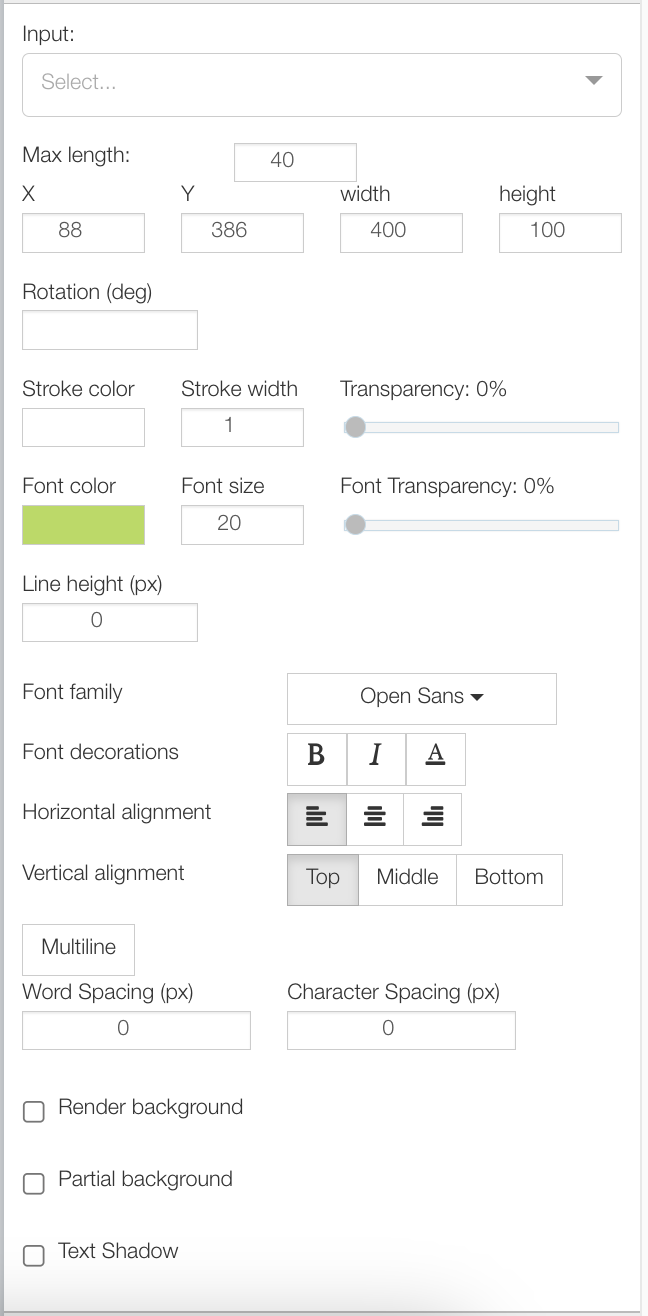
The Image Designer adds a dynamic text as DynamicText layer in the Layers tab. You can edit the dynamic text with the following settings:
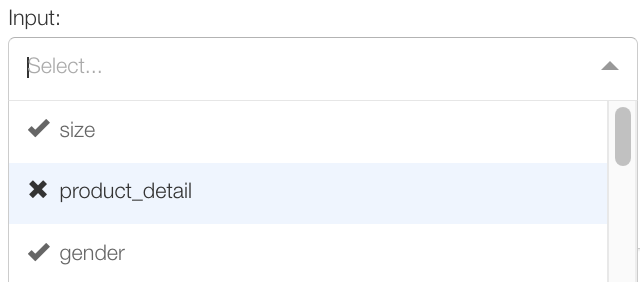
Input: Select the attribute that contains the value you want to use as dynamic text.
Note
If the attribute has an ex (✘) before its name, the product you are currently editing in Image Designer has no value in that attribute. If you choose an attribute with an empty value, Image Designer displays the warning text
DYNAMIC TEXT - NO VALUE IN SELECTED COLUMNin the product's image preview. However, if you send an image with an empty value to an export channel, the platform removes the warning text and displays a blank value instead.If the attribute has a checkmark (✔) before its name, the product has a relevant value in the attribute.
Max length: Define the max length of the text.
X and Y: Set text area coordinates to place your text on the template. You can also drag the layer in the image preview area to achieve the same result.
width: Define the width of the text.
height: Define the height of the text.
Rotation (deg): Define the rotation degree of the text area.
Color: Choose the color of the text.
Stroke color: Choose the color of the text borders in the color picker.
Stroke width: Define the width of the text borders.
Transparency: Select the transparency of the text borders on a scale from 0% to 100%, where 0% means no transparency and 100% means fully transparent text borders.
Font color: Define the text color in the color picker.
Font size: Define the text size in pixels.
Font Transparency: Select the transparency of the text on a scale from 0% to 100%, where 0% means no transparency and 100% means fully transparent text.
Line height (px): Define the line height in pixels.
Superscript currency symbol and fractional checkbox lets you superscript the currency symbol preceding the price and the fractional part of the price. You can use it only for the price attributes.
Font family: Choose between 800 different fonts from the Google Fonts project or Add custom text fonts.
Font decorations: Define the font decorations such as bold, italics, underline, or strikethrough.
The strikethrough font decoration applies to the entire value rather than a part of it, such as "This is value".
Horizontal alignment: Choose the type of horizontal alignment.
Vertical alignment: Choose the type of vertical alignment.
Multiline: Activate this button to write text in more than one row.
Word Spacing (px): Change the spacing between the words by filling in the number of pixels.
Character Spacing (px): Change the spacing between the characters by filling in the number of pixels.
Render background: Add a background color to the whole text area.
Partial background: Add a background color to the inserted text area.
Text Shadow: Add a shadow to your text.
Add custom text fonts
You can add custom text fonts used by your brand to make consistent design of your images.
Note
The font files you wish to upload must be one of the supported formats: .otf, .woff, or .woff2.
To add custom fonts for texts in Image Designer:
Add static or dynamic text as described in Add a static text or Add a dynamic text.
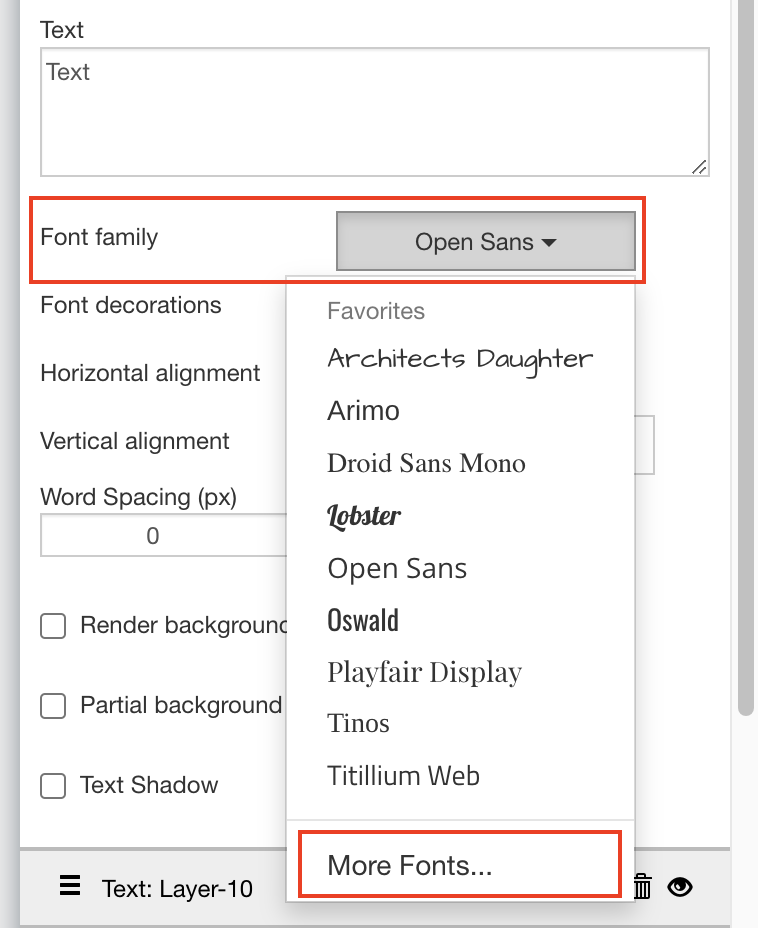
In Layers in the right panel, select the Font family drop-down menu.
Scroll down in the menu and select More Fonts.
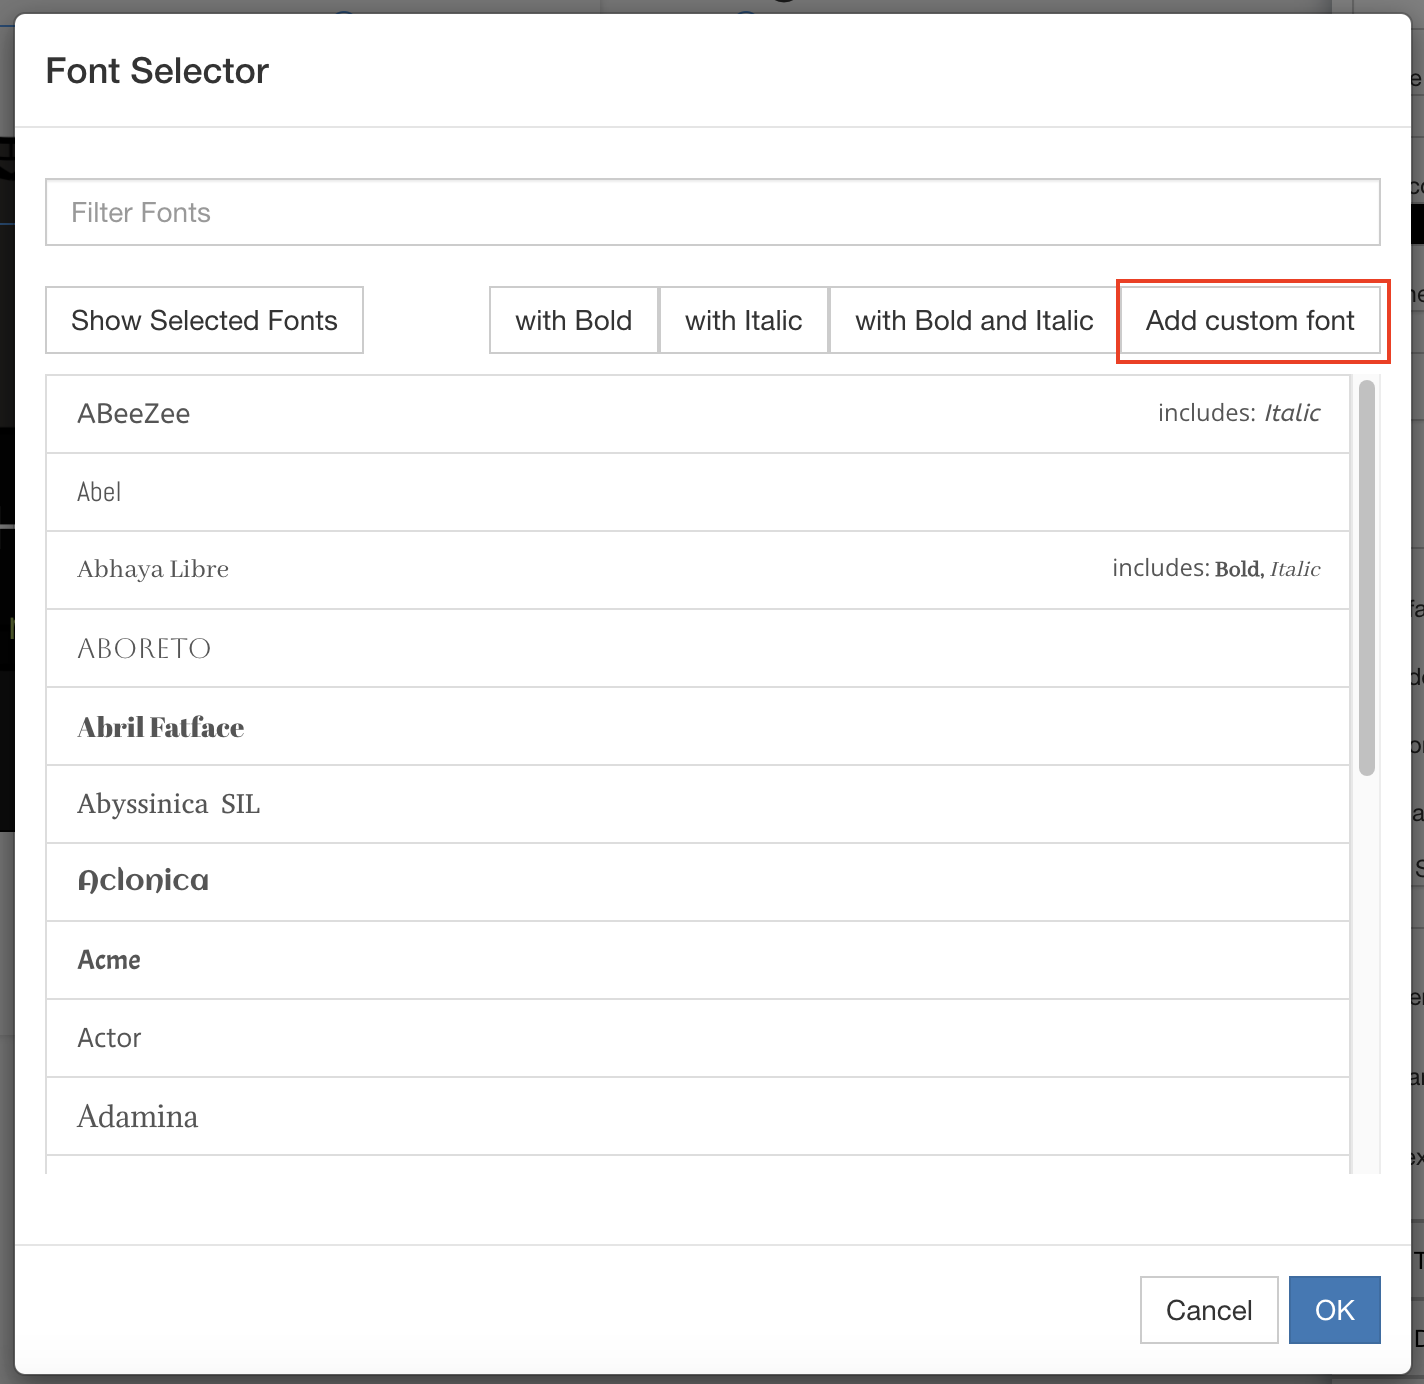
In the Font Selector pop-up window, select Add custom font.
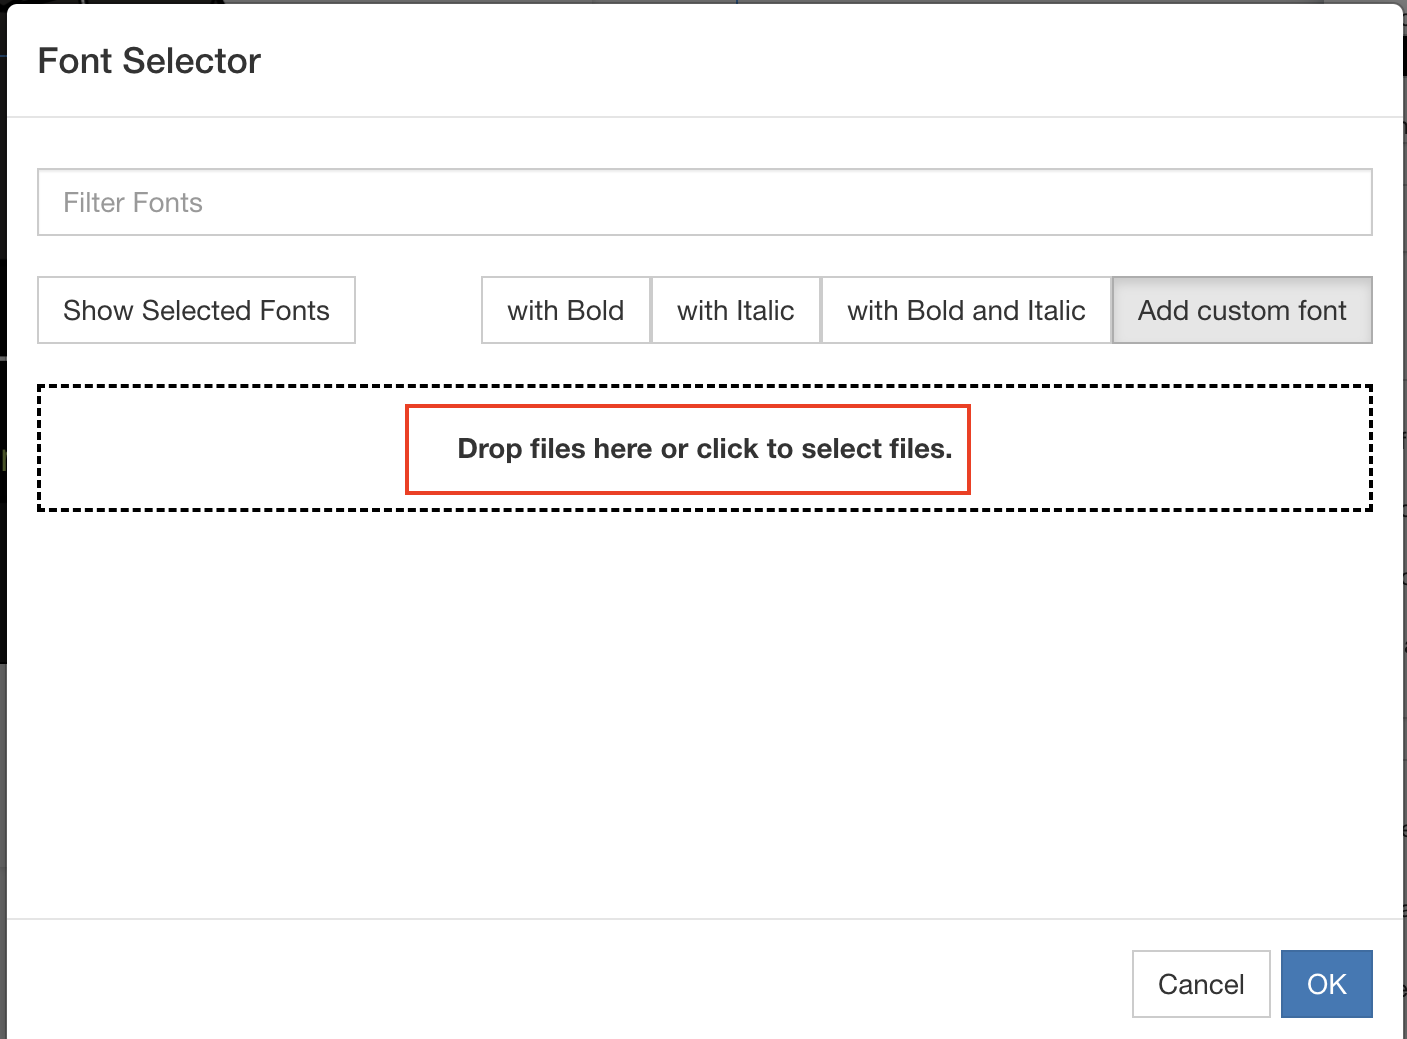
Drag and drop the font files to the upload area or select the highlighted area to choose a file from your computer. Select OK.
For each uploaded font, in Font Name, enter a font name that should include the font variant, such as
Roboto regularorArial italic. Accurate labeling helps you distinguish among the added fonts.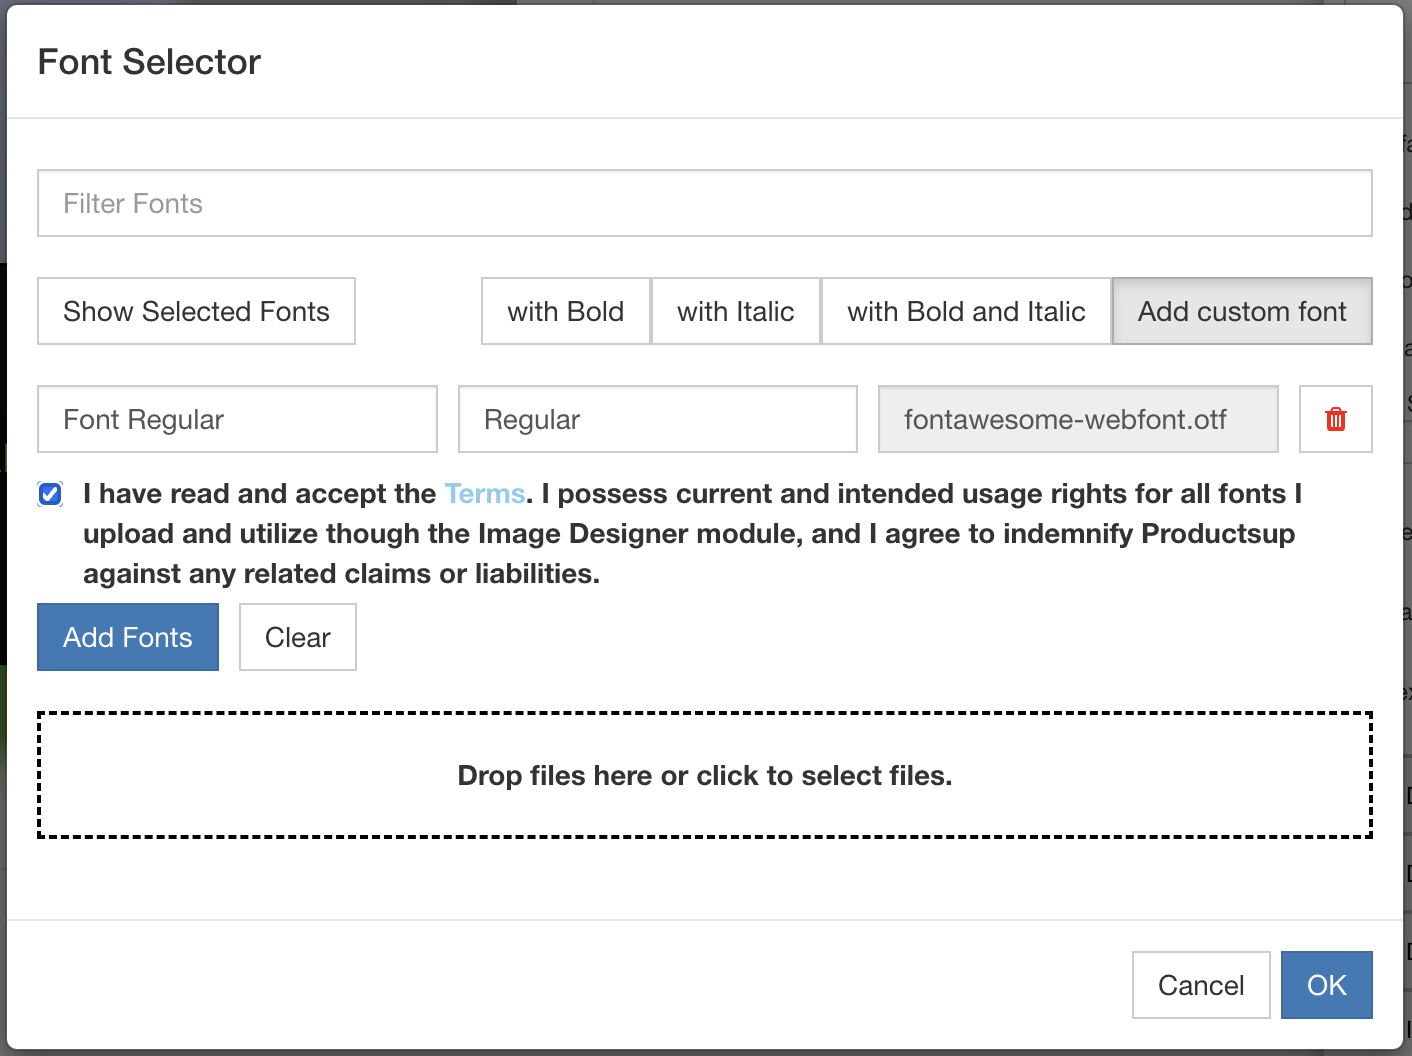
In Font Variant, add the corresponding font variant such as
regular,bold, oritalic. If you leave the field empty, the platform considers the font as regular.Select the terms and conditions checkbox to confirm your right to use and distribute the uploaded fonts in your projects.
Select Add Fonts. The new fonts are now available for use in your designs.
To find and use your custom fonts, in the text layer, select the Font family drop-down menu, and select a needed font in Your Selected Fonts.