Add the Productsup Server destination
Learn how to add and set up the Productsup Server destination to generate a link with your product data.
Introduction
The Productsup Server export destination is available for all exports in Productsup. This destination sends your data to a server hosted by Productsup and generates a link to that location. You can use this link in your export channel system to let it import your data via URL.
The data you send to the Productsup Server destination isn't password-protected. It is accessible via the generated link without any login data.
Productsup Server data retention policy
The Productsup Server destination keeps your historical files for 12 months since they were last requested.
Your Productsup organization admin can contact support@productsup.com if your company needs to delete files from the Productsup Server.
Send data to the Productsup Server destination
Go to Exports from your site's main menu and select an export from the list to open the export setup page. If your site doesn't have the needed export yet, select ADD EXPORT to find and add an export.
On the export setup page, select Add Destination, choose Productsup Server from the drop-down list, give it a name, and then select Save.
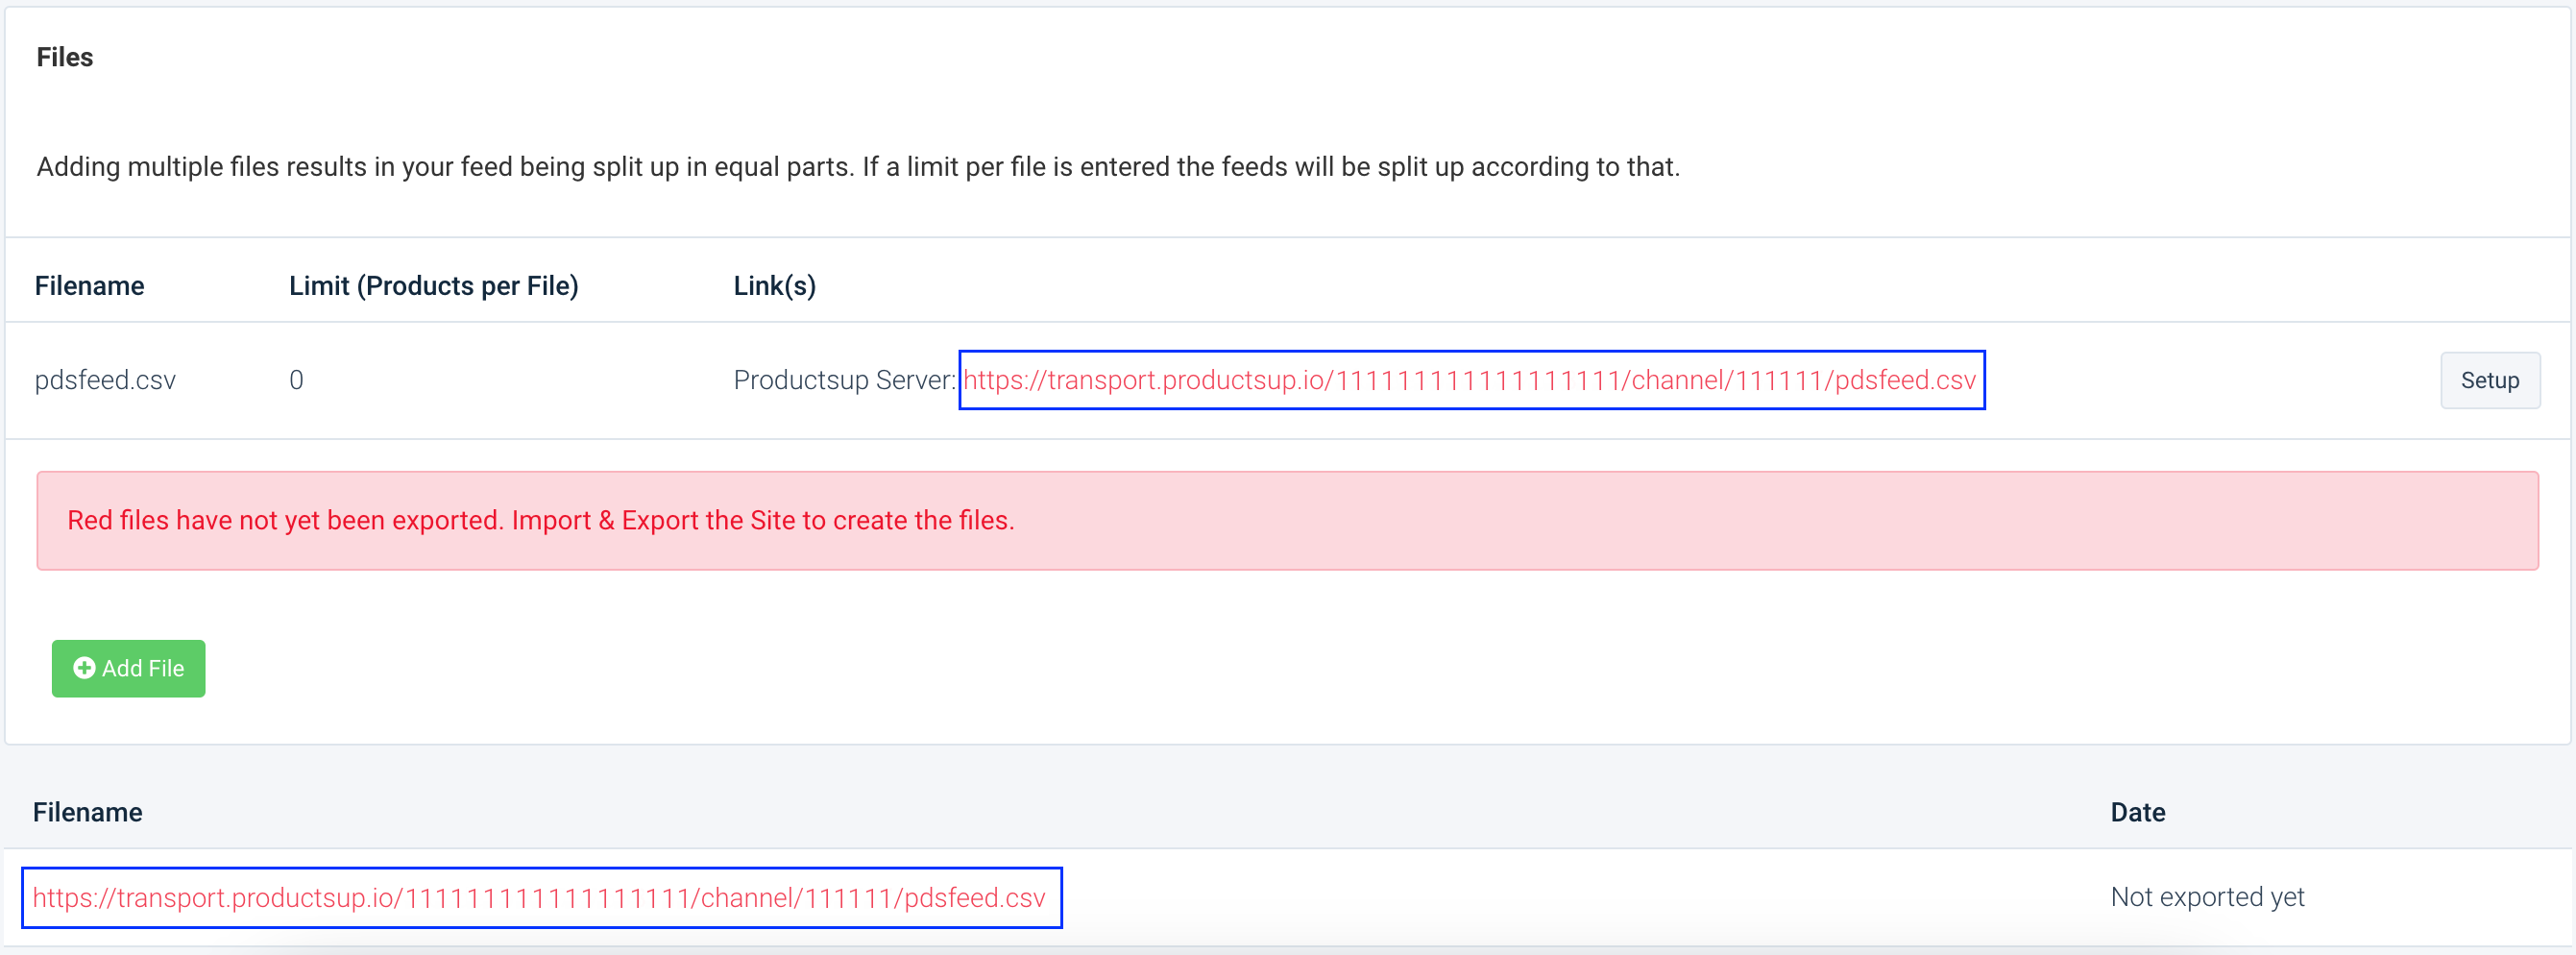
This generates a link for your export data:
When you first add the Productsup Server destination, you can find the generated link at the bottom of the export setup page both in the Files panel under Link(s) and in the Filename section.
While the link remains red, it is just a placeholder, and the platform hasn't generated the actual file yet. If that is the case, you see the message: "Red files have not yet been exported. Import & Export the Site to create the files."

After the first run of the Productsup Server destination, you can find the generated link in the Filename section only. The link turns black, so it is no longer a placeholder and the file already exists at this URL.
When your data is ready for export, select Run in the top-right corner of your page to let the platform import, process, and send your data to the destinations of all active exports in your site.
If you want to run only the export where you added the Productsup Server destination, you should:
Select Import to let the site import and process your data.
Go to Exports, select the needed export to open the export setup page, and choose Export this export.

Tip
You can also run only one export from the main page in Exports:
Hover over the needed export and select Export at the end of its row.

Once the site finishes the export, you can copy the Productsup Server link in the Filename section on the export setup page. Then, paste it into your desired export channel system to let it import your data.