Set up single sign-on (SSO)
Turn on single sign-on (SSO) in the Productsup platform to let your users log in to multiple related applications with the same login credentials.
As an admin user, you can configure single sign-on (SSO) to let the users within your organization log in to all related applications with one set of login credentials.
There are three variants of login for users in Productsup:
Regular login lets users log in with their Productsup credentials. This option is available to all users before you configure SSO.
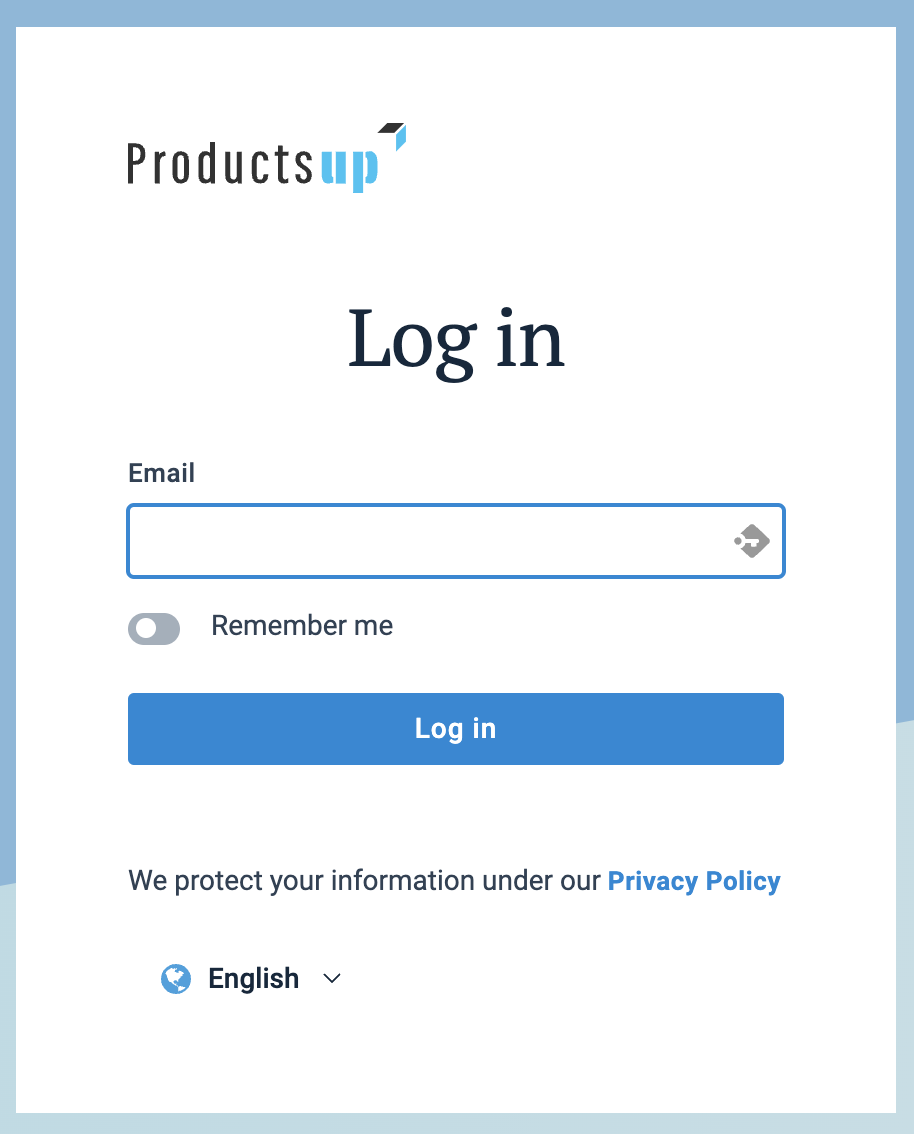
Enabled SSO lets users log in with either Productsup or SSO credentials. This option is available when you have already enabled SSO but haven't finalized the configuration yet. You can stop the SSO configuration process on this step if you want to enable SSO in parallel with regular login. This step also lets you test your SSO before proceeding to enforced SSO.
Enforced SSO lets users only log in using SSO credentials. This option is available as soon as you finalized the SSO configuration process and enforced single sign-on.
Warning
Once you set up enforced SSO, you can't remove it and roll back to the previous step. Contact support@productsup.com if you need to remove the enforced SSO settings.
To log in with enforced SSO, users have two options:
Go to
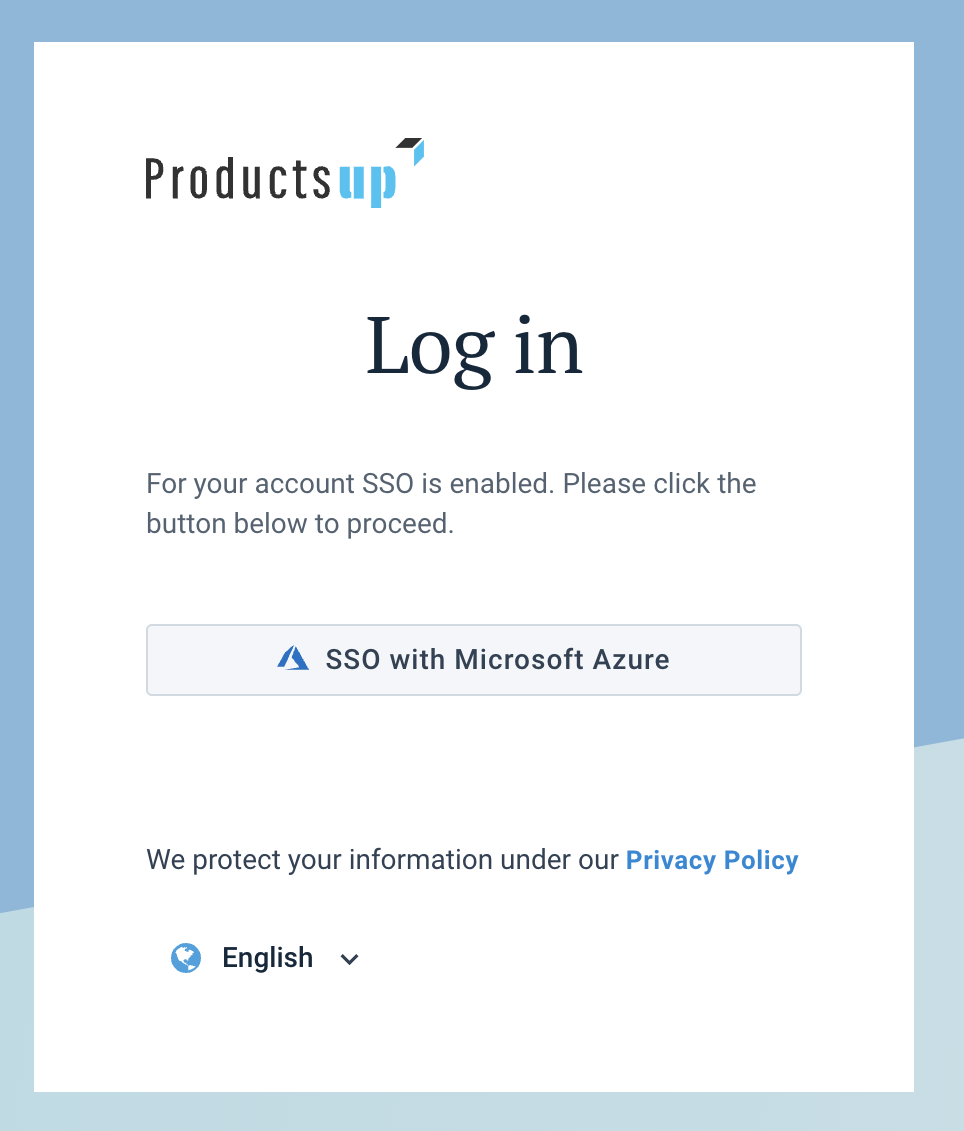
subdomain.productsup.comcreated for your organization after enabling SSO. The link redirects you to the Productsup login page with the SSO login button. Select the button to land on the Identity Provider (IdP) login page where you must provide your IdP credentials, such as Google account login and password.Go to
platform.productsup.comand enter the email associated with the Productsup account. If their account has enforced SSO, the platform redirects you to the Productsup login page with the SSO login button as described in Option a.
Tip
Learn more about the SSO benefits and use cases on our Academy website by taking the video course User authentication and management.
Prerequisites
To set up SSO, you need:
An account with an Identity Provider (IdP), such as Google, Microsoft, AWS, etc.
The admin access rights to your IdP account interface to set up SSO for users in your organization.
The Identity Provider (IdP) metadata file. See Prepare the IdP metadata file.
The admin access rights in Productsup.
Prepare the IdP metadata file
Identity Provider (IdP) is a service that stores and verifies user identity.
To use the SSO feature in Productsup, you must upload your IdP metadata file to the platform. The Productsup platform then creates metadata information for you to share with your IdP. When the configuration is ready, Productsup, as an SSO provider, checks user identity with the IdP when users log in.
For example, to learn how to get the IdP file from Microsoft Entra ID, see Configure Microsoft Entra SSO.
The IdP metadata XML file that you receive from your IdP should contain the following:
IdP or Entity ID.
Certificate.
SSO URL.
Redirect URL.
The service provider metadata XML file contains:
Entity ID
Redirect URL
Logout URL
SSO Assertion Consumer Service URL
Set up SSO
To set up SSO in Productsup for your organization:
Select the cogwheel icon
 at the bottom of your organization's main menu.
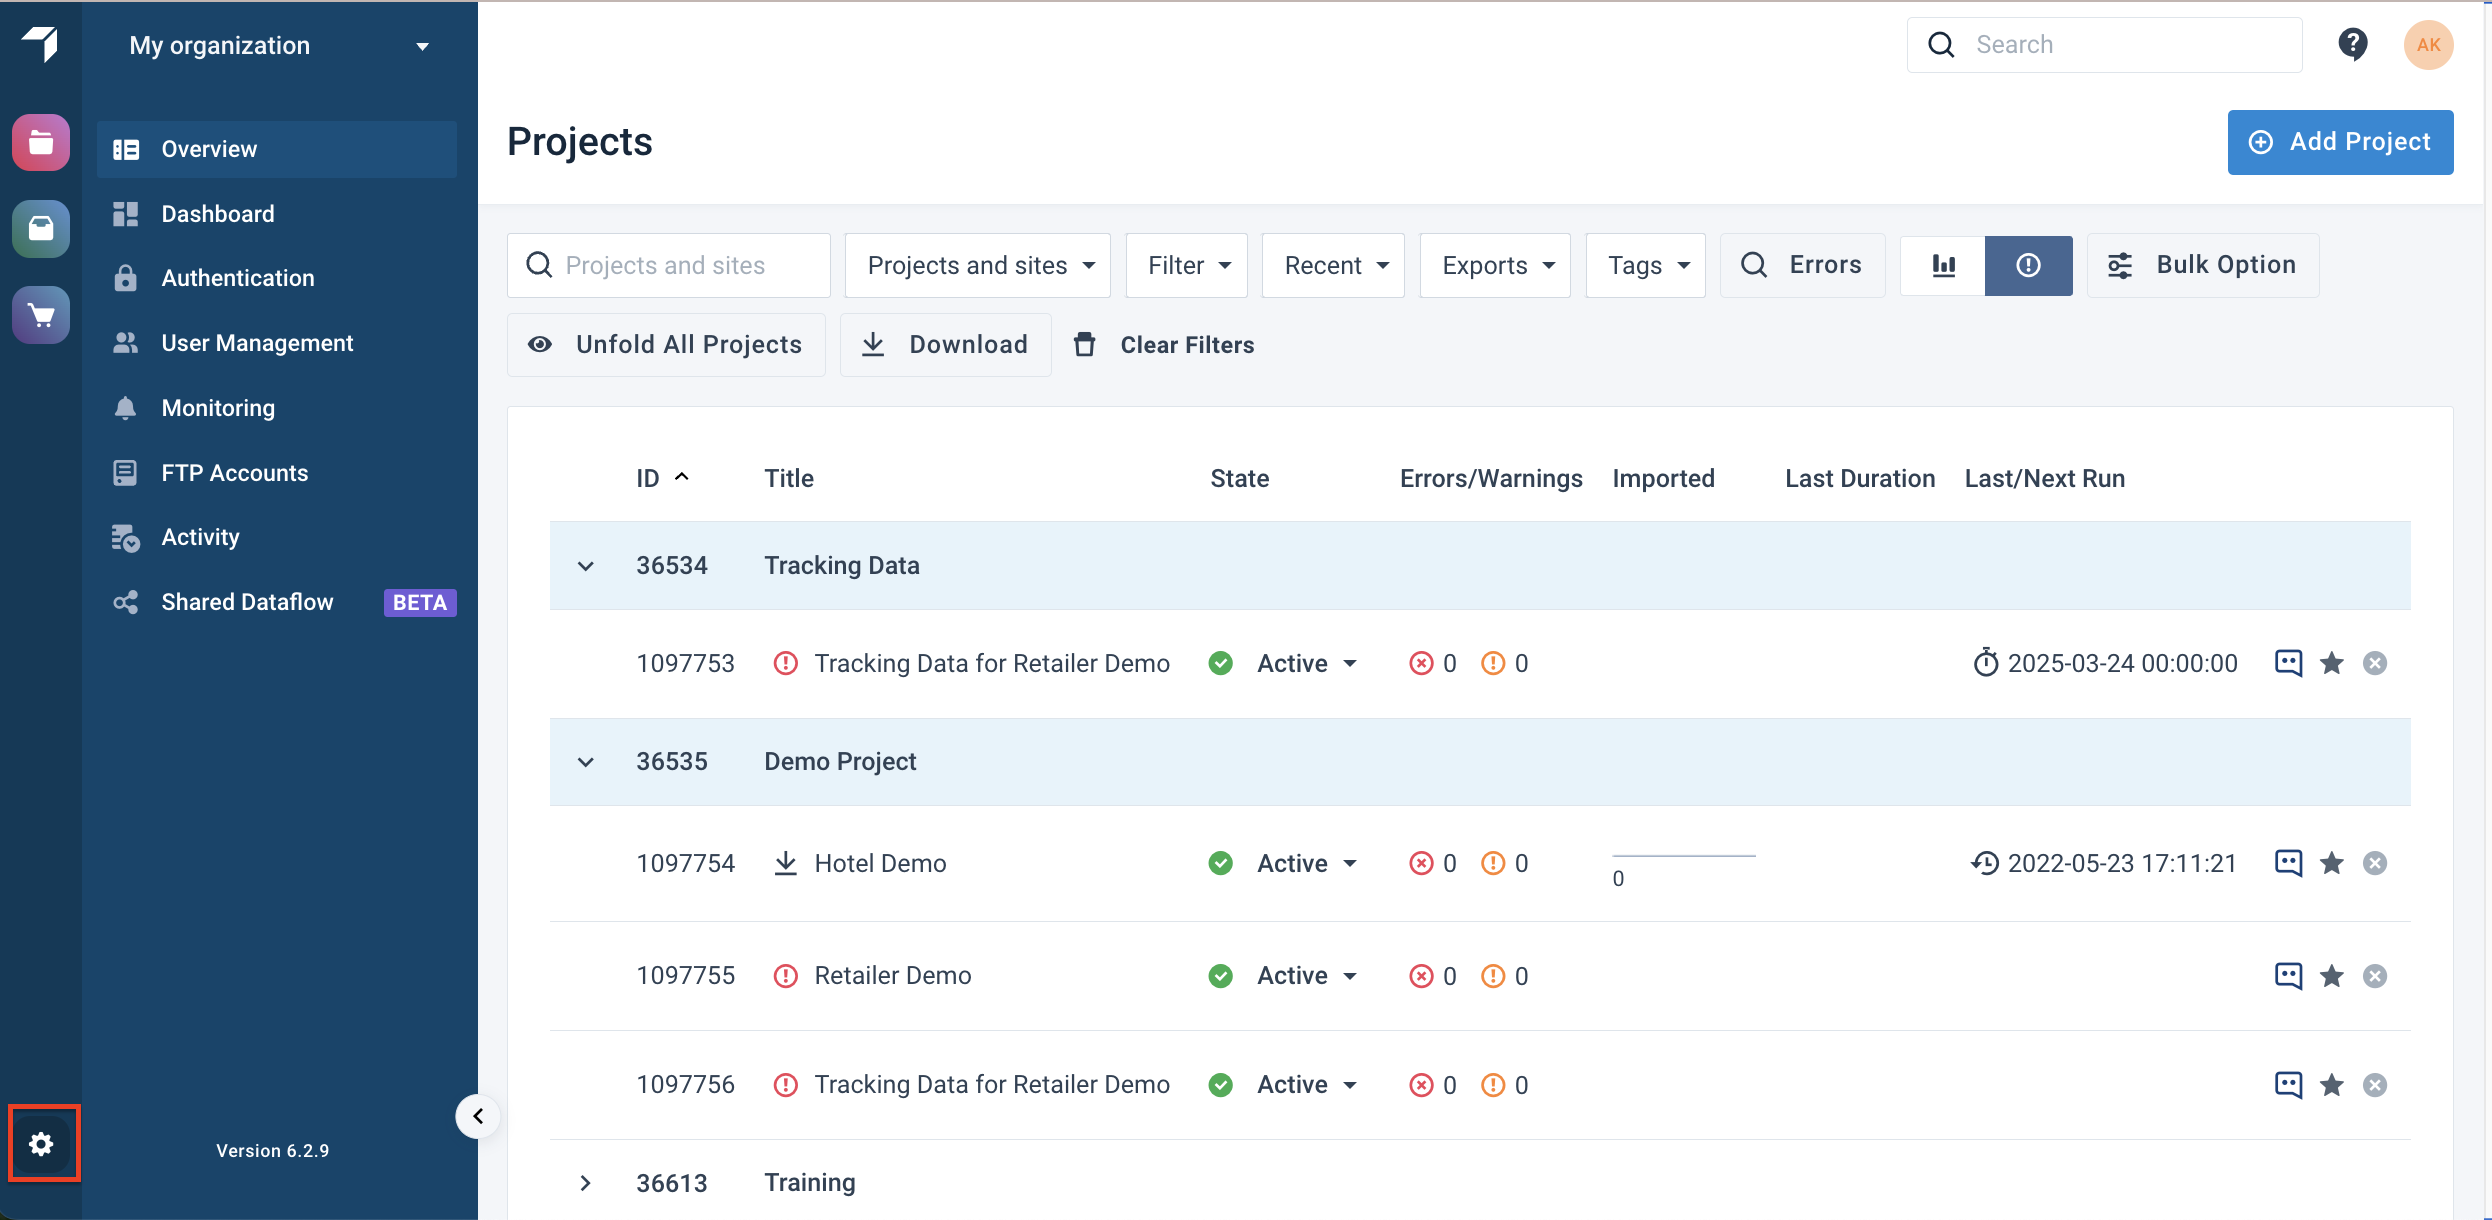
The Organization settings page opens in a new tab.
Select the Single Sign-On (SSO) tab on the left-hand side.
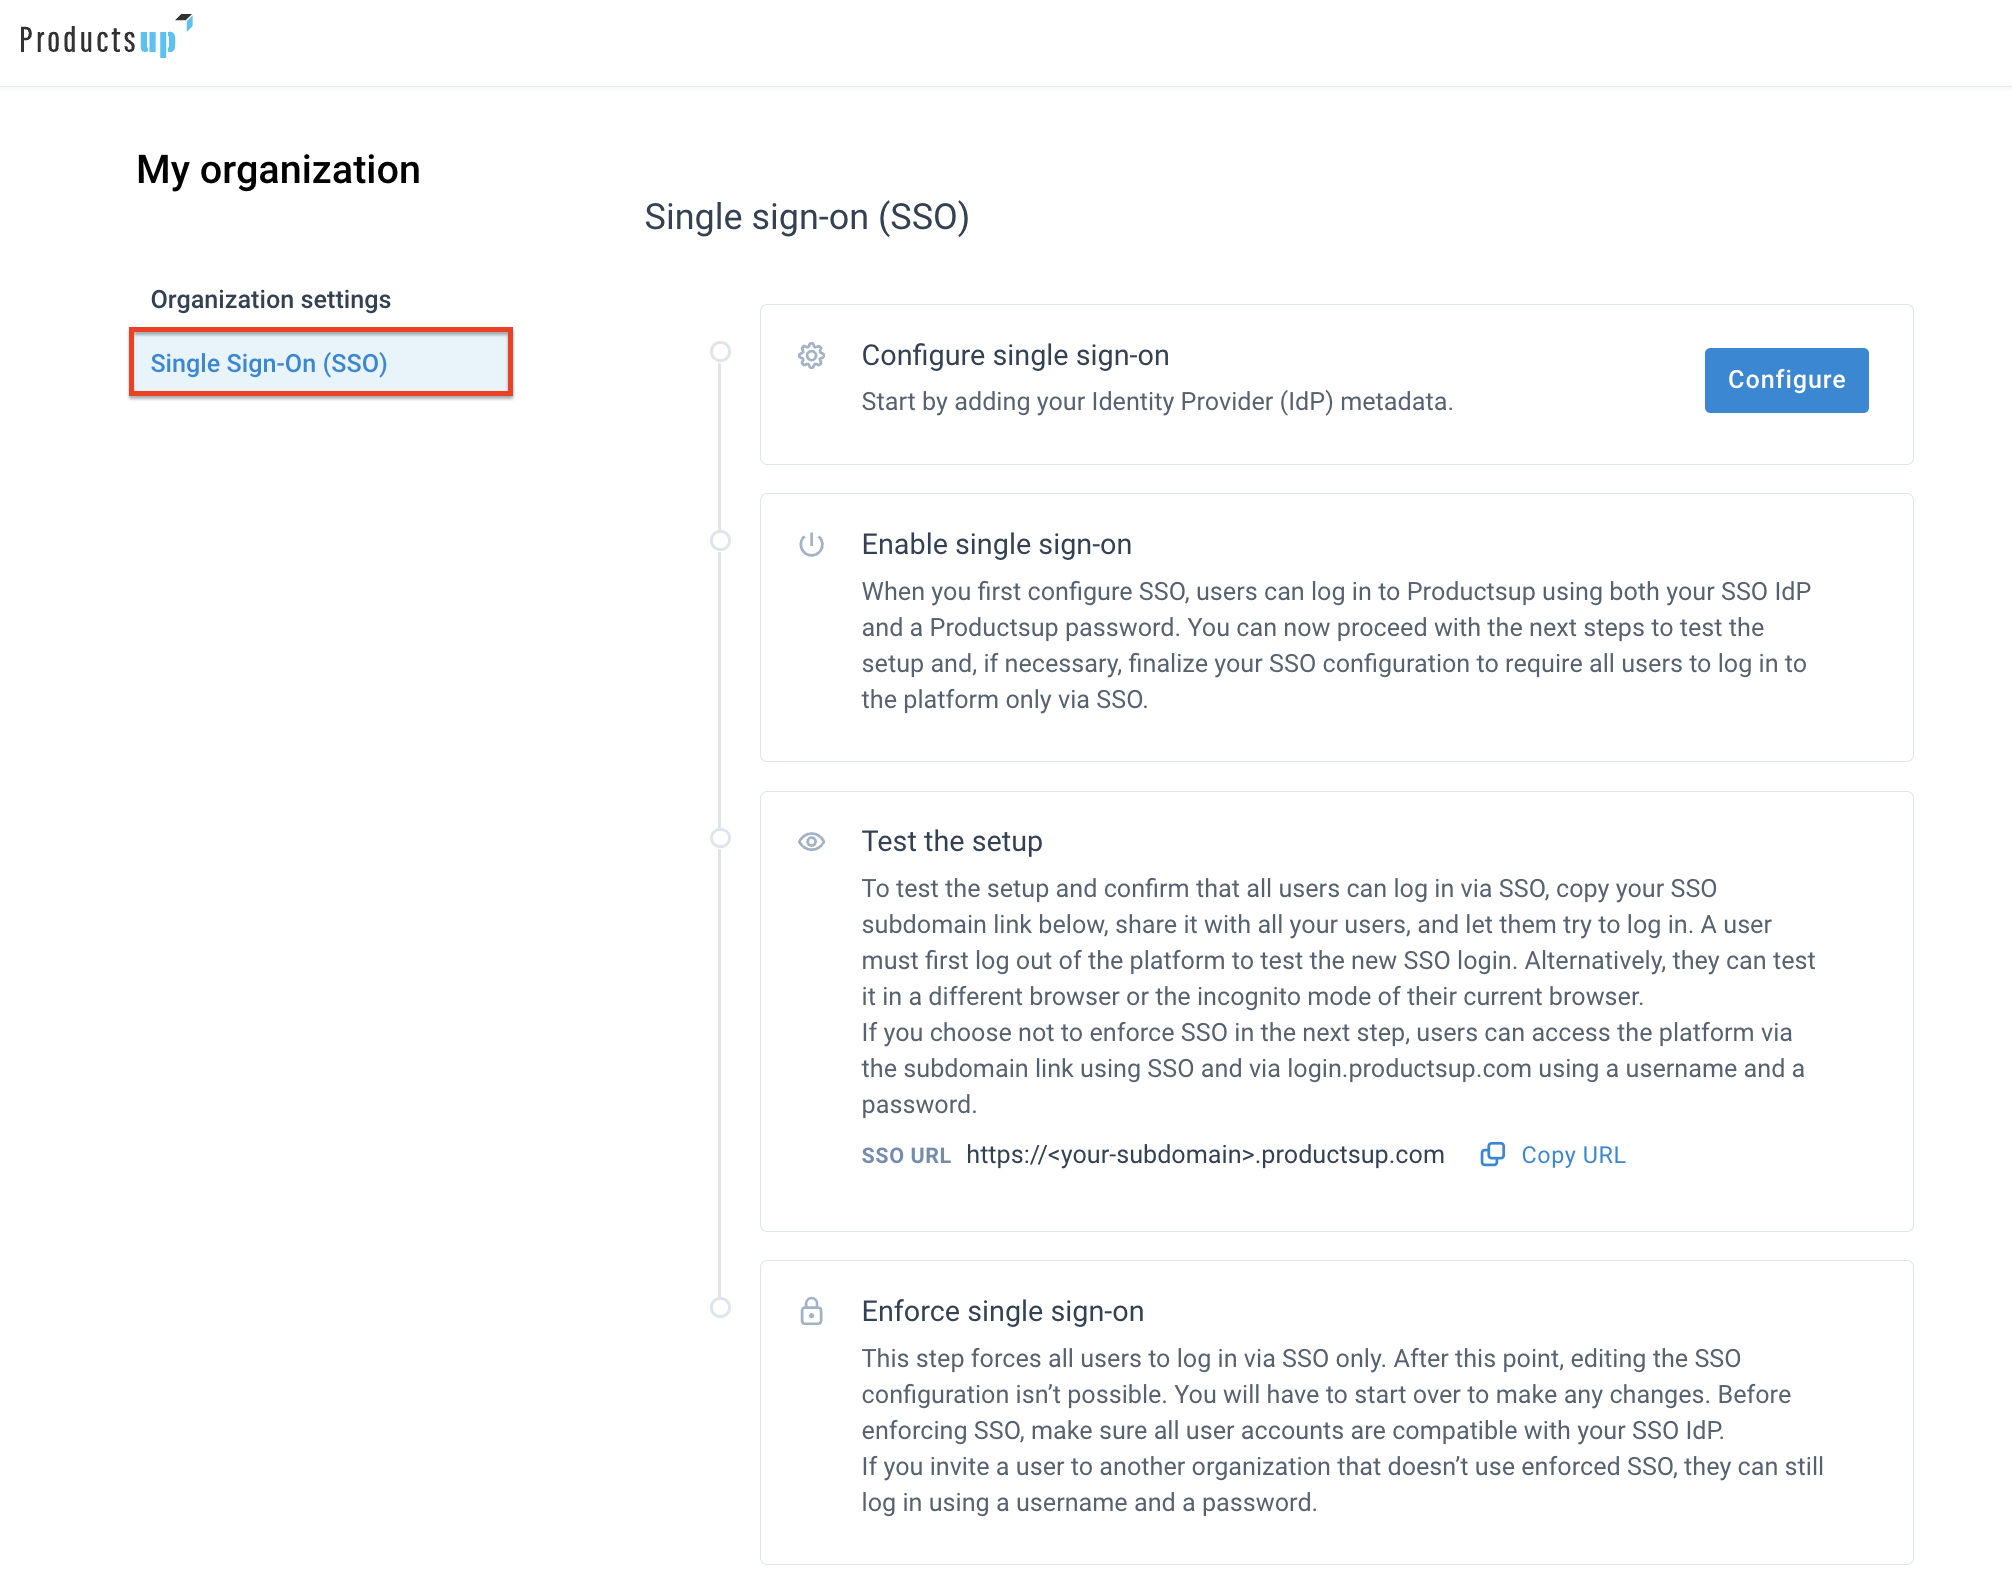
Take the following steps:
Configure single sign-on
In this step, you need to provide you organization subdomain information:
In the Configure single sign-on section, select Configure.

Enter your organization's subdomain name, for example,
yourcompany.productsup.com, and select Continue.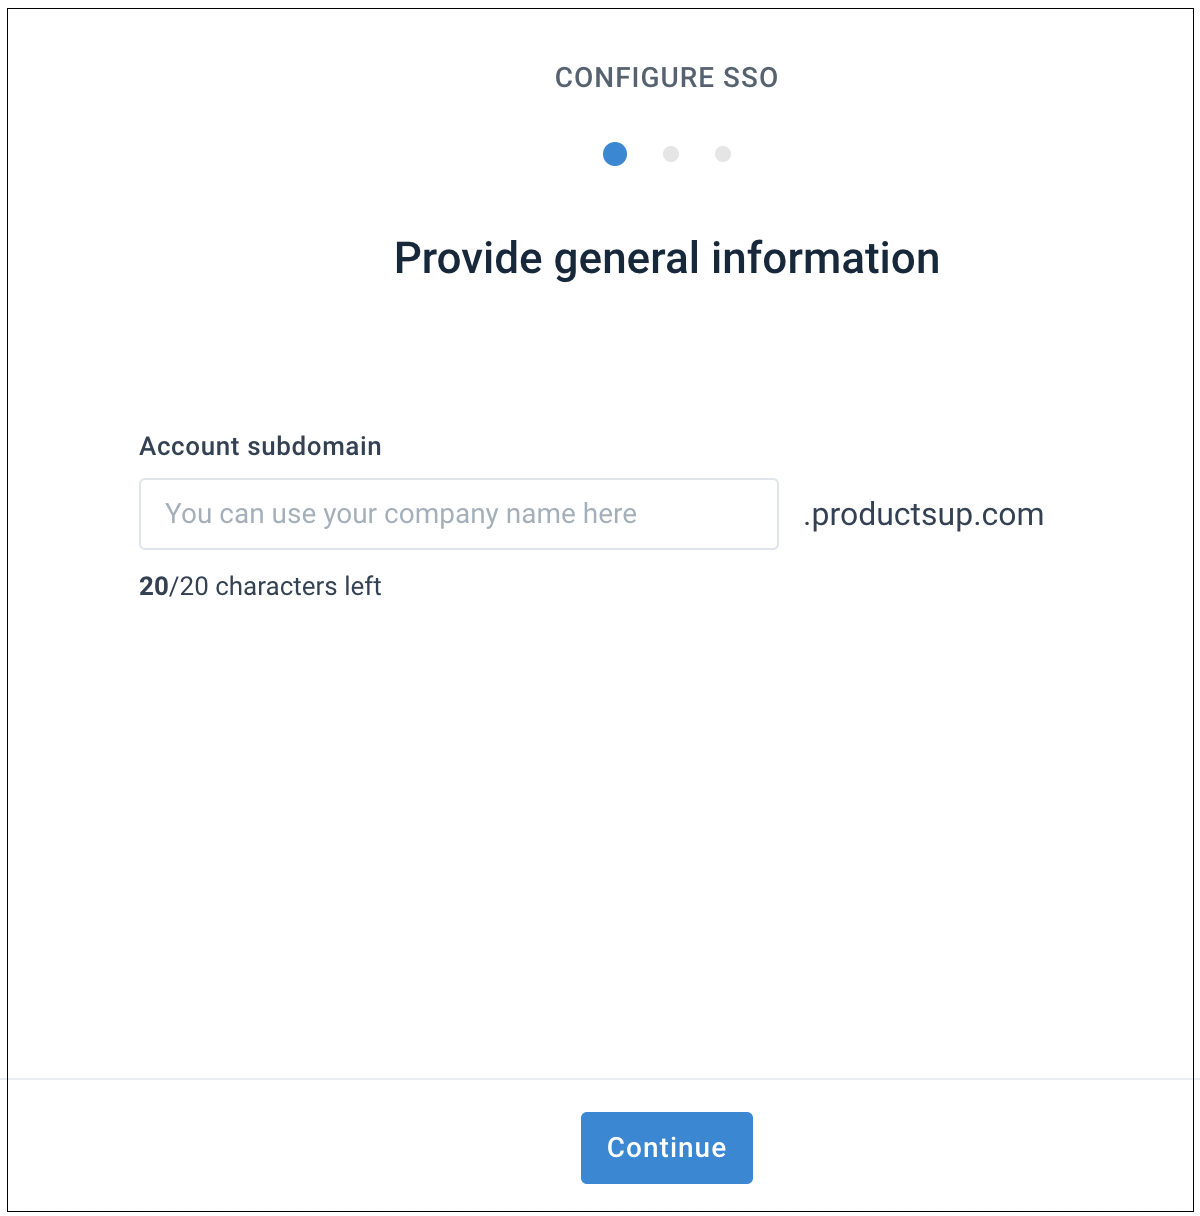
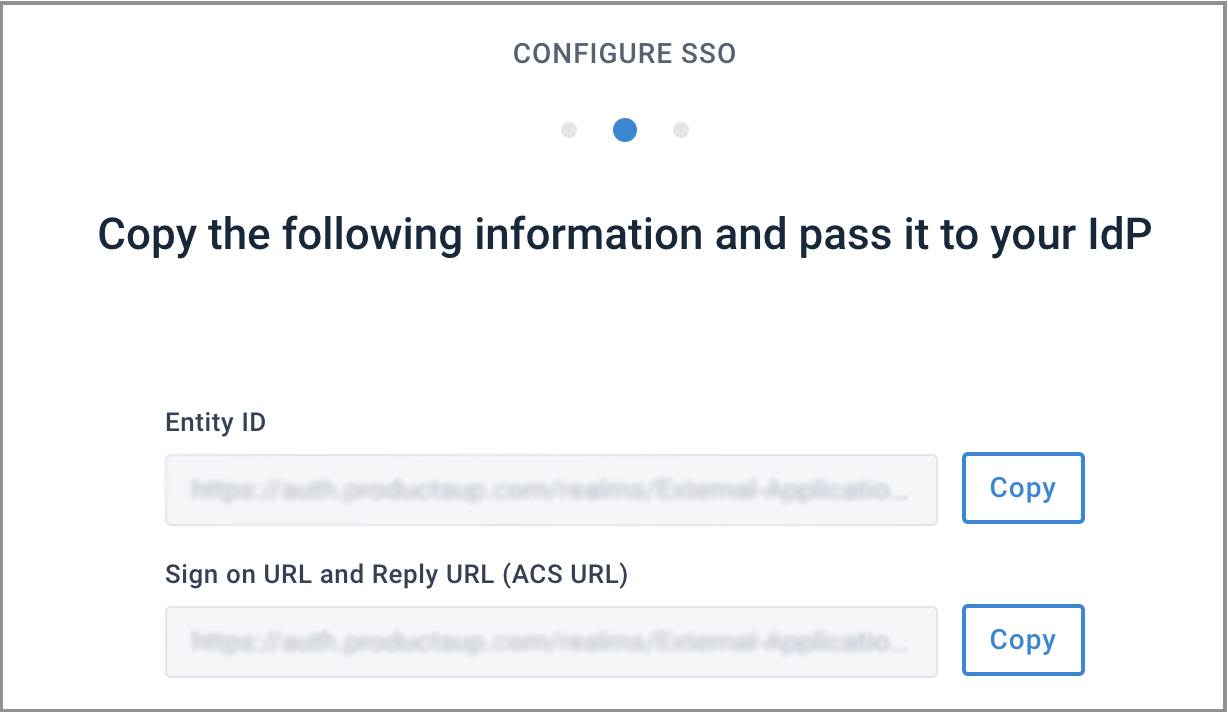
Copy the Entity ID and Sign on URL and Reply URL (ACS URL) using the Copy buttons and paste them into your IdP's admin console. Select Continue.
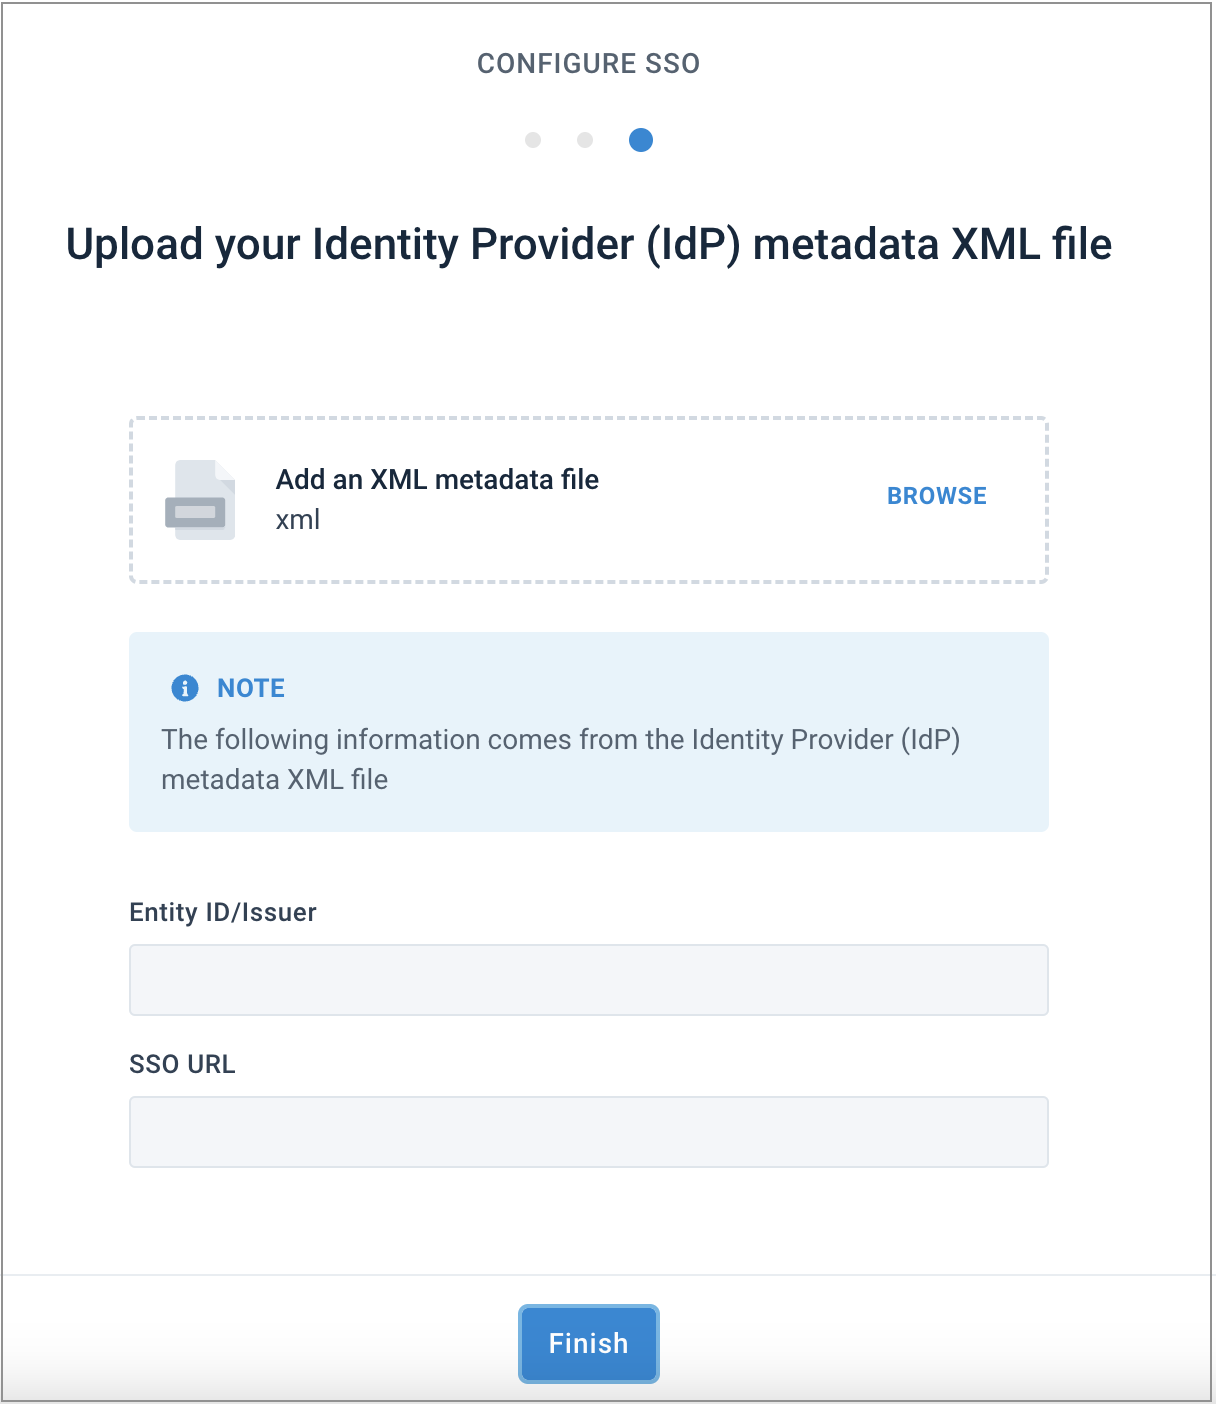
Drag and drop your IdP's metadata XML file or select BROWSE to add the file from your computer. Select Finish.
Note
The platform fills out the Entity ID/Issuer and SSO URL fields automatically, but your IdP's XML file must contain the Productsup Entity ID and SSO URL.
You have now configured SSO. Continue with Enable single sign-on.
Enable single sign-on
In this step, you can enable SSO and test it to ensure everything works correctly and all users in your organization can access the platform via SSO.
In the Enable single sing-on section, select Enable.
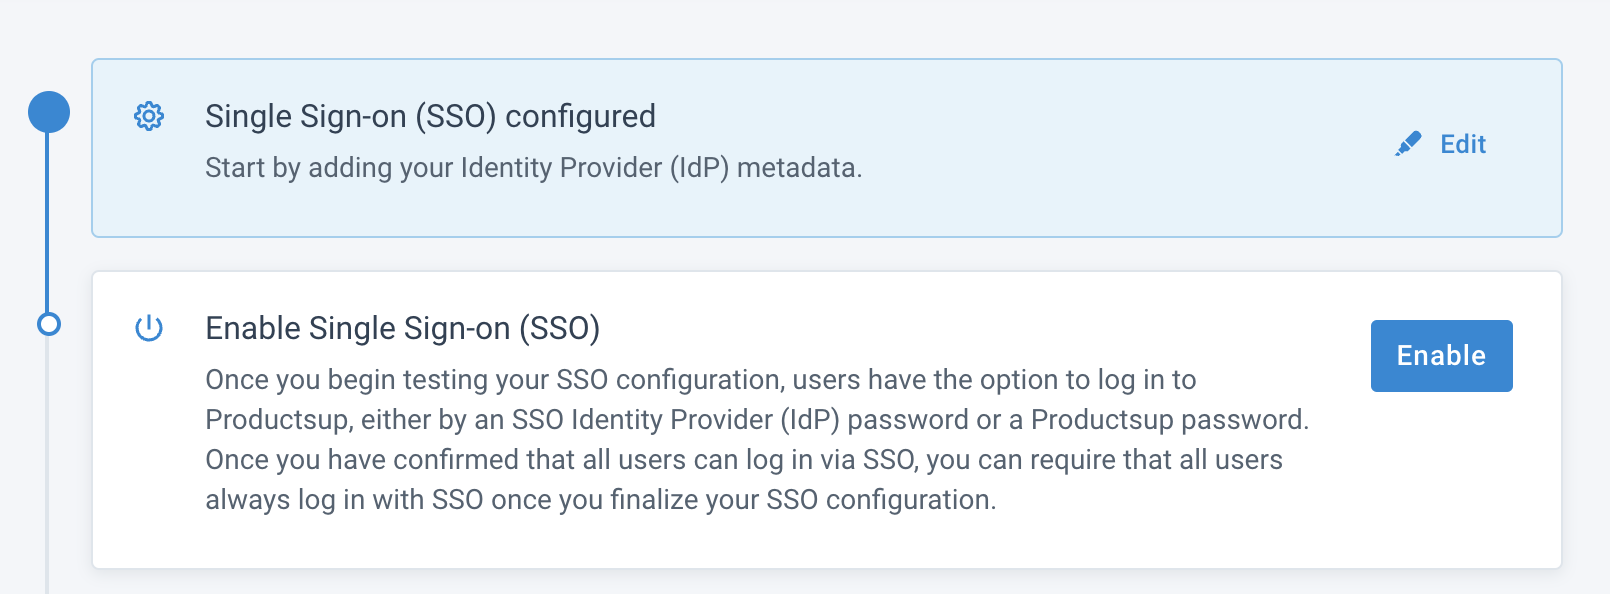
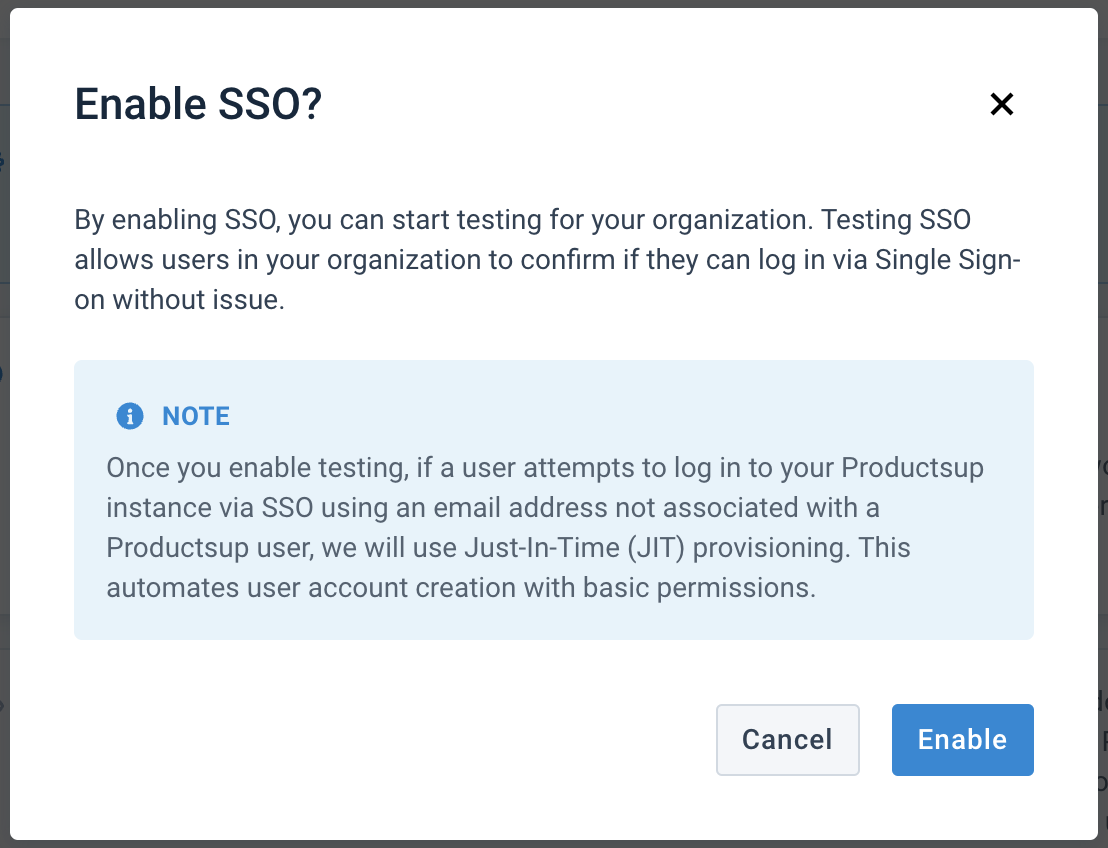
A pop-up window appears with the following message:
By enabling SSO, you can start testing for your organization. Testing SSO allows users in your organization to confirm if they can log in via Single Sign-on without issue.
Note: Once you enable testing, we will use Just-In-Time (JIT) provisioning if a user attempts to log in to your Productsup organization via SSO using an email address not associated with a Productsup user. This automates user account creation with basic permissions.
Note
Just-In-Time (JIT) is an authentication method that automates user account creation using the information from the IdP.
Basic permissions are access rights given to the users who logged in with SSO. Newly-created SSO users don't have access to projects or sites until the admin provides it to them in the organization's User Management.
Select Enable in the pop-up to turn on SSO.
You have enabled SSO. Take the following steps to test it.
Test the setup
Select Copy URL in the bottom of the Test the setup section.
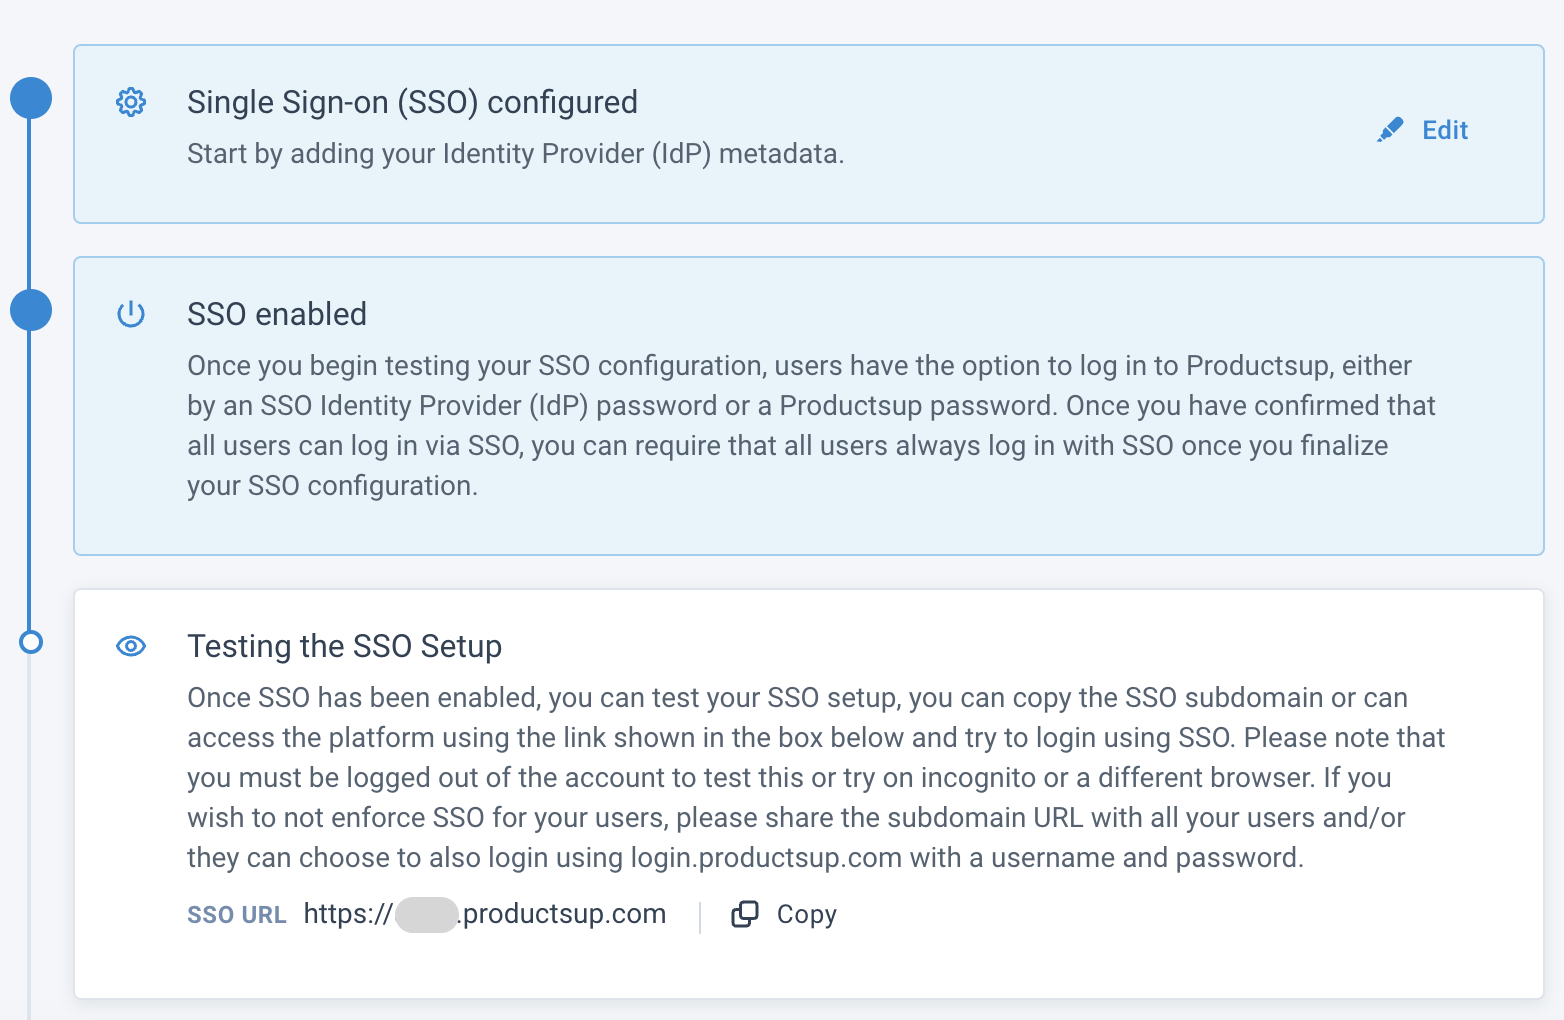
Log in using SSO.
Note
Before testing, log out of the account, use the incognito mode or another browser.
If you don't want to enforce SSO for your users, you can stop here and share the copied subdomain URL with your users to let them log in via the URL. Or they can still log in using their Productsup credentials.
Enforce single sign-on
Enforcing SSO enables your users to log in only via SSO, not with the Productsup credentials. Ensure the user accounts are compatible with your SSO Identity Provider. For example, their registered platform emails must match the SSO IdP, such as an Outlook email address matches the Outlook IdP.
If you invite users to an additional organization that isn't SSO enforced, they may still log in via an email and a password.
Warning
Once you enforce SSO, you can't remove the enforced SSO configuration. Contact support@productsup.com if you need to remove the enforced SSO settings.
Now you can only enforce SSO for the emails with specific domain names:
In Domain name, enter one or multiple domain names separating them with
##.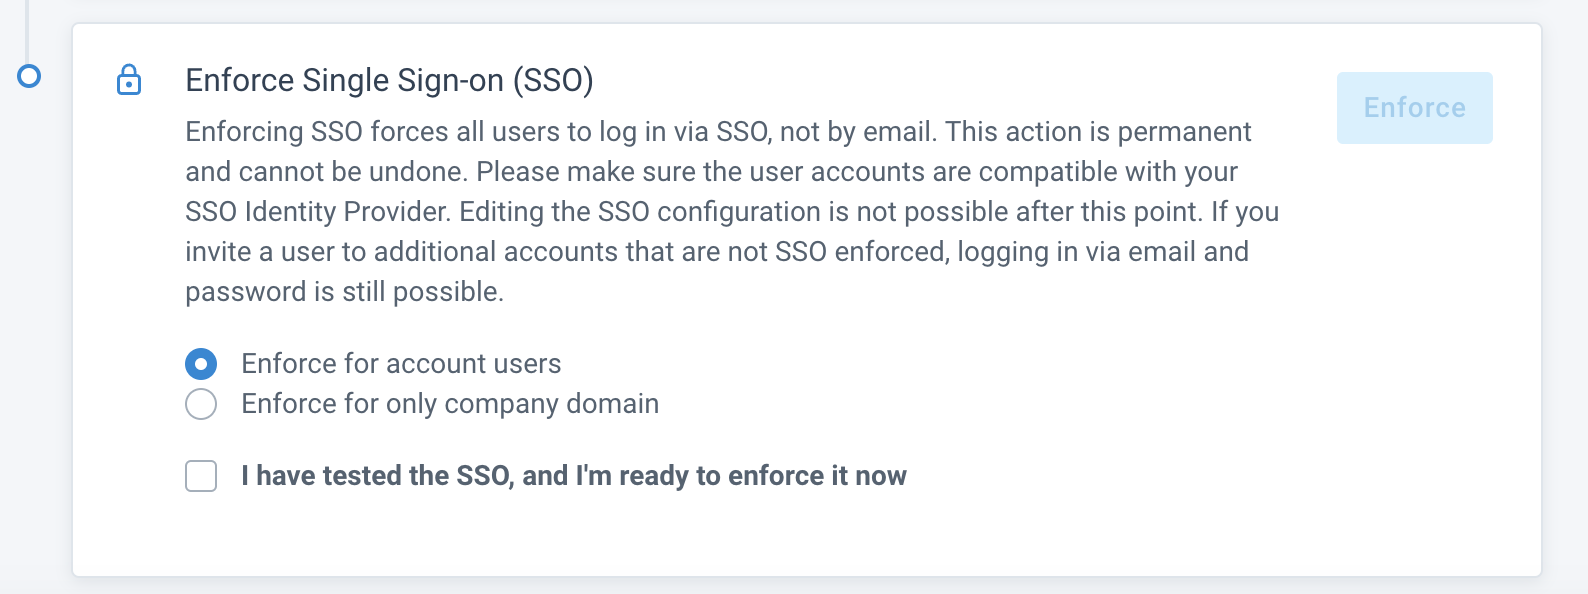
Select I have tested the SSO, and I'm ready to enforce it now. This checkbox activates the Enforce button.
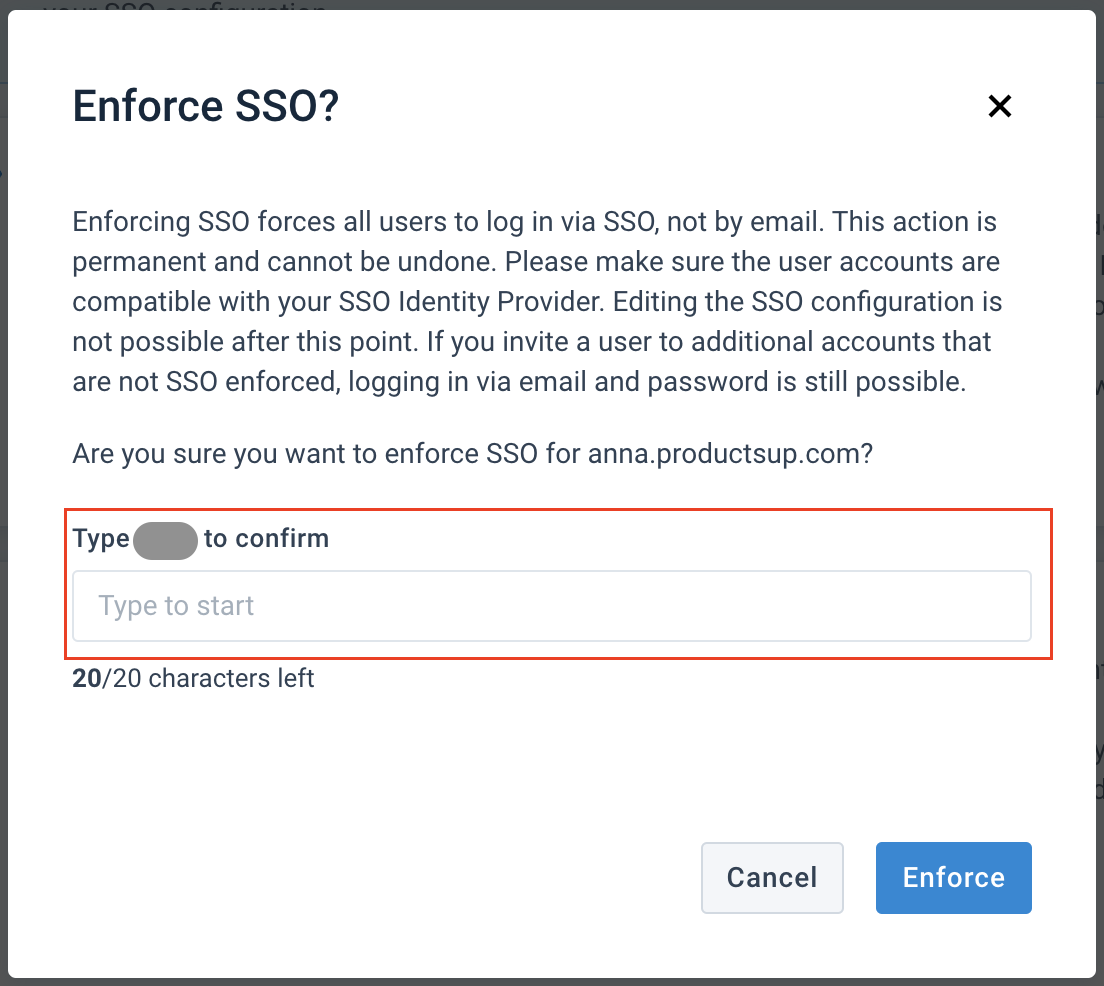
Select Enforce in the top right corner. In the pop-up, enter the same organization's subdomain name that you entered in the step Test the setup. Select Enforce to confirm the SSO enforcement.
You have now turned on SSO for users in your organization.