Export your data to Google Cloud Storage
Learn how to set up the destinations Google Cloud Storage and Google Cloud Storage (service account) in Productsup.
Introduction
All exports in Productsup have the option of sending data to Google Cloud Storage:
The destination Google Cloud Storage sends data to Google Cloud Storage using a regular Google account.
The destination Google Cloud Storage (service account) sends data to Google Cloud Storage using a Google service account.
Prerequisites
To set up the Google Cloud Storage destination in Productsup, you need:
A regular Google account.
A Google storage authentication in your Productsup organization.
To add a Google storage authentication:
Go to Authentication from the organization's, project's, or site's menu and select ADD AUTHENTICATION.
In Type, select Google Storage Authentication, give it a desired name, and select Next.
Select Connect for Productsup to redirect you to a Google account page where you can give Productsup access to your Google Cloud Storage. Once ready, Google redirects you back to Productsup. Close the confirmation window to proceed.
The name of the bucket where you want to send data.
To set up the Google Cloud Storage (service account) destination in Productsup, you need:
A Google service account key in JSON. See Create and delete service account keys.
The name of the bucket where you want to send data.
Set up the destination Google Cloud Storage
Tip
Choose the destination Google Cloud Storage if you use a regular Google account for data transfer between systems.
Go to Exports from your site's main menu and select an export from the list to open the export setup page. If your site doesn't have the needed export yet, select ADD EXPORT to find and add an export.
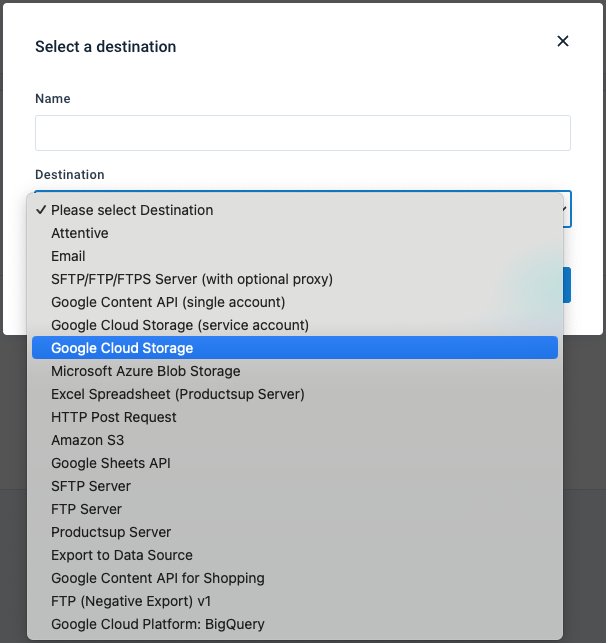
On the export setup page, select Add Destination, choose Google Cloud Storage from the drop-down list, give it a name, and then select Save.

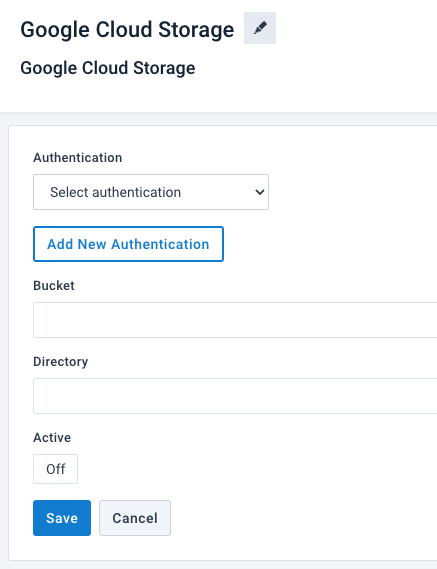
On the destination setup page, choose the needed Google storage authentication in Authentication if your organization, project, or site already has it. If not, add the needed authentication by selecting Add New Authentication as shown in Prerequisites. Then, choose the added authentication in the Authentication drop-down list on the destination setup page.

In Bucket, enter the name of the bucket where you want to send data.
You can enter both static and dynamic bucket names in this field. See Dynamic bucket and directory names.
If you want to send your data to a specific folder in your Google Cloud Storage bucket, provide the path to the desired folder in Directory. By default, the platform sends your data to the root folder.
You can enter both static and dynamic folder names in this field. See Dynamic bucket and directory names.
Toggle Active to On to activate the destination.
Select Save.
When your data is ready for export, select Run in the top-right corner of your page to let the platform import, process, and send your data to the destinations of all active exports in your site.
If you want to run only the export where you added your Google storage destination, you should:
Select Import to let the site import and process your data.
Go to Exports, select the needed export, and choose Export this export.

Once the site finishes the export, you can go to your Google storage bucket to check the uploaded data. If everything is as expected, you can let your export channel system start an import from the bucket.
Set up the destination Google Cloud Storage (service account)
Tip
Choose the destination Google Cloud Storage (service account) if you use a Google service account for data transfer between systems. Typically, service accounts are the preferred option for virtual machines and applications.
Go to Exports from your site's main menu and select an export from the list to open the export setup page. If your site doesn't have the needed export yet, select ADD EXPORT to find and add an export.
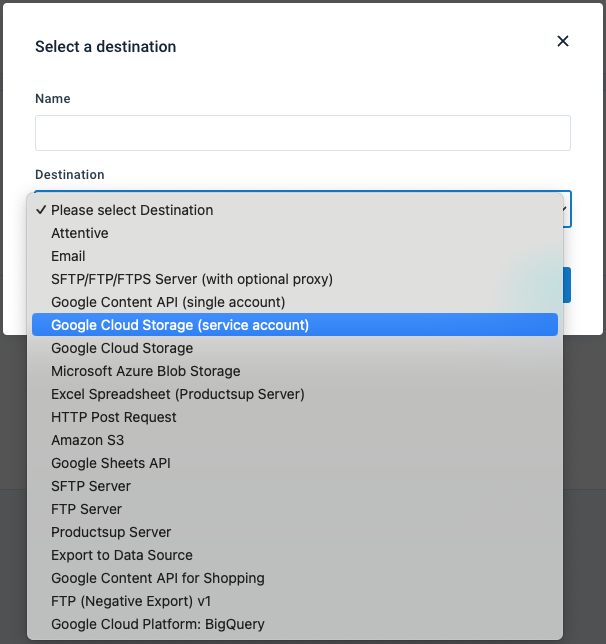
On the export setup page, select Add Destination, choose Google Cloud Storage (service account) from the drop-down list, give it a name, and then select Save.

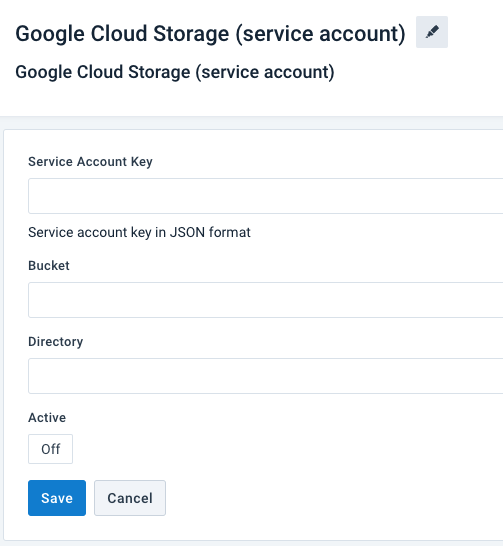
On the destination setup page, provide your Google service account key in Service Account Key. It must be in JSON.

In Bucket, enter the name of the bucket where you want to send data.
You can enter both static and dynamic bucket names in this field. See Dynamic bucket and directory names.
If you want to send your data to a specific folder in your Google Cloud Storage bucket, provide the path to the desired folder in Directory. By default, the platform sends your data to the root folder.
You can enter both static and dynamic folder names in this field. See Dynamic bucket and directory names.
Toggle Active to On to activate the destination.
Select Save.
When your data is ready for export, select Run in the top-right corner of your page to let the platform import, process, and send your data to the destinations of all active exports in your site.
If you want to run only the export where you added your Google storage destination, you should:
Select Import to let the site import and process your data.
Go to Exports, select the needed export, and choose Export this export.

Once the site finishes the export, you can go to your Google storage bucket to check the uploaded data. If everything is as expected, you can let your export channel system start an import from the bucket.
Dynamic bucket and directory names
In both Google Cloud Storage destinations, the fields Bucket and Directory support static and dynamic bucket or folder names.
A dynamic bucket or folder name can use information like the name or ID of a site or export. For example, if you send data to multiple buckets from different locations in Productsup, the names of these buckets may correspond to the names of the sites or exports that send data to them. This is where you can use dynamic bucket or folder names in the destination setup.
{{Site.name}}uses the name of a site as a bucket or folder name.{{Site.id}}uses the ID of a site as a bucket or folder name.{{Export.name}}uses the name of an export as a bucket or folder name.{{Export.id}}uses the ID of an export as a bucket or folder name.
Tip
If the names of your sites or exports contain a forward slash /, and so do your folder names in Google Cloud Storage, you need to replace the forward slash in your Google Cloud Storage folder names with another symbol, such as _, because / indicates a new folder in the Directory field input.
When you replace / with _ or another symbol in your folder names, you need to add a replace filter to the Directory field input. For example, if you want to use a folder path that contains a folder with a site name and a folder with an export name where the site name folder now has _ instead of /, the field input should be {{Site.name| replace({ "/":"_" })}}/{{Export.name}}.