Lists feature
Use the Lists feature to define how specific rules boxes help you optimize your product data. Include or exclude, replace, or map values in your product feed using lists in Productsup.
Introduction
Use lists to define how specific rule boxes help you optimize your product data. You can include or exclude, replace, or map values in your product feed using lists. For example, suppose you want to include or exclude a list of items from your inventory. In that case, the Standard Inclusion/Exclusion rule box explicitly uses the values you first defined in Lists.
In other words, If you want to exclude, replace, or connect values to different values for several products in a column, you must first create a list. A list contains all the terms or values you want to apply rules to. You can edit replacement terms from a dynamic source with the Dynamic Inclusion/Exclusion or Dynamic Replacement list for efficiency. For example, upload, drag and drop, or link a CSV file to this list type via URL, rather than entering terms manually in the platform.
After creating a list, you then add a rule box in Data View that tells the platform how to treat the intended products. A small pop-up message in each rule box explains which list types you need to create first and which rule boxes require a list.
For example, to exclude products from your product feed, you can use the Blacklist rule box. It works with the Standard Inclusion/Exclusion list.
The Lists feature offers you list types from the three categories: Inclusion/Exclusion, Replacement, and Mapping. See the following tables:
List category | List name |
|---|---|
Inclusion/Exclusion | Standard Inclusion/Exclusion |
Dynamic Inclusion/Exclusion |
List category | List name |
|---|---|
Replacement | Standard Replacement |
Dynamic Replacement | |
Attribute-based Replacement |
Category | List name |
|---|---|
Mapping | Partner Taxonomy Mapping |
Classification Mapping |
List types
In Lists, you can create the following lists:
Standard Inclusion/Exclusion is a list of values you want to include or exclude from your feed.
Dynamic Inclusion/Exclusion imports a list of values you want to include or exclude from your feed via a CSV file upload or URL.
Standard Replacement creates a list of values in your feed that you want to replace by applying your defined values.
Dynamic Replacement imports a list of dynamic values you want to replace from a CSV file upload or URL.
Attribute-based Replacement creates a list of values for a selected import or intermediate attribute where you can replace them with your choice of values.
Partner Taxonomy Mapping creates a list of all values included in a selected import/intermediate attribute and replace them with categories from a partner's taxonomy.
Classification Mapping creates a list of all included values in a selected import or intermediate attribute and replace them with categories from a classification system.
Inclusion/Exclusion lists
Standard Inclusion/Exclusion
The Standard Inclusion/Exclusion list feature lets you define products in your data feed that you want to include or exclude from your export. It's a list containing terms that the Productsup platform accepts or skips when it matches your previously specified words. You can share this list with all sites in a project or an organization. And when you modify your data feed, the platform automatically updates the list.
With the Standard Inclusion/Exclusion list, you manually enter all the values used for inclusion or exclusion in Lists. See Exclude products with the Standard Inclusion/Exclusion list for the setup.
Dynamic Inclusion/Exclusion
The Dynamic Inclusion/Exclusion list feature works similar to the Standard Inclusion/Exclusion list. But instead of manually entering values for inclusion or exclusion in Lists, you upload a CSV file or access the list of values via URL. See Exclude products with the Dynamic Inclusion/Exclusion list for the setup.
Replacement lists
Standard Replacement
The Standard Replacement list lets you efficiently edit terms within the product feed to:
Standardize specific terms or keywords
Minimize redundancy
Replace low-volume search terms with high-volume search terms
You create a list of terms to replace existing terms in the data feed. This list ensures that there is always one standard variation of a specific word used in a particular context. See Replace feed terms with the Standard Replacement list for the setup.
Dynamic Replacement
The Dynamic Replacement list is similar to the Standard Replacement list, although it lets you upload or import a list file from a CSV file or via URL. See Replace feed terms with the Dynamic Replacement list for the setup.
Attribute-based Replacement
Use the Attribute-based Replacement list to replace existing attributes with your choice of new values. This list of unique values replaces your import and intermediate feed attributes. See Replace feed attributes with the Attribute-based Replacement list for the setup.
Mapping lists
Partner Taxonomy Mapping
Partner Taxonomy Mapping lets you create a list of all values included in a selected import or intermediate attribute and replace them with categories from a partner's taxonomy.
For some export channels, you can match shop categories with a channel partner taxonomy. In some cases, it's mandatory, for example, with Google Merchant Center (GMC). Matching a partner taxonomy ensures that your product categorizations are correct in export channels. See Replace attributes with Partner Taxonomy Mapping list for the setup.
Classification Mapping
The Classification Mapping list lets you create a list of all included values in a selected import or intermediate attribute and replace them with categories from a classification system.
For example, manufacturers in the electrical, heating and ventilation, and building and construction industries often need to provide product data to trade and industry partners. These products follow an international classification standard, which structures product information by class. See Set up the Classification Mapping list for the setup.
View list information and edit settings
Search and filter lists
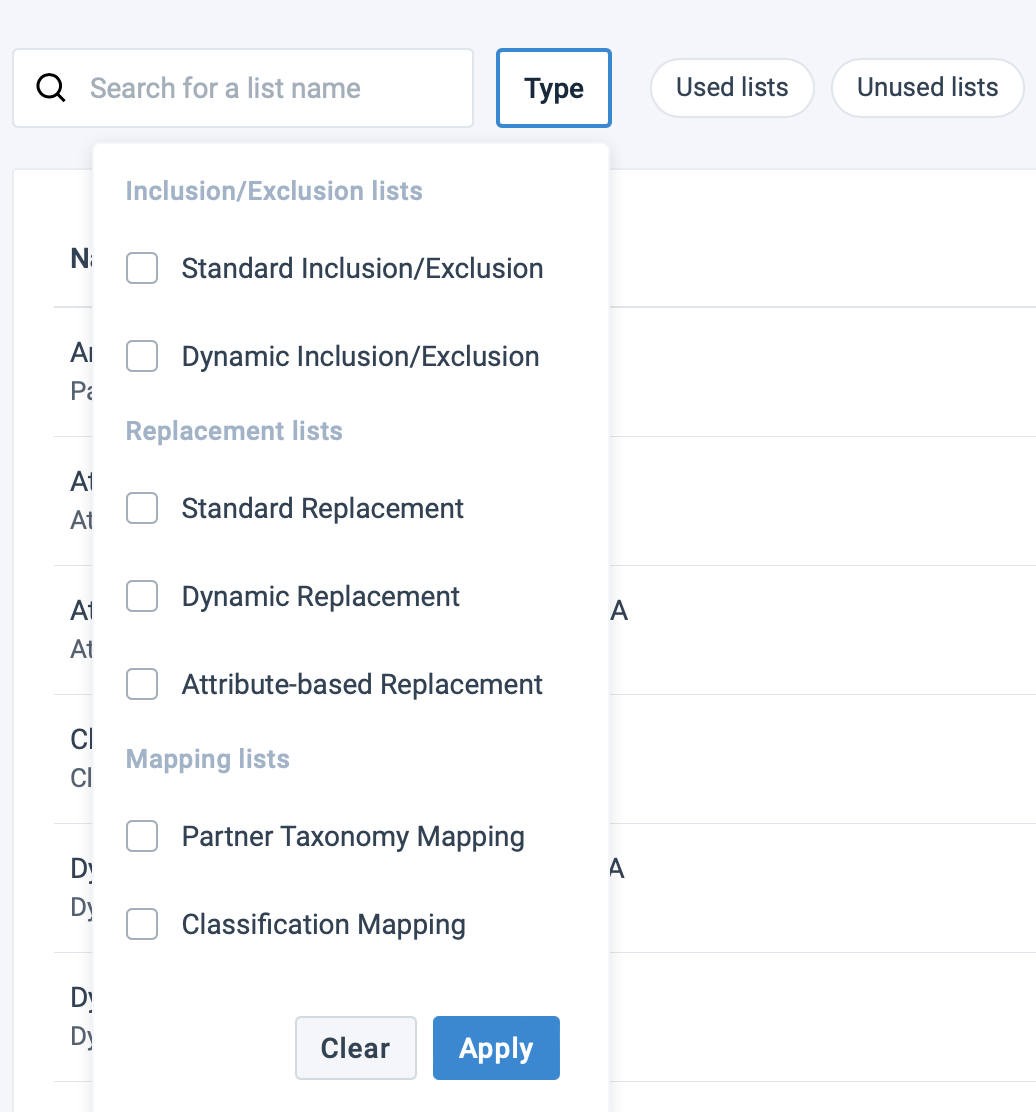
Enter a list name in the search field to perform a search. Or select Type and choose the list type from the drop-down menu.
You can also select the Used lists and Unused lists filter buttons to quickly display specific lists.
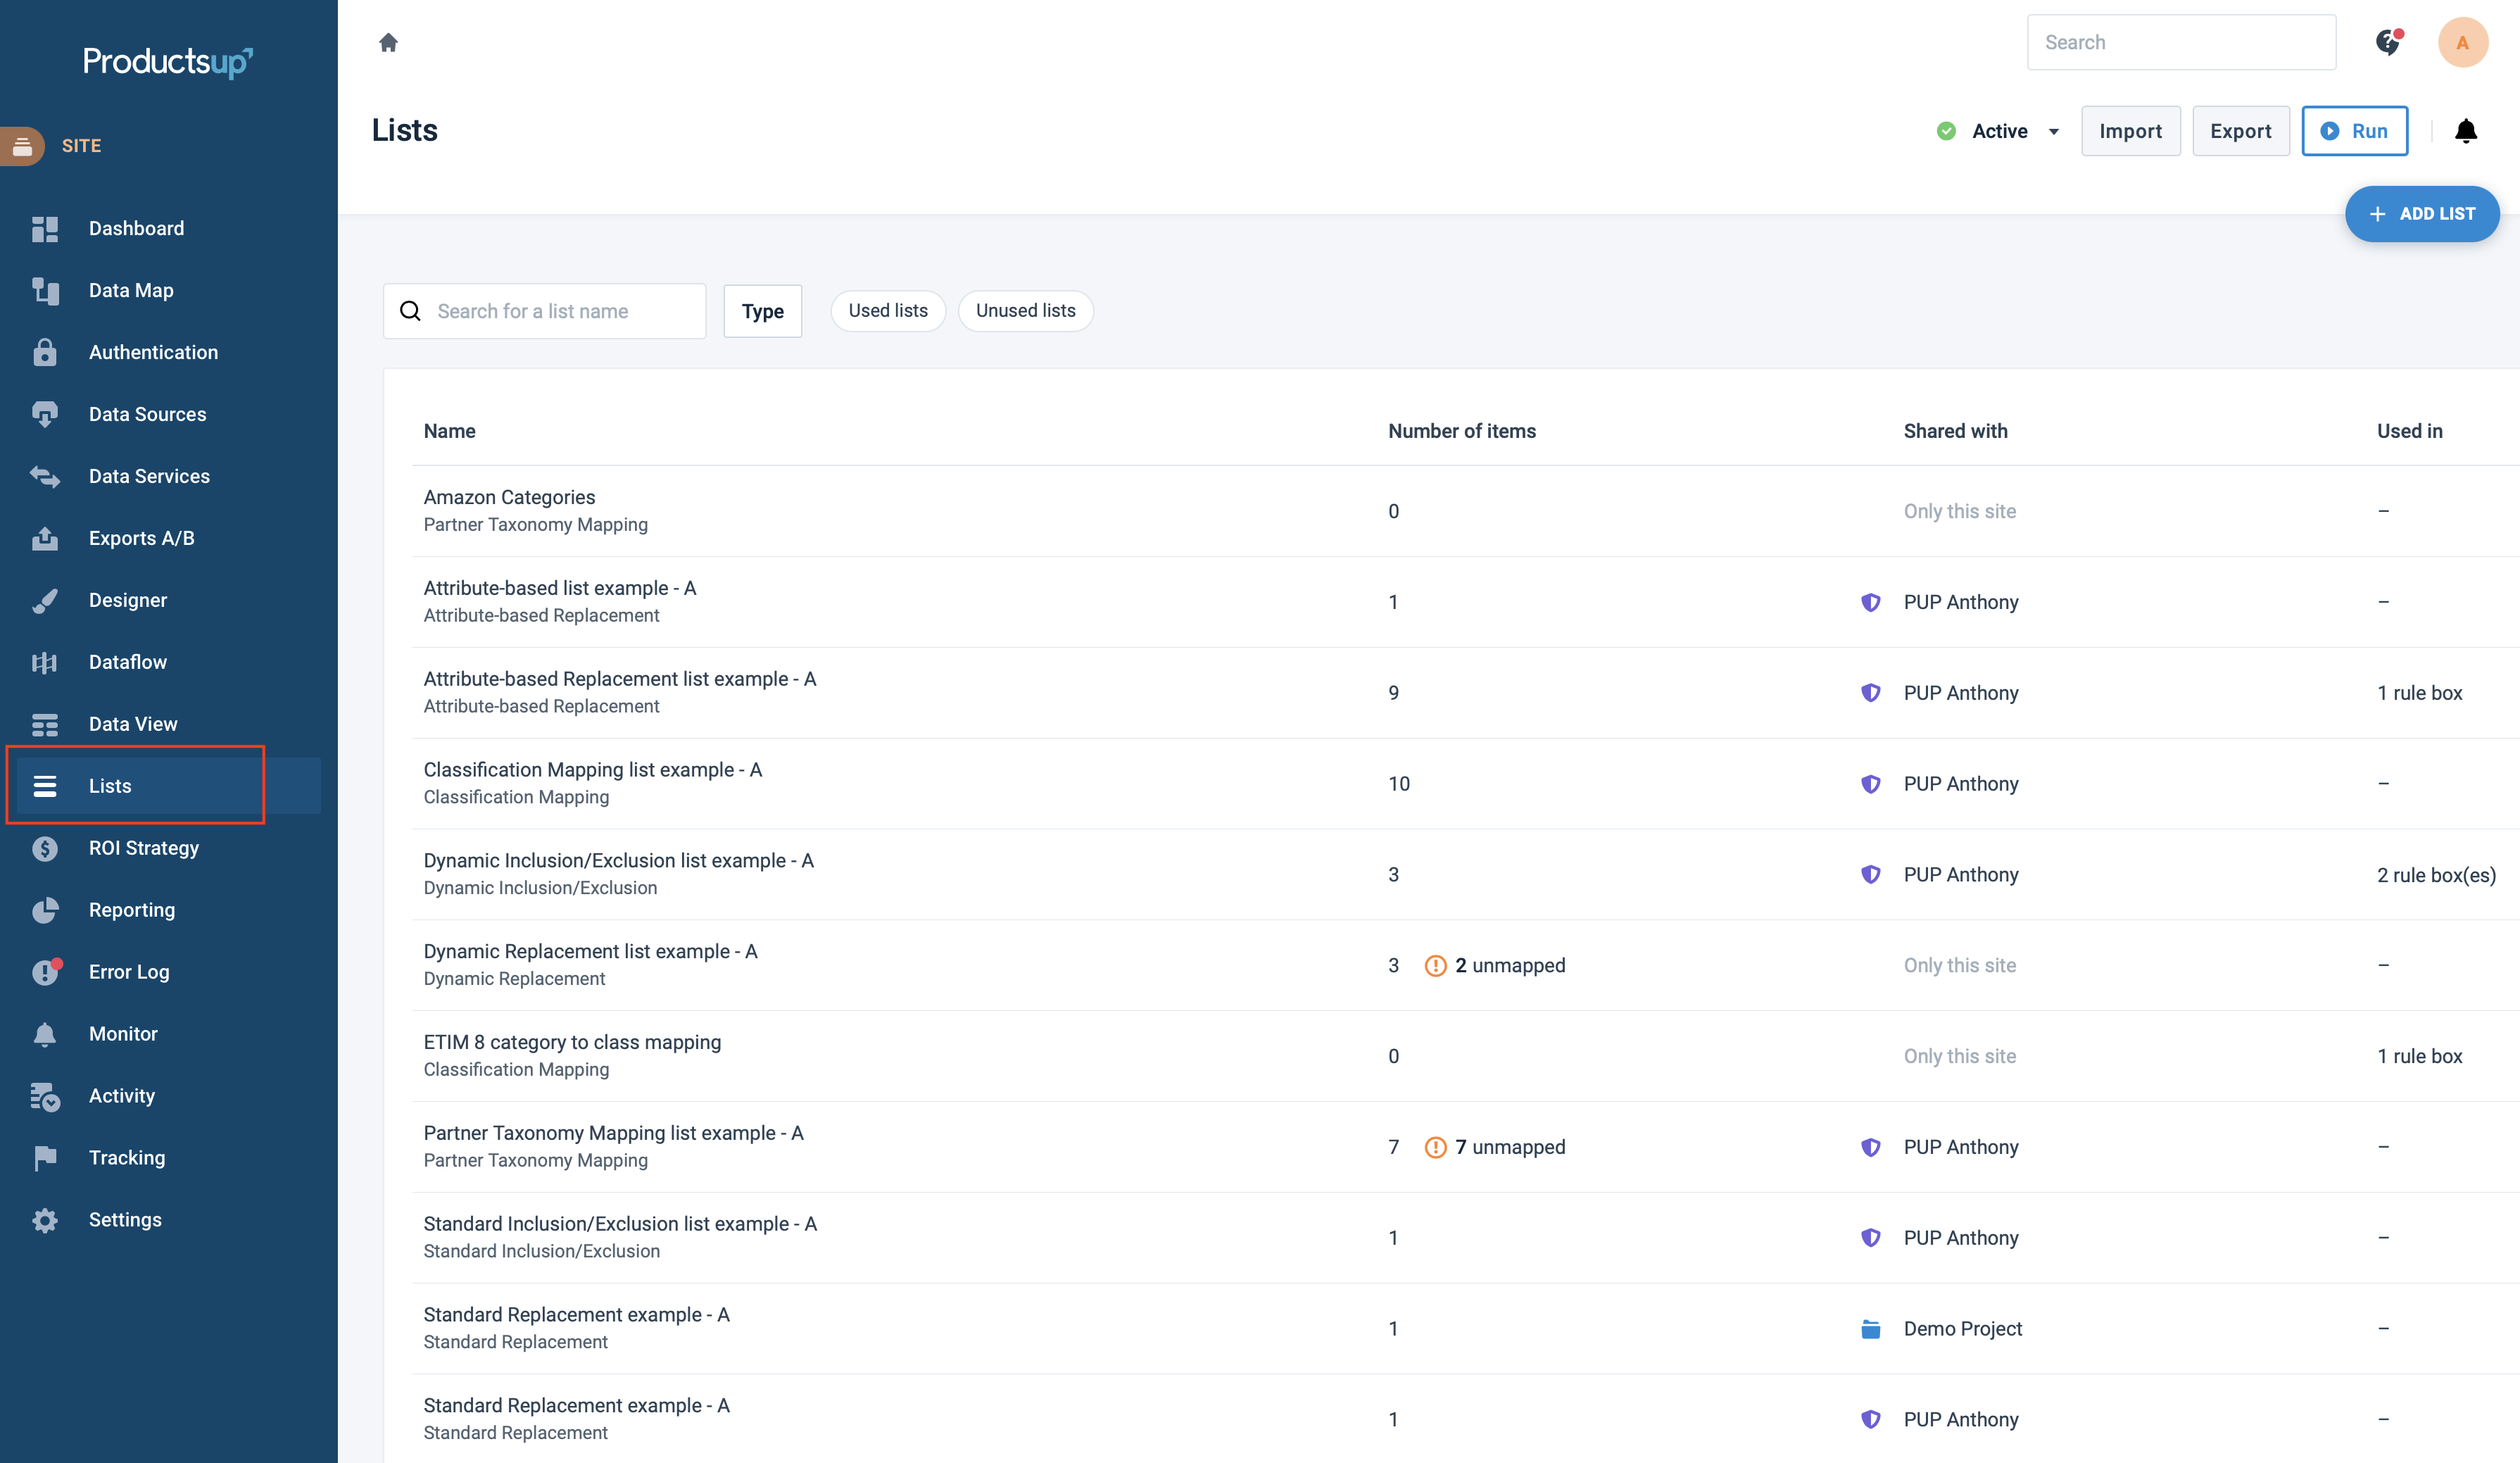
Get detailed information for each list in the Lists' main view.
Names shows custom list names and list types.
Number of items displays the number of items in the list. It also displays the number of unmapped objects.
Shared with displays if and where you shared the list across organizations or projects.
Used in views if none, one, or several rule boxes use the list.

Edit list settings
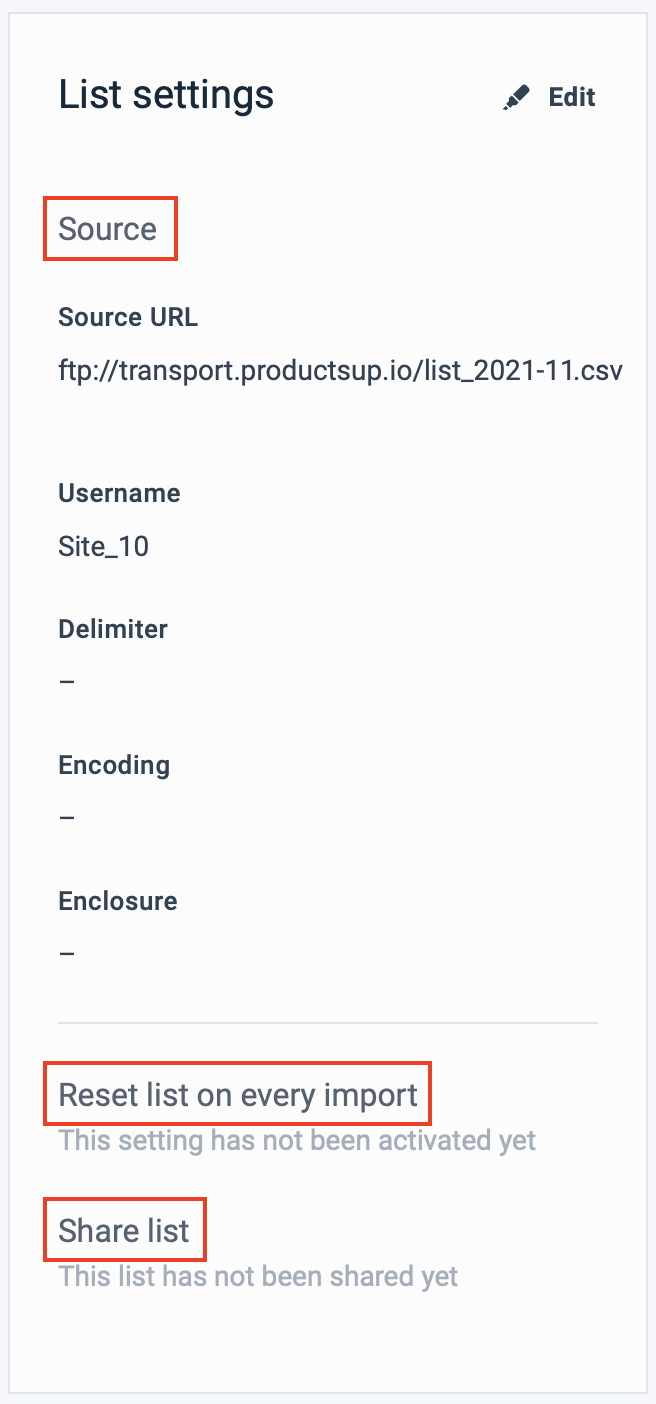
You can choose a list to view its settings. Under List settings, select Edit to modify list options for your chosen list on the right.
Source lets you see for dynamic lists where the list file originates: in Import or Intermediate. See source information by selecting a list. For taxonomy lists, you can see the selected partner taxonomy source and attribute.
Reset list on every import is only available for the Dynamic Replacement and Dynamic Inclusion/Exclusion lists. Displays the status if you have activated this setting.
When the feature is active, the platform resets the list every run deleting all values and then re-importing them into the list.
When the feature is inactivate, the platform re-imports the list, adding only new items and ignoring changed or deleted items.
Share list displays if you shared this list with a project or organization. You can select the hyperlink(s) to visit the organization or project that shares the list.
From within a list, you can edit the list name. Select the edit icon to the right of the list name, and enter a new list name.
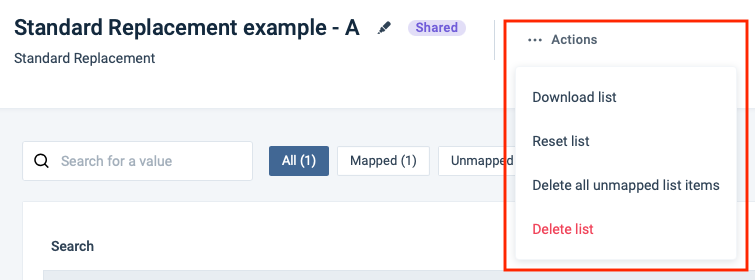
You can also perform some quick operations by selecting the Actions button in the top-left ribbon to:
Download the list
Reset the list removes all data but leaves all configurations untouched.
Delete all unmapped list items
Delete the list
Edit list terms
Review the following to see which list types let you modify the list terms or values within the list:
Standard Replace list: Select the Search and Replace term input fields to modify the attributes or values and replacement terms.
Dynamic Replacement list: Select the Replace term input field to modify the replacement term.
Standard Inclusion/Exclusion list: Select the Term input field to modify the term.
Dynamic Inclusion/Exclusion list: Modify the list from the CSV or URL source, or activate the Reset the list option to remove all data except the configuration.
Attribute-based list: Select the Replace term input field to modify the term.
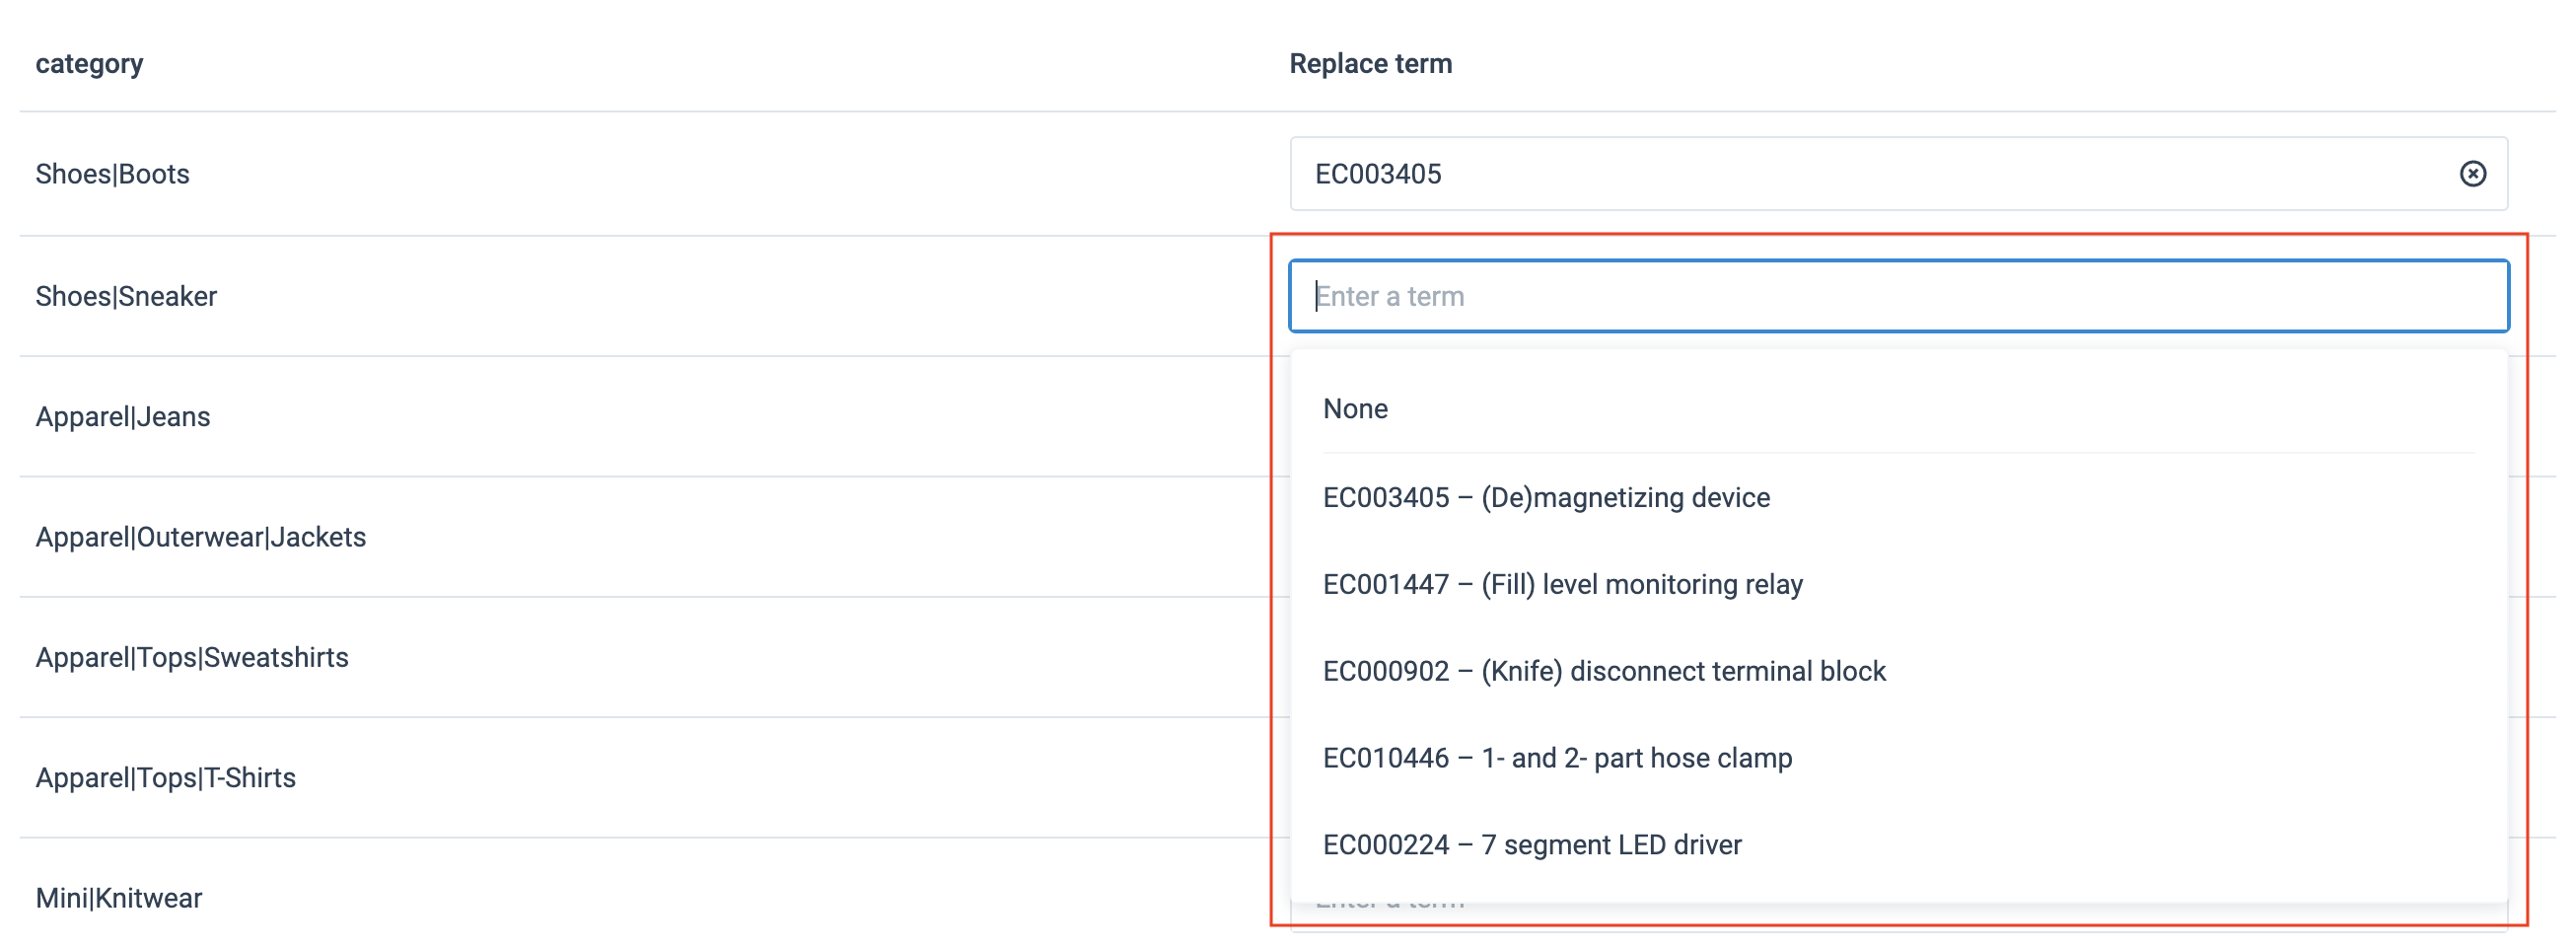
Partner Taxonomy Mapping list: Select the Replace term input field and enter a term to choose from an auto-complete list of categories.
Classification Mapping list: Select the Replace term input field to choose a different classification from an auto-complete list of classifications.
View box connections per list
If you set up rule boxes to use your list, you can see the site and the number of rule boxes that use your list.
Select the list, and a message above List settings displays the number of rule boxes that use the list.
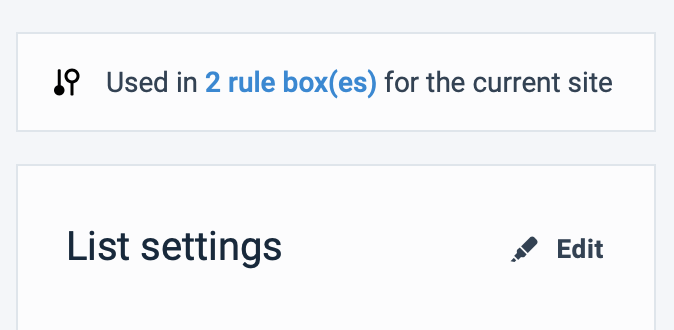
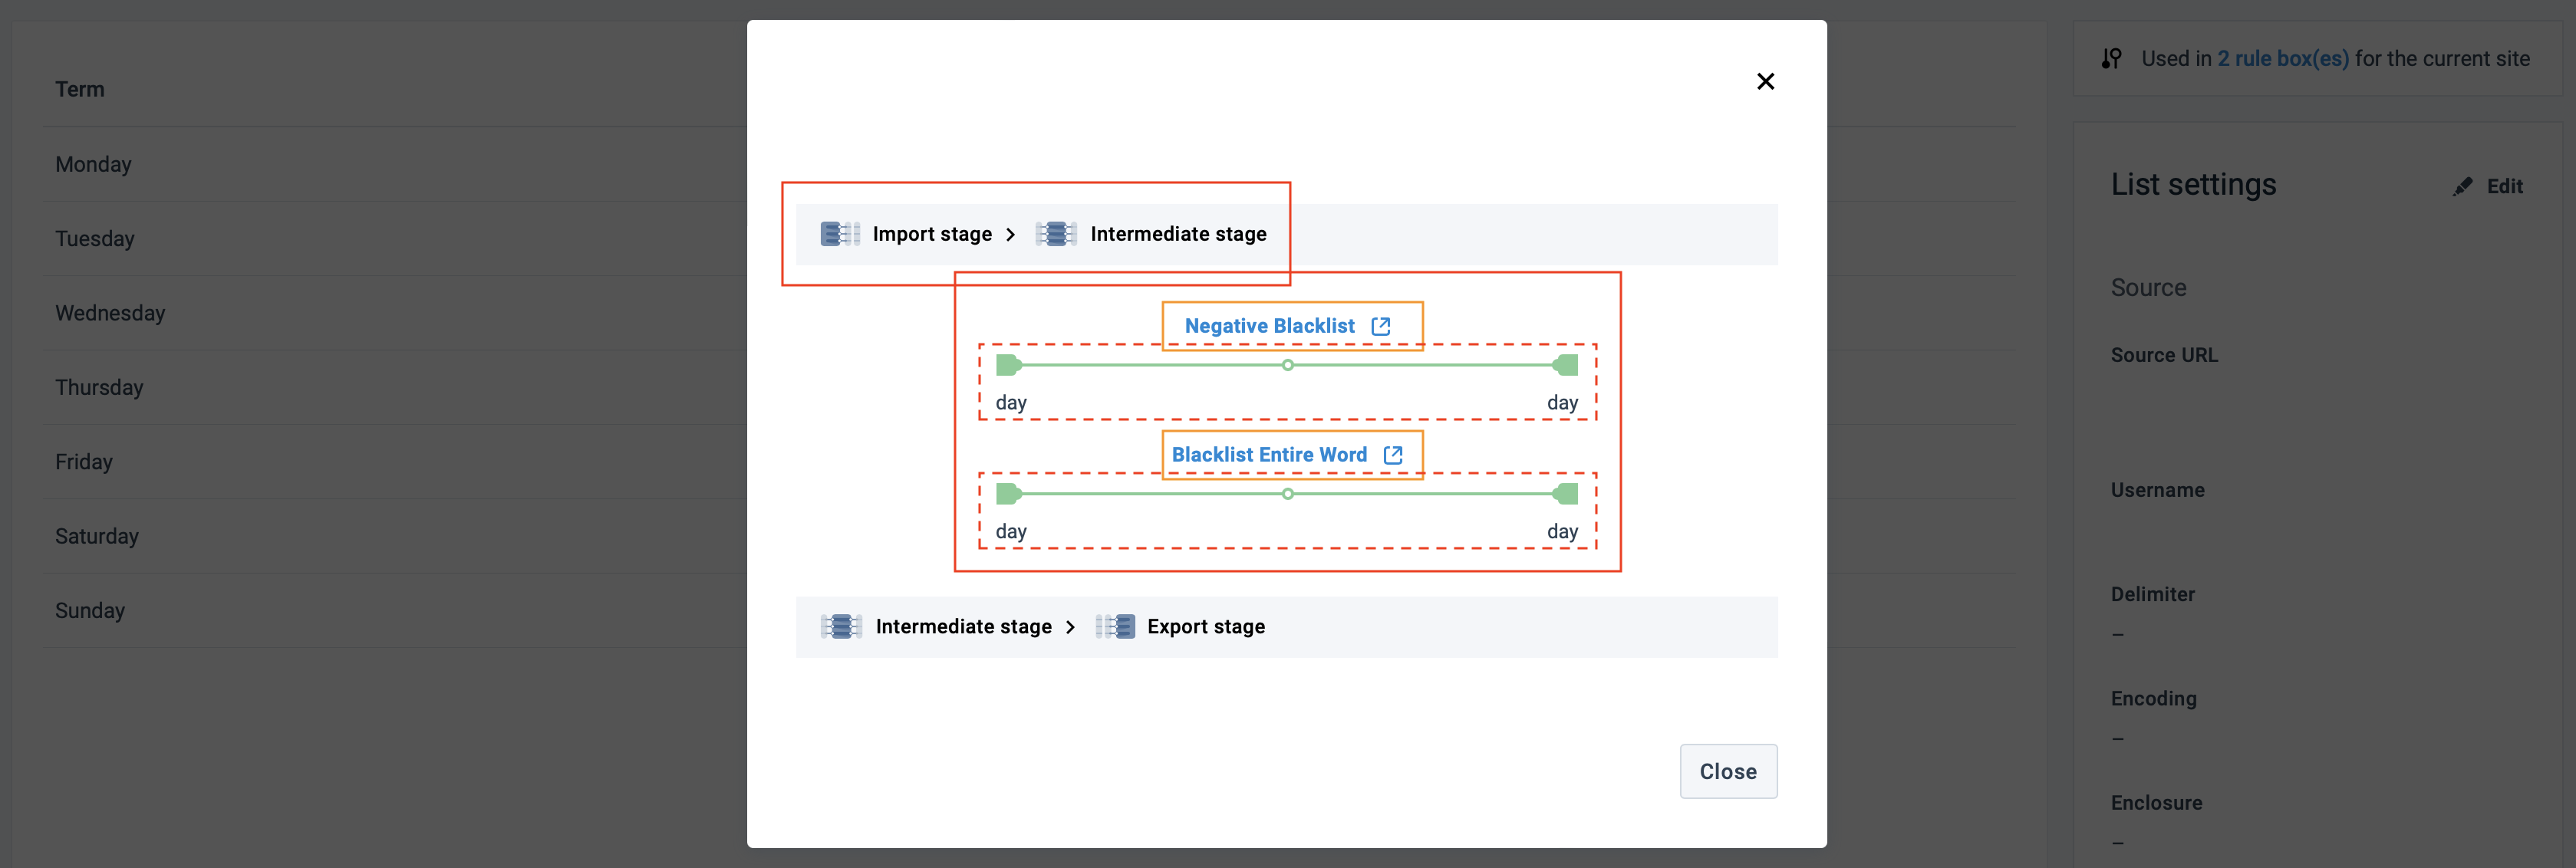
Select the hyperlinked rule box text in the message, and a window appears to illustrate the stages of your defined list values, what they map to, and the box names using the list.
Select the hyperlinked rule box to land in Data View. Here you can get a better view or manage your impacted product data.
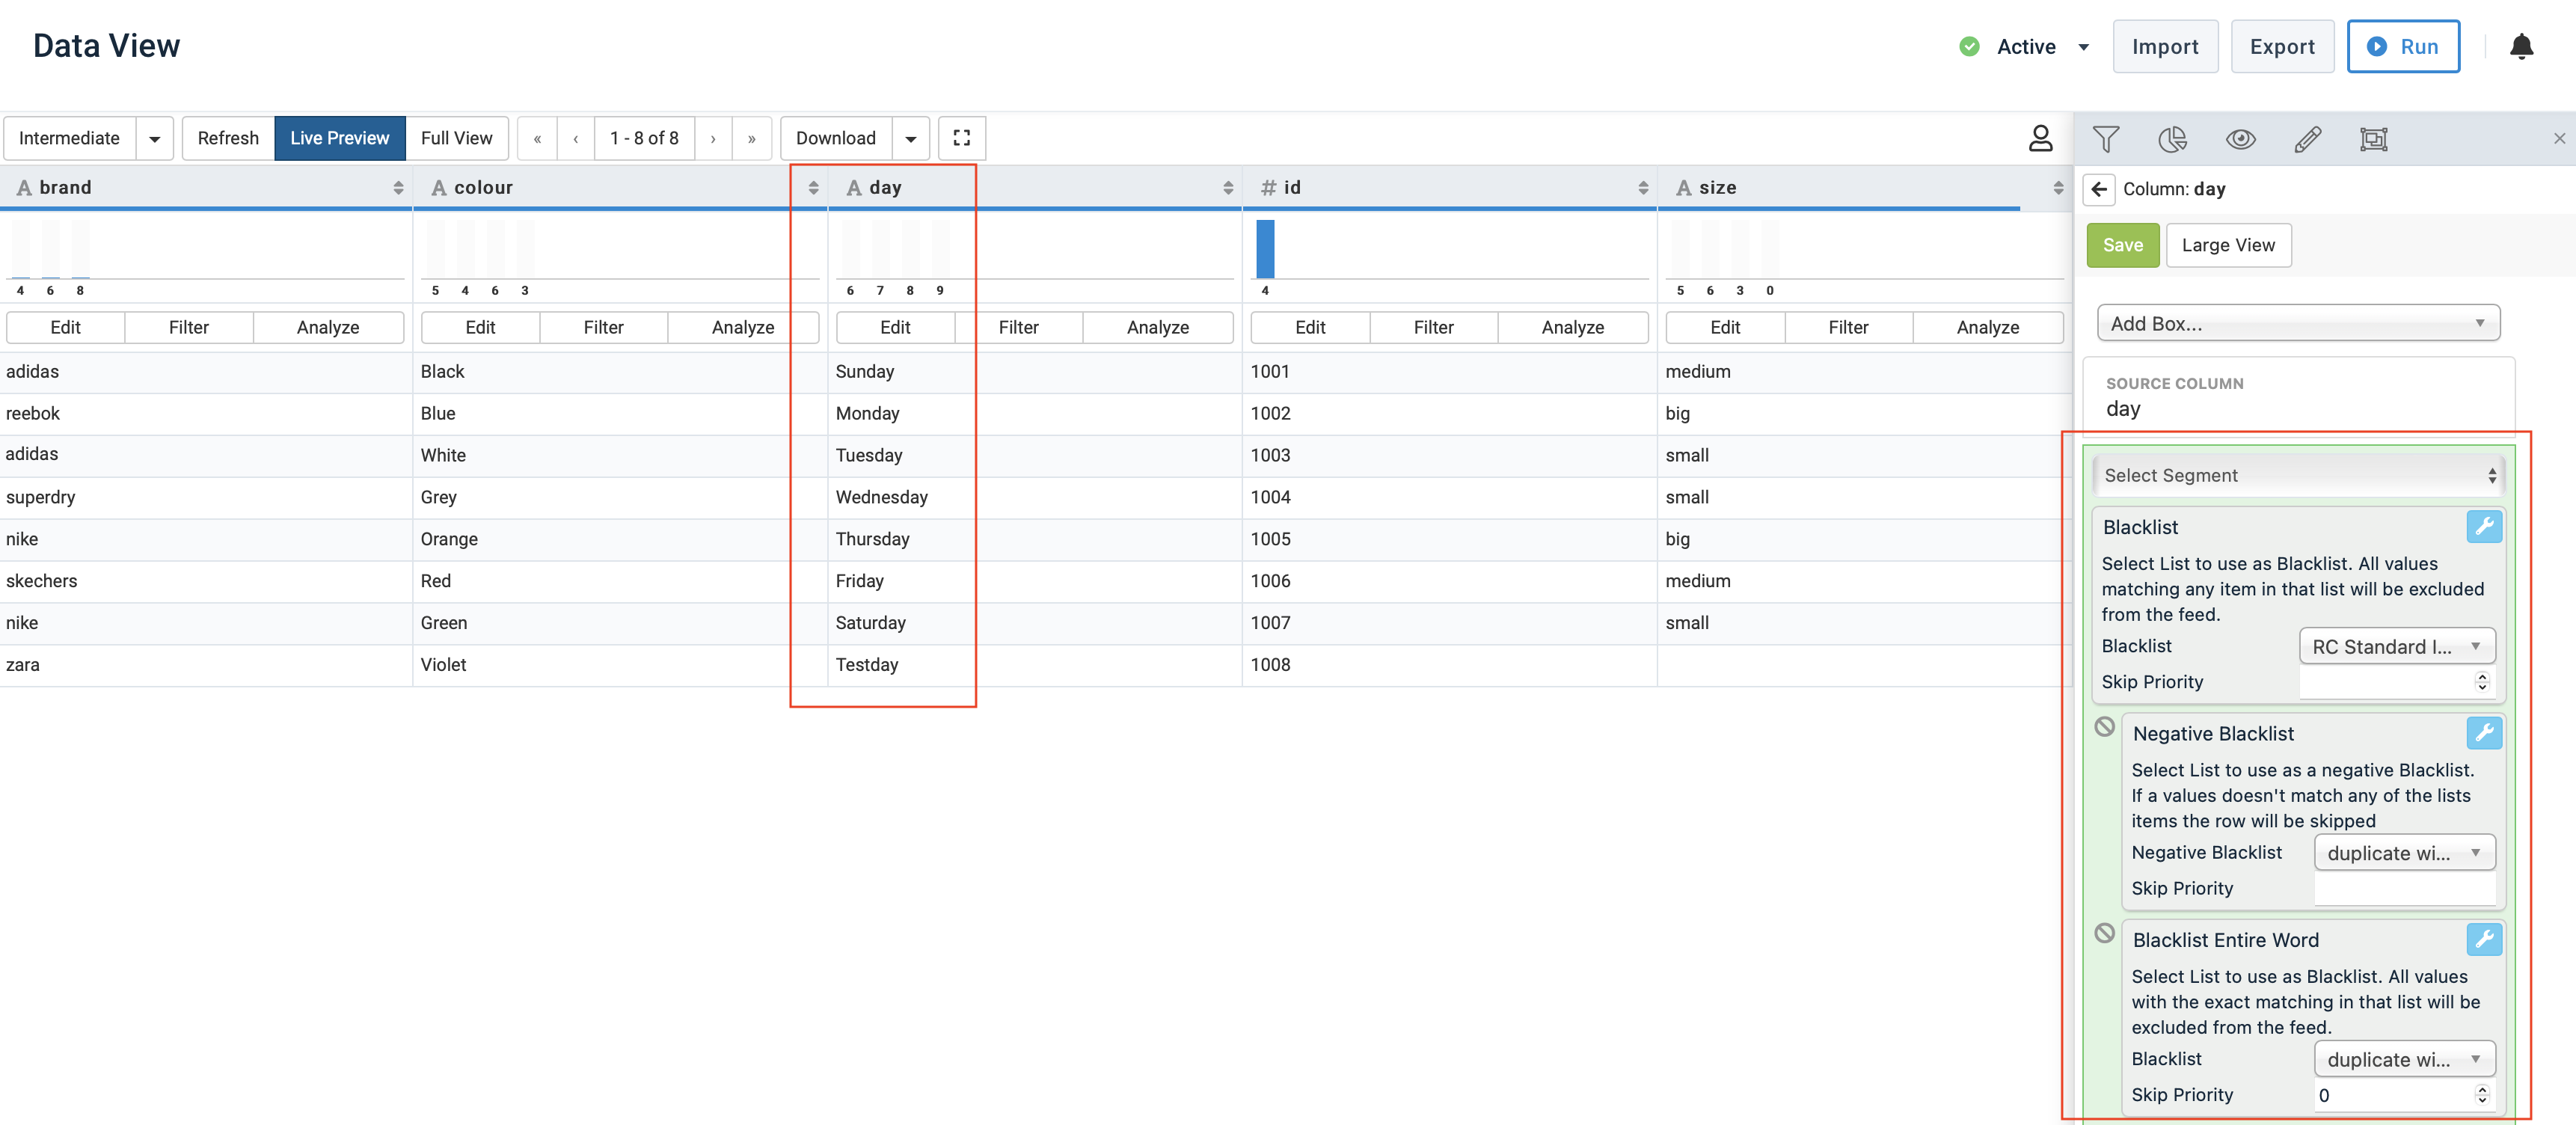
In this example, the Negative Blacklist and the Blacklist Entire Word rule boxes use your list values in the Import to Intermediate stages. Both stages map to the attribute
day.