Rule box category Other
Learn how to use rule boxes in the category Other to add comments to your attributes, generate hashes, or work with site tags and JSON bodies in Productsup.
Introduction
The rule box category Other contains miscellaneous rule boxes that can help you modify your data in different ways. For example, add a comment to an attribute to store information about its data transformations, create a SHA-256 or MD5 hash for the values of an attribute, extract desired data from a JSON body, generate a random number or a unique ID, assign a site tag to the attribute, sort values, etc.
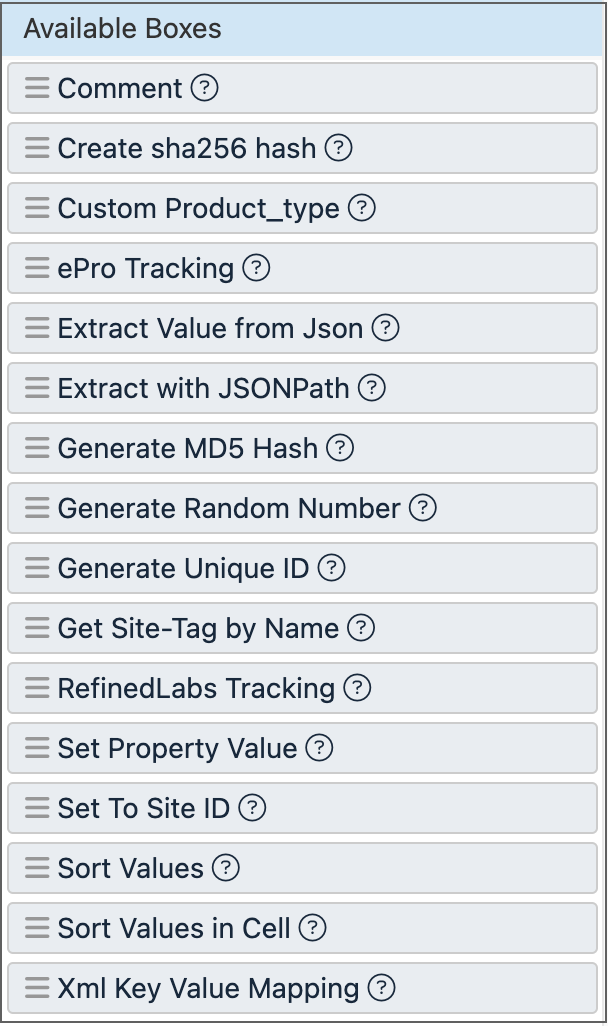
This category can be divided into several subgroups. In the following sections, you can find how to use the rule boxes of the category Other:
Provide notes in attributes and rearrange attribute contents
The rule box category Other contains the rule boxes Comment, Sort Values, and Sort Values in Cell to let you perform housekeeping tasks, such as adding comments for better comprehension of attribute data and its transformations or rearranging the contents of your attribute values according to a desired order.
Comment
The Comment rule box lets you add a note to an attribute. It doesn't change the data in the attribute; it only stores any needed information for reference. For example, you can use this rule box to explain how rule boxes transform the data in the attribute or what sort of data an attribute contains.
You can see the added comment in the rule box setup in Data View and in a speech bubble in Dataflow.
Take the steps from Add a rule box to add the Comment rule box.
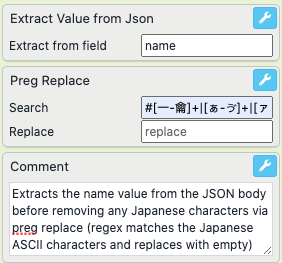
In the field comment on your dataflow, enter your desired note.
Select Save.
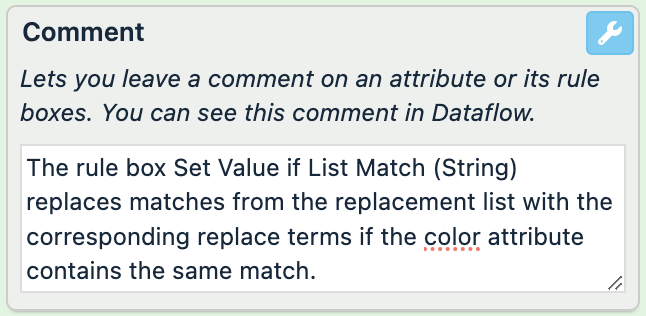
For example, you have the following values in the title attribute where you have applied complex data transformations. You want to add a note to this attribute without changing its data to explain how the applied rule boxes work. You can achieve this with the Comment rule box:
title (before) | title (after) | title in Dataflow |
|---|---|---|
Flat leather sandals with a bow, black | Flat leather sandals with a bow, black | 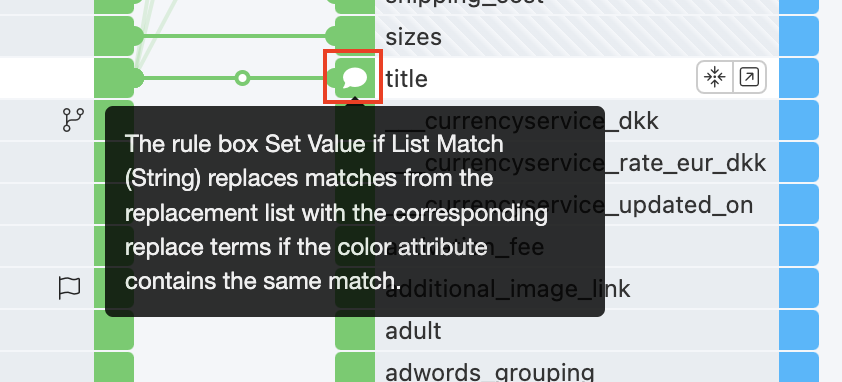 |
High-heel sandals with a buckle, yellowish red | High-heel sandals with a buckle, yellowish red | |
Square-toed loafers, black | Square-toed loafers, black |
Sort Values
The Sort Values rule box splits your values into items using a delimiter and rearranges the items in an ascending or descending alphabetical order.
Take the steps from Add a rule box to add the Sort Values rule box.
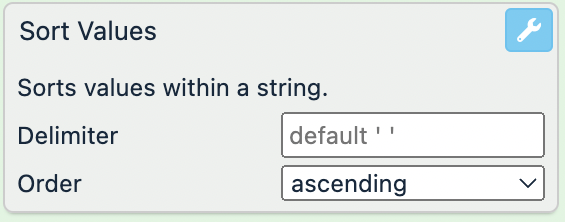
In Delimiter, enter the character or characters that separate items in your values. For example, the value XS, S, M, L, XL uses a comma and a space character (
,) as a delimiter.If you don't provide any input in this field, the rule box uses one space character as a default delimiter.
In Order, select how you want the rule box to rearrange the delimited items in your values:
ascending arranges items from A to Z. This is the default option. If any items start with symbols, such as
&,-, or>, the rule box places them at the beginning of the value.descending arranges items from Z to A. If any items start with symbols, such as
&,-, or>, the rule box places them at the end of the value.
Select Save.
For example, you have the following values in the colors attribute and want to display all the mentioned colors alphabetically, from A to Z. You can achieve this with the following setup of the Sort Values rule box using a comma and a space character (, ) as a delimiter:
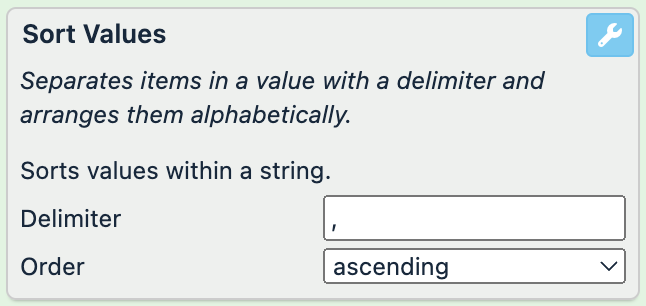
colors (before) | colors (after) |
|---|---|
white, red, blue, yellow, green, black |
|
yellow, orange, red, purple |
|
khaki-black-gray | khaki-black-gray |
If you use only a comma as a delimiter, the values change to black, blue, green, red, yellow,white and orange, purple, red,yellow. The rule box considers a space character as the first character in each item except for the first item.
Sort Values in Cell
The Sort Values in Cell rule box splits your values into items using a delimiter and rearranges the items alphabetically or in any desired order based on a user-defined pattern or a regular expression (regex). See Rule box category Use regular expressions for more information on regex.
Take the steps from Add a rule box to add the Sort Values in Cell rule box.
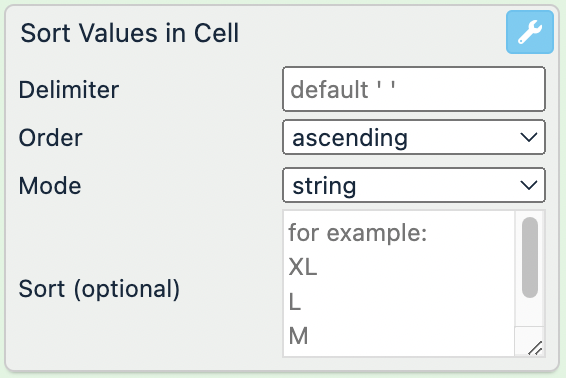
In Delimiter, enter the character or characters that separate items in your values. For example, the value XS, S, M, L, XL uses a comma and a space character (
,) as a delimiter.If you don't provide any input in this field, the rule box uses one space character as a default delimiter.
Choose how you want to rearrange the delimited items in your values:
To rearrange the delimited items alphabetically, select the desired option in Order:
ascending arranges items from A to Z. This is the default option. If any items start with symbols, such as
&,-, or>, the rule box places them at the beginning of the value.descending arranges items from Z to A. If any items start with symbols, such as
&,-, or>, the rule box places them at the end of the value.
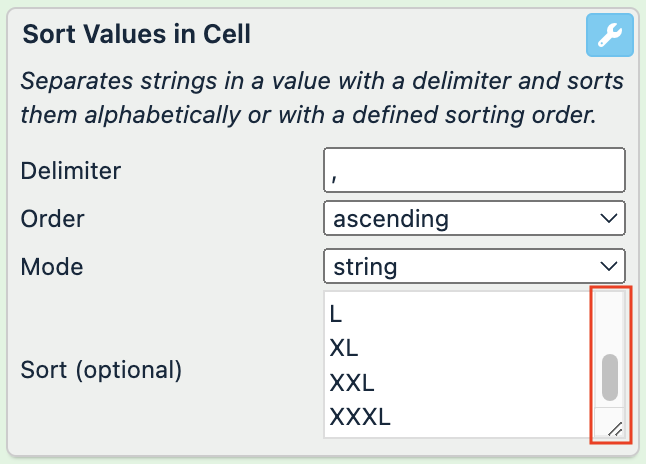
To rearrange the delimited items in a custom order, select the desired options in Mode and Sort (optional):
Choose string in Mode to define the needed sorting order with text using the Sort (optional) field. Enter one item per line.
If a value contains items not mentioned in the sorting order, the rule box places them at the end of the value in the same order they appear in the value.
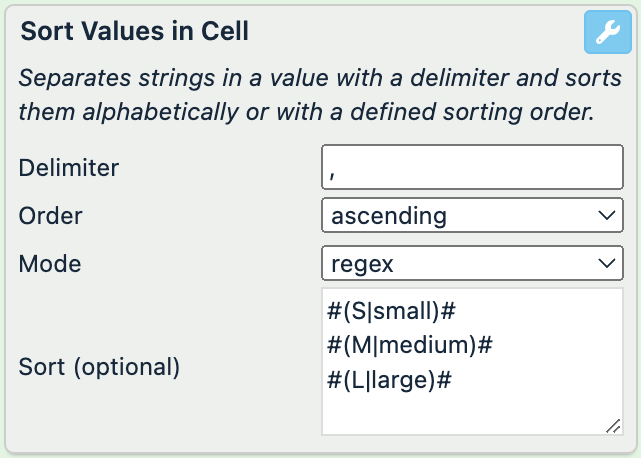
Choose regex in Mode to define the needed sorting order with regex using the Sort (optional) field. Enter one regex-coded item per line.
If a value contains items not mentioned in the sorting order, the rule box places them at the end of the value in the same order they appear in the value.
Note
An example of a regex is
/([A-Z])\w+/. If you run a search in a text and use this regular expression, you can find all words in the searched text that have uppercase letters from A to Z. In Productsup, you can use this regex as is or change the opening and closing forward slashes to hash signs:#([A-Z])\w+#.See Rule box category Use regular expressions for more information on using regular expressions in Productsup.
Select Save.
For example, you have the following values in the sizes attribute and want to display all the mentioned sizes in the following order: XXS, XS, S, M, L, XL, XXL, XXXL. You can achieve this with the following setup of the Sort Values in Cell rule box using a comma and a space character (, ) as a delimiter:
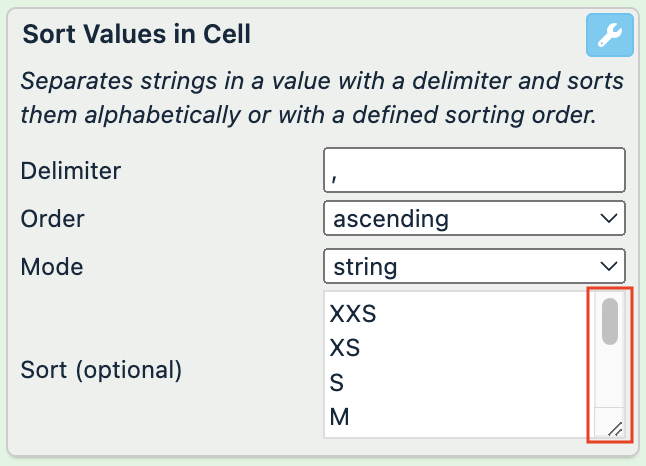
sizes (before) | sizes (after) |
|---|---|
M, XS, XXXL, XXS, L, S, XL, XXL |
|
L, S, XXS |
|
M, L, S, XXXS, 5XL, XS, XXL |
|
L#S#XL | L#S#XL |
Alternatively, your sizes attribute can have values where the same size is referred to with a capital letter and the entire word. You can rearrange these values using regular expressions and the following setup of the Sort Values in Cell rule box:
sizes (before) | sizes (after) |
|---|---|
M, large, S |
|
L, small, M |
|
medium, L, S |
|
Generate numbers and hashes
The rule box category Other contains the rule boxes Create sha256 hash and Generate MD5 Hash to let you create hashes for your attribute values. It also contains the rule boxes Generate Random Number and Generate Unique ID to let you generate numbers and IDs for your products.
Create sha256 hash
The Create sha256 hash rule box uses the SHA-256 hash function to create a unique SHA-256 hash for your attribute values and overwrite the current values with the generated hashes.
Take the steps from Add a rule box to add the Create sha256 hash rule box.

Select Save.
For example, you have the following values in the id attribute and want to create a SHA-256 hash for each ID. You can achieve this with the Create sha256 hash rule box:
id (before) | id (after) |
|---|---|
15486932 |
|
| |
17854695 |
|
58467896 |
|
Generate MD5 Hash
The Generate MD5 Hash rule box uses the MD5 hash function to create a unique and encrypted MD5 hash for your attribute values and overwrite the current values with the generated hashes.
Take the steps from Add a rule box to add the Generate MD5 Hash rule box.

Select Save.
For example, you have the following values in the id attribute and want to create an MD5 hash for each ID. You can achieve this with the Generate MD5 Hash rule box:
id (before) | id (after) |
|---|---|
15486932 |
|
| |
17854695 |
|
58467896 |
|
Generate Random Number
The Generate Random Number rule box creates random numbers and overwrites the current values with these numbers. You can use this rule box to generate IDs for your products. However, every product row gets a new random ID every time, which means one product can have multiple IDs if your site contains multiple rows for the same product. If you need IDs that uniquely identify products without creating ambiguity, see Generate Unique ID.
Note
With every refresh in Data View and every site run, the generated number changes.
Take the steps from Add a rule box to add the Generate Random Number rule box.

Select Save.
For example, you have mostly empty values in the description_id attribute and want to generate random numbers to create description IDs. All the descriptions in your site are different, so you can safely generate random IDs for these descriptions without worrying about duplicates. You can achieve this with the Generate Random Number rule box:
description_id (before) | description_id (after) |
|---|---|
33 |
|
| |
| |
|
If you refresh Data View, the description IDs will change to new random numbers.
Generate Unique ID
The Generate Unique ID rule box creates unique IDs for products and overwrites the current values with these IDs. It generates the same ID for all products that have the same values in the current attribute or any other chosen attributes within your site. You can also generate IDs for your products based on values in multiple attributes so that products with the same values across all the chosen attributes have the same ID.
Tip
You can use the Unique ID Generator data service to create IDs for all the products within your site, project, or organization. See Create unique IDs for your products with the Unique ID Generator.
Take the steps from Add a rule box to add the Generate Unique ID rule box.
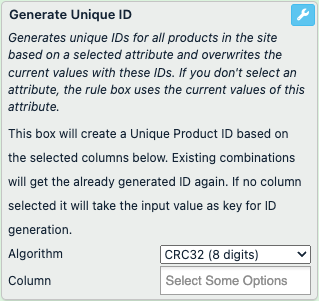
In Algorithm, choose what type of algorithm the rule box should use to create your IDs.
Options producing IDs with numbers only:
SHA1 (48 digits) uses the SHA-1 hash function to create roughly 48-character long IDs with numbers only. For example,
84044912709718804110787965505457268176973725696.SHA256 (±70 digits) uses the SHA-256 hash function to create roughly 70-character long IDs with numbers only. For example,
81983725597162597899440910891210119525448112224341689875515260969905123491840.CRC32 (8 digits) uses the cyclic redundancy check algorithm to create 10-character long IDs with numbers only. For example,
3212973355. This is the default option.
Options producing IDs with letters and numbers:
SHA1 (40 digits) uses the SHA-1 hash function to create 40-character long IDs with numbers and letters. For example,
0eb8b4484399e1de23588be80cdb85ee416ffbea.SHA256 (64 digits) uses the SHA-256 hash function to create 64-character long IDs with numbers and letters. For example,
b54124f069a39c825ff04eabd8b8ccbe81264179e1783d4046a9eece93eb8cc7.
In Column, select what attributes the rule box should use as a basis for ID generation. For example, if two products have the same value in the chosen base attributes, the rule box creates the same ID for both products.
Note
If you don't select an attribute, the rule box follows the same logic using the values of the current attribute.
Select Save.
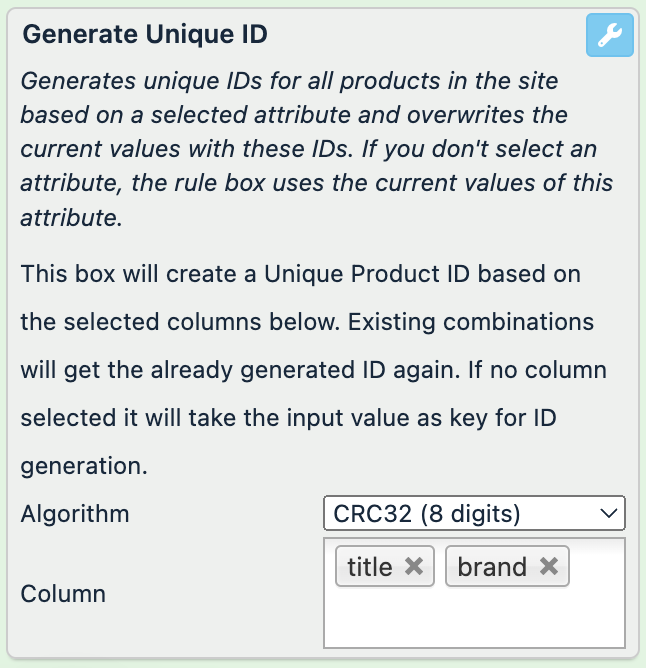
For example, you have mostly empty values in the id attribute and want to create IDs based on the contents of title and brand because the combination of these values uniquely identifies your products. You can achieve this with the following setup of the Generate Unique ID rule box:
title (no changes) | brand (no changes) | id (before) | id (after) |
|---|---|---|---|
Flat leather sandals with a bow | Massimo Dutti | 33 |
|
High-heel sandals with a buckle | Manolo Blahnik |
| |
Square-toed loafers | COS | 24 |
|
Flat leather sandals with a bow | Massimo Dutti |
| |
Square-toed loafers | & Other Stories |
|
The rule box identified the Flat leather sandals with a bow product by Massimo Dutti as the same product and assigned 2292198251 as an ID in both cases.
Extract data from values delimited with commas or semicolons
The rule box category Other contains the rule boxes Custom Product_type and Xml Key Value Mapping to let you extract the longest or the mapped part of a value from attributes delimited with commas or semicolons.
Custom Product_type
The Custom Product_type rule box uses a comma (,) as a delimiter to split your values into items, identify the longest item, and overwrite the current value with the longest item. If there are multiple longest items with the same number of characters, the rule box overwrites the current value with the longest item that appears last.
Take the steps from Add a rule box to add the Custom Product_type rule box.

Select Save.
For example, you have the following values in the colors attribute and want to display only the longest color in your values. You can achieve this with the Custom Product_type rule box:
colors (before) | colors (after) |
|---|---|
white, red, blue, yellow, green, black |
|
yellow, orange, red, purple |
|
khaki - black - gray | khaki - black - gray |
Xml Key Value Mapping
The Xml Key Value Mapping rule box overwrites the current values with the needed parts of a value from a selected attribute if another selected attribute contains a match of a regular expression (regex). This rule box works specifically with two interconnected attributes whose values are delimited with a semicolon and a space character (; ).
For example, attribute A contains the value key 1; key 2; key 3; key 4, and attribute B contains the value value 1; value 2; value 3; value 4. The rule box uses a regex to find the needed key in attribute A and then overwrites the current value with the part of attribute B that corresponds to the needed key in attribute A.
See Rule box category Use regular expressions for more information on regex.
Note
The Xml Key Value Mapping rule box looks for one regex match only and ignores all subsequent regex matches in your key attribute.
Take the steps from Add a rule box to add the Xml Key Value Mapping rule box.
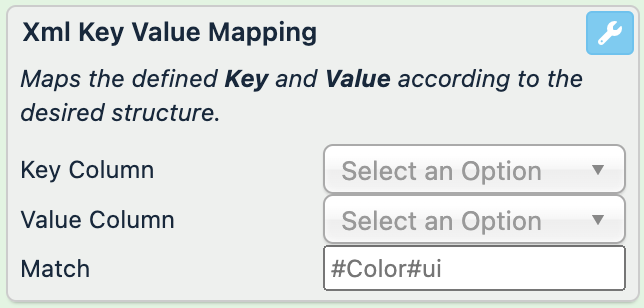
In Key Column, select the attribute whose values the rule box should search using a regex. The attributes listed here and their searched contents come from a previous stage.
In Value Column, select the attribute where the rule box should map the regex match to a corresponding part of the value. The rule box then uses the mapped part of the value from this attribute to overwrite the values in the current attribute.
The attributes listed here and their searched contents come from a previous stage.
In Match, enter a regular expression to find the needed key in the first selected attribute.
Note
An example of a regex is
/([A-Z])\w+/. If you run a search in a text and use this regular expression, you can find all words in the searched text that have uppercase letters from A to Z. In Productsup, you can use this regex as is or change the opening and closing forward slashes to hash signs:#([A-Z])\w+#.See Rule box category Use regular expressions for more information on using regular expressions in Productsup.
Select Save.
For example, the attribute_names attribute contains names of multiple product attributes delimited with a semicolon and a space character (; ), and the attribute_values attribute contains the values of those attributes stored in the same order and delimited in the same way. You want to extract product IDs from the attribute_values attribute into the id attribute. You can achieve this with the following setup of the Xml Key Value Mapping rule box:
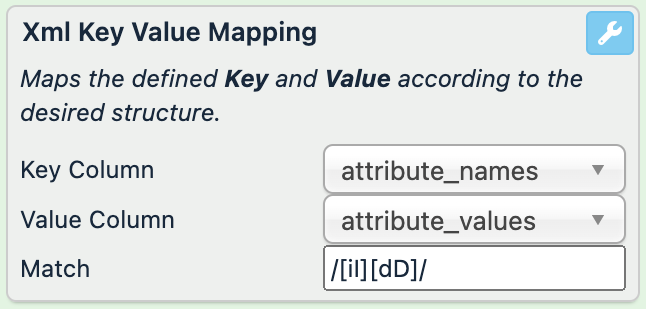
attribute_names (no changes) | attribute_values (no changes) | id (before) | id (after) |
|---|---|---|---|
brand; price; title; id | Gucci; 1400.00 EUR; Tall rubber boots; 1547896544 | 1 |
|
title; ID; size; availability; brand | Eco-leather sneakers; 8475; ; out of stock; |
| |
id; brand; color; title; id | 971; Prada; yellow; Flat leather sandals with a bow; 4444 | 3 |
|
If you want to extract brands from the attribute_values attribute into the brand attribute, you can use the regex /brand/ and get the following result:
attribute_names (no changes) | attribute_values (no changes) | brand (before) | brand (after) |
|---|---|---|---|
brand; price; title; id | Gucci; 1400.00 EUR; Tall rubber boots; 1547896544 | C&A |
|
title; ID; size; availability; brand | Eco-leather sneakers; 8475; ; out of stock; | ||
id; brand; color; title; id | 971; Prada; yellow; Flat leather sandals with a bow; 4444 | H&M |
|
Work with tracking links
The rule box category Other contains the rule boxes ePro Tracking and RefinedLabs Tracking to let you create tracking links using attributes in your site.
ePro Tracking
The ePro Tracking rule box percent-encodes your current URLs and transforms them into tracking or deep links using the http://ad.eanalyzer.de/ domain and URL parameters populated with the desired static and dynamic values.
Take the steps from Add a rule box to add the ePro Tracking rule box.
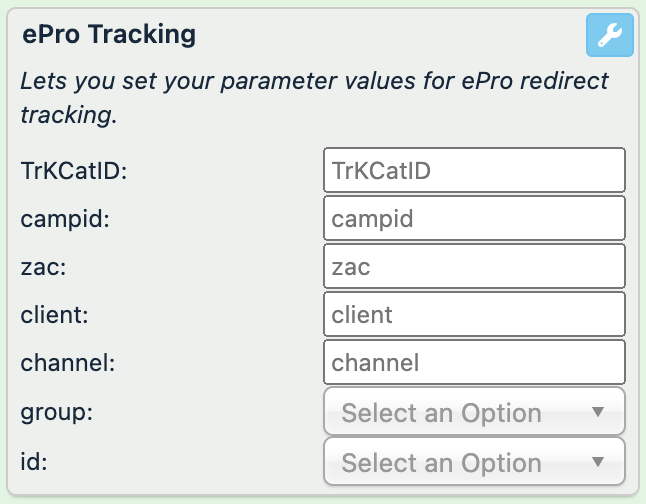
Choose dynamic values for your output URLs:
In group, select the attribute whose values the rule box should add as values for the
groupproperty of your output URL. For example, it can be your category attribute. The attributes listed here and their contents come from a previous stage.In id, select the attribute whose values the rule box should add as values for the
idproperty of your output URL. For example, it can be your id attribute. The attributes listed here and their contents come from a previous stage.
Optionally, you can add more parameters to your output URL. Use the following fields to add static values to all links:
In TrKCatID, enter your tracking category ID.
In campid, enter the ID of your tracking campaign.
In zac, enter a value for the
zacproperty of your output URL.In client, enter a value for the
clientproperty of your output URL.In channel, enter a value for the
channelproperty of your output URL.
Select Save.
For example, you have the following values in the link attribute and want to transform them into tracking URLs starting with http://ad.eanalyzer.de/ and featuring your products' categories and IDs, as well as the tracking category ID and the campaign ID. You can achieve this with the following setup of the ePro Tracking rule box:
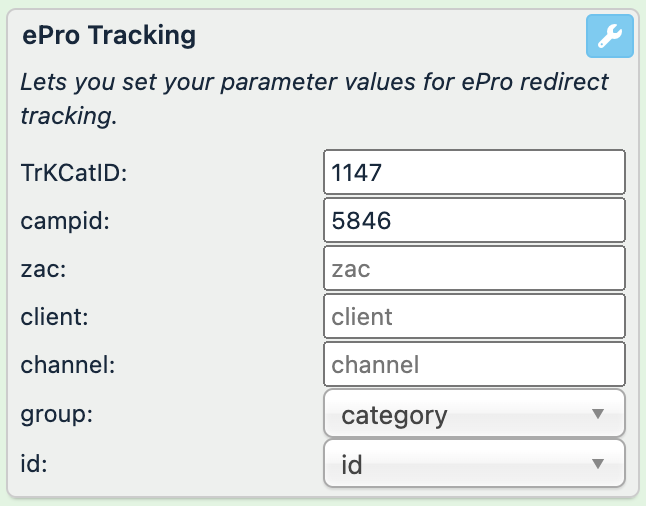
category (no changes) | id (no changes) | link (before) | link (after) |
|---|---|---|---|
Apparel & Accessories > Shoe Accessories | 111 | https://www.your-store.com/images/white-socks-1?utm_campaign=google_play~ |
|
Home & Garden > Linens & Bedding > Bedding > Blankets | 222 | https://www.your-store.com/images/black-socks-1 |
|
Apparel & Accessories > Clothing > Underwear & Socks | 333 | https://www.your-store.com/images/black-socks-2 |
|
RefinedLabs Tracking
The RefinedLabs Tracking rule box percent-encodes your current URLs and transforms them into tracking or deep links using the http://r.refinedads.com/ domain and URL parameters populated with the desired static and dynamic values.
Take the steps from Add a rule box to add the RefinedLabs Tracking rule box.
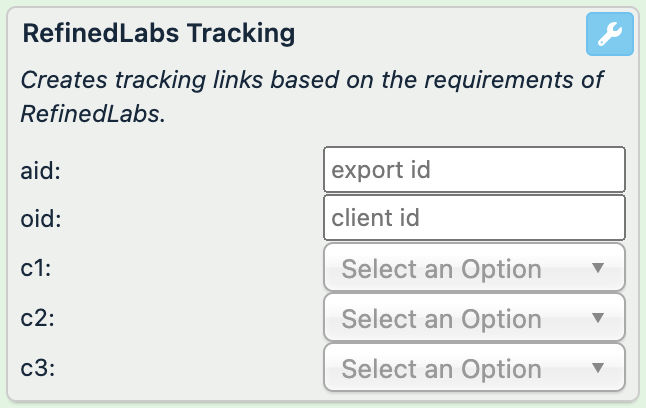
Use the following fields to add static values to all links:
In aid, enter a value for the
aidproperty of your output URL.In oid, enter a value for the
oidproperty of your output URL.
Choose dynamic values for your output URLs:
In c1, select the attribute whose values the rule box should add as values for the
c1property of your output URL. The attributes listed here and their contents come from a previous stage.In c2, select the attribute whose values the rule box should add as values for the
c2property of your output URL. The attributes listed here and their contents come from a previous stage.In c3, select the attribute whose values the rule box should add as values for the
c3property of your output URL. The attributes listed here and their contents come from a previous stage.
Select Save.
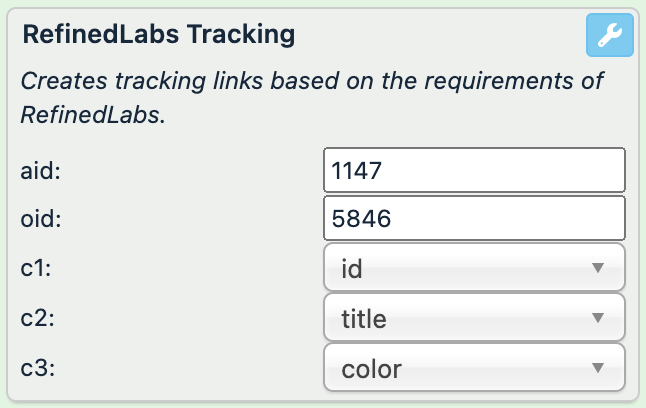
For example, you have the following values in the link attribute and want to transform them into tracking URLs starting with http://r.refinedads.com/ and featuring your products' IDs, titles, and colors, as well as the export and client IDs. You can achieve this with the following setup of the RefinedLabs Tracking rule box:
id (no changes) | title (no changes) | color (no changes) | link (before) | link (after) |
|---|---|---|---|---|
111 | Flat leather sandals with a bow | white | https://www.your-store.com/images/flats-1?utm_campaign=google_play~ |
|
222 | High-heel sandals with a buckle | yellow | https://www.your-store.com/images/heels-2 |
|
333 | Square-toed loafers | khaki | https://www.your-store.com/images/loafers-1 | http://r.refinedads.com/r.rfa?aid=1147&oid=5846&c1=333&c2=Square-toed+loafers&c3=khaki&url=https%3A%2F%2Fwww.your-store.com%2Fimages%2Floafers-1 |
Work with JSON
The rule box category Other contains the rule boxes Extract Value from Json and Extract with JSONPath to let you extract the needed keys from JSON bodies.
Extract Value from Json
The rule box Extract Value from Json extracts a value from a specific field within a JSON object. It works with JSON bodies that contain only one object. To extract values from JSON bodies with multiple objects, use the Extract with JSONPath rule box. See Extract with JSONPath.
Take the steps from Add a rule box to add the Extract Value from Json rule box.
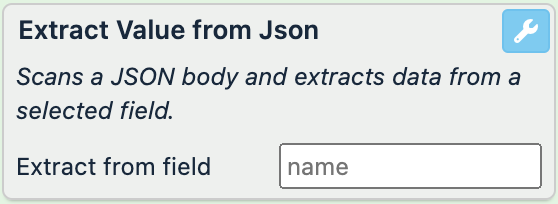
In Extract from field, enter the name of the key where you want to extract a value.
Select Save.
For example, you have the following values in your GTIN attribute and want to have only the GTINs in your values instead. You can achieve this with the Extract Value from Json rule box by entering GTIN in the setup:
GTIN (before) | GTIN (after) |
|---|---|
{
   "GTIN":"4028516019993",
   "height":"30 MM",
   "color1":"black",
   "color2":"gray",
   "color3":"white"
}
|
|
{
   "height":"50 MM",
   "GTIN":"4026402626043",
   "color1":"yellow",
   "color2":"orange",
   "color3":""
}
|
|
Extract with JSONPath
The Extract with JSONPath rule box extracts values from specific fields within a JSON body using the path to the needed key. It is useful if your JSON bodies have multiple objects with the same or similar sets of keys. See JSONPath Online Evaluator to learn about JSONPath syntax and test it.
Note
The Extract with JSONPath rule box supports Twig input. To reference values from other attributes, you can use a Twig template in your JSONPath. See Twig-based rule box capabilities to enhance your product data for more information on using Twig with rule boxes in Productsup.
Take the steps from Add a rule box to add the Extract with JSONPath rule box.
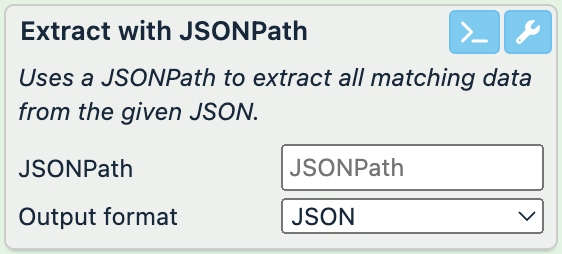
In JSONPath, enter the query to filter all keys in the JSON structure and extract the needed values. Optionally, you can use a Twig template inside your JSONPath to reference other attribute's values.
If needed, you can use the AI-based JSONPath generator to create the needed JSONPath.
Select the >_ icon in the top-right corner of the rule box.

Describe what you want to extract from the JSON body in the JSONPath generator window and select Generate.
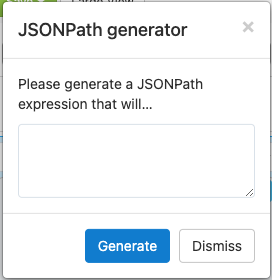
Select Copy and then choose Dismiss.
Paste the copied suggestion into the JSONPath field of the rule box.
In Output format, select how the platform should display the extracted values:
JSON overwrites the current value with the extracted values formatted as a JSON body. This is the default option.
Comma-separated list overwrites the current value with the extracted values separated by commas.
Select Save.
For example, you have the following values in your GTIN attribute and want to have only the GTINs in your values instead. You can achieve this with the Extract with JSONPath rule box by entering $.[?(@.GTIN != "")].GTIN in JSONPath:
GTIN (before) | GTIN (after) |
|---|---|
[
   {
      "GTIN":"4028516019993",
      "height":"30 MM",
      "color1":"black",
      "color2":"gray",
      "color3":"white"
   },
   {
      "height":"50 MM",
      "GTIN":"4026402626043",
      "color1":"yellow",
      "color2":"orange",
      "color3":""
   },
   {
      "height":"70 MM",
      "GTIN":"",
      "color1":"green",
      "color2":"blue",
      "color3":"purple"
   }
]
|
|
[
   {
      "GTIN":"7564538217089",
      "color1":"black",
      "color2":"gray",
      "color3":"orange"
   },
   {
      "GTIN":"7564538217000",
      "color1":"black",
      "color2":"white",
      "color3":""
   },
   {
      "GTIN":"",
      "color1":"lilac",
      "color2":"red",
      "color3":"yellow"
   }
]
|
|
If you want to extract values from your JSON bodies based on the values of another attribute, you can use a Twig template in your JSONPath. For example, you can use the JSONPath $.[?(@.height == "{{ height }}")].GTIN where the Twig {{ height }} lets you reference the needed GTIN within the JSON body to extract values as follows:
height (no changes) | GTIN (before) | GTIN (after) |
|---|---|---|
30 MM | [
{
"GTIN":"4028516019993",
"height":"30 MM",
"color1":"black",
"color2":"gray",
"color3":"white"
},
{
"height":"50 MM",
"GTIN":"4026402626043",
"color1":"yellow",
"color2":"orange",
"color3":""
},
{
"height":"70 MM",
"GTIN":"",
"color1":"green",
"color2":"blue",
"color3":"purple"
}
]
|
|
50 MM | [
{
"GTIN":"4028516019993",
"height":"30 MM",
"color1":"black",
"color2":"gray",
"color3":"white"
},
{
"height":"50 MM",
"GTIN":"4026402626043",
"color1":"yellow",
"color2":"orange",
"color3":""
},
{
"height":"70 MM",
"GTIN":"",
"color1":"green",
"color2":"blue",
"color3":"purple"
}
]
|
|
Work with site tags
The rule box category Other contains the rule boxes Get Site-Tag by Name, Set Property Value, and Set To Site ID to let your exported data contain information about the Productsup site where your product data originates from.
Get Site-Tag by Name
The Get Site-Tag by Name rule box overwrites your current values with the value of the needed tag located in the settings of the site. It is useful when exporting data via API because it helps you learn what site the data comes from. See Add tags to a site to add a site tag.
Take the steps from Add a rule box to add the Get Site-Tag by Name rule box.

In Tagname, enter the name of the site tag whose value you want to add in the current attribute.
Select Save.
For example, you export your product data from multiple Productsup sites into one of your internal systems using an API. You see an issue with the product data in your internal system, but you don't know which site in Productsup to open to fix the issue. You can use site tags to help you locate the source site.
In one of the sites, you create the following site tag:

In the same site, you create the project_country_tag attribute where you want to store the value of the corresponding site tag. You can achieve this with the Get Site-Tag by Name rule box by entering project_country as the tag name:
project_country_tag (before) | project_country_tag (after) |
|---|---|
|
|
|
|
|
|
Set Property Value
The Set Property Value rule box uses a Twig template to add site information, such as a site ID or a site tag, in your current values. It is useful when exporting data via API because it helps you learn what site the data comes from.
See Twig-based rule box capabilities to enhance your product data to learn how to work with Twig in Productsup. See Add tags to a site to add a site tag if needed.
Take the steps from Add a rule box to add the Set Property Value rule box.
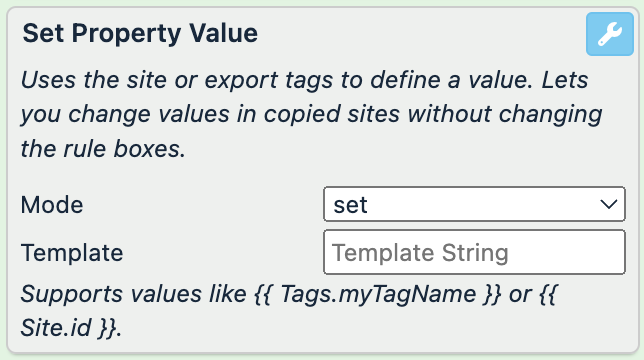
In Mode, select a suitable value modification option:
set completely overwrites the current value with the desired site information. This is the default option.
append adds the desired site information at the end of the current value and separates it with a space character.
prepend adds the desired site information at the beginning of the current value and separates it with a space character.
In Template, enter the Twig that should add the needed site information in the current attribute. For example,
{{ Site.id }}adds a site ID and{{Tags.tag1}}adds the value of a site tag named tag1.Select Save.
For example, you export your product data from multiple Productsup sites into one of your internal systems using an API. You see an issue with the product data in your internal system, but you don't know which site in Productsup to open to fix the issue. You can use site tags to help you locate the source site.
In all the sites that export data to your internal system, you create a site tag called project_country and assign the needed country value to it as follows:

Then, you create the project_country_tag attribute in all of these sites. In this attribute, you want to store the value of the corresponding site tag.
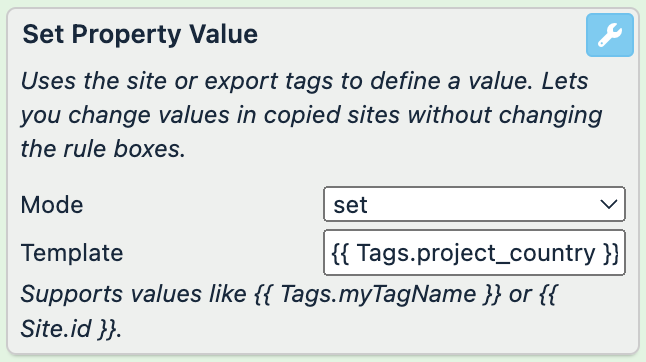
In the site where the created site tag has the value germany, you add the following setup of the Set Property Value rule box to the project_country_tag attribute to add the needed site tag value as shown:
project_country_tag (before) | project_country_tag (after) |
|---|---|
| |
| |
|
Tip
Now, instead of adding and setting up this rule box in all the other sites, you can use the bulk option Add Dataflow Boxes to copy this rule box setup to the other sites in bulk. See Apply rule boxes in bulk across multiple sites.
Set To Site ID
The Set To Site ID rule box overwrites your current values with the ID of the current site. It is useful when exporting data via API because it helps you learn what site the data comes from.
Take the steps from Add a rule box to add the Set To Site ID rule box.

Select Save.
For example, you export your product data from multiple Productsup sites into one of your internal systems using an API. You see an issue with the product data in your internal system, but you don't know which site in Productsup to open to fix the issue.
You create the site_id attribute in a site where the ID is 11118888. In this attribute, you want to store the site ID. You can achieve this with the Set To Site ID rule box:
site_id (before) | site_id (after) |
|---|---|
| |
| |
|