Add a project
Learn about projects in Productsup and add them to your organization to set sites in a clear structure.
Introduction
According to the Productsup data structure, each site should exist in a project. The project is a container for sites, and you need to add a project to your Productsup organization before creating sites.
It is up to you to define the names and hierarchy of your projects and sites within Productsup.
Add a project to your organization
You may have access to several organizations, each of which has its projects, sites, and settings. If you have only one organization, you can go to the organization level one of the following ways:
Select your organization name at the top of the main menu (highlighted in red).
Select your organization name in the breadcrumbs (highlighted in blue).
Go directly to the link ending with your organization ID, for example,
https://platform.productsup.com/overview/account/123456.

Select Add Project.
Enter a name for your project.
Select Save. This action creates a project and redirects you to the project level in Productsup, where you can see an overview of the selected project and all its sites.

Note
To see an overview of all projects within your organization, go to the organization level described in Step 1.
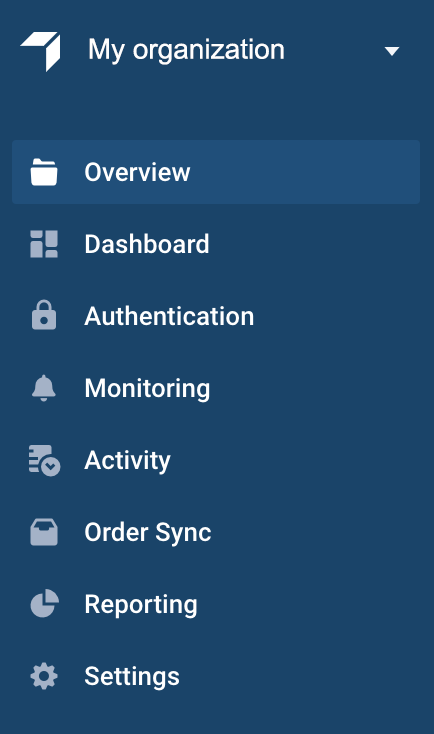
Project's main menu
You can open the project-level menu by selecting it in breadcrumbs.

The project's main menu features include:
Overview: an overview of all sites within the selected project available for you according to your access rights.
Dashboard: an overview of errors and warnings occurring in the sites belonging to the project.
Authentication: a feature that lets you add and view your authentications with external systems. See Add OAuth authentication to external systems for more information.
Monitor: a feature that lets you set up email alerts for error events and process breaks. See Monitor events overview for more information.
Activity: a summary of maintained and exported products by a selected month.
Reporting: settings to generate and download performance reports for clicks and orders of the selected exports.
Settings: a page where you can rename, delete, or move a site to another project.
Note
The list of available features depends on your user access rights. See User types and access rights for more information.
Use the navigation bar of the project level
Once you've created a project, you can use the upper ribbon to apply various actions to the sites within the chosen project.

Use the Search field to find a site by its name.
Use the Filter, Recent, Exports, and Tags drop-down menus to filter sites within the selected project based on their states, time of creation, available exports, and tags. You can add tags in the project level:
Select the Tag drop-down menu in the needed project line.
Select Add new tag or select a tag from the list of existing tags.

Add key and value and select Save.
Note
In the project level, you can only add new tags or select from the existing tags. To edit or delete tags, go to the Setting in the site level. See Edit or delete tags.
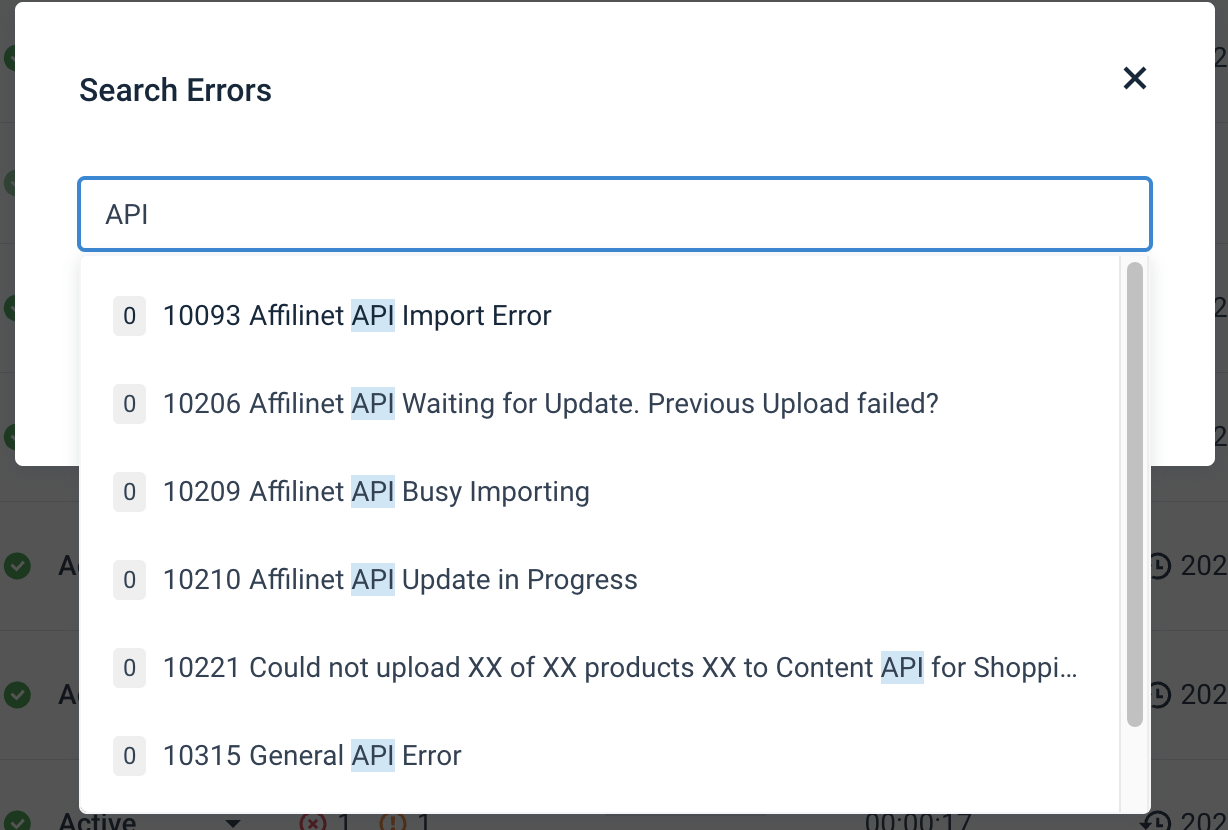
To search for errors, select Errors and start typing the error name. Select the necessary error from the drop-down list and choose Search to see the sites with the error.
To get the meaning of the errors, see Error log codes and troubleshooting overview. Alternatively, you can view the error history in Error Log in the main menu.

Tip
Use Clear Filters in the upper ribbon to restore the page view before the error searching.
Select the graph icon to change the project view and have different columns describing your sites. By default, the warning view is active.
The graph view provides such columns as ID, Title, State, Imported, Changed, Export(ed), Tags, Last Duration, and Last/Next Run.

The warning view provides such columns as ID, Title, State, Errors/Warnings, Imported, Last Duration, and Last/Next Run.

Note
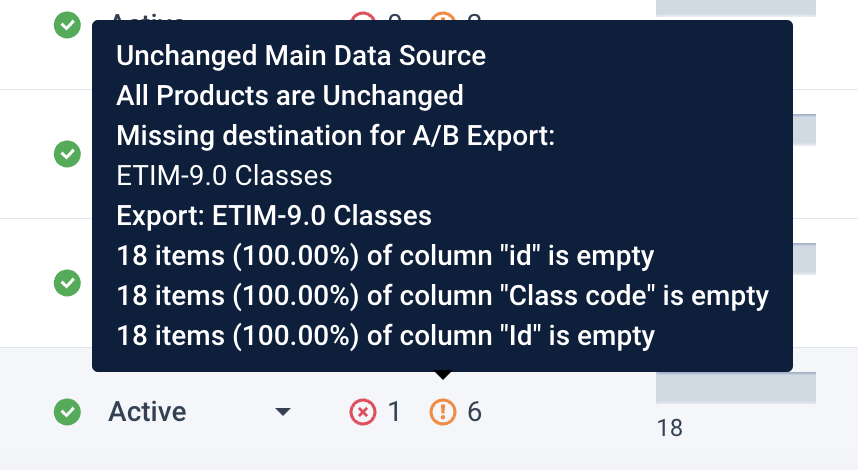
The Errors/Warnings column shows the number of errors and warnings during the last run. To see the list of errors, hover over the red cross icon. To see the list of warnings, hover over the orange exclamation mark icon.

Perform a bulk action on multiple projects and sites simultaneously by selecting Bulk Option. See Use bulk options to perform actions across multiple sites for more information.
Select Download to download a list of all sites within the selected project as a CSV file.
Select Clear Filters, to restore the default state of the page before using any filters.
Sort through sites by any column selecting the column title and using the up and down arrows.