Send your data to Microsoft SharePoint
Use blank export to export your data to MS SharePoint.
Introduction
You can export data from Productsup to Microsoft SharePoint using the Blank Export (empty) and Blank Export (with ID) with one of the following destinations:
MS SharePoint for CSV and XLSX to export CSV and XLSX files.
MS SharePoint for XML to export XML files.
Note
You may need some technical expertise to set up an export to Microsoft SharePoint.
Prerequisites
To use Microsoft SharePoint in Productsup, you need to set up the integration with Productsup:
Step 1: Create an app registration and save the account data for further setup
Go to Microsoft Azure portal.
Go to the Entra ID.
Go to App registrations and create a new registration by taking all the steps in the wizard.
Tip
Name your registration Productsup-sharepoint-connector and decide on the supported accounts. A single-tenant should be enough, but this depends on your organisation.
When you created the application, save separately the following details that you will need for the data source setup:
Application (client) id for Client Id
Directory (tenant) id for Tenant Id.
Go to API permissions from the menu to set the permissions:
User.Read
Sites.Selected.
Switch on the Grant admin consent for [Company].
Go to Certificates & secrets from the menu and generate a new client secret. Give it a description and set expiry date. Save it as your Client secret for further data source setup.
Step 2: Give the application access to the specific sites
To give an enterprise application or app registration access to a specific site or multiple sites in SharePoint, you need to execute a SharePoint PnP PowerShell script. You can use the script provided below as a starting point and ask your internal IT team to adjust it for you.
A CSV file mentioned in the script should contain the following:
A list of MS SharePoint site URLs.
Your admin account User Principal Name.
The app ID or AppDisplayName.
Note
You need the Administrator rights of your MS SharePoint account to execute the script.
# Connecting to the <Company name> SPO Service and importing the SPO PNP Module
Connect-SPOService -URL <InsertTenantSPAdminURL>
Import-Module PnP.PowerShell
##########################################################################################################################
#                                                                                                                        #
# The following part gives the respective Enterprise Application their neccessary rights.                                 #
# It does so by using the .csv file from the previous part as input for sites to give the respective rights for.         #
#                                                                                                                        #
##########################################################################################################################
$SPSitelist = <InsertPathToCSVContainingListOfSPSites>
$ADMAccount = <InsertUsedADMAccount>
$AppID = <InsertAppID>
$Displayname = <InsertAppDisplayname>
foreach ($SPSite in $SPSitelist)
{
    write-output $SPSite
    Set-SPOUser -site $SPSite -LoginName $ADMAccount -IsSiteCollectionAdmin $True -Verbose
    Connect-PnPOnline [yourtenant].sharepoint.com -Interactive -ClientId <client id of your Entra ID Application Registration>
    Grant-PnPAzureADAppSitePermission -AppId $AppID -DisplayName $Displayname -Site $SPSite -Permissions Write -Verbose
    Set-SPOUser -site $SPSite -LoginName $ADMAccount -IsSiteCollectionAdmin $False -Verbose
}
Tip
You can also toggle between Write and Read permission by changing the respective permissions parameter in the foreach loop.
If you need help with providing access, you can contact support@productsup.com.
Set up export for MS SharePoint
To export your data to MS SharePoint, you can use one of the blank export templates:
Blank Export (empty) lets you manually create a custom set of attributes in the export stage of Dataflow.
Blank Export (with ID) is similar to Blank Export (empty) but has the id attribute pre-defined as a mandatory attribute in the export stage in Dataflow.
The process of setting up the exports Blank Export (empty) and Blank Export (with ID) is similar:
Go to Exports from your site's main menu.
Select Add export.
Select the necessary blank export in the gray banner under the search field.

Go to Dataflow from the site's main menu and select your blank export from the dropdown on the left of the top toolbar.
Map the needed attributes from intermediate to export by dragging a connection from an attribute in the intermediate stage to Drop or Click to add new field in the export stage.

Note
For Blank Export (with ID), the id attribute is the only mandatory attribute. You must connect it with a corresponding attribute in the intermediate stage.
Go to Exports, find your blank export in the list of exports, and toggle its status in the Status column to Active.
Select the name of your blank export in the Export name column.
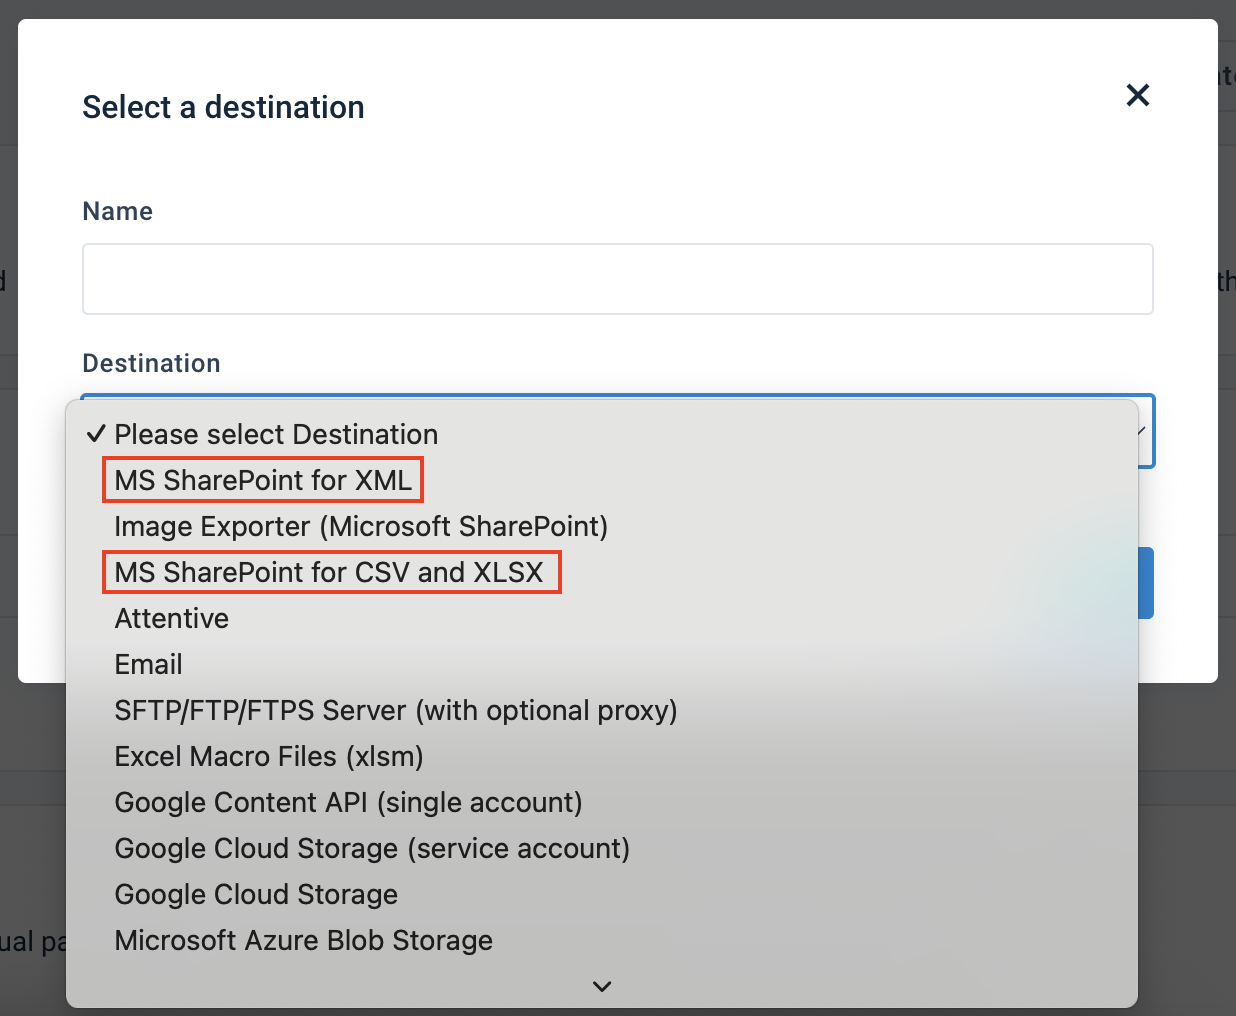
Select Add Destination, and choose MS SharePoint for CSV and XLSX or MS SharePoint for XML from the drop-down menu. Select Save. See Set up MS SharePoint for CSV and XLSX or Set up MS SharePoint for XML for further setup steps.

Select Export this export in the top-right corner of the page to send your data to the destination. Alternatively, the platform exports the data during the next scheduled run.
Set up MS SharePoint for CSV and XLSX
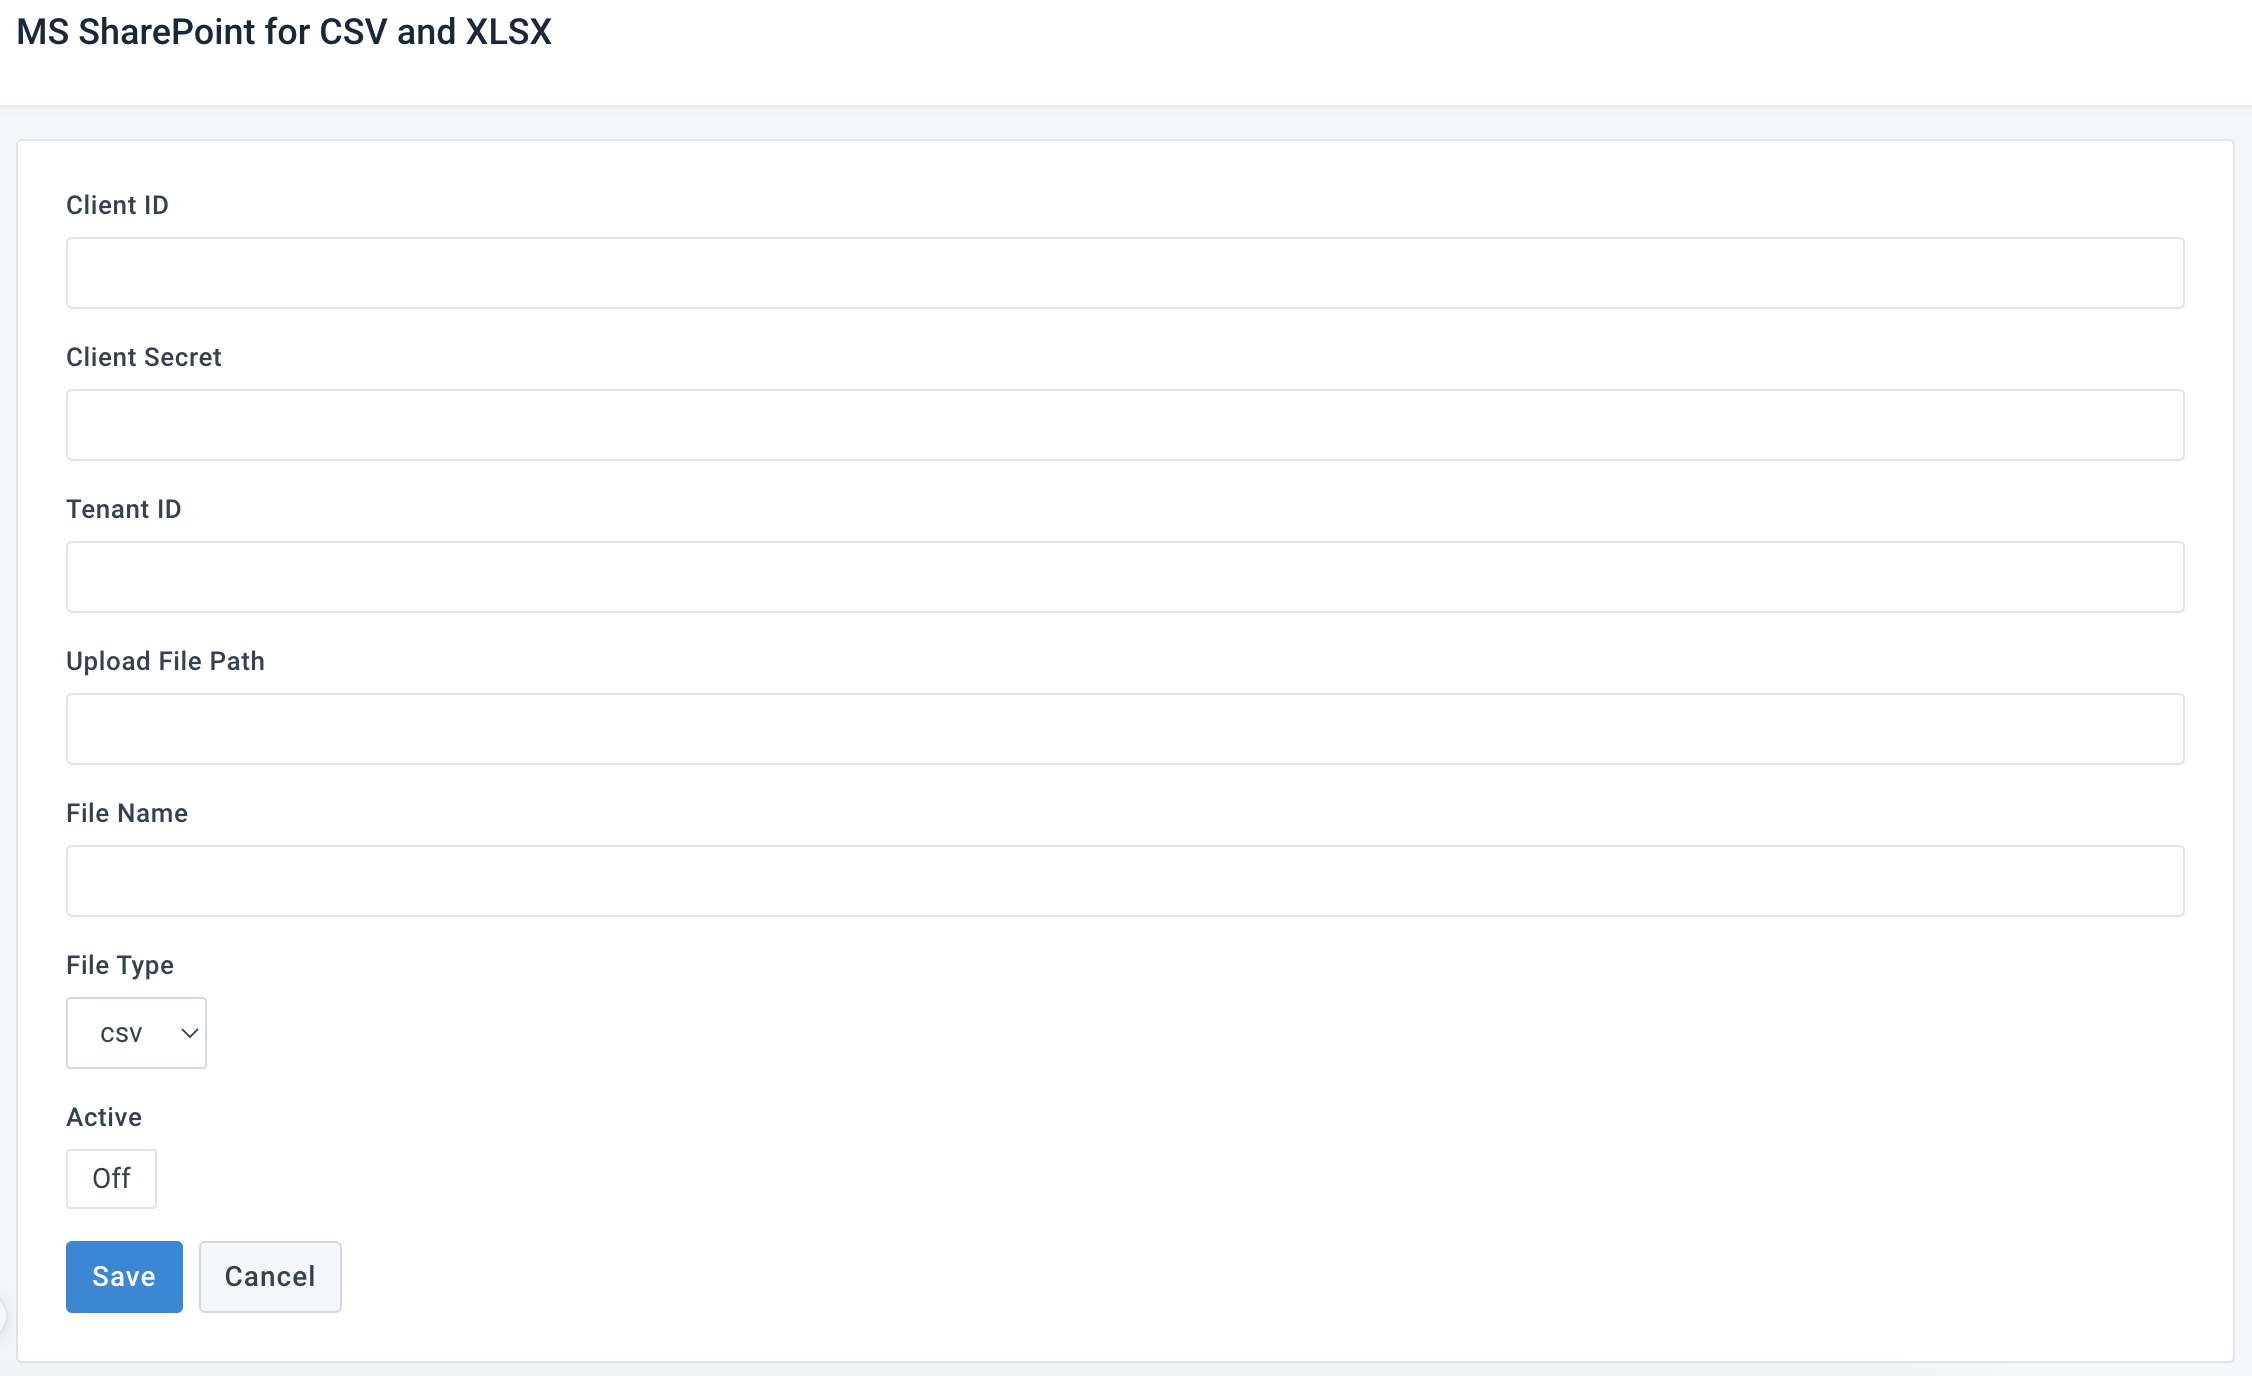
To set up the destination MS SharePoint for CSV and XLSX, enter your Microsoft SharePoint data from the Prerequisites into the following fields:
In Client ID, enter your MS SharePoint client ID.
In Client Secret, enter our MS SharePoint client secret's value.
Important
For an already set-up export.
If, after some time, you start experiencing the export fail, it can mean that your client secret has expired, and you must update it:
Generate a new client secret in your MS SharePoint account.
Enter the new client secret's value in the Client Secret field. Don't use the Secret ID.
Leave Client ID unchanged.
In Tenant ID, enter your MS SharePoint tenant ID.
In Upload File Path, add the location path of the file.
In File Name, enter the name of the uploaded file.
In File Type, select the type of the shared file: csv or xlsx.
Note
Check if access to the file in MS SharePoint isn't restricted.
Set Active to On, to activate the destination.
Select Save.

Set up MS SharePoint for XML
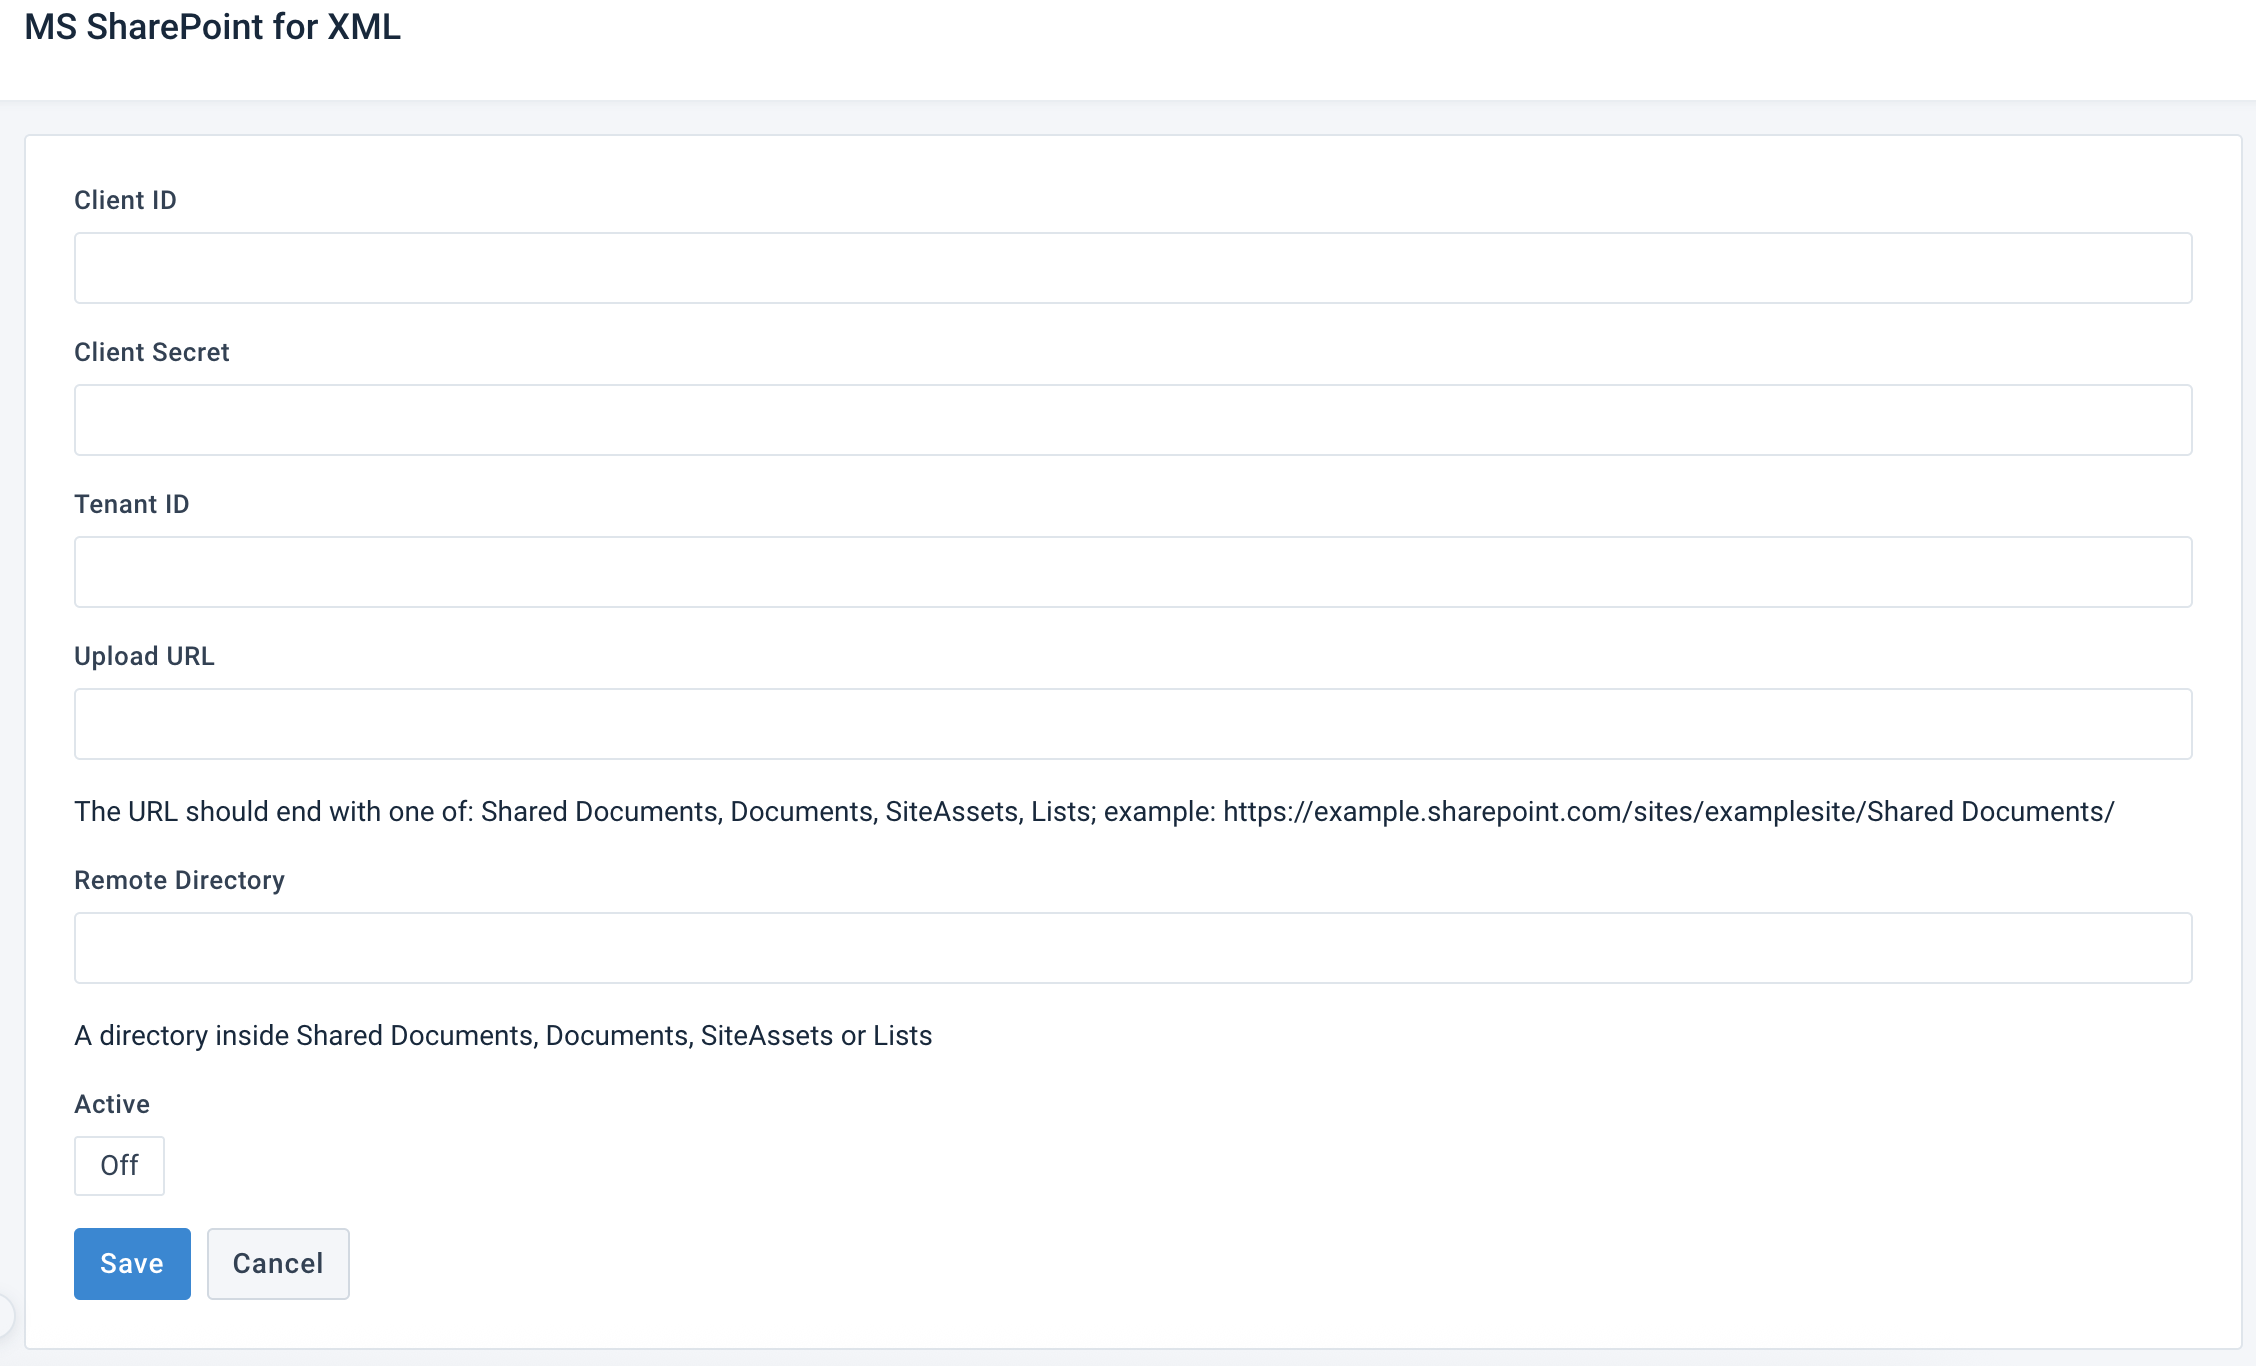
To set up the destination MS SharePoint for XML, enter your Microsoft SharePoint data from the Prerequisites into the following fields:
In Client ID, enter your MS SharePoint client ID.
In Client Secret, enter your MS SharePoint client secret's value.
Important
For an already set-up export.
If, after some time, you start experiencing the export fail, it can mean that your client secret has expired, and you must update it:
Generate a new client secret in your MS SharePoint account.
Enter the new client secret's value in the Client Secret field. Don't use the Secret ID.
Leave Client ID unchanged.
In Tenant ID, enter your MS SharePoint tenant ID.
In Upload URL, add the location URL of the file. The URL should end with one of the following: Shared Documents, Documents, SiteAssets, or Lists. For example,
https://example.sharepoint.com/sites/examplesite/Shared Documents/In Remote Directory, enter a directory inside the Sharepoint Shared Documents, Documents, SiteAssets, or Lists, where the file should be uploaded.
Set Active to On, to activate the destination.
Select Save.
