Add longitude and latitude with the Geolocation service
Enrich your data feed with latitude and longitude data with the Geolocation data service in Productsup.
Introduction
If you have location information in your product feed, you can use the Geolocation data service to enhance it with latitude and longitude data.
Note
The Geolocation data service is available for the import and intermediate stages.
The Geolocation data service scans your address column and creates an additional data source in your Productsup site to add four (4) new columns containing latitude and longitude data:
___geolocation_titleis a duplicate of your address column.___geolocation_latitudecontains your latitude data.___geolocation_longitudecontains your longitude data.___geolocation_next_try_datedetermines when the platform should send the next request to the Geolocation API in case an address returned an error in the previous run.
Prerequisites
To use the Geolocation data service, you need:
An API Key for the Google Geolocation API.
Location data in the correct format. Your addresses must use the same format as the national postal service of the country in question. Separate your street address elements with spaces and, if applicable, avoid providing such info as business names and floor numbers. For example, here is a German address using the German postal service format delimited by spaces: Alex-Wedding-Straße 5 10178 Berlin.
See Geocoding request and response for more information.
A unique item identifier. See Set a unique item identifier for more information.
Add the Geolocation data service
Go to Data Services from your site's main menu and select ADD SERVICE.
Search for Geolocation, select Add, and give it a desired name and column prefix.
By default,
___geolocationis the column prefix.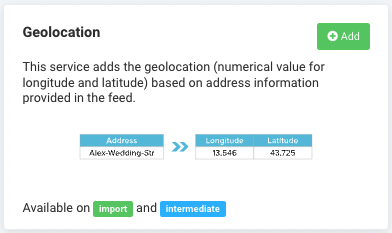
Choose the stage where you have your location data in Service Data Level and select Add.
Add your authentication data for the Google Geolocation API in API Key.
Choose the column in your feed that contains your address data in Address column.
Note
If you chose Import in Step 3, the Address column drop-down list displays the columns of your import stage. If you chose Intermediate in that field, the drop-down list contains your intermediate-stage columns.
If you want the platform to run the Geolocation data service every time there is a refresh in Data View, select the checkmark icon (✔) in Trigger during a refresh in Data View.
Select Save.
For the platform to process a new data service, select Run in the top-right corner of your site's view.
Note
If you can't see your new geolocation data in Data View, ensure the platform hasn't hidden it:
Go to Data View from your site's main menu and choose the relevant stage or export in the dropdown on your left.
Select the menu icon on the right and then select the eye icon.
Find the attributes in the list that use the custom prefix
___geolocationand select the eye icon next to each attribute you want Data View to display.Close the pop-up.
The naming of the attributes created by the Geolocation data service depends on the column prefix you choose in Step 2. The attribute names the data service generates always start with three underscores (
___), which means the platform doesn't send such attributes to your export channels.
Edit the Geolocation data service
Go to Data Services from your site's main menu.
Search for your data service.
Select the cogwheel icon (⚙) next to the desired data service to edit settings.
Select Save.
Delete the Geolocation data service
Go to Data Services from your site's main menu.
Select the cogwheel icon
 next to the desired data service.
In the Danger Area panel, select Remove this service.
Select Yes.