Set up BMEcat 2005 Single-feature Approach export channel
Standardize and simplify product catalog exchanges between suppliers and purchasing companies by setting up the BMEcat 2005 - Single-feature Approach export channel in Productsup.
Introduction
BMEcat 2005 is a product data exchange format based on XML. Developers designed BMEcat in Germany to standardize and simplify product catalog exchanges between suppliers and purchasing companies. Industries widely use it across Europe. It can also integrate with a classification system, such as ETIM.
Next, learn how to set up the BMEcat 2005 - Single-feature Approach export channel.
Compare BMEcat export channels
Before you start, be sure to choose the correct BMEcat 2005 channel based on your needs.
BMEcat 2005 - Single-feature Approach export channel | BMEcat 2005 - Bundled-features Approach export channel |
|---|---|
Your BMEcat has fewer than 50 features | Your BMEcat has more than 50 features |
You do not have a separate site handling data mapping to a classification standard, such as ETIM. | You have a separate site handling data mapping to a classification standard such as ETIM. See Set up ETIM Classes exports for setup instructions. |
If the BMEcat 2005 - Single-feature Approach export channel is right for you, take the following steps in the next section to set it up.
Set up BMEcat 2005 - Single-feature Approach export channel
Go to Exports from your site's main menu and select ADD EXPORT. Search for BMEcat 2005 - Single-feature Approach and select Add.

Give your export a custom name if desired. In this example, use the name BMEcat 2005 export. The custom name replaces the export name on the BMEcat - Single-feature Approach Overview page. Then select Add.
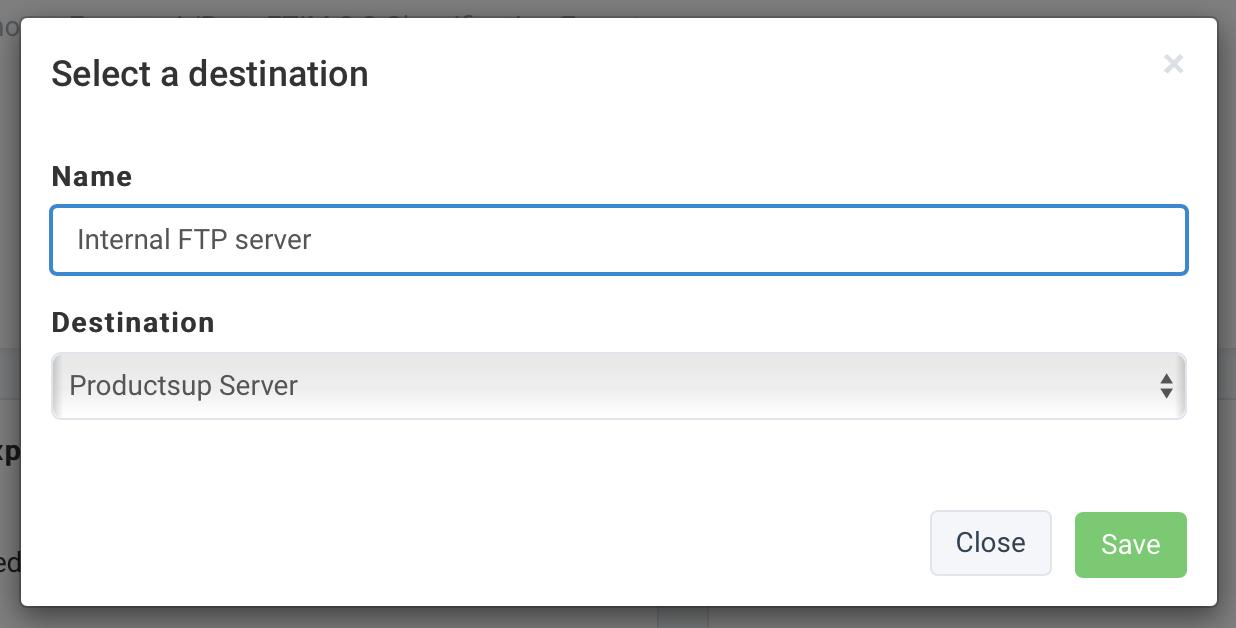
Select Add Destination and choose your destination. For the following example, choose Productsup Server from the drop-down list. Give this destination a title in Name, for example, Internal FTP server, and select Save.

Go to the Settings tab and switch Export as XML to ON.
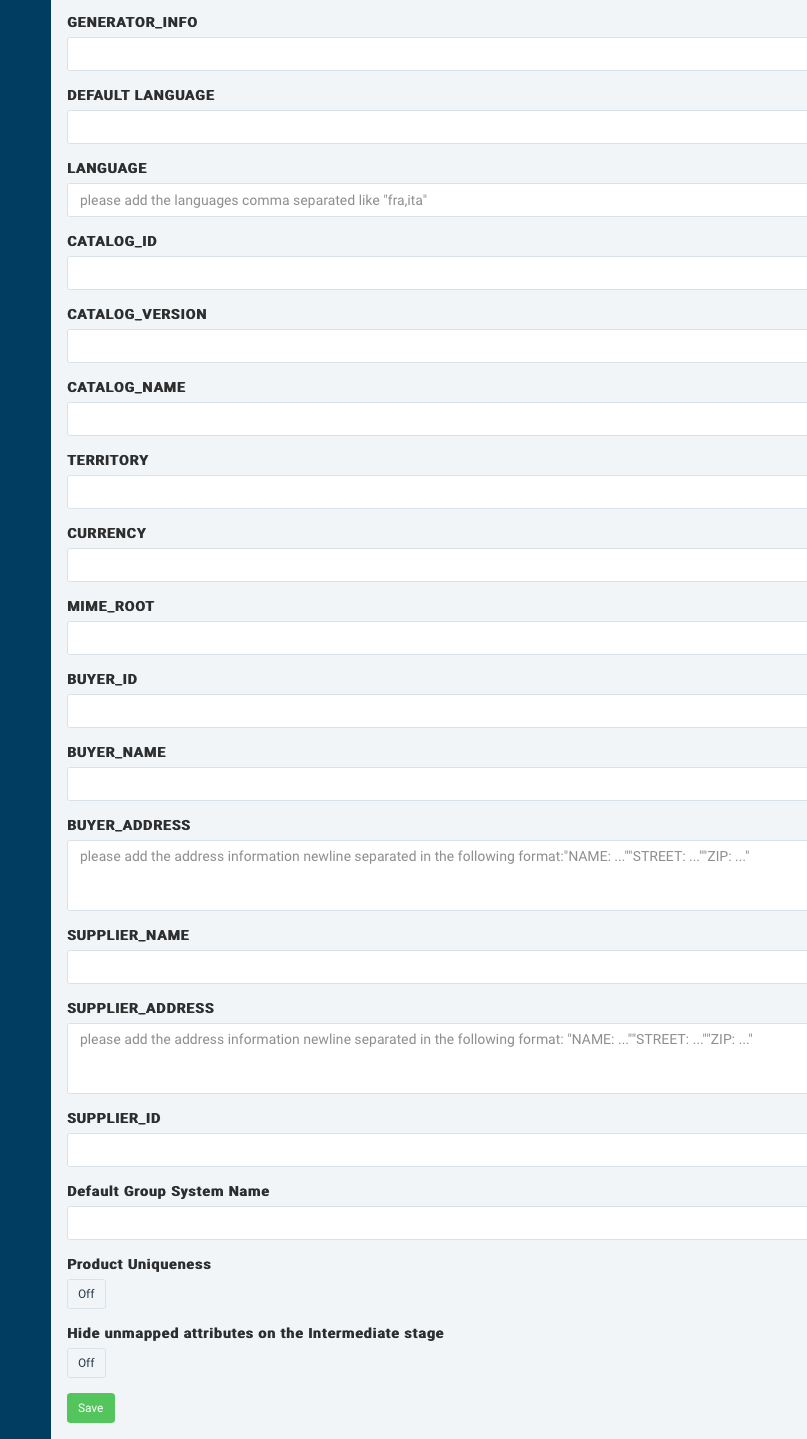
Continuing on the Settings page, enter the BMEcat header information beginning with the field GENERATOR_INFO.
The BMEcat header does not transfer the description of products. It only transfers information concerning the identification and validity of the catalog, the catalog creator, receiver, and the underlying skeleton agreement. In addition, the BMEcat header contains applicable default values that it can place on all contained products, for example, language and currency.
Note
Correctly entering BMEcat header information depends on the intended recipient's requirements for the Header BMEcat you are creating. If you are uncertain of the requirements, see Header beginning on page 21 in the Specification BMEcat 2005 PDF document.

Select Save to store the header fields information that you entered.
Exit Exports and go to Dataflow from your site's main menu.
Map the BMEcat attributes and validate the data
Before continuing with the BMEcat setup, here is some essential information on mapping BMEcat elements.
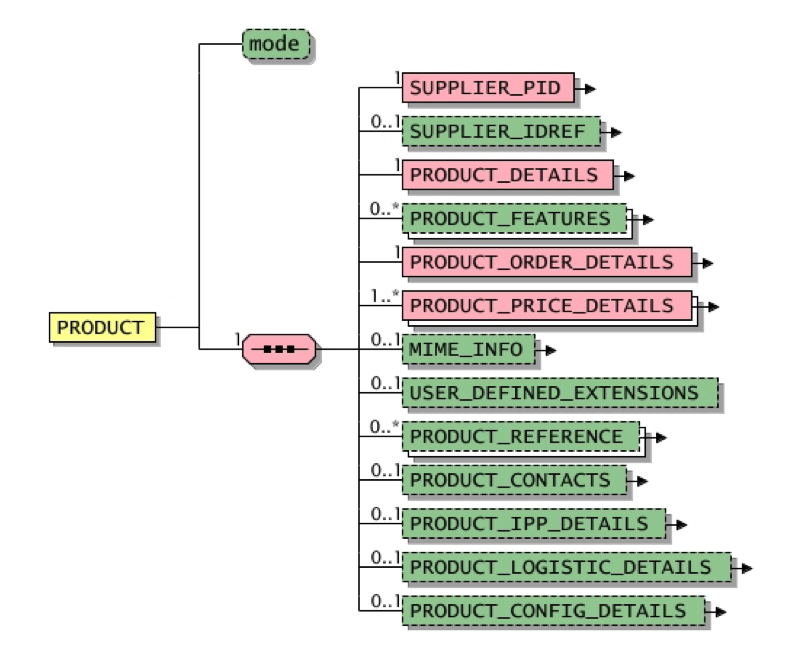
To become familiar with the BMEcat 2005 structure, in this example, the export column contains the highest-level elements that hold a value under the main element PRODUCT. See the following illustration:

Accordingly, directly from the main element PRODUCT, the SUPPLIER_PID element appears in the export column because it carries a value. In contrast, the PRODUCT_DETAILS element does not appear in the export column because it is a structural element and does not hold a value. Lower-level elements under PRODUCT_DETAILS, such as DESCRIPTION_SHORT and DESCRIPTION_LONG appear in the export column because these elements also hold a value.
See PRODUCT in context, beginning on page 34 in the Specification BMEcat 2005 PDF document for more information.
In Dataflow, map the attributes for all BMEcat attributes you want to export.
Note
The attribute
PROD_IDin the export column isSUPPLIER_PIDin BMEcat and is written asSUPPLIER_PIDin the final output file.If you need to add more attributes, you can manually create them in the export column, following the same naming convention or style used for attribute naming. For example, if you want to add more product features, you should name the new attribute
FEATURE_YourAttributeName.Table 2. All possible attributes that you can manually add:Attributes
Examples
FEATURE_YourAttributeNameFEATURE_MaterialMIME_ALT_numberMIME_ALT_6MIME_DESCR_numberMIME_DESCR_6MIME_PURPOSE_numberMIME_PURPOSE_6MIME_SOURCE_numberMIME_SOURCE_6MIME_TYPE_numberMIME_TYPE_6PRICE_AMOUNT_numberPRICE_AMOUNT_4PRICE_CURRENCY_numberPRICE_CURRENCY_4PRICE_LOWER_BOUND_numberPRICE_LOWER_BOUND_4PRICE_TAX_numberPRICE_TAX_4PRICE_TYPE_numberPRICE_TYPE_4DESCRIPTION_SHORT_languageDESCRIPTION_SHORT_itaDESCRIPTION_LONG_languageDESCRIPTION_LONG_itaPRICE_DATETIME_TYPE_numberPRICE_DATETIME_TYPE_2PRICE_DATETIME_DATE_numberPRICE_DATETIME_DATE_2Go to Data View to review the data and, if required, add rule boxes to adjust your values. To learn more about rule box possibilities, see Find the needed rule box category.