Replace feed terms with the Dynamic Replacement list
Use the Dynamic Replacement list feature to replace existing terms dynamically in your feed via uploading a CSV file or URL in Productsup.
Introduction
The Dynamic Replacement list feature lets you create an extensive list of terms to update them dynamically via a CSV file or URL.
Note
See Replace feed terms with the Standard Replacement list for an alternative list type that may work for your use case.
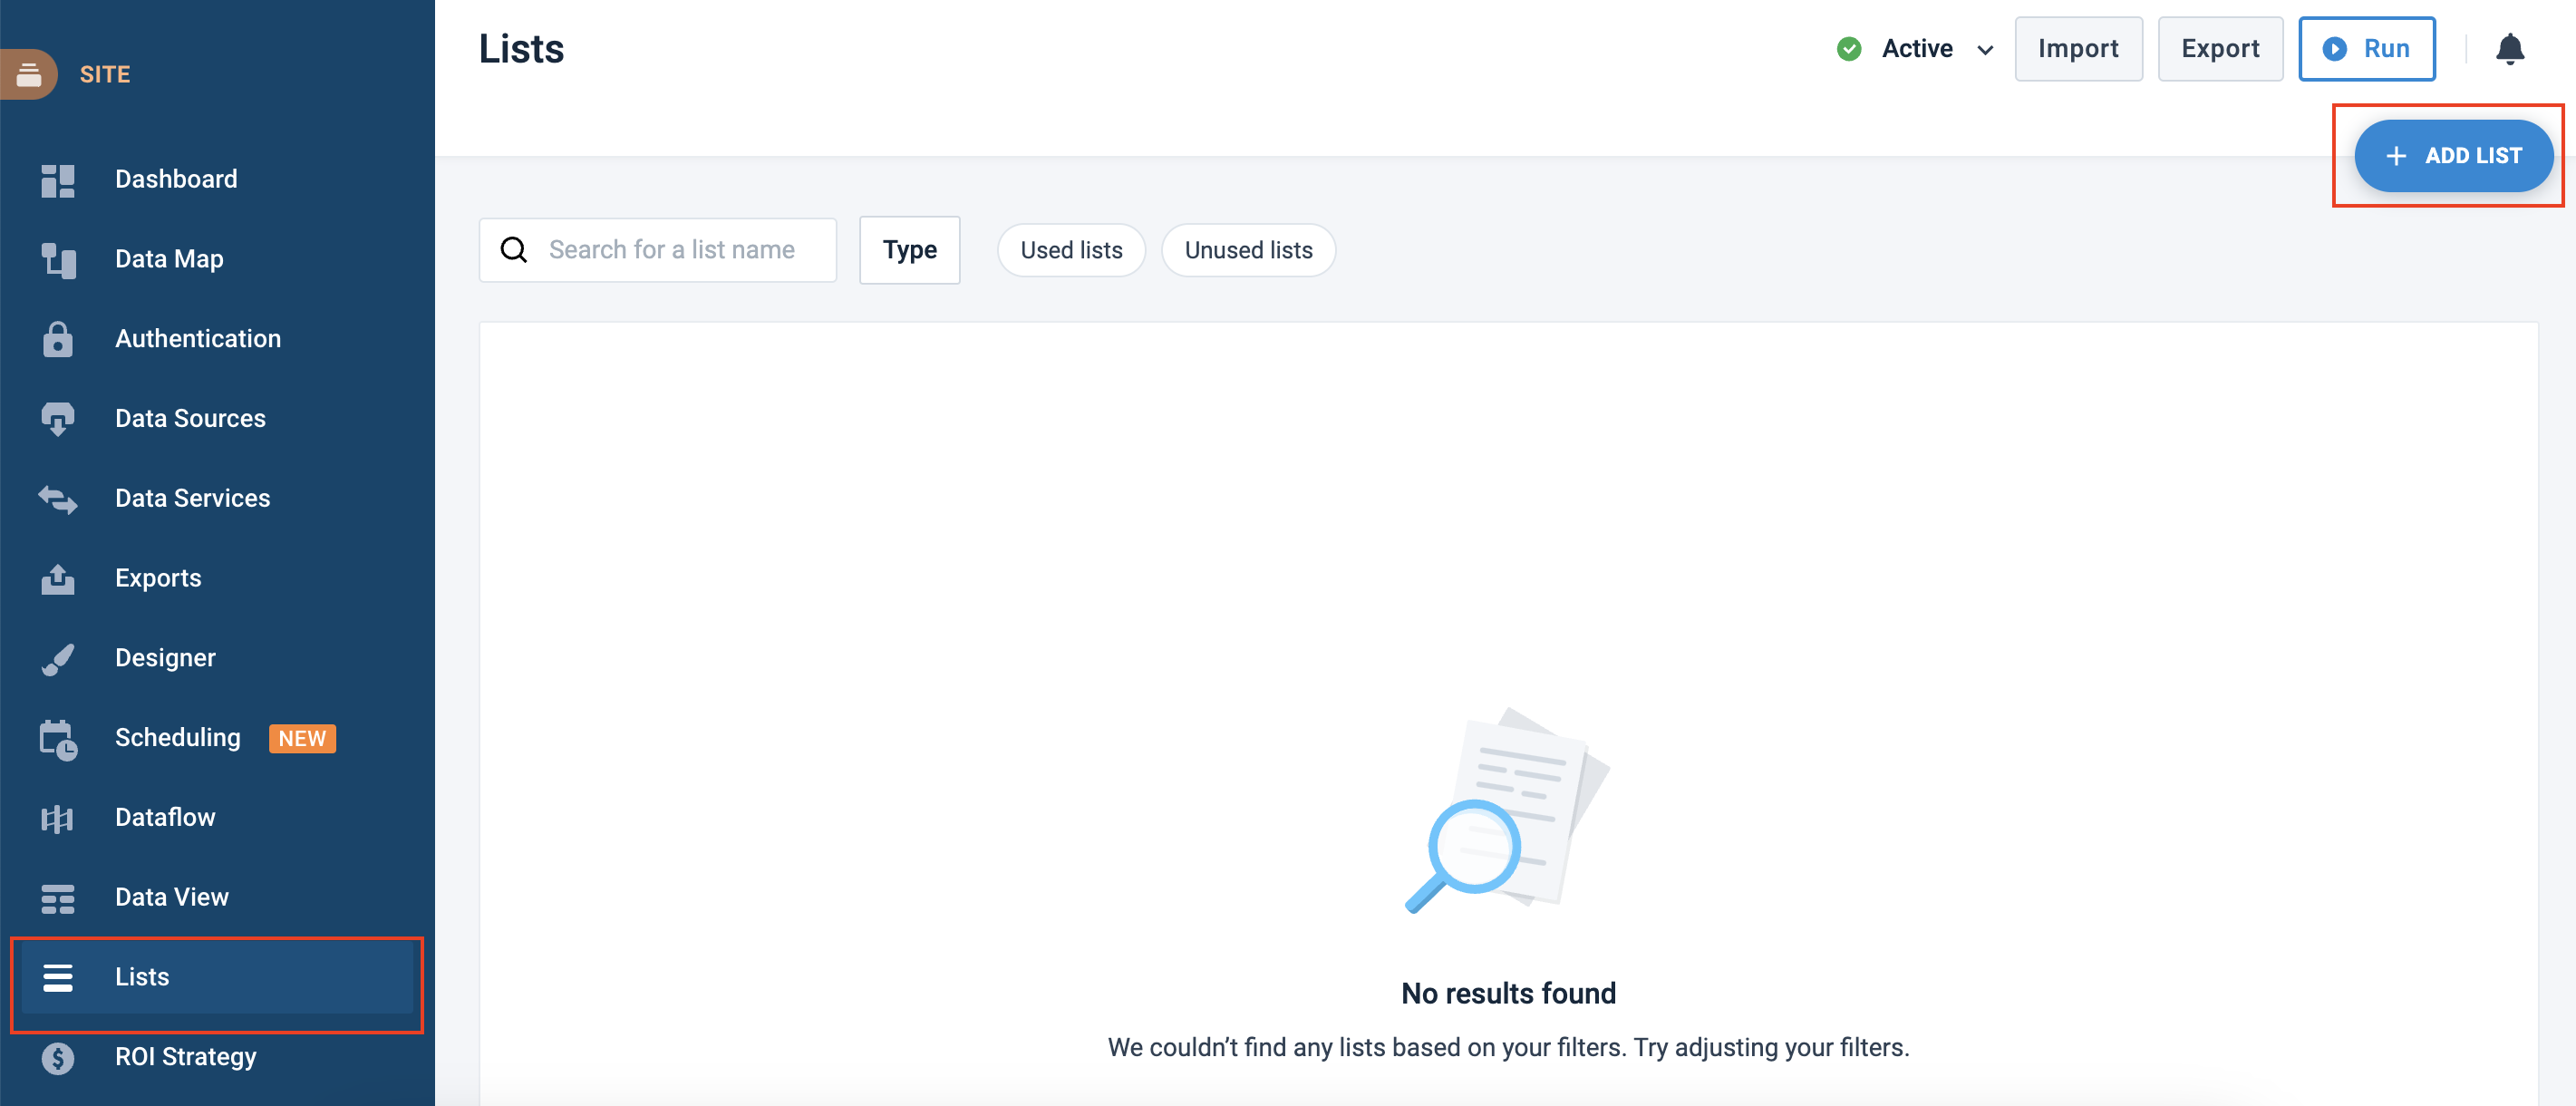
Set up the Dynamic Replacement list
Go to Lists from your site's main menu and select ADD LIST.
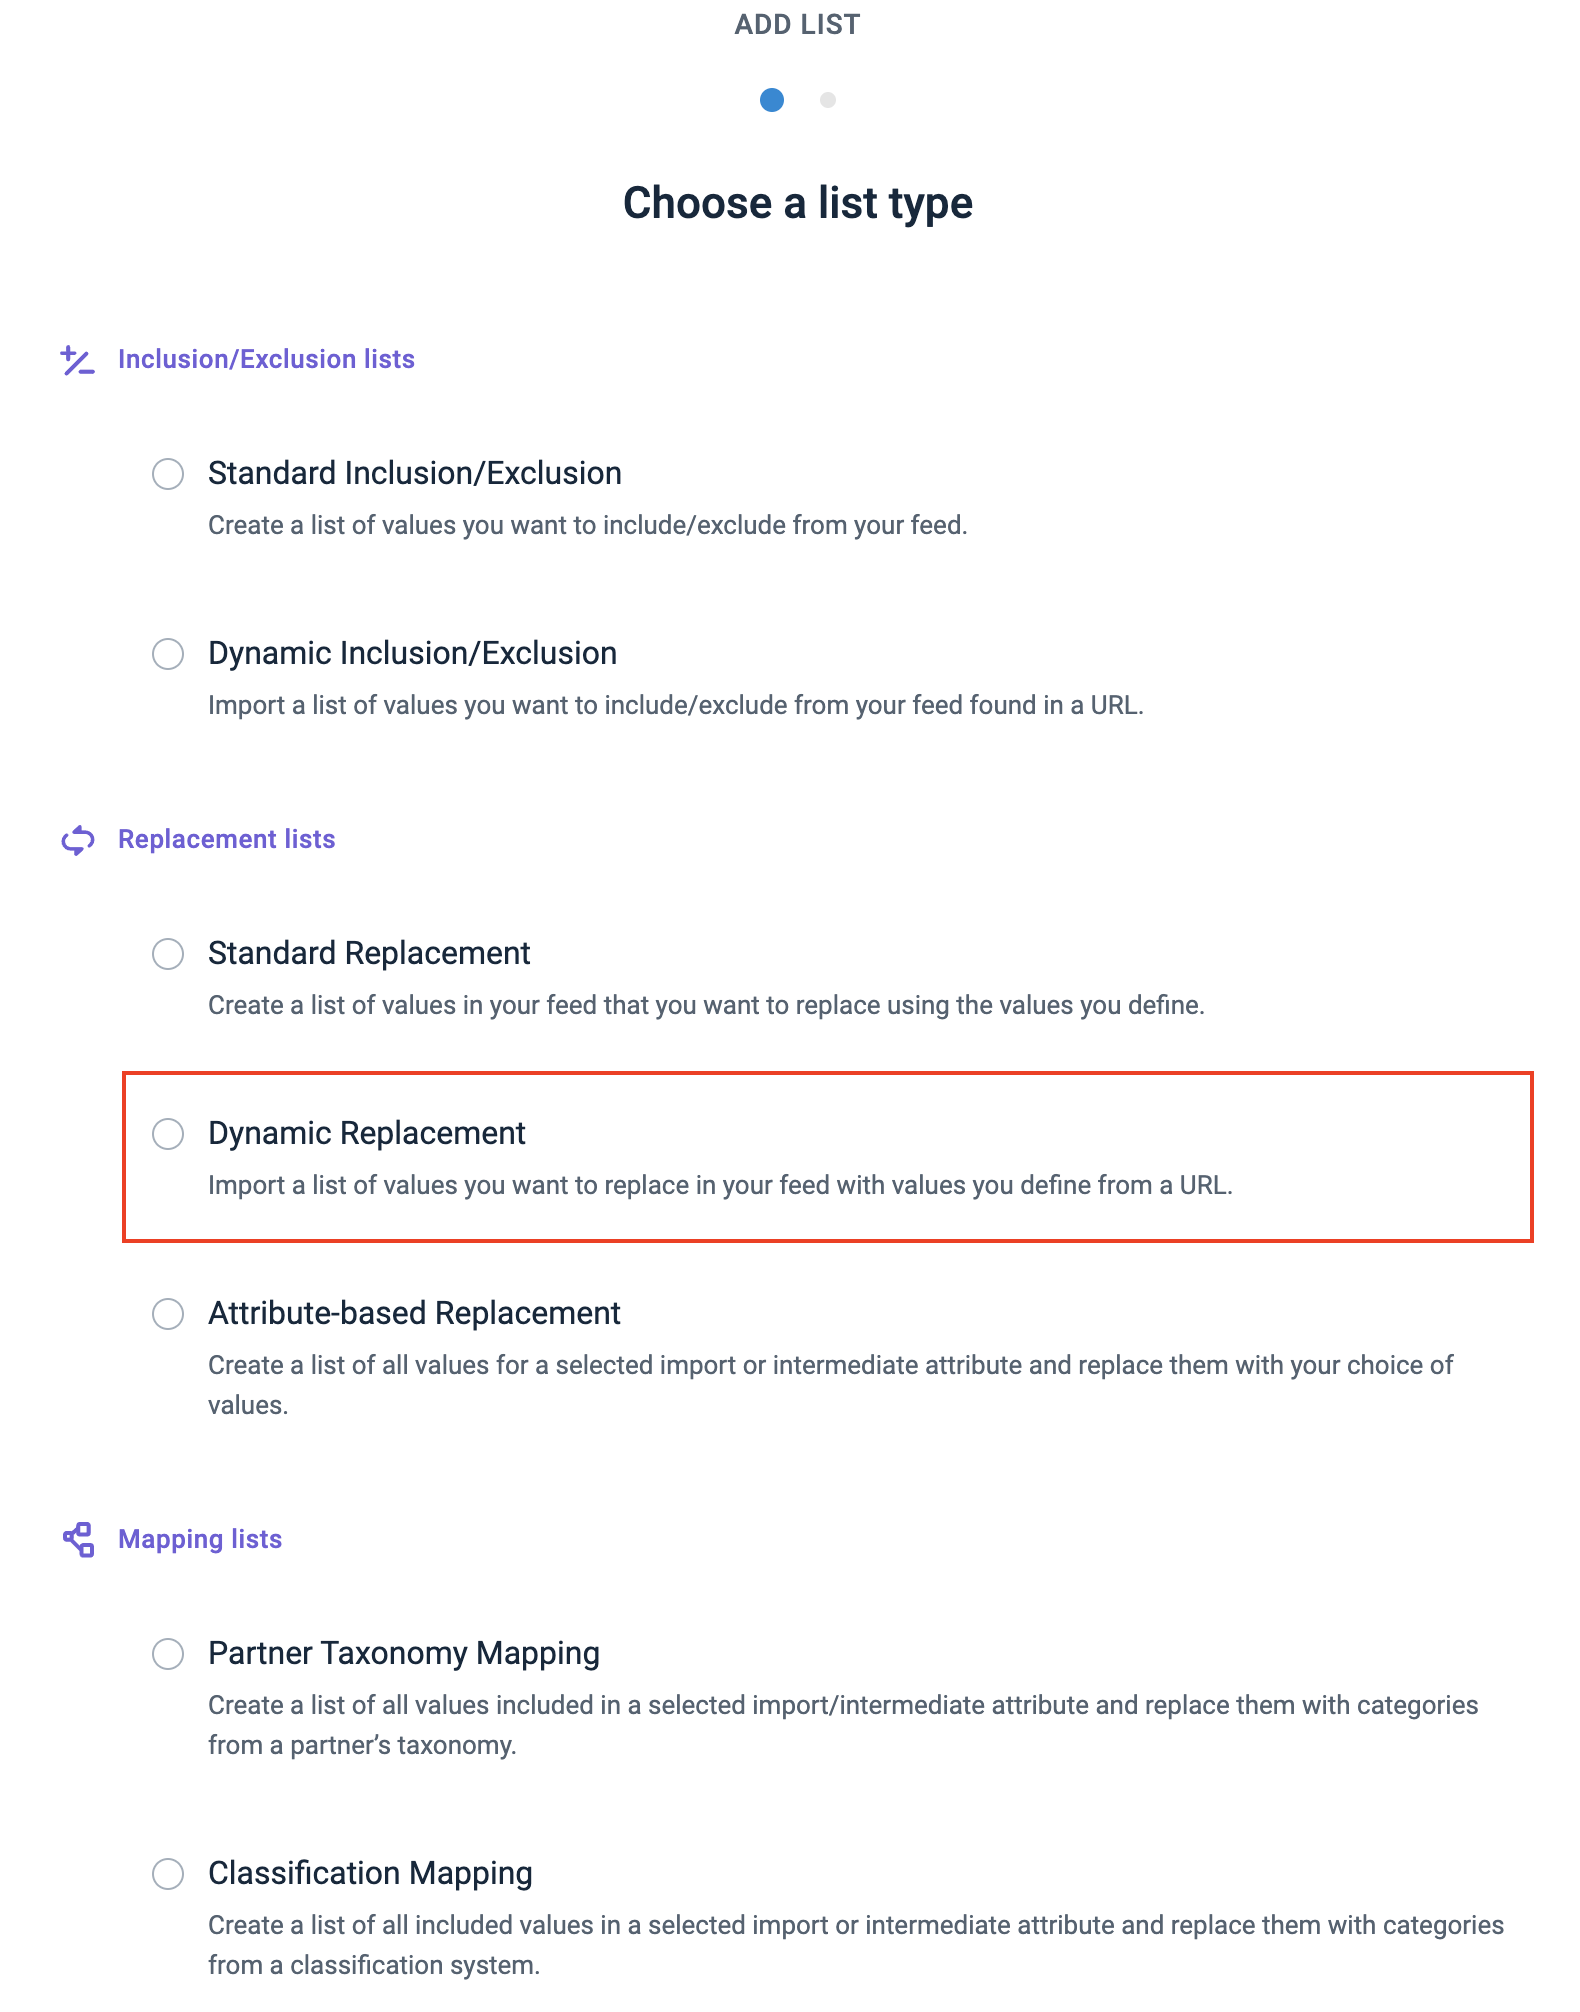
Next, choose Dynamic Replacement and select Continue.
In Name, give your replacement list a custom name.
Choose the way of adding the terms between two (2) options.
Option 1 - Upload a source file
Create a CSV file with a header and the following structure:
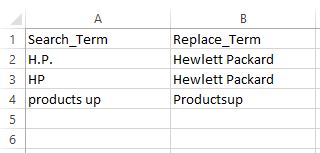
Note
The CSV file must contain a header since the platform skips the first row.
Drag your CSV list file to the Drag and drop a CSV file field, or select Browse to upload the file.

Select Add at the bottom of the page.
Option 2 - Add the source URL
Enter a source file URL in Source URL. To add a Google Sheets source file, see Add a list source file via Google Sheets and return to this section, step 2.
Enter credentials in Username and Password to access the source file.
In Delimiter, choose a delimiter. The platform selects the
tab (\t)by default.Note
If you use a Google Sheet as a list source file, choose comma (
,) as a delimiter.Optionally, in Encoding, add the encoding if it isn't UTF-8.
Optionally, in Enclosure, choose a desired enclosure, for example, (
‘’or““or||).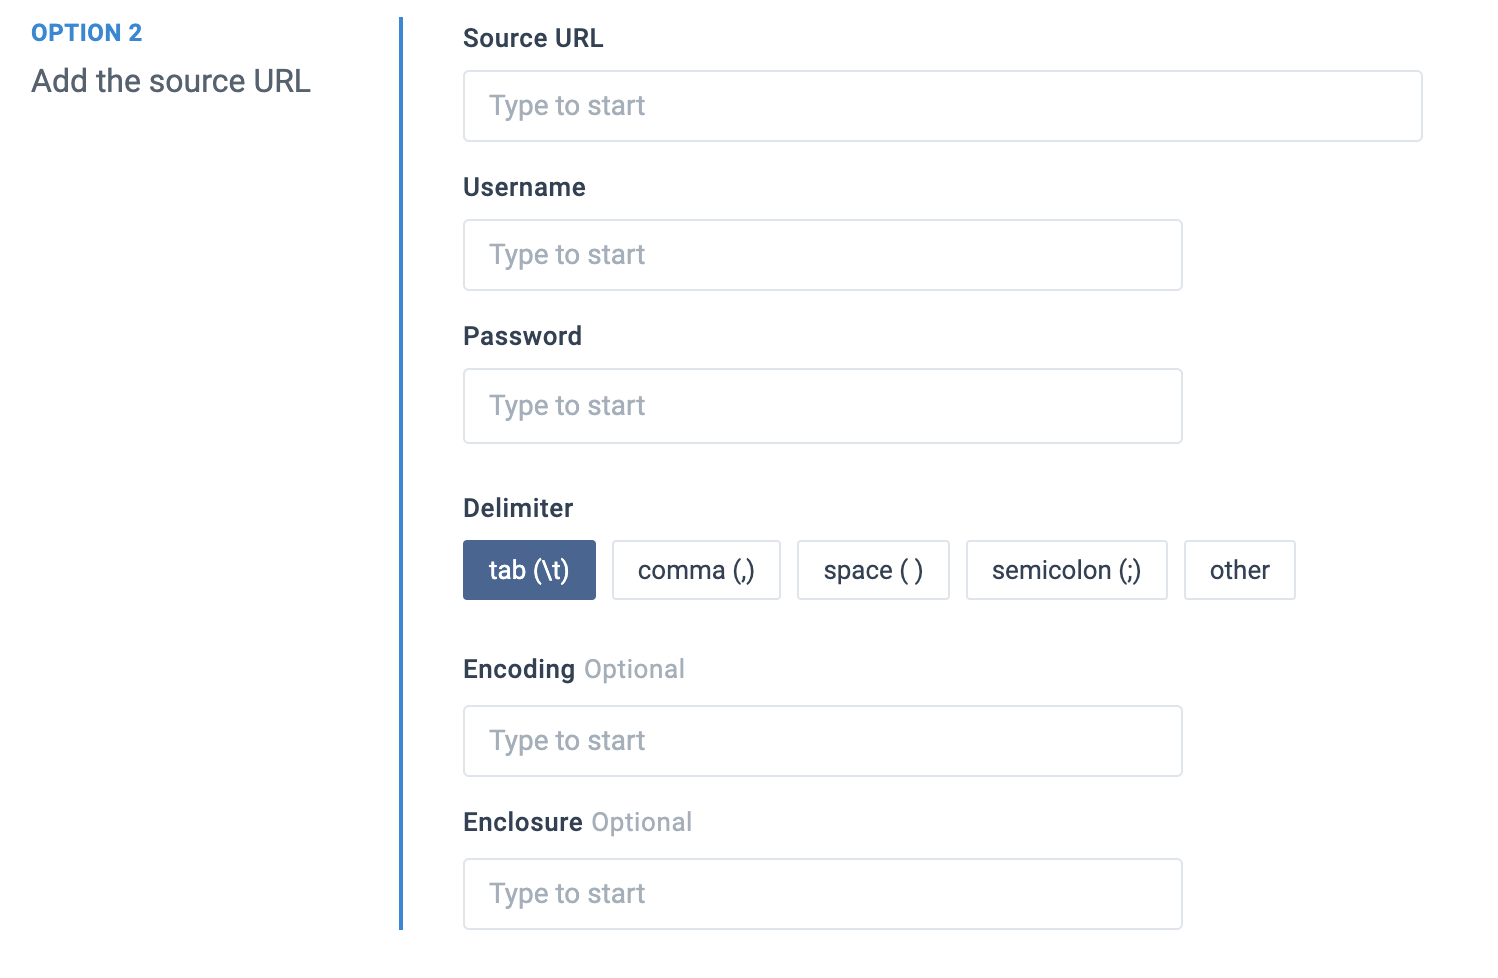
Select Add.
Toggle on Reset list on every import to remove all previous data from the feed after each new import.
When the feature is active, the platform resets the list every run deleting all values and then re-importing them into the list.
When the feature is inactivate, the platform re-imports the list, adding only new items and ignoring changed or deleted items.
To share the list at the organization or project levels, toggle on Share list and select:
Account level shares this list with all sites across all projects under this organization.
Project level share this list with all sites under this project.
Note
If you share the list at the organization or project level, the platform updates the list during an import from the original site where you created the list.
Once the platform uploads your CSV file, the list of defined values appears in the Replace term column.
Note
Whenever you change the source CSV file, select Import to update the list.
Add a list source file via Google Sheets
To add a list file in Google Sheets, you must modify the URL that leads to your list as follows:
In the URL, replace the text
editwith:export?format=csvIf
#gidexists in the spreadsheet URL, replace it with:&gidThe modified link should look similar to the following example:
https://docs.google.com/spreadsheets/d/{key}/export?format=csv&gid={gid}In this example,
{key}and{gid}are placeholders.
Make the Google Sheets URL accessible to everyone. Productsup can only import publicly accessible sheets. Viewer mode is enough.
Test the URL by opening it in a browser. If you set it up correctly, once you hit enter, a CSV download begins.
Continue the setup in Option 2 - Add the source URL.
Add the Replacement rule box
To apply your Dynamic Replacement list to your feed, add the Replacement rule box to your feed attributes in Data View.
Go to Data View from your site's main menu and select Intermediate or a needed export from the drop-down menu on the left side of the upper ribbon.
Select Edit for the needed attribute.
Select the Select an Option drop-down menu, search for and select the Replacement rule box.
Take steps from Replacement.
(optional) Add the Replacement Sensitive rule box
As an alternative to the Replacement rule box, you can apply replacement with the Replacement Sensitive rule box.
Go to Data View from your site's main menu and select Intermediate or a needed export from the drop-down menu on the left side of the upper ribbon.
Select Edit for the needed attribute.
Select the Select an Option drop-down menu, search for and select the Replacement Sensitive rule box.
Take steps from Replacement Sensitive.