Optimize your data in Data View with rule boxes
Optimize your product data in Data View using rule boxes in Productsup.
You can modify your data using rule boxes in Data View or Dataflow before exporting it. For example, you can use the Static Value rule box to add a specific value to all or part of the products in an attribute, such as the US Dollar sign ($).
When you add rule boxes in Data View, you can immediately see the results of changes in your data.
Add a rule box in Data View
To add a rule box:
Go to Data View from your site's main menu and select Intermediate or a needed export from the dropdown on the left-hand side of the top ribbon.
Note
You can add rule boxes only in the intermediate or export stage.
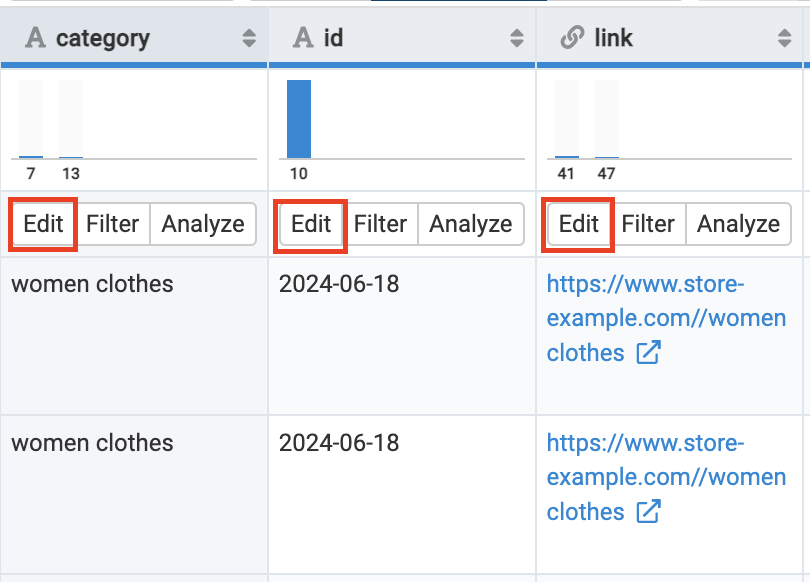
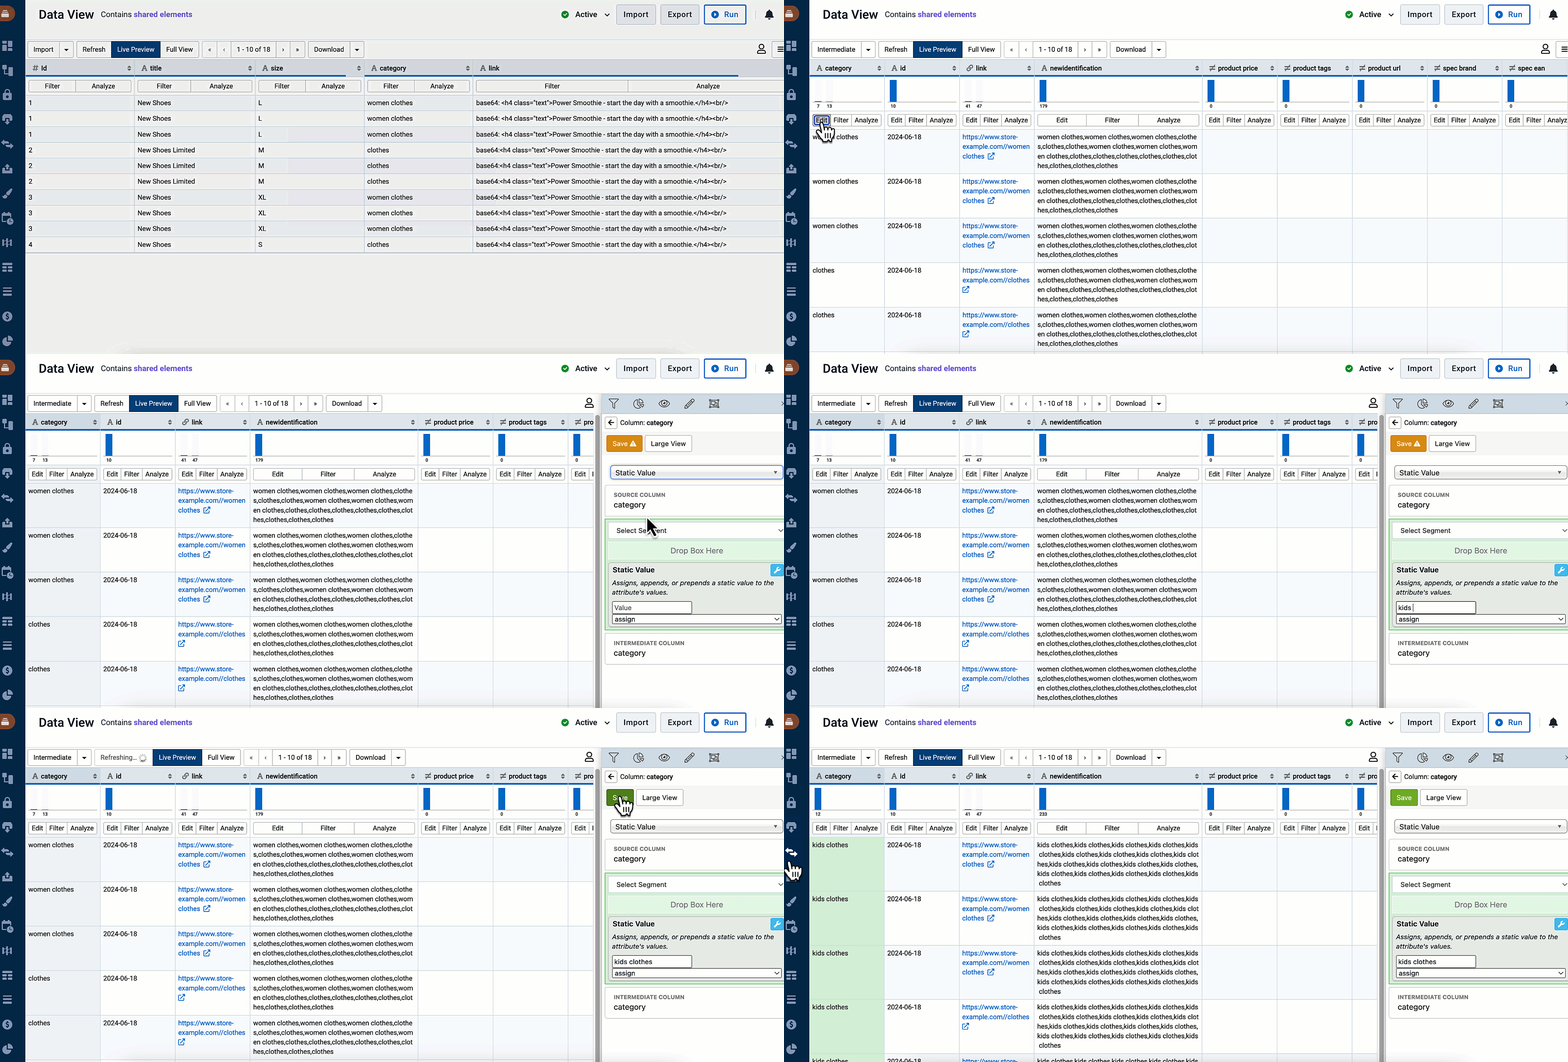
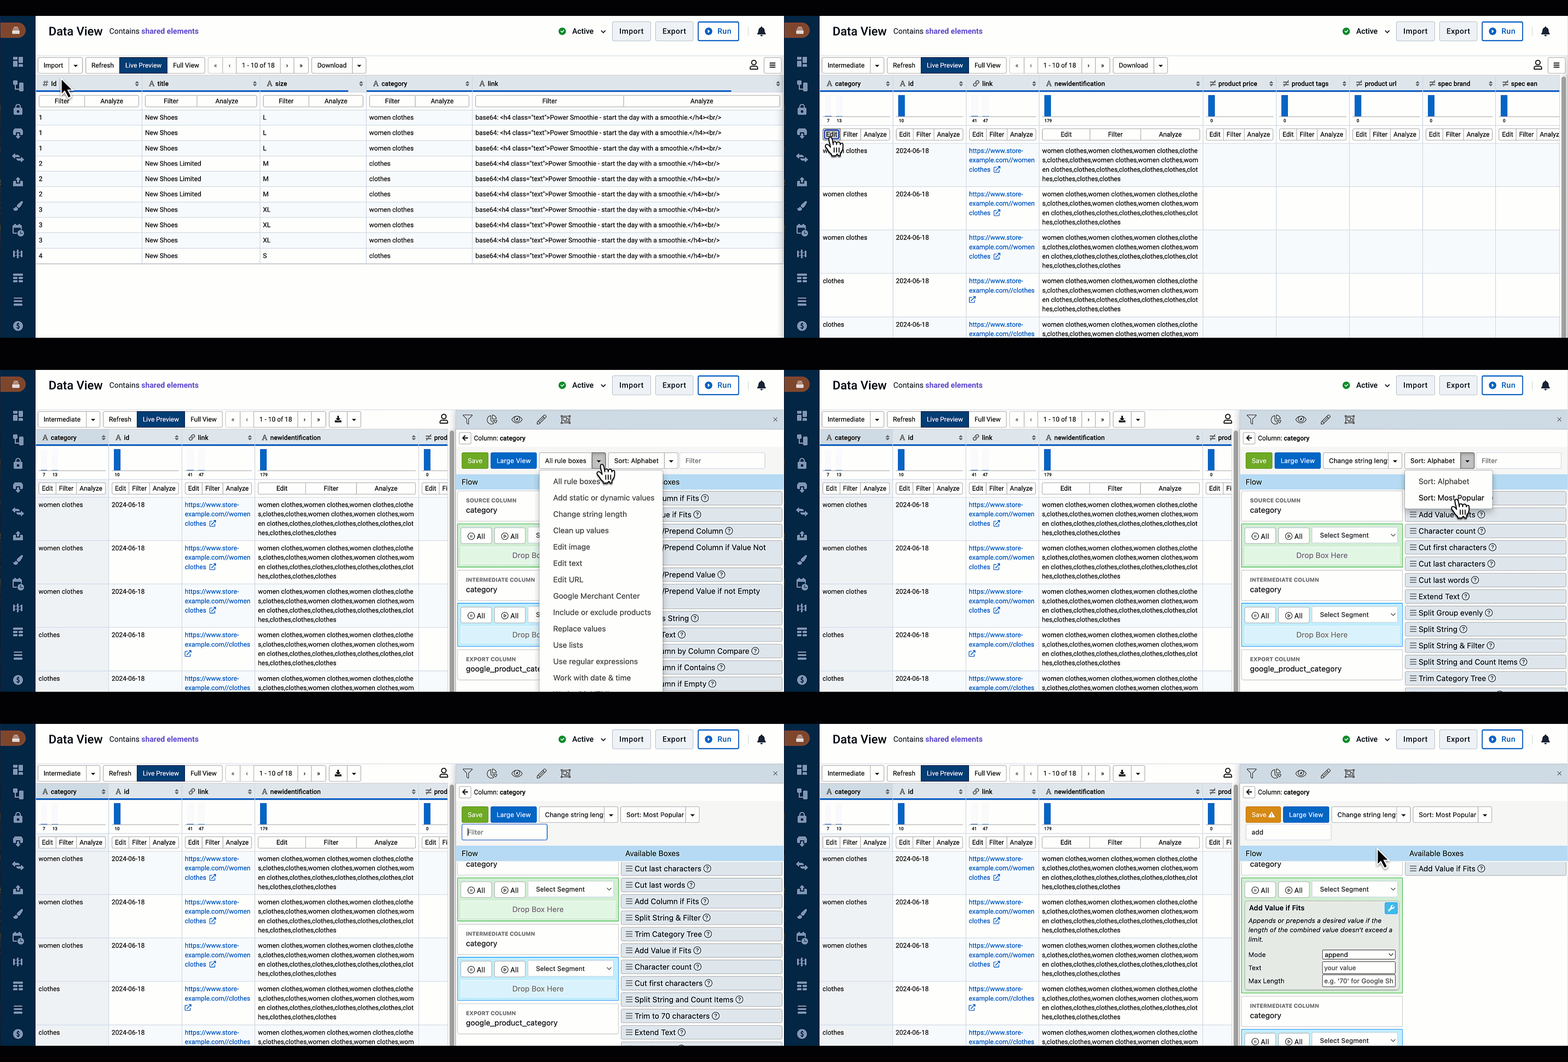
Select Edit in the attribute that needs changes. The panel on the right opens.
Select the Select an Option dropdown, search for and select the needed rule box in the list.
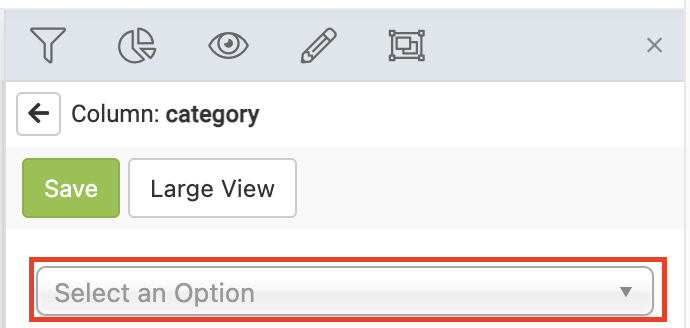
Search for and select the needed rule box in the list.
Configure the rule box by selecting or entering values.
Tip
Select the wrench icon 🔧 in the top-right corner of the rule box to open advanced options such as pausing, duplicating, removing, or applying the rule box to a segment.
Select Save.
Add a rule box using Large View
To gain more information on various boxes and for additional filtering options, you can use Large View.
In the right panel opened after you selected an attribute for editing, select the Large View button.
To find a needed rule box, use the following options:

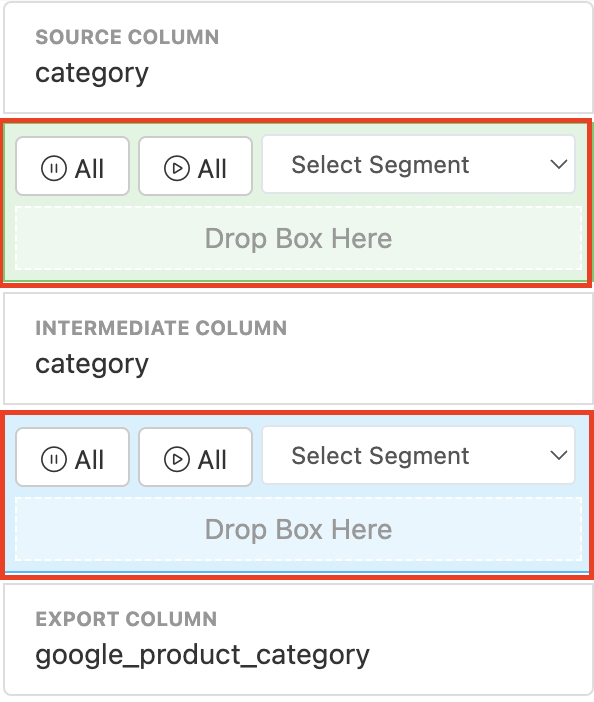
Drag the rule box to the needed stage: the green area is for the import to intermediate stages, and the blue area is for the intermediate to export stages.
Configure the rule box and select Save.
Edit a rule box
You can also edit any rule boxes you have previously set up in Data View.
Go to Dataflow from your site's main menu and select the needed export from the dropdown on the left-hand side of the top ribbon.
Select the arrow icon
 next to the needed attribute in the relevant stage. The panel on the right opens.
Configure the rule box by selecting or entering values.
Select Save.
Add rule boxes in bulk across multiple sites
If you need to add the same rule boxes to multiple sites, you can consider using the Bulk Option feature to save time.
See Apply rule boxes in bulk across multiple sites for more information.