Import from Google Sheets
Learn how to import your data feed from Google Sheets to Productsup.
A Google Sheets file is a spreadsheet created and edited online in Google Workspace.
You can import your data from Google Sheets in two ways:
Import from your existing Google spreadsheet. See Import from an existing Google Sheets file via the Feed URL data source.
Create a new spreadsheet via the platform in the Producstup Google Drive or your Google account. See Create a new Google Sheets file via Productsup.
Note
The Google Sheets data source can import files up to 10 MB in size. If your Google Sheets file is larger than 10 MB, you can split it into two files and set up two separate Google Sheets data sources. Alternatively, you can upload your large file to an FTP or SFTP server and import it into Productsup using the Feed URL data source. See Import a file from a URL.
Import from an existing Google Sheets file
You can provide access to your existing spreadsheet hosted in your company's Google Drive. It doesn't require making your sensitive, organization-owned Google Sheets public, and you stay fully aligned with your enterprise security policies.
Note
The feature only imports data from the first sheet tab within the specified Google Sheet file. You can't import multiple sheets at a time from a single file. In future iterations, we will explore multi-sheet import capabilities.
To import your existing file via the Google Sheets data source:
Go to Data Sources from your site's main menu and select Add data source.
Search for Google Sheets and select Add.

Edit the data source name if desired and select Continue.
Select the Add an existing spreadsheet source URL option.

Scroll down to the Authentication selection to set up access to the Google account. In Authentication, choose the Google authentication you previously set up in your organization, project, or site. If you haven't set up Google authentication yet, perform the following steps:
Select Add New Authentication. A pop-up opens.
Select Google Spreadsheets in Type. You can optionally give your authentication a name.
Select Next.
Select Connect. Before proceeding, Productsup redirects you to Google to finalize your authentication. After completing the authentication setup, Google redirects you back to Productsup.
Close the confirmation pop-up to proceed.
Note
If, in the future, you decide to delete the Google Sheets data source from the platform, your data source file moves into the trash bin of your Google account.
You can restore it if you have set up the authentication for your Google account.
When the authentication setup is complete, add your Google spreadsheet URL to Source URL.

Important
Change the URL from
…/editto…/export. For example, change https://docs.google.com/spreadsheets/d/123/edit?pli=1&gid=123#gid=123 to https://docs.google.com/spreadsheets/d/123/export?pli=1&gid=123#gid=123.In Description (optional), add a description for your data source. It substitutes the data source name in the Overview tab in Data Sources.
Select Save and choose Import in the top-right corner of the page.
As an alternative to importing an existing file via the Google Sheets data source, you can import it using the Feed URL data source. This method may not be suitable for you if the file has private access rights and you don't want to change it to public.
Note
This method requires you to enable the Viewer rights for anyone who opens the link so that the platform can access the file. See Share files from Google Drive to learn how to change the rights.
Go to Data Sources from your site's main menu, and select Add data source.
Search for Feed URL, select Add, give it a name as desired, and then select Continue.
Insert the link to your Google spreadsheet in Source URL. For example, you can copy it from the address bar of your browser: https://docs.google.com/spreadsheets/d/1aAaA11A1aaaaAa1A1aa11A1a_A1a111aAaa1aA1Aaa1aA/edit?gid=0#gid=0.
Select Save.
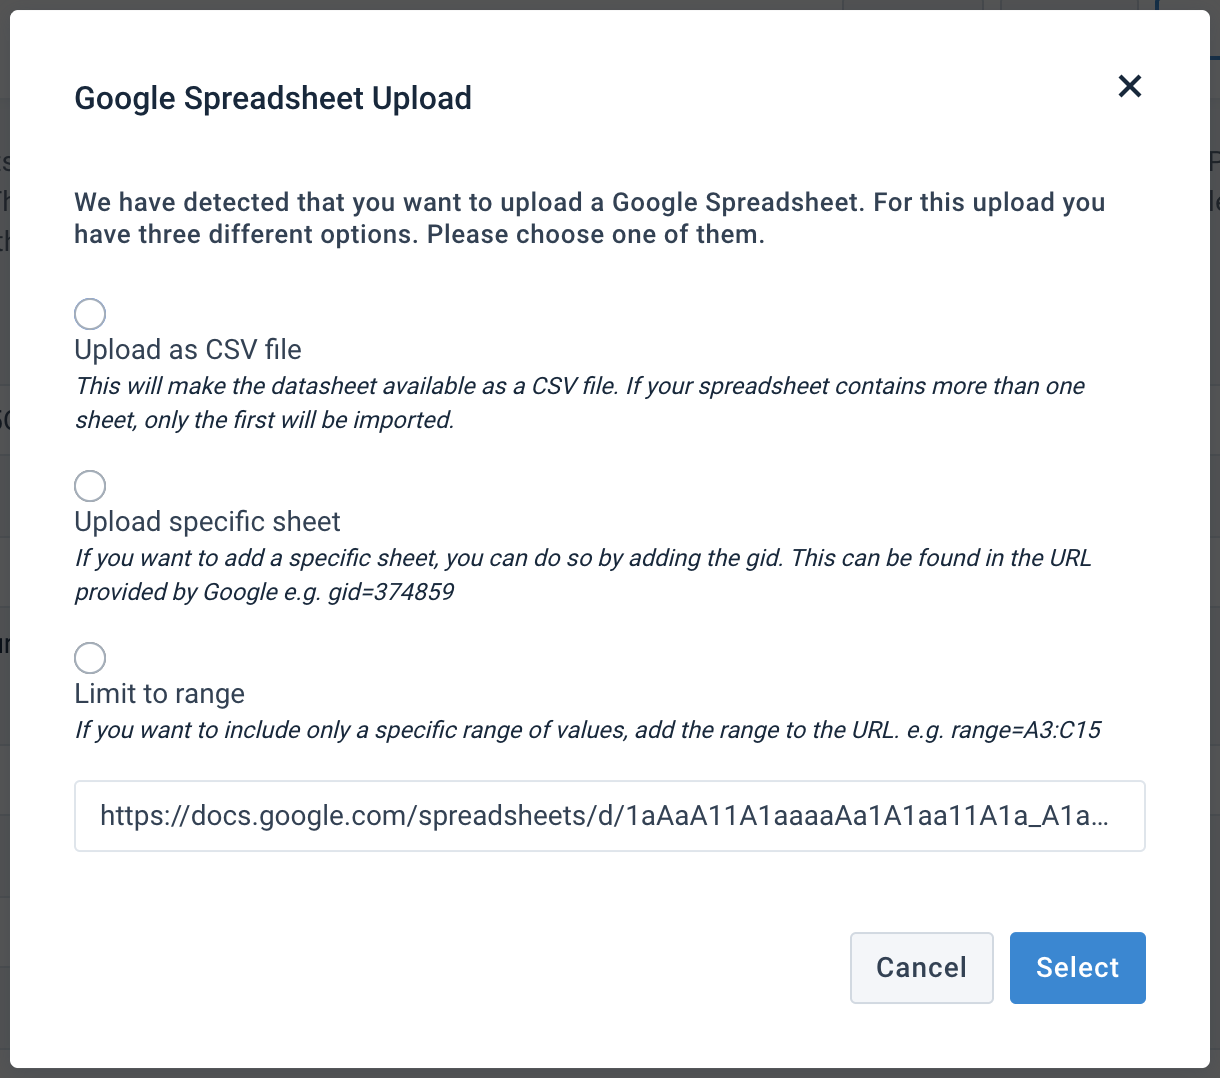
The platform detects that you want to upload a Google spreadsheet. It shows the Google Spreadsheet Upload pop-up, where you can see a changed format of your link, for example, https://docs.google.com/spreadsheets/d/1aAaA11A1aaaaAa1A1aa11A1a_A1a111aAaa1aA1Aaa1aA/export?format=csv.
You can now further set up the data source by choosing one of the following options:

Upload as CSV file is the basic option that imports your main sheet within the spreadsheet as a CSV file and ignores any other sheets. Use this option if you don't need to import a specific sheet or range of cells.
Upload specific sheet lets you import a desired sheet from your spreadsheet. If you select this option, go to the end of the link at the bottom of the pop-up and substitute
0in thegidparameter with the unique ID of your desired sheet.Tip
To find the needed value of the
gidparameter, which is a unique ID for the sheet defined by Google, go to the desired sheet in your Google spreadsheet, locate thegidparameter at the end of the link, and copy its value after the equals sign=.For example, to import data only from the sheet that has 111111111 in the
gidparameter, change the link as follows:From:
https://docs.google.com/spreadsheets/d/1aAaA11A1aaaaAa1A1aa11A1a_A1a111aAaa1aA1Aaa1aA/export?format=csv&gid=
0To:
https://docs.google.com/spreadsheets/d/1aAaA11A1aaaaAa1A1aa11A1a_A1a111aAaa1aA1Aaa1aA/export?format=csv&gid=
111111111Limit to range lets you import a desired cell range within the main or any other desired sheet in your spreadsheet. If you select this option, go to the end of the link at the bottom of the pop-up and do the following:
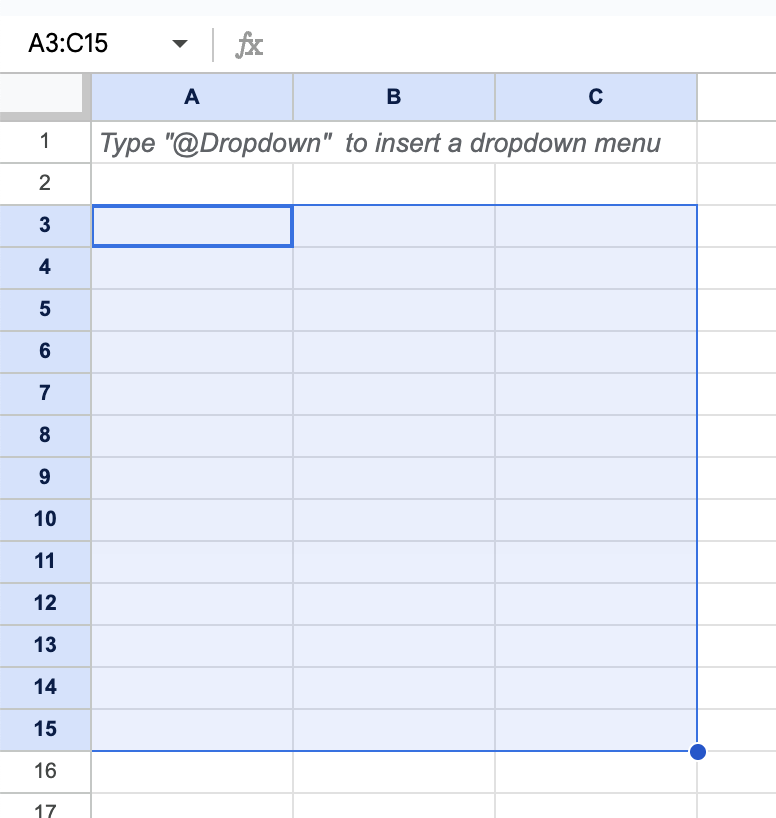
If your desired range is in the main sheet of the spreadsheet, add the needed cell range, such as
A3:C15.
For example, if you want to import only from cells in the range from A3 to C15, change the link as follows:
From:
https://docs.google.com/spreadsheets/d/1aAaA11A1aaaaAa1A1aa11A1a_A1a111aAaa1aA1Aaa1aA/export?format=csv&gid=0&range=
{range}To:
https://docs.google.com/spreadsheets/d/1aAaA11A1aaaaAa1A1aa11A1a_A1a111aAaa1aA1Aaa1aA/export?format=csv&gid=0&range=
A3:C15If your desired range is in any other sheet of the spreadsheet, substitute
0in thegidparameter with the unique ID of your desired sheet. Then, add the needed cell range.Tip
To find the needed value of the
gidparameter, which is a unique ID for the sheet defined by Google, go to the desired sheet in your Google spreadsheet, locate thegidparameter at the end of the link, and copy its value after the equals sign=.For example, to import only from cells in the range from A3 to C15 in the sheet that has 111111111 in the
gidparameter, change the link as follows:From:
https://docs.google.com/spreadsheets/d/1aAaA11A1aaaaAa1A1aa11A1a_A1a111aAaa1aA1Aaa1aA/export?format=csv&gid=
0&range={range}To:
https://docs.google.com/spreadsheets/d/1aAaA11A1aaaaAa1A1aa11A1a_A1a111aAaa1aA1Aaa1aA/export?format=csv&gid=
111111111&range=A3:C15
Choose Select.
Create a new Google Sheets file via Productsup
Go to Data Sources from your site's main menu and select Add data source.
Search for Google Sheets and select Add.

Edit the data source name if desired and select Continue.
Select the Generate a new spreadsheet option.

Before generating a spreadsheet, scroll down to the Authentication selection and choose your authentication:
Proceed with the pre-selected Productsup Authentication in the Authentication selection dropdown to let the platform create a Google Sheets file on Productsup’s own Google Drive. You will get a URL to the file where you can upload your data. If you select this option, continue with the Step 6.
Warning
The platform creates a Google Sheets file on Productsup's Google Drive with public access rights, accessible via a URL. This is necessary to let the platform import your data.
If you want the platform to create a Google Sheets file on your Google Drive, you need to provide access to your Google account. In Authentication, choose the Google authentication you previously set up in your organization, project, or site. See Add OAuth authentication to external systems. If you haven't set up Google authentication yet, perform the following steps:
Select Add New Authentication. A pop-up opens.
Select Google Spreadsheets in Type. You can optionally give your authentication a name.
Select Next.
Select Connect. Before proceeding, Productsup redirects you to Google to finalize your authentication. After completing the authentication setup, Google redirects you back to Productsup.
Close the confirmation pop-up to proceed.
Note
If, in the future, you decide to delete the Google Sheets data source from the platform, your data source file moves into the trash bin of your Google account.
You can restore it if you have set up the authentication for your Google account.
Select Generate a new spreadsheet in the Source URL section.

The created spreadsheet URL appears in the Source URL field.

Select Open spreadsheet to add your data to it.
In Description (optional), add a description for your data source. It substitutes the data source name in the Overview tab in Data Sources.
Select Save and choose Import in the top-right corner of the page.
Note
Before you import the data, you can change the spreadsheet from which to import, if your file contains several tabs. See Select a sheet from a spreadsheet created via Productsup.
Select a sheet from a spreadsheet created via Productsup
If your Google Sheets file contains multiple sheets, you can specify which one you want to import.
Note
For now, if your have a multi-sheet file, you can choose which sheet to import only when you created a file via Producuctsup. If you import from an existing Google sheets, the platform imports only the first sheet and ignores the other sheets even if you change the selection.
Go to Data Sources from your site's main menu, and select the cogwheel icon
 next to the relevant data source.
Choose the necessary sheet from the Worksheet dropdown.

Tip
If the dropdown doesn't show all relevant sheets from your file, select Save at the bottom of the page and try again.
Select Save and choose Import in the top-right corner of the page.
Update a Google spreadsheet created via Productsup
Go to Data Sources from your site's main menu, and select the cogwheel icon
 next to the relevant data source.
Select Open spreadsheet and make the necessary updates.

Alternatively, you can save or bookmark the link to the file and access it directly.
Tip
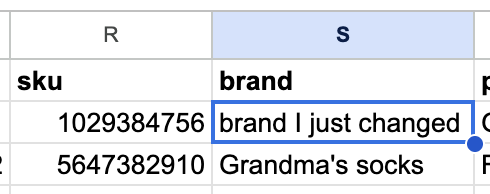
If you are editing a particular attribute value in Google Sheets, ensure that you deselected the cell where you made the changes or move the selection area away from it. Google Sheets may not import your changes to Productsup from the cell where they were made if that cell is still highlighted as follows:
