Set up Monitor for your feeds
Set up Monitor to receive error event notifications for your feeds in Productsup.
Introduction
Let Productsup help you stay on top of your feed status automatically by setting error events and receiving notifications when events occur. In Monitor, you can set up email and chat tools, such as Slack and Microsoft Teams, to receive error notifications to an audience of your choice.
Here are some questions you may have in regards to your feeds, such as:
Did the data from our back-end update successfully?
Am I missing key attributes in my feeds?
Do my feeds meet all partner channel expectations?
Do we have high latency when providing our data to clients?
You can set up monitoring events to address those questions and set up notifications or trigger a run to stop processing runs entirely. For more information on available event types, see Monitor events overview.
Note
Only Administrators or Users with Read/Write access can manage monitoring.
Ensure you have defined a unique item identifier in Data Sources on the Settings tab. See Add a unique item identifier.
Set up error events
You can add or edit and configure events for multiple sites or projects.
Add/edit a monitoring event
Go to Monitor in the main menu from the site, project, or organization level.
Select ADD ERROR EVENT.
To edit a pre-existing event, select the event's settings button and choose Edit.

To create a new event, select one of the following stages: Import, Intermediate, Export, or General, and select Continue.
Choose your event and select More to get the event's details. Then, either choose Select within the event description box or select Continue from the ADD ERROR EVENT view to proceed.
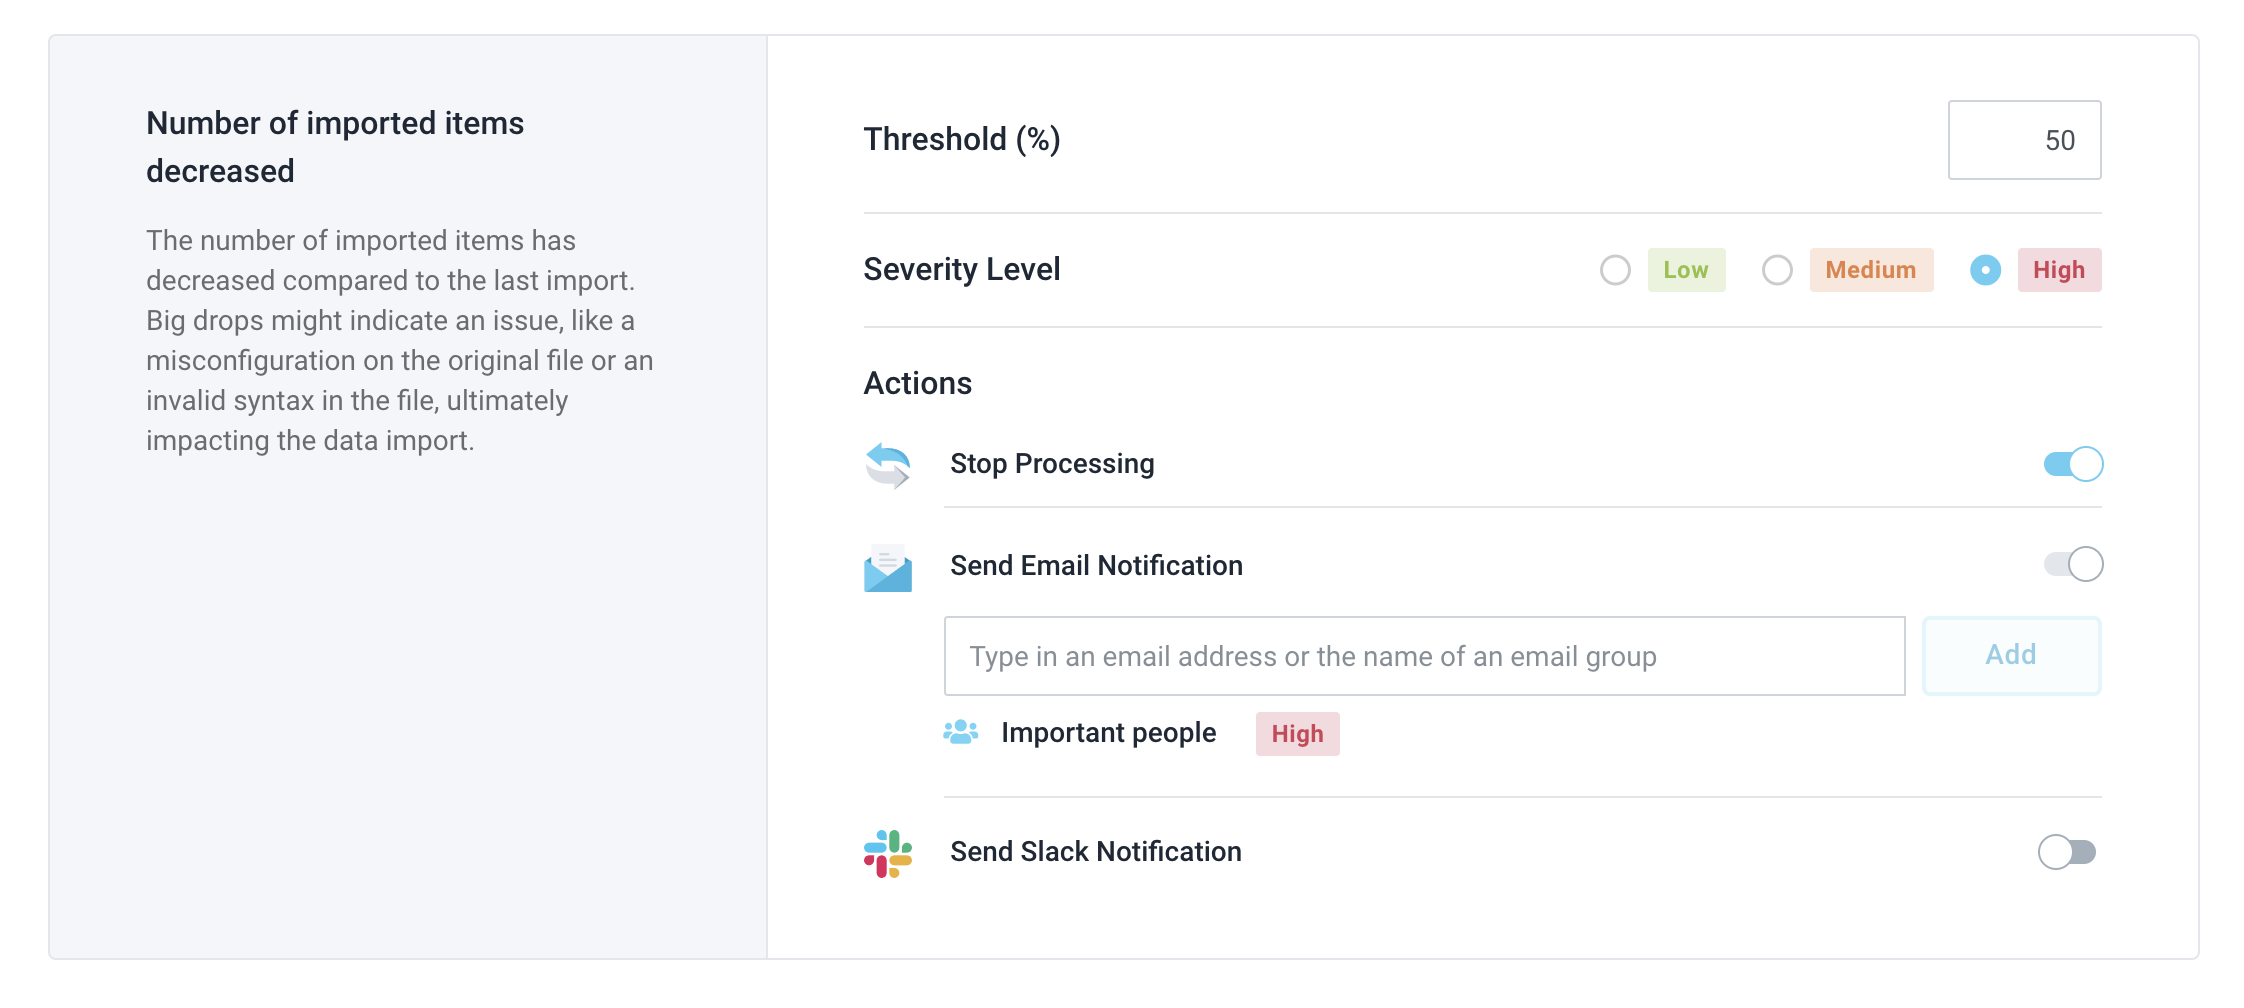
Configure your event by selecting a Severity Level.
Note
Some of the events can have the Threshold (%) field. For example, these are all the events on the intermediate level. These events only happen upon reaching a predetermined threshold.

Select the action you want to trigger when an error event occurs. Choose among Stop Processing, Email Notification, or Slack Notification.
Select Add.
Your error event is now active for all stage sub-levels.
Set up the Import failed for Data Source event
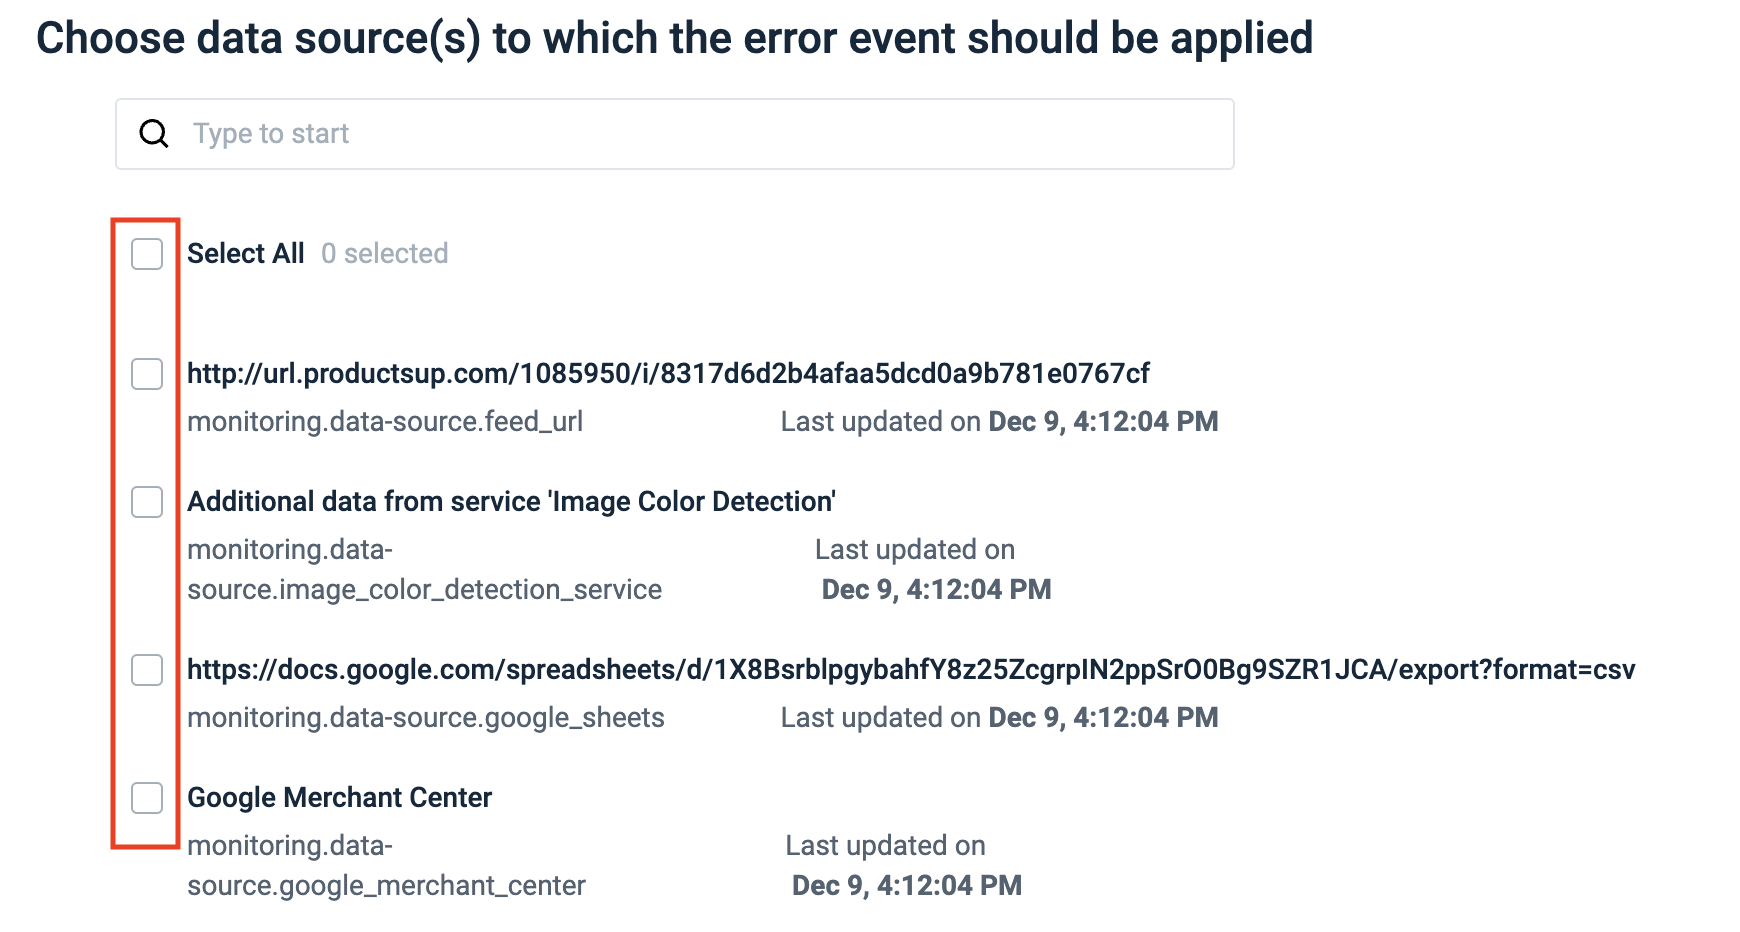
For the Import failed for Data Source monitor event, you should also define Data Source after Step 5 of the previous section.
 |
Here are the rules depending on the level where you add an event:
When you add an event at the organization or project level:
There is no Choose data source(s) to which the error event should be applied section step. The platform automatically selects all data sources.
The platform creates only one event for all data sources.
When you add new data sources, the platform automatically includes them in the monitoring.
Note
If an event already exists on the organization level, the project-level event overrides it, but only for the data sources belonging to this project. All other data sources follow the organization level's event settings.
When you add an event on the site level:
The Choose data source(s) to which the error event should be applied section appears in the wizard, and you must select all or specific data sources.
The platform creates individual events for each data source.
When you add new data sources, the platform doesn't include them in the monitoring automatically, even if you choose Select All for data sources.
Set up error event notifications
To stay informed of error events, you can set up automated notification messages via email, Slack, or Microsoft Teams.
Tip
You can use email, Slack, and Microsoft Teams notifications combined.
Set up email notifications for single email addresses
Go to Monitor in the main menu.
Set up a new monitoring event or edit a pre-existing one. See Add/edit a monitoring event, step 2.
Toggle the Send Email Notification button to the On position.
Enter the recipient's email address in the Email Notification field.
Select Add.
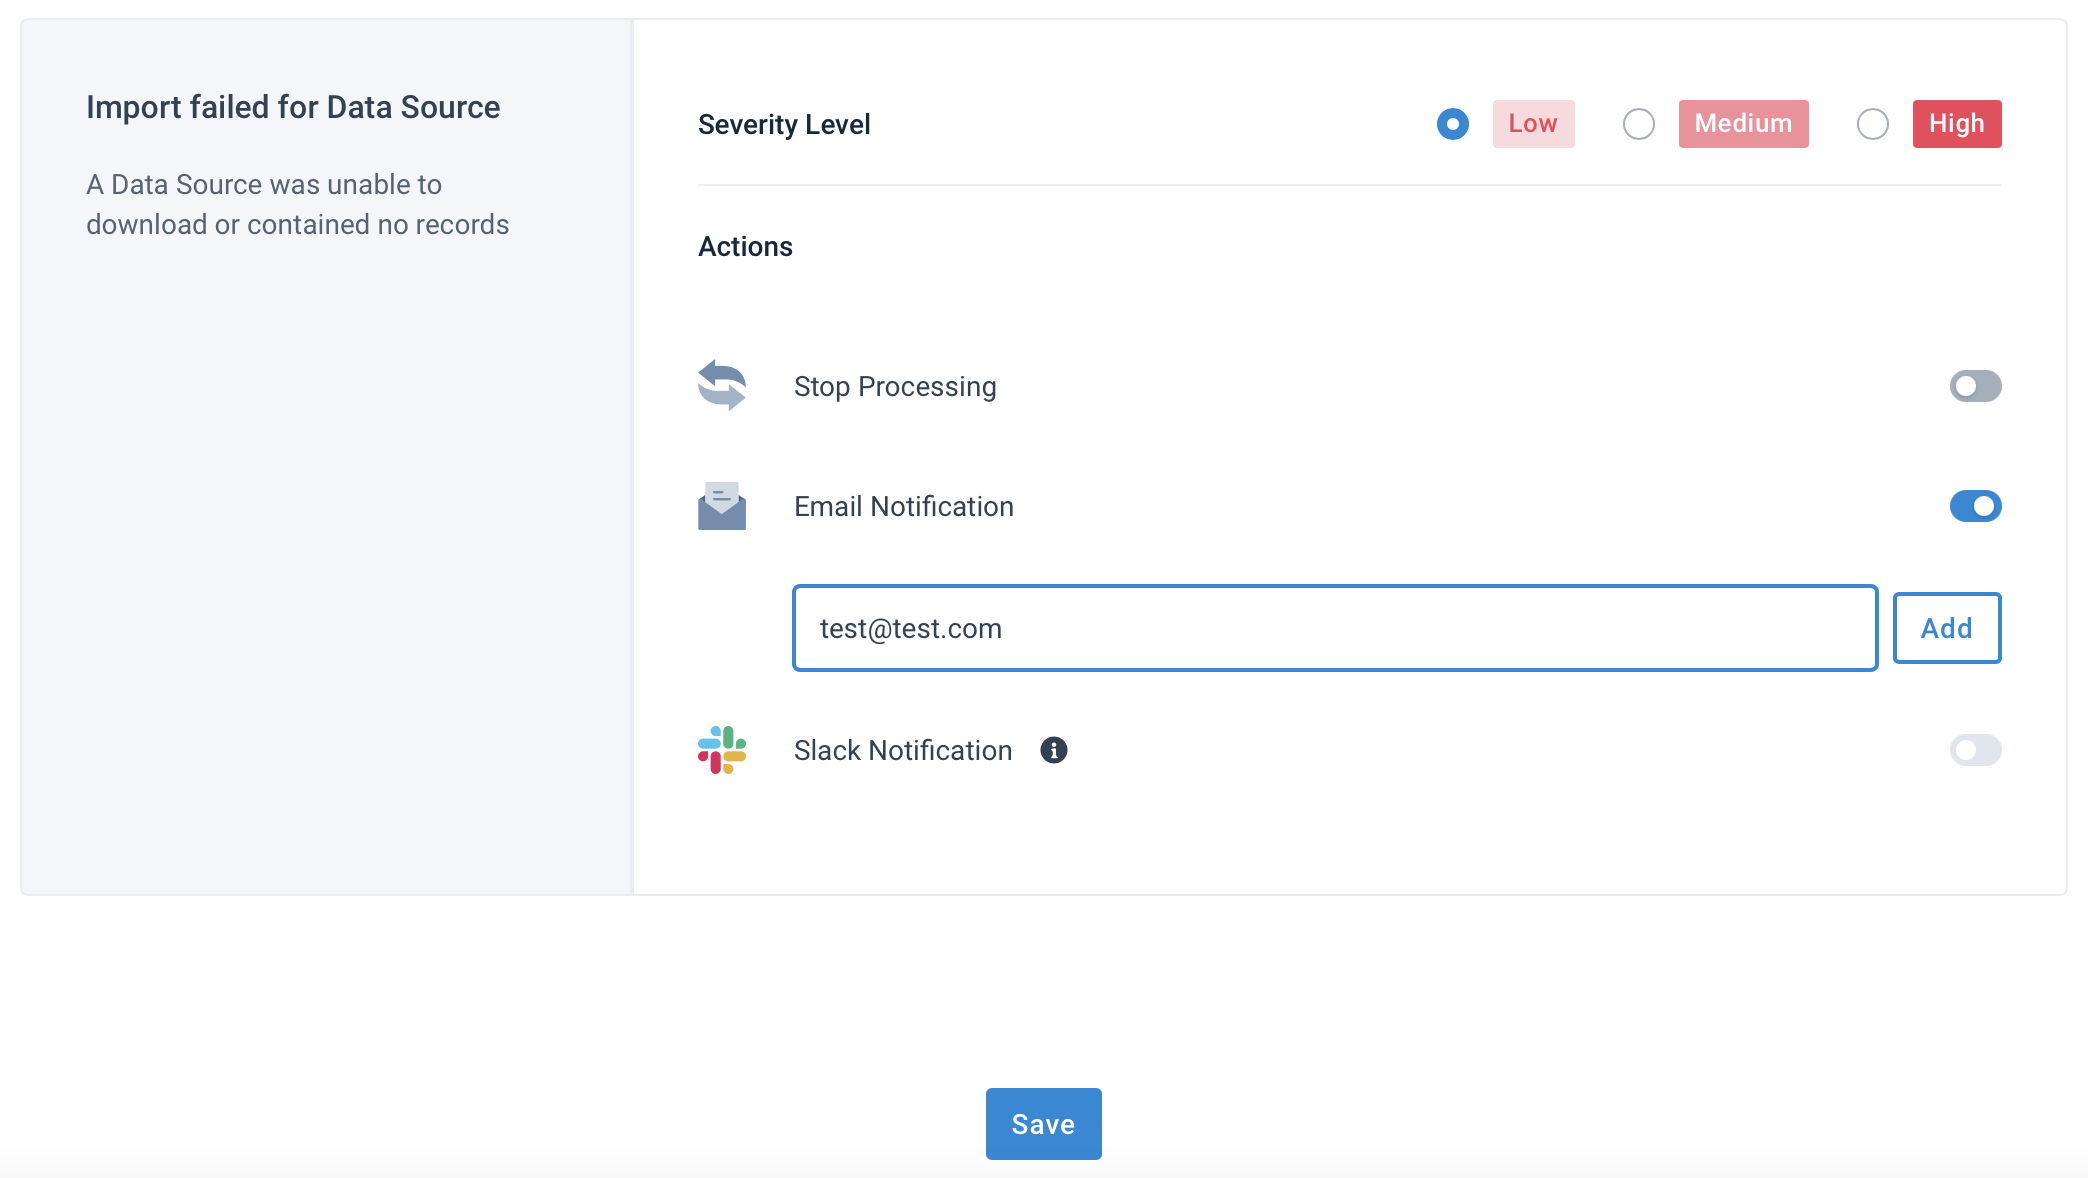
Repeat the process as necessary and select Save.
Set up group email notifications
You can also set up error event notifications sent to group email addresses.
Go to Monitor in the main menu.
Create a new error event or edit a pre-existing one. To add a new group notification, select Group Notifications.
Next, select ADD GROUP.
Choose Email and select Continue.
In Name, enter a group name. Next, add the group email address in Members and select Add.
(Optional) Toggle the Assign responsibilities button to the On position. Assigning responsibilities lets you define which types of error event notifications your specified groups receive. Then choose the Severity Level for group notifications.
Select Finish.
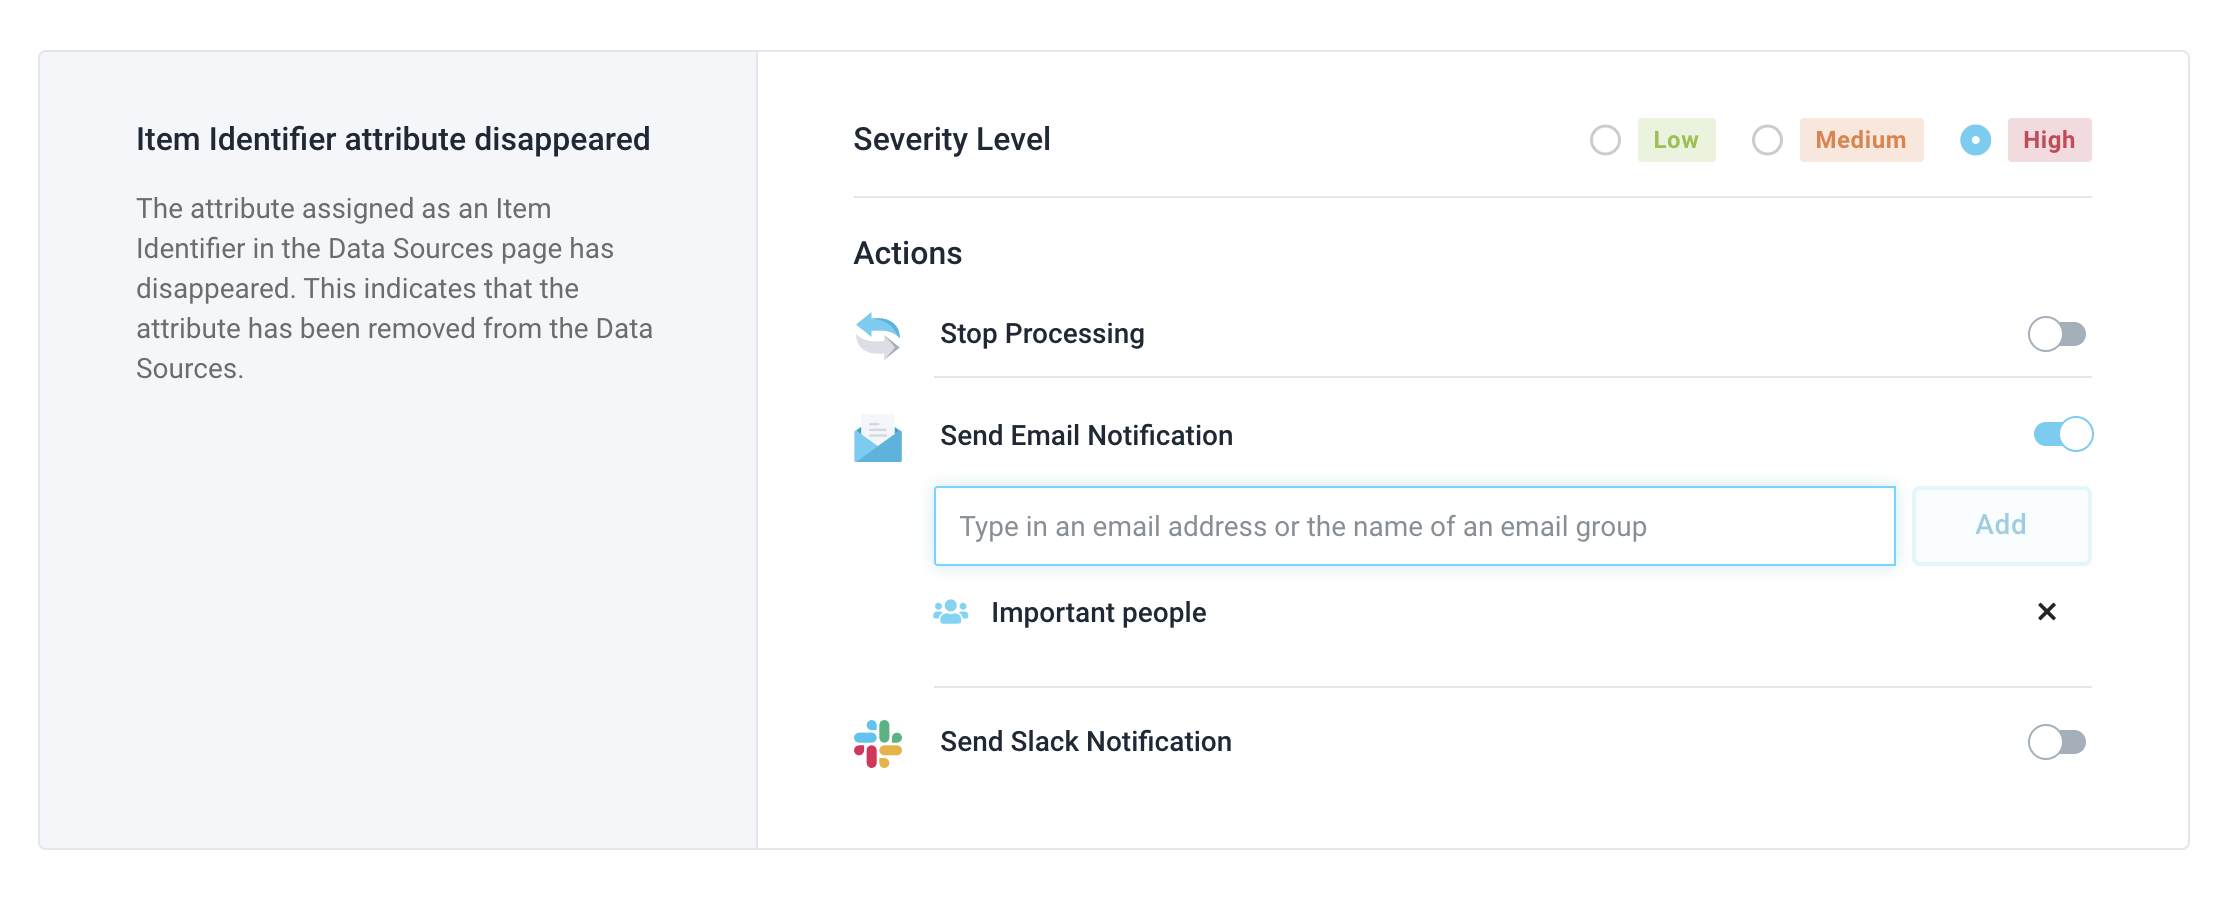
To edit error event group notifications, choose the group error type on the overview page. Then select the settings button and choose Edit. Modify the settings and select Save.

Set up Slack group notifications
You can receive notifications directly in Slack. Similar to email notifications, you can send notifications to personal Slack chats, including yours, or a multi-person chat where you're a member. You can also receive notifications in Slack channels.
Go to Monitor in the main menu.
Set up a new Slack monitoring event or edit a pre-existing one. To add a connection to your Slack chat or channel, you must first select Group Notifications and perform the setup.
Next, select ADD GROUP.
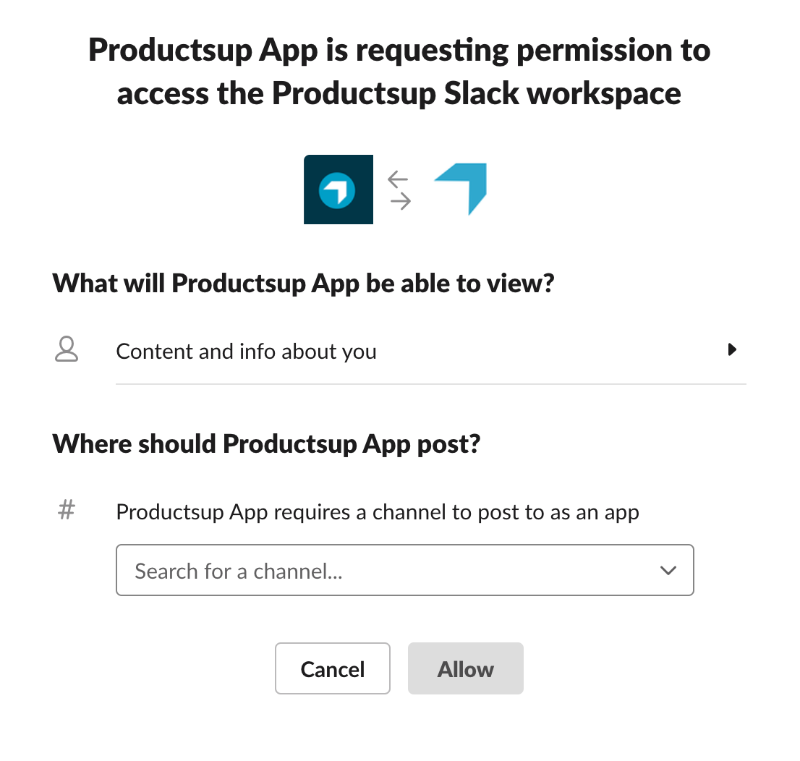
Choose Slack and select Continue. A pop-up window appears where you can enter your Slack login credentials.
Select a personal Slack chat or channel that you want to notify from the drop-down list under Where should Productsup App post?
Set up Slack notifications
Go to Monitor in the main menu.
Add a new monitoring event or edit a pre-existing one. See Add/edit a connection to your Slack chat or Slack channel step 2.
Toggle the Slack Notification button to the On position.
In Slack Notification, enter the name of the Slack channel or Slack chat you want to notify.
Select Add.
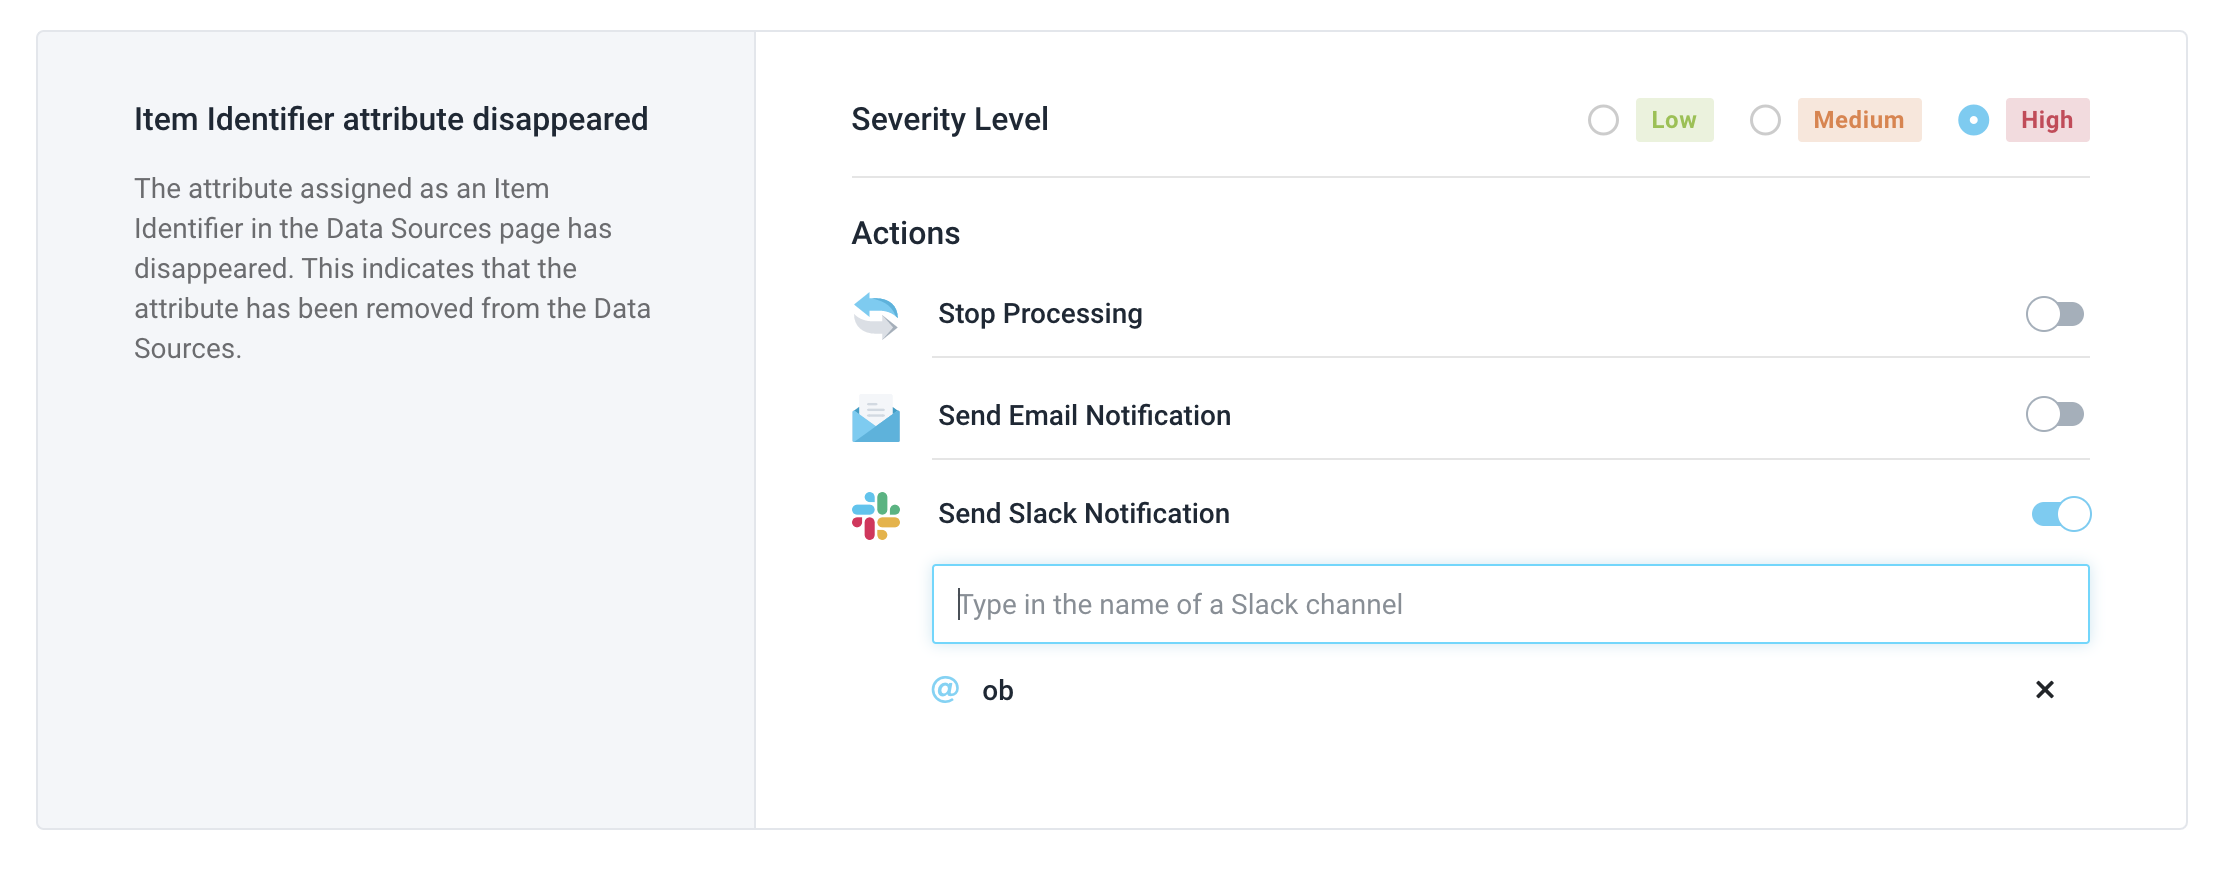
Repeat the process as necessary and select Save.
Set up Microsoft Teams group notifications
Connect your Microsoft Teams account to Productsup to automatically receive error event notifications on the platform. You can set up notifications and assign them to specific groups for each monitoring event.
Note
You must have a Microsoft Teams account to set up notifications from the Productsup platform. See Microsoft Teams for an account.
Go to Monitor in the main menu.
Set up a new Microsoft Teams monitoring event or edit a pre-existing one. To add a connection to your Microsoft Teams channel, you must first select Group Notifications and perform the setup.
Next, select ADD GROUP.
Choose Microsoft Teams and select Continue. A pop-up window appears where you can enter your Microsoft Teams login credentials.
You then advance to Microsoft Teams to decide which channels you want to set up for notifications.
Set up Microsoft Teams notifications
Go to Monitor in the main menu.
Create a new error event or edit a pre-existing one. To add a new group notification, select Group Notifications.
Next, select ADD GROUP.
Choose Microsoft Teams and select Continue.
Select the Choose a channel drop-down list and find and select the channel name.
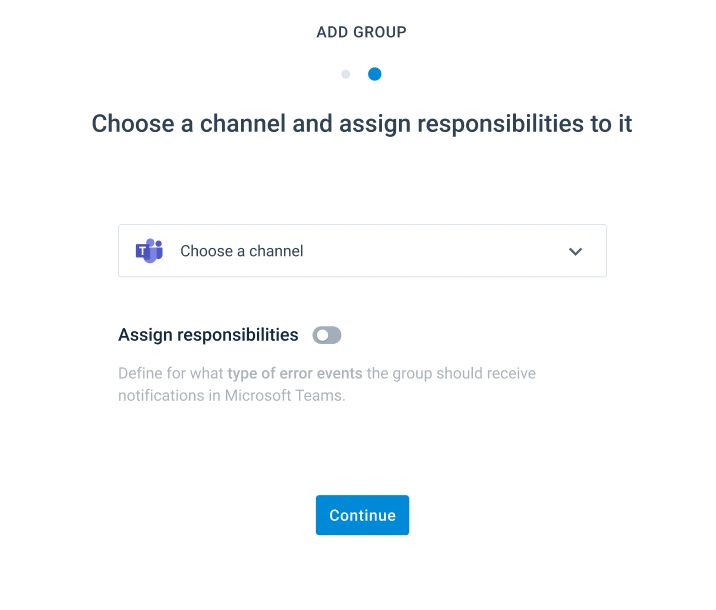
(Optional) Toggle the Assign responsibilities button to the On position. Assigning responsibilities lets you define which types of error event notifications your specified groups receive. Then choose the Severity Level for group notifications.
Select Continue.
To edit error event group notifications, choose the group error type on the overview page. Then select the settings button and choose Edit. Modify the settings and select Save.
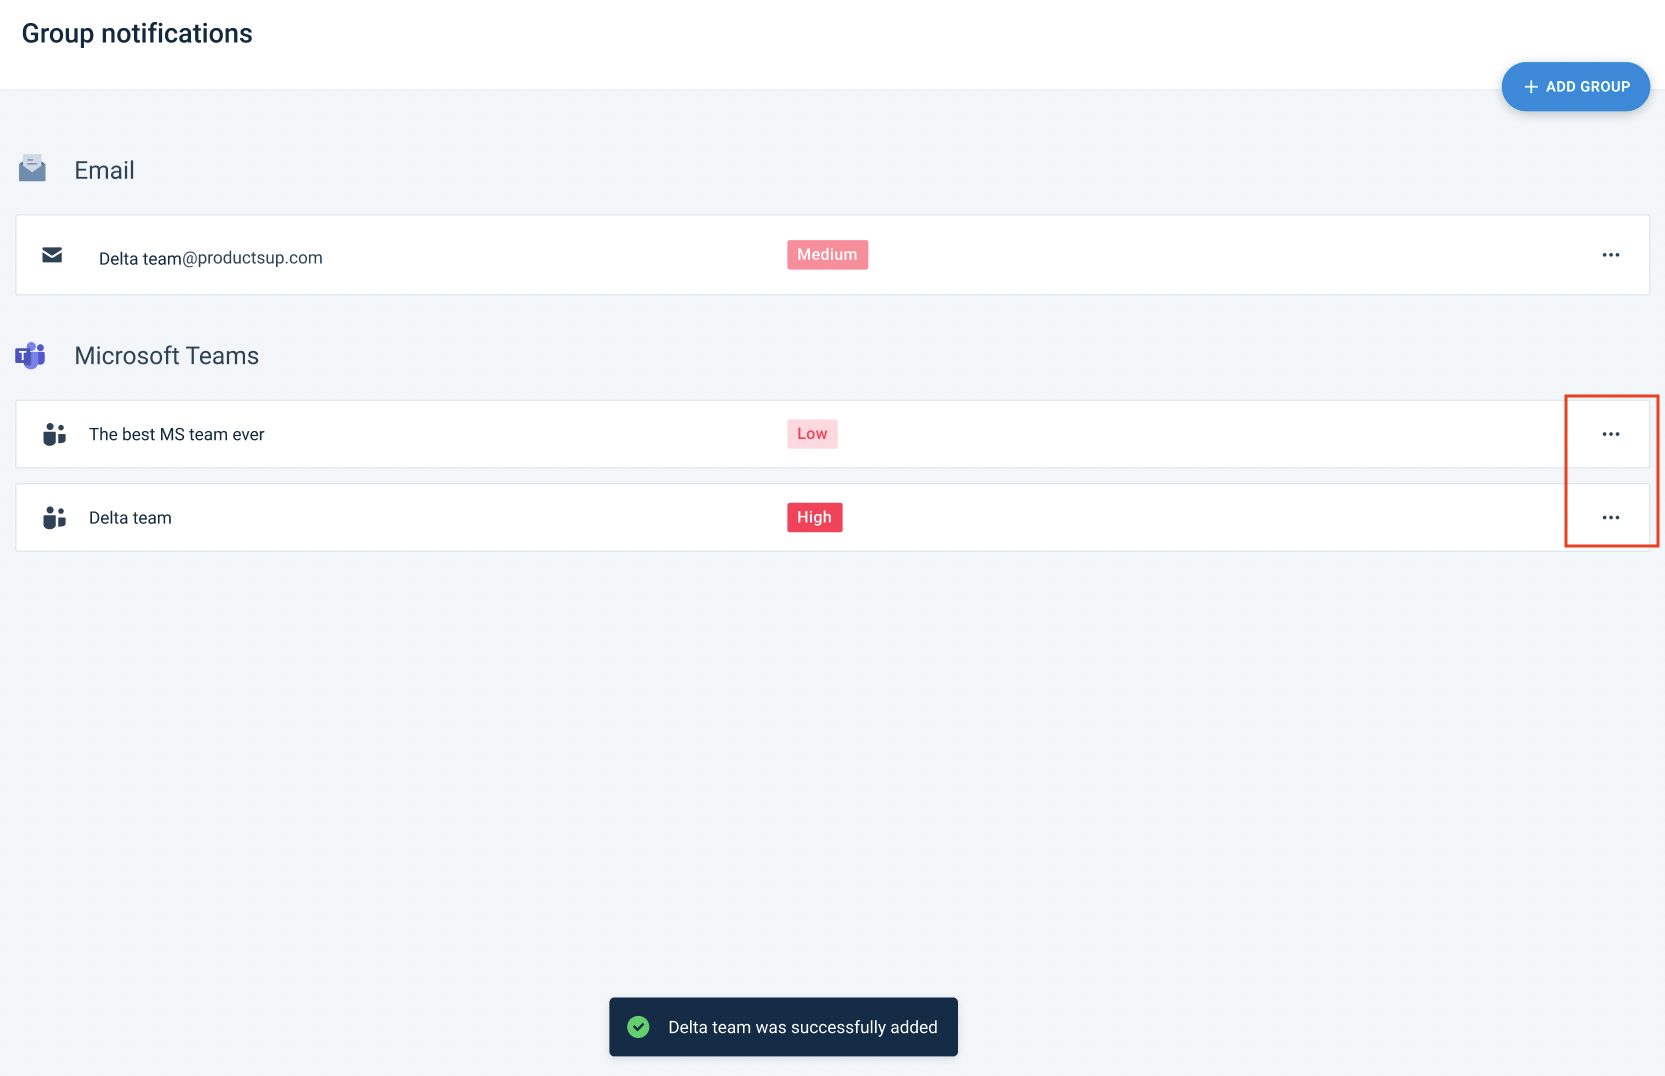
Set up notifications based on severity levels
Severity levels let you assign a level of importance to specific error events. For notifications via email groups or Slack, you can include a severity level to the notification. In other words, email groups or Slack channels automatically receive error event notifications when they match the severity level you set.
Note
You can also use severity levels to moderate which target groups should receive specific notifications.
Add a severity level to an email group, Slack, or Microsoft Teams channel
Go to Monitor in the main menu.
Select the Group Notifications.
Either add a new monitoring group or edit the pre-existing one.
(Optional) Toggle the Assign responsibilities button to the On position. Assigning responsibilities lets you define which types of error event notifications your specified groups receive. Then choose the Severity Level for group notifications.
Select Add to add the email group or Slack channel.
Repeat the process as necessary and select Save.
Now notifications are sent to the email group, Slack, or Microsoft Teams channel that you assigned a severity level.
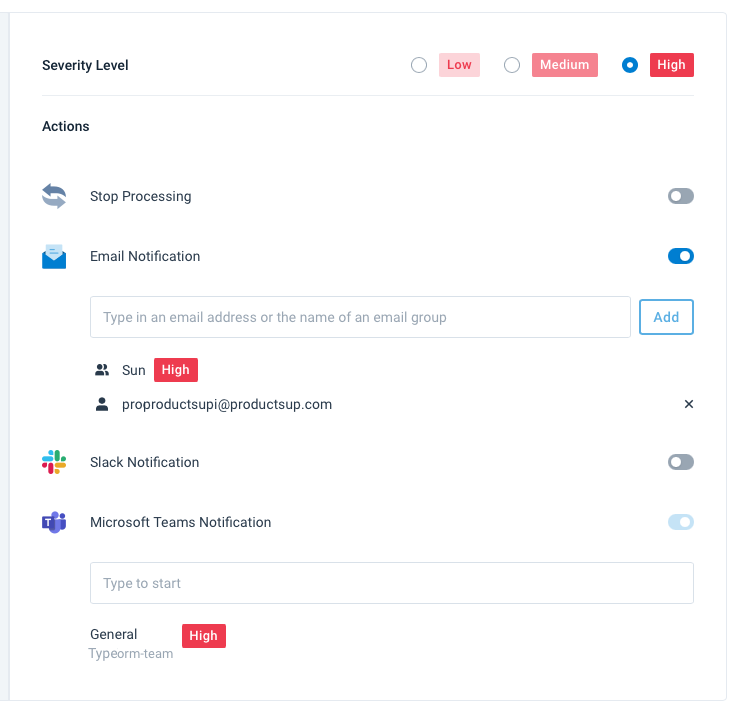
Stop feeds from processing based on monitoring events
When you add an error event, such as being notified via email or Slack, you can also stop the site from processing runs. When turned on, your error event triggers this action.
For example, if an import failure causes a significant drop in products, you probably want to avoid creating feeds with a large number of missing products. The platform stops processing runs when a run triggers an event. In other words, if you set an import monitoring event, the site does not process the intermediate or export stages.
Set up a monitoring event to stop the processing of a site
Go to Monitor in the main menu.
Set up a new monitoring event or edit a pre-existing one. See Add/edit a monitoring event.
Toggle the Stop Processing button to On.
