Advanced rule box options
Optimize your work with advanced rule box options such as pause, delete, duplicate, schedule, and segment in Data View in Productsup.
Introduction
While optimizing your product data with the help of rule boxes in Data View or Dataflow, you can apply the following advanced options to rule boxes:

Also, you can copy and apply rule boxes across multiple sites with the Bulk Option functionality. See Apply rule boxes in bulk across multiple sites for more information.
Tip
Take the video course and practice working with advanced options for rule boxes Optimization: Rule boxes for platform.productsup.com on our Academy website.
Pause or delete a rule box
To terminate the effect of a rule box, you may pause or delete it.
Pause a rule box
To temporarily pause a rule box and re-activate it later:
Go to Data View from the site's main menu.
Choose the needed export or the intermediate stage in the dropdown on the left.
Select Edit in the attribute's column where you have a rule box.
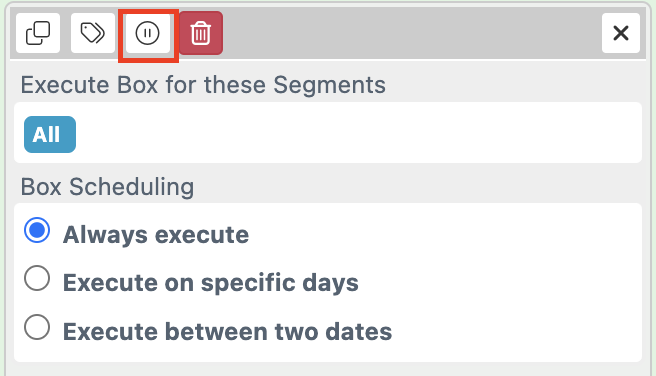
Select the wrench icon 🔧 in the top right-hand corner of the rule box.
Select the pause (||) icon.
Select Save.
Note
To activate the rule box again, repeat the previous instructions and select the play icon (▶︎) in step 5.
Delete a rule box
To remove the rule box:
Go to Data View from the site's main menu.
Choose the needed export or the intermediate stage in the dropdown on the left.
Select Edit in the attribute's column where you have a rule box.
Select the wrench icon 🔧 in the top right-hand corner of the rule box.
Select the red trash icon.
Select Save.
Duplicate a rule box
To apply the same rule box several times for the same attribute, but with slightly different settings, you can duplicate a rule box and its settings. To duplicate a rule box:
Go to Data View from the site's main menu.
Choose the needed export or the intermediate stage in the dropdown on the left.
Select Edit in the attribute's column where you have a rule box.
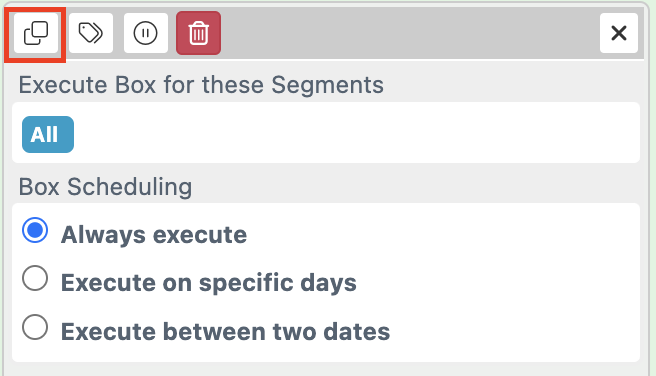
Select the wrench icon 🔧 in the top right-hand corner of the rule box.
Select the duplicate icon.
Select Save.
Apply rule boxes to segments
If you need to edit only a part of your products, you can combine these products into a segment and apply rule boxes to the whole segment without affecting other products.
Before applying rule boxes to specific product segments, you must first create a segment. To learn how to create segments, see Create a segment.
To apply rule boxes to segments:
Go to Data View from your site's main menu.
Choose the needed export or the intermediate stage in the dropdown on the left.
Select Edit in the attribute column where you want to apply a rule box to a product segment.
If you have already added the needed rule box, proceed to the next step. If not, choose Select an Option, select the needed rule box, and set it up.
Select the wrench icon 🔧 in the top-right corner of the rule box.
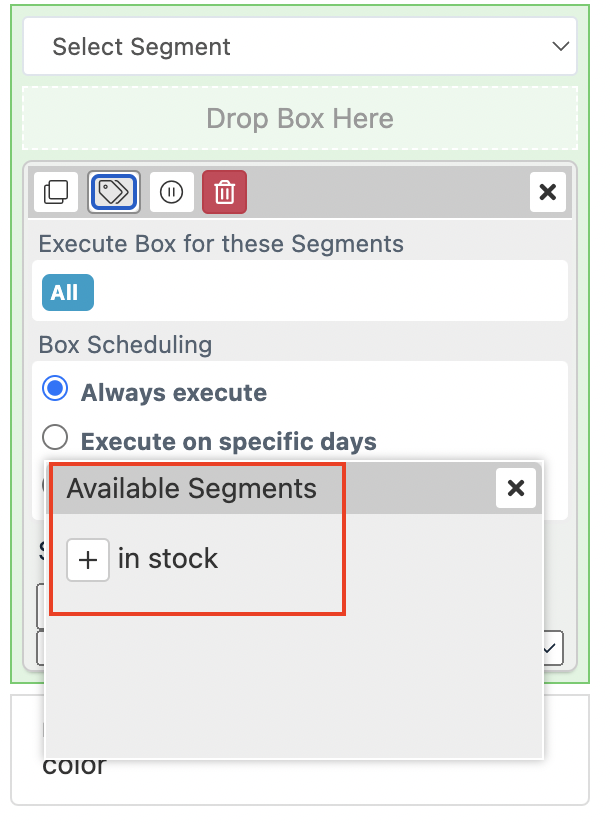
Select the label icon 🏷 at the top of the rule box and go to the Available Segments window to select the plus icon + next to the needed product segment.
Tip
You can select several segments in one rule box. In this case, the platform applies the rule box to all products matching all selected segments.
Select Save.
The rule box affects the products of the selected segment only. The rest of the products remain unchanged.
Tip
If you need to apply rule boxes to products based on the contents of multiple attributes, you can use the Rule box conditions feature available in Dataflow. See Apply rule boxes based on conditions.
Schedule rule boxes to run at a specific time
You can schedule rule boxes to run at a specific time. For example, if you want to offer discounts on products on weekends.
Note
The timezone of the rule boxes is the same as the site's timezone. You can't change it by yourself. If you need to change the timezone, contact support@productsup.com. In your request, indicate the following:
needed timezone
the site IDs where you want to apply the timezone.
Schedule a rule box for a specific day
To schedule a rule box for a specific day of the week and time interval:
Go to Data View from the site's main menu.
Choose the needed export or the intermediate stage in the dropdown on the left.
Select Edit in the attribute's column where you have a rule box.
Select the wrench icon 🔧 in the top right-hand corner of the rule box.
In the Box Scheduling section, select Execute on specific days.
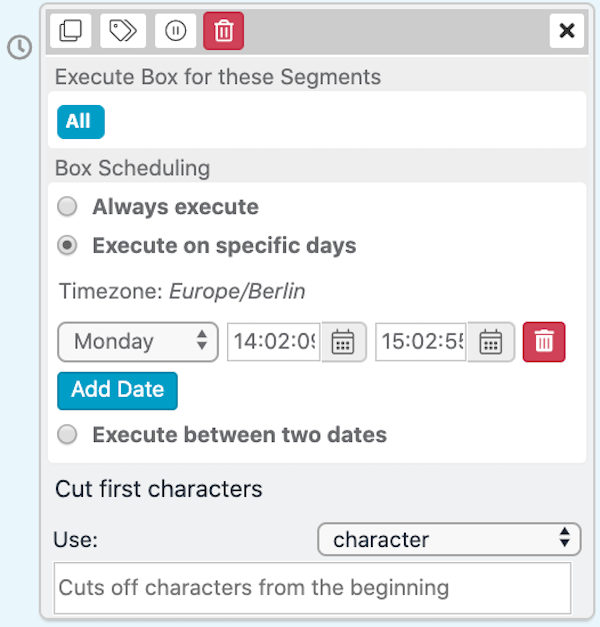
Select Add Date.
Pick a day of the week from the dropdown.
Select the Begin and End times.
Select Save at the top of the toolbar.
Note
You can schedule as many timeframes as desired by repeating the previous actions.
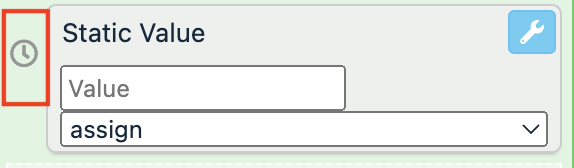
After you add a schedule, a little clock icon appears next to the scheduled rule box.
Schedule a rule box between two dates
Go to Data View from the site's main menu.
Choose the needed export or the intermediate stage in the dropdown on the left.
Select Edit in the attribute's column where you have a rule box.
Select the wrench icon 🔧 in the top right-hand corner of the rule box.
In the Box Scheduling section, select Execute between two dates.
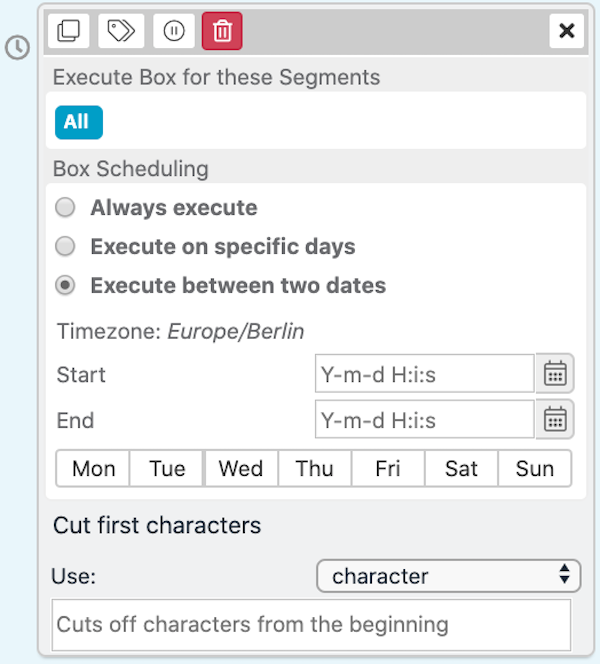
Define both Start and End dates or just one of them.
Select Save at the top of the toolbar.
Note
If you define only a Start date, the rule box works for all runs starting this date.
If you define only an End date, the rule box works for all runs before the end date.
If you define the Start and End dates, the rule box works for all runs between and on those dates.
Apply rule boxes in bulk across multiple sites
If you need to add the same rule boxes to multiple sites, use the Bulk Option functionality to save time.
Note
Your sites must have the same attribute names to apply rule boxes in bulk.
Set up the rule boxes in one site.
Go to the organization or project level.
Select Bulk Option in the upper ribbon. A new page opens.

In the Choose Sites step, choose the site where you created the rule boxes and select Next Step.
In the Choose Operation step, select Add Dataflow Boxes and confirm your choice by selecting Next Step.
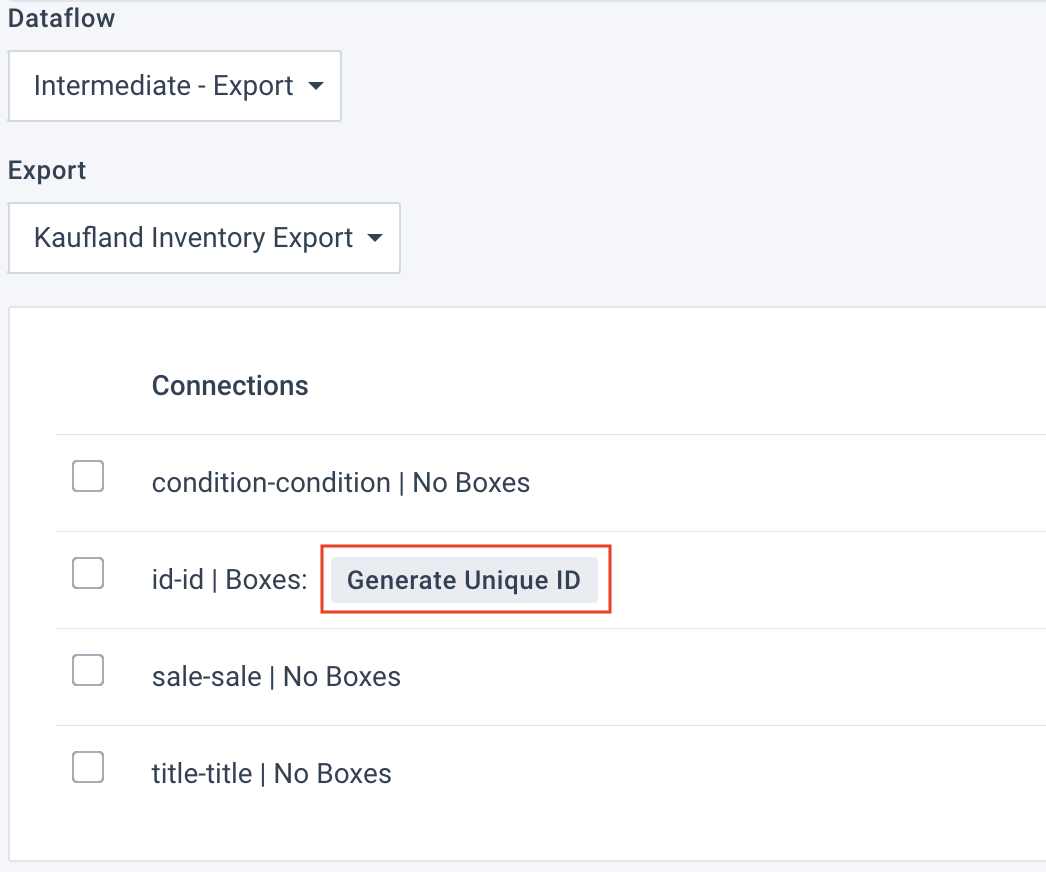
In the Operation Details step, choose the stages that contain the rule boxes in the Dataflow dropdown. If you choose Intermediate - Export, select the export containing your rule boxes from the Export dropdown.
Note
All sites where you want to apply the rule boxes must have the selected export.
In the Connections section, select the connections that contain the rule boxes you want to copy and apply in bulk.
You can see the rule boxes applied to each connection.
To let the platform display the sites where you want to copy the rule boxes, select the projects they belong to in the Target Projects section.
Search for your desired sites in the Target Sites search field.
If you are adding rule boxes between the intermediate and export stages, find the Channels column and select the exports where you want to apply the copied rule boxes.
Select Execute.
In the Confirmation step, check the results of the applied changes.
You can leave this screen by selecting Return to organization page. You can also go to one of the sites where you performed the changes by selecting the name of the needed site.