Import products from Akeneo PIM
Import products from Akeneo product information manager (PIM) or product management system (PMS) in Productsup.
Introduction
In Productsup, you can directly import products from a product information manager (PIM), such as Akeneo.
You can use the following data sources to import your data from Akeneo:
Akeneo Cloud API v5.0
Akeneo File Import
Prerequisites
To use Akeneo Cloud API v5.0 as a data source in Productsup, you need:
Have an account in the Akeneo Serenity Enterprise and Growth editions. See What is the Serenity version.
Create a connection in Akeneo. See Create a connection.
Set up Akeneo Cloud API data source in Productsup
After creating a connection to Productsup from your Akeneo account, you can use the same credentials to proceed with the Akeneo Cloud API data source in Productsup.
Go to Data Sources from your site's main menu and select ADD DATA SOURCE. Then choose Akeneo Cloud API v5.0 and select Add.

Optionally, give your data source a custom name. This replaces the name of the data source on the Data Sources Overview page. Then, select Continue.
In Host, enter the URL path to your data.
Enter the four (4) credentials you received when you previously created the Akeneo connection in Username, Password, ClientId, and Client Secret.
Choose which delimiter to use to group several products in Bundle Delimiter. The default is
###.Set the number of products that the platform can fetch at a time in Limit.
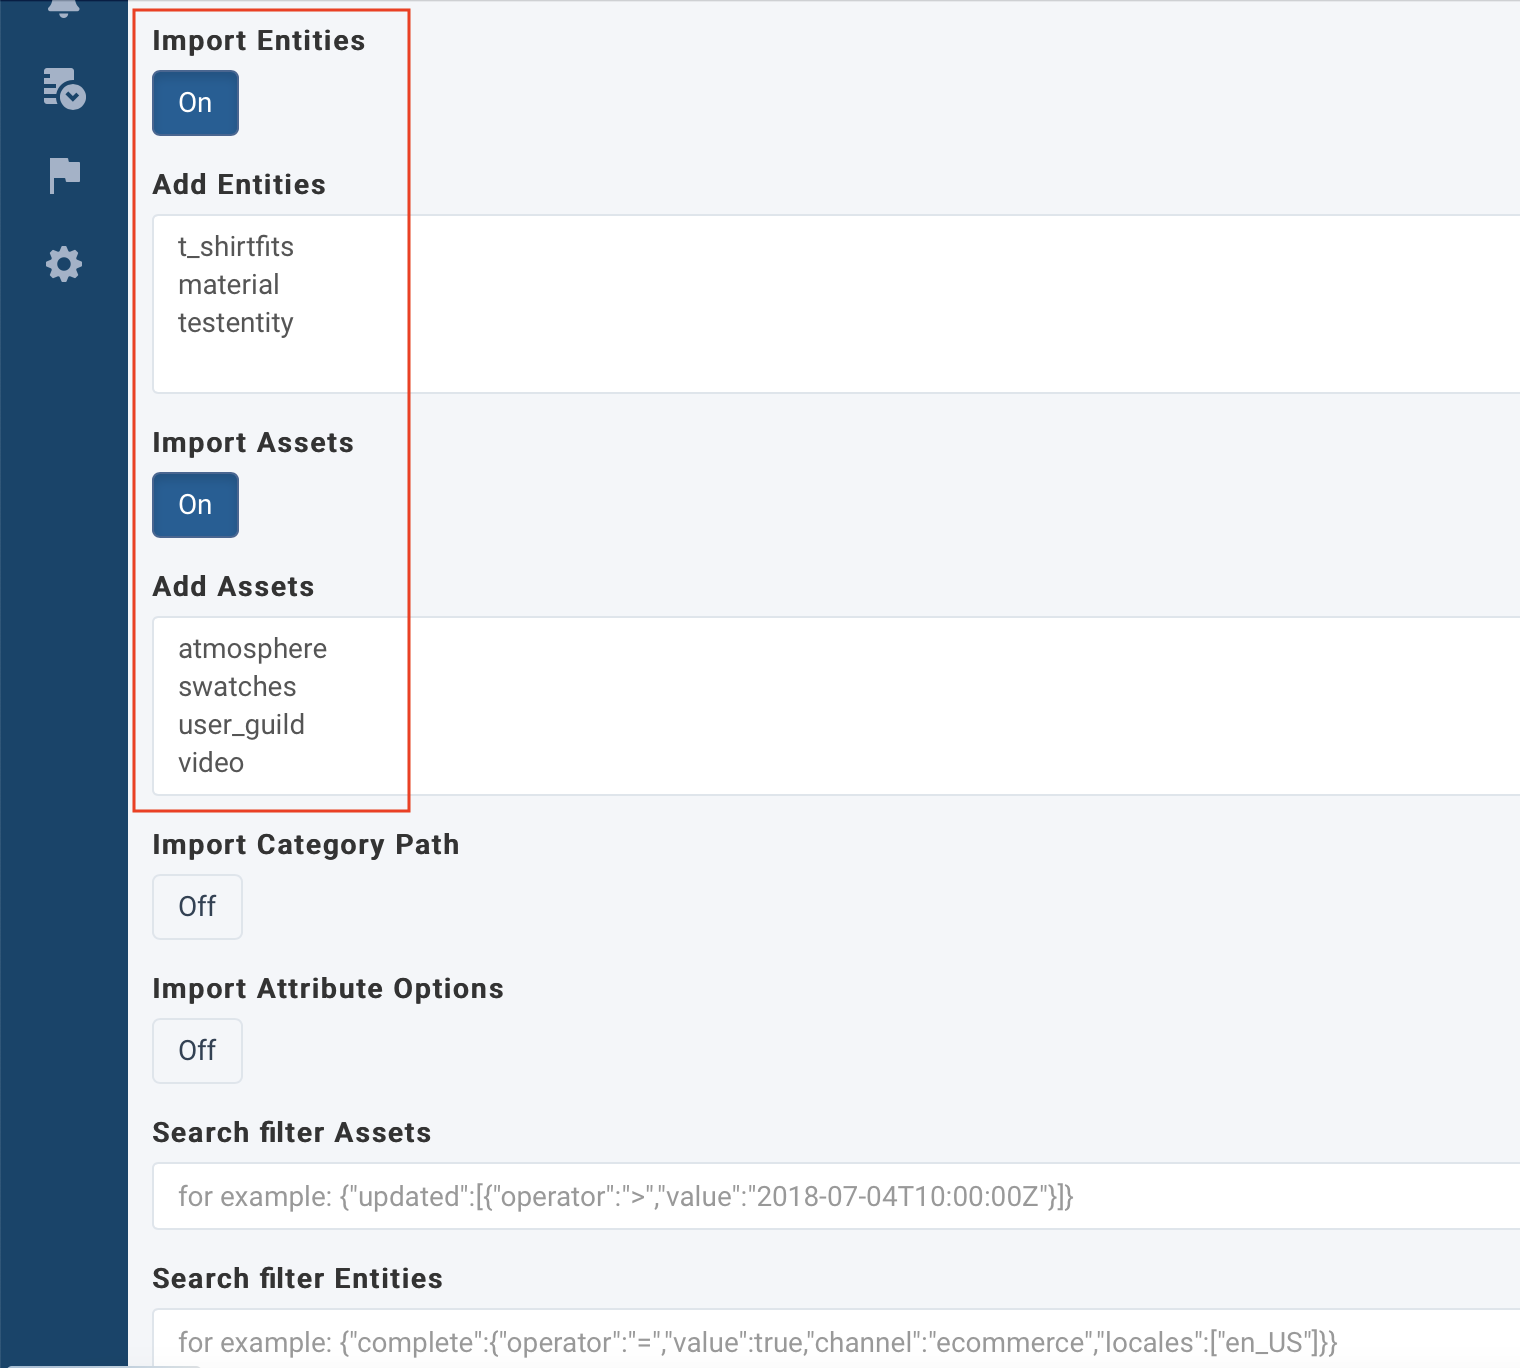
Optionally, add entities and assets. Productsup imports all products and describes in the logs which entity groups and assets are available in Akeneo. By default, Productsup doesn't import entities or assets. If you wish to import entities or assets from Akeneo, take the following steps:
Switch the Import Entities or Import Assets buttons to ON.
In Add Entities and Add Assets, enter the names of the entities and assets you wish to import. Add each entity and asset names with a new line.
Tip
You can see which entities and assets are in the Productsup logs during the first import run. Open the logs panel anytime in Productsup by selecting the notifications icon in the top-right header.

Switch the Import Category Path to On to import the category path of your products.
Switch the Import Attribute Options to On to get a list of attribute options.
Enter asset filters in Search filter Assets. For example, {"updated":[{"operator":">","value":"2018-07-04T10:00:00Z"}]}}.
Enter attribute filters in Search filter Attribute. For example, {"code":[{"operator":"IN","value":["code1","code2"]}]}.
Enter entity filters in Search filter Entities. For example, {"complete":{"operator":"=","value":true,"channel":"ecommerce","locales":["en_US"]}}.
Enter family filters in Search filter Families. For example, {"code":[{"operator":"IN","value":["family_code1","family_code2"]}]}.
Enter product filters in Search filter Products. For example,
{"enabled":[{"operator":"=","value":true}]}.Enter the product location filter for your product downloads in Filter by Locales.
In Filter by Scope, enter the filter for product values to return relevant attributes for the given channel and the non-localized or irrelevant attributes.
In Description (optional), you can change this data source name, which appears in your data source list.
Select Save and select Import at the top of the page.
Continue in your Akeneo account to configure your feed export to Productsup. See Export your data.
Next, import your data from Akeneo to Productsup. See the following section.
Set up Akeneo File Import in Productsup
Go to Data Sources from your site's main menu and select ADD DATA SOURCE. Then, choose Akeneo File Import and select Add.

Optionally, give your data source a custom name. This replaces the name of the data source on the Data Sources Overview page. Then select Continue.
In Host (required), enter the URL path to your data.
Enter your Akeneo login credentials in Username (optional) and Password (optional).
Enter the name of your product file for import in Product Filename (required).
In Product URI, enter the Uniform Resource Identifier (URI) that identifies your specific resource.
Choose one of the following CSV delimiter types in the Product CSV Delimiter drop-down list:
, COMMA| PIPE; SEMICOLON\t TAB~ TILDE
Optionally, you can repeat the previous three steps for the category, variant, attribute, and family files in the corresponding fields that follow.
In Locale, choose the product location for your product downloads.
In Bundle Delimiter, choose which delimiter to use to group several products. The default is a pipe
|.In Channel (optional), enter the Akeneo channel you wish to import from. The default is set to all.
Switch the Enabled button to On to activate the data source.
In Output filter, you can choose to apply a filter to only import specific columns. To accomplish this, set a Pearl Compatible Regular Expressions (PCRE) or Regular Expression (RegEx) condition to exclude specific columns under the output filter.
See How does the Regular Expression (RegEx) filter work? to learn more.
In Description (optional), you can customize this data source name, which appears in your data source list.
Select Save and select Import at the top of the page.