Import products from SAP Commerce Cloud and SAP Commerce
Import products from SAP Commerce Cloud and SAP Commerce into your Productsup site.
Introduction
To manage product data in SAP, you can use SAP Commerce Cloud or SAP Commerce (formerly known as Hybris).
SAP Commerce Cloud is a cloud-based e-commerce platform that helps large businesses build connected, insightful, and adaptive commerce experiences.
SAP Commerce is an on-premises commerce solution with product information management (PIM) functionality.
You can import product data from your SAP Commerce Cloud or SAP Commerce solution to Productsup to optimize and send it to your desired export channels. The integration between the two systems uses the Productsup Connector installed in SAP and the Productsup Stream API.
The new Productsup Connector (version 2.0.0 and up) is compatible with SAP Commerce Cloud and SAP Commerce versions 2105, 2205, and 2211, as well as all subsequent versions. If you are using an older version of SAP or an older Productsup Connector version, you may need to migrate to the newer versions.
Note
The only possible function of the Productsup Connector is to send selected product data from your SAP Commerce Cloud or SAP Commerce solution to your Productsup site. It is impossible to use the Productsup Connector in reverse or use it in any way to gain access to your SAP solution.
The process of setting up product data import from SAP Commerce Cloud or SAP Commerce to Productsup is as follows:
Add the Productsup Connector to your SAP solution to let it push product data to the Productsup Stream API.
Create a stream in the Productsup Stream API.
Add the Productsup Stream API data source in your Productsup site.
When you set up the integration between your SAP solution and your Productsup site, you may also need instructions on performing your first data export from SAP to Productsup or adding new product attributes in SAP. You can find these instructions at the bottom of this document.
SAP PCM (oData) data source
Besides the Productsup connector option, you can use the SAP PCM (oData) data source to import your data into Productsup from SAP. However, this integration option is no longer the preferred way of importing your product data from SAP into Productsup. We recommend using the Productsup Connector unless there is a specific reason why it doesn't work for you.
See Use the SAP PCM (oData) data source to set up the SAP PCM (oData) data source. Contact support@productsup.com if you need assistance.
Prerequisites
Disclaimer
The Productsup Help Center doesn't bear any responsibility and accountability for the accuracy and relevance of the processes, features, UI elements, and other information mentioned in the following instructions about third-party websites and platforms. The following instructions aim to help the readers of the Productsup Help Center perform complex activities outside the Productsup platform while the official technical documentation of the website or platform in question doesn't provide relevant information on the needed activities.
To import your data from SAP Commerce Cloud or SAP Commerce into your Productsup site, you first need to:
Reach out to your Customer Success Manager or contact support@productsup.com to get a Stream API access token to push your data from SAP to Productsup through the Productsup Stream API.
Download a .zip file with the Productsup Connector from this repository: https://github.com/productsupcom/nemeses-sap-hybris-releases. You can simply choose the latest version on the list if your SAP version is compatible with it.
Note
This prerequisite is relevant for SAP Commerce Cloud only. You can skip this if you are setting up product data import from SAP Commerce.
Create a separate git-repository for the Productsup Connector code:
Create a private repository for the Productsup Connector in your
gitversion control system. SAP doesn't allow the use of public repositories.Create a branch in your repository.
Create a
core-customizefolder in the branch and extract the contents of the .zip file into this folder.Add a
manifest.jsonfile to the folder or modify an alternative of that file:If your SAP solution doesn't use any other extensions, you can copy the
manifest.jsonfile from this repository and add it to your private repository. You can also use this public repository as an example of the needed folder structure.If your SAP solution already uses other extensions, add the following values to the element
"extensions": []in the file that your SAP solution is currently using to pick up the code of the needed extensions:“productdataexport”, “productdataexportaccelerator”, “productdataexportacceleratorbackoffice”, “productdataexportbackoffice”
The structure of the
core-customizefolder should thus be as follows:¦ +---core-customize ¦ manifest.json ¦ +---productdataexport +---productdataexportaccelerator +---productdataexportacceleratorbackoffice +---productdataexportbackofficeTip
Add the extension
productdataexportmigrationto the folder and themanifest.jsonfile (or its alternative) if you are migrating from an older version of the Productsup Connector.
Use the Productsup Connector to import data from SAP
Add the Productsup Connector to your SAP solution
This section describes what you need to do in SAP Commerce Cloud or SAP Commerce to add the Productsup Connector.
SAP Commerce Cloud
Create and deploy a build
To start setting up your SAP Commerce Cloud solution and add the Productsup Connector to it, do the following:
Go to the homepage of your SAP Commerce Cloud solution.
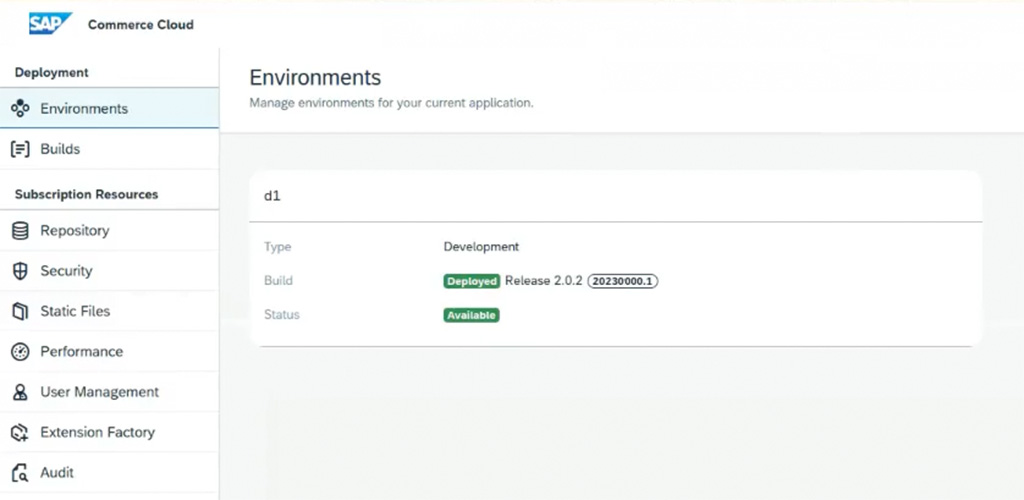
In Subscription Resources, go to Repository and add the git-repository you created as shown in Prerequisites.
There are two (2) options to add a repository. See Connecting a Code Repository Using SSH or Connecting a Code Repository Using HTTPS based on your desired protocol type.
Go to Builds in Deployment and select Create.
Enter a build name in Name and add the name of your repository branch in Git Branch or Tag.
Select Save.
When your build finishes running, it displays the status
Successin the column Last Build. When you see this status, choose your build and then select Deploy to Environment in the top-right corner of your view.In Target Environment, select your needed environment. Then, choose a suitable option in Deployment Mode.
In Platform Update Mode, select the following:
If you are adding the Productsup Connector for the first time, choose Initialize database.
If your SAP Commerce Cloud solution has already used an older version of the Productsup Connector, choose Migrate data.
Select Deploy in the top-right corner of your view. The deployment process may take a long time to finish.
Set up the export jobs
When you successfully deploy your build to the needed environment, you can set up your product data export to the Productsup Stream API:
Go to your Backoffice endpoint (SAP Administration Cockpit) and scroll down in the main navigation menu on the left to find the Productsup extension.
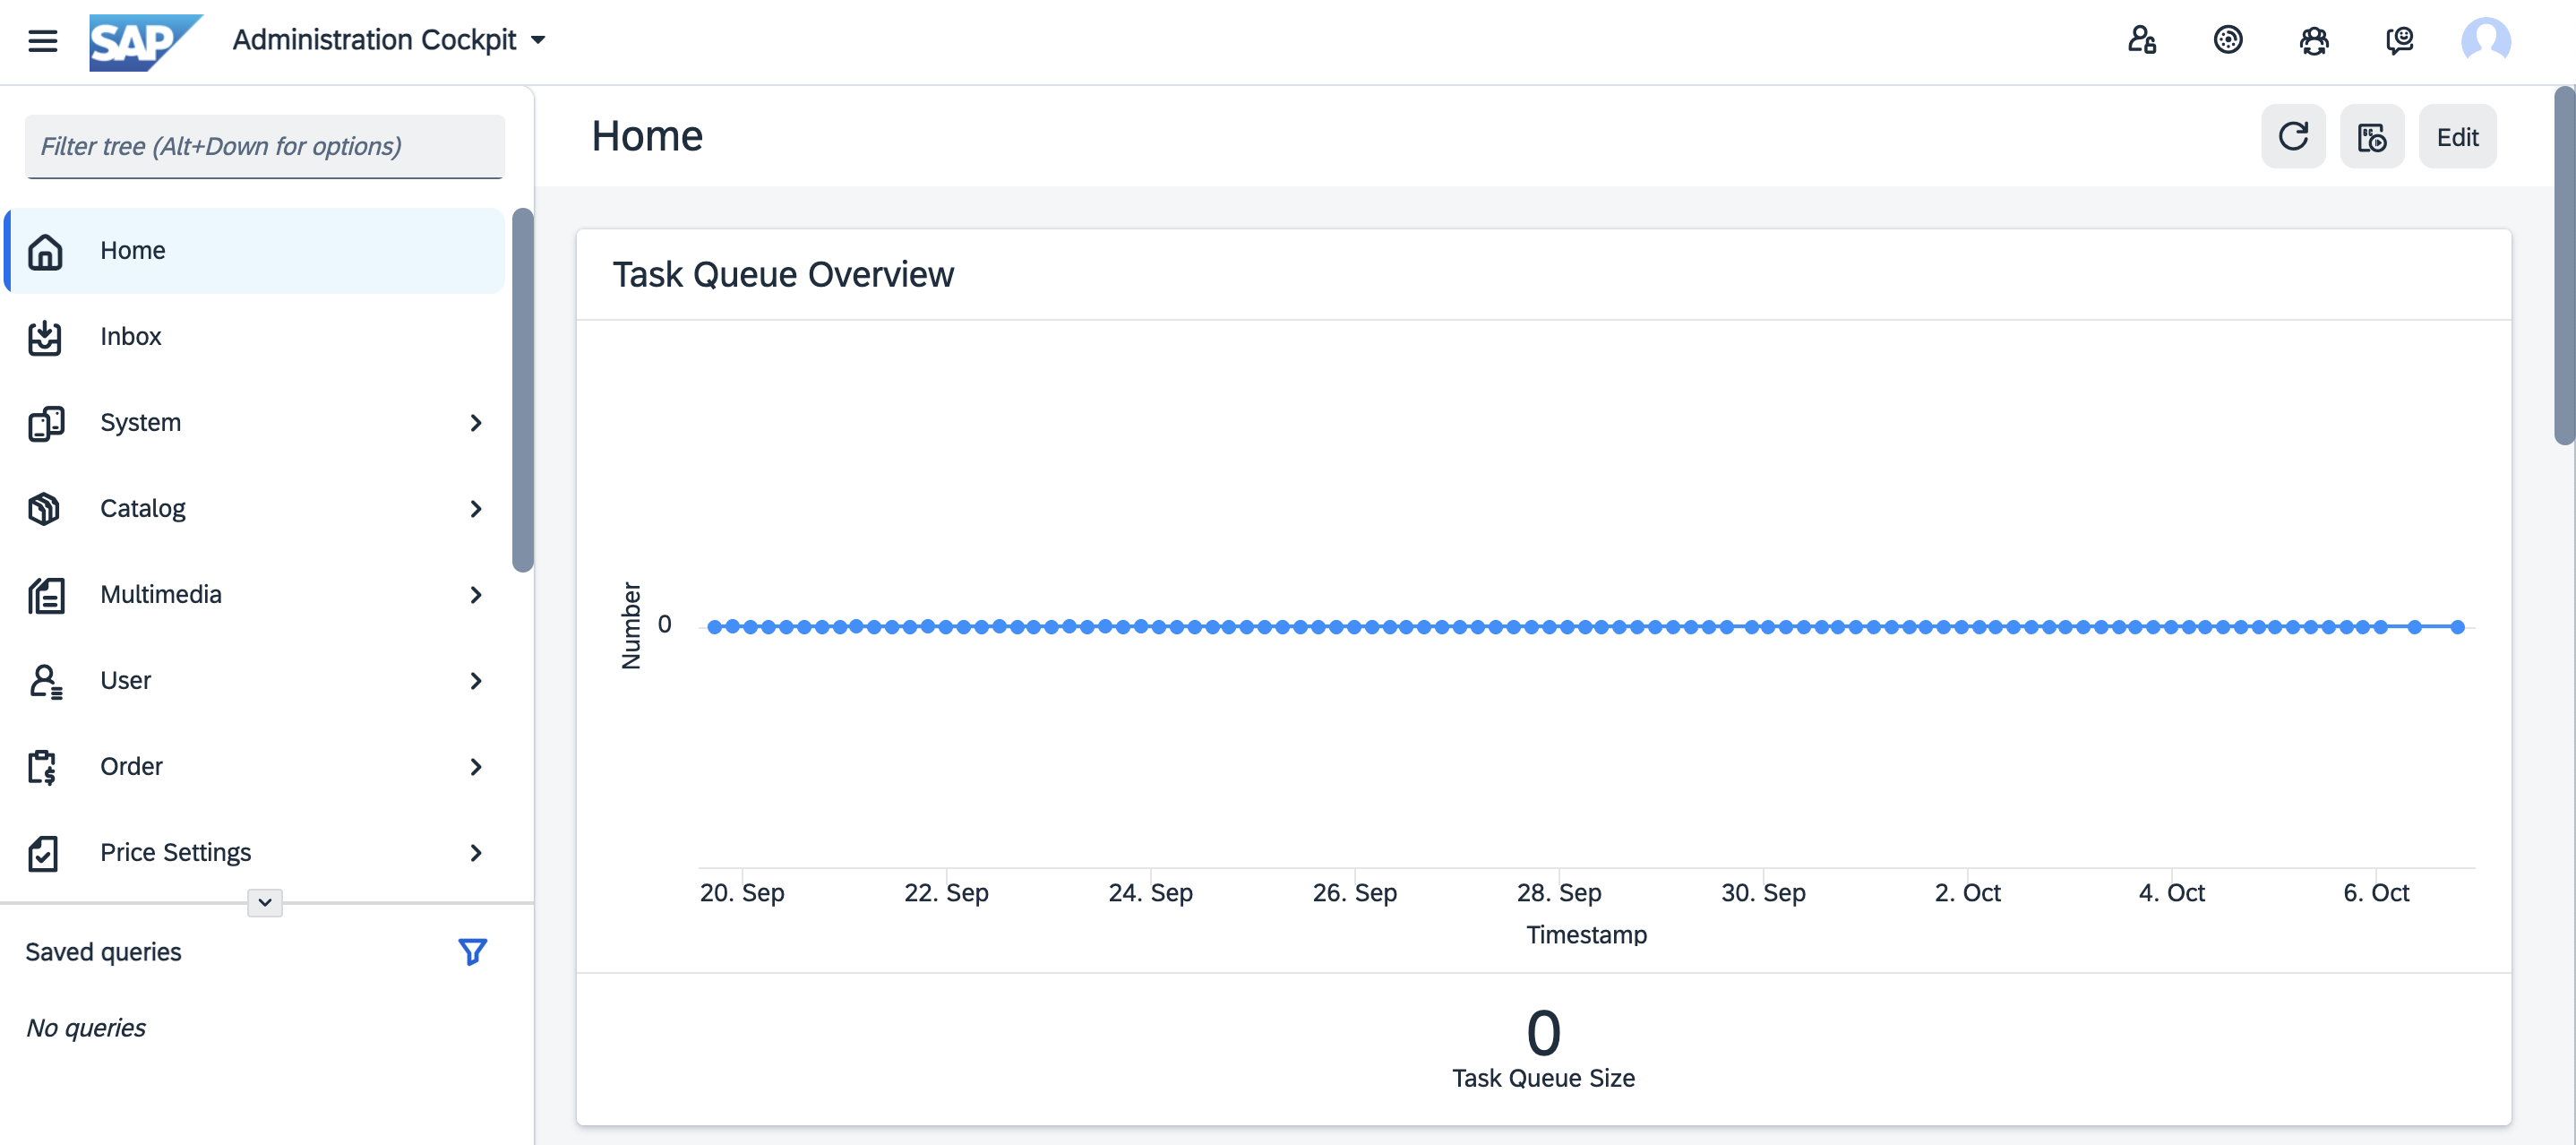
Go to Export Connection to edit your connection to the Productsup Stream API. Choose AccessTokenRestApiExportConnection and add the API access token you requested from Productsup in Access Token. Select Save.
The hostname should be
stream-api.productsup.com, and the port should be443.
Go to Export Configuration to find your preconfigured product attribute sets.

There are two (2) export configurations available:
ideal- This attribute set can include all the product attributes that you want to send to Productsup.minimal- This attribute set can include only a limited set of product attributes. You can use it for more frequent exports of certain attribute values to Productsup.
You can select each export configuration and add or remove attributes in Assigned Field Configurations as needed.
Select API Export CronJob and open each job on the list to review and adjust its settings as needed. For example, you can schedule the jobs or choose the needed export configurations:
Select ideal in Export Configuration to let the job send all the desired attributes to Productsup.
Select minimal in Export Configuration to let the job send a small set of attributes.
Tip
If you want to send all your product data to Productsup once a week and only some attributes, such as
priceandstock, every day, you can select theidealexport configuration in the job ProductsupApiExport and chooseminimalin the job ProductsupApiDeltaExport. Then, go to Export Configuration and make sureminimalonly contains the attributespriceandstock.If you schedule these jobs to run weekly and daily, respectively, you can achieve the goal of sending different sets of attributes at different intervals.
The setup in your SAP solution is mostly over. See Create a stream with the Productsup Stream API to proceed.
SAP Commerce
To add the Productsup Connector to your SAP Commerce solution, do the following:
Unpack the .zip file you downloaded as stated in Prerequisites and move the unpacked contents to the same local folder where you have the extensions of your SAP Commerce platform. For example, its location can be hybris/bin.
Go to hybris/config, open the file
localextensions.xml, and add the following to the<extensions>tag:<extension dir="${HYBRIS_BIN_DIR}/ext-productsup/productdataexport" /> <extension dir="${HYBRIS_BIN_DIR}/ext-productsup/productdataexportaccelerator" /> <extension dir="${HYBRIS_BIN_DIR}/ext-productsup/productdataexportbackoffice" /> <extension dir="${HYBRIS_BIN_DIR}/ext-productsup/productdataexportacceleratorbackoffice" />Tip
Add another extension line at the end of this snippet if you are migrating from an older version of the Productsup Connector.
<extension dir="${HYBRIS_BIN_DIR}/ext-productsup/productdataexportmigration" />Run the command ant clean all in the console.
Remove cached backoffice files by deleting the relevant backoffice folder: hybris/data/backoffice.
Run the command ant updatesystem.
Start your server.
If your SAP Commerce solution hasn't used an older version of the Productsup Connector before, continue following the steps in this list.
Note
If your SAP Commerce solution already used an older version of the Productsup Connector, proceed with the steps in Migrate from an older version of the Productsup Connector.
Log in to the Hybris administration console.
Remove the following outdated types:
Extension: productdataexportmigration
ComposedType FTPExportConnection
ComposedType FTPSExportConnection
ComposedType SFTPExportConnection
Log in to the Backoffice endpoint of your SAP Commerce solution and press the F4 key to open the admin view.
Select the menu icon in the top-right corner of your view, choose Reset Everything, and select Yes to confirm.
Press the F4 key again to return to the Backoffice homepage and continue with the setup starting with Step 1 in Set up the export jobs..
Migrate from an older version of the Productsup Connector
After adding the needed extensions and running commands, as shown above, do the following to migrate to a newer version of the Productsup Connector:
Go to the Backoffice homepage of your SAP Commerce solution and select API Export CronJob.
Copy the configurations from the jobs starting with CSVExportCronJob into the settings of the jobs starting with ProductsUpApiExportCronJob.
Delete the jobs where the names start with CSVExportCronJob.
Stop your server.
Go to the
localextensions.xmlfile and remove the line:<extension dir="${HYBRIS_BIN_DIR}/ext-productsup/productdataexportmigration" />Run the command ant clean all.
Remove cached backoffice files by deleting the relevant backoffice folder: hybris/data/backoffice.
Run the command ant updatesystem.
Remove the cached backoffice files again.
Start your server.
Log in to the Hybris administration console.
Remove the following outdated types:
Extension: productdataexportmigration
ComposedType FTPExportConnection
ComposedType FTPSExportConnection
ComposedType SFTPExportConnection
Execute IMPEX (hAC):
REMOVE CSVExportProtocol;code[unique=true]
;FTP;
;FTPS;
;SFTP;
Log in to the Backoffice endpoint of your SAP Commerce solution and press the F4 key to open the admin view.
Select the menu icon in the top-right corner of your view, choose Reset Everything, and select Yes to confirm.
Press the F4 key again to return to the Backoffice homepage and continue with the setup starting with Step 1 in Set up the export jobs..
Create a stream with the Productsup Stream API
The Productsup Connector installed in your SAP Commerce Cloud or SAP Commerce solution uses the Productsup Stream API to push product data from SAP to your Productsup site. To use the Stream API, you need to create a chunked stream.
To create a chunked stream, run an API query similar to this:
curl --location --request POST 'https://stream-api.productsup.com/streams' \
--header 'Content-Type: application/vnd.api+json' \
--header 'Accept: application/vnd.api+json' \
--data-raw '{
  "data": {
    "type": "stream",
    "attributes": {
      "name": "Stream name example",
      "type": "chunked"
    }
  }
}'
Tip
Make sure to copy the stream ID you receive in the API response and paste it into the settings of both export jobs in SAP. Go back to Step 4 in the Backoffice endpoint of your SAP solution to add the stream ID in the API Configuration section.

Later, you will also need to use your stream name and ID to choose your stream in the setup of a data source in your Productsup site.
See Stream creation for more information.
See Add the Productsup Stream API data source to your site to proceed.
Add the Productsup Stream API data source to your site
To let your Productsup site import product data from your newly created stream, you need to add the Productsup Stream API data source to your site.
See Import data via the Productsup Stream API for the setup steps. In Step 4, choose the name and ID of the stream as stated in your API query and response.
Send data from SAP into Productsup for the first time
Once you finish the Stream API data source setup, the integration between your SAP solution and Productsup should be fully functional. To import your full product catalog from SAP into Productsup, do the following:
Go to the Backoffice endpoint of your SAP solution.
Open the Productsup extension in the main navigation menu on the left and select API Export CronJob.
To send your full product catalog to Productsup, select the job ProductsupApiExport and choose the fast-forward icon.

Warning
Depending on the size of your product catalog, this process can take a long time.
Go to your Productsup site and select Import in the top-right corner of your view to let the site import product data from your stream.
Add and send new product attributes
After setting up your product data import from SAP Commerce Cloud or SAP Commerce into Productsup, you may need to add new attributes to your products in SAP and send them to your Productsup site. You can do so by following these steps:
On the Backoffice homepage of your SAP solution, scroll down in the main navigation menu on the left to find the Productsup extension.
Select Field Configuration and choose the arrow next to the plus icon to select the needed attribute type. Then, add a new attribute and set it up.
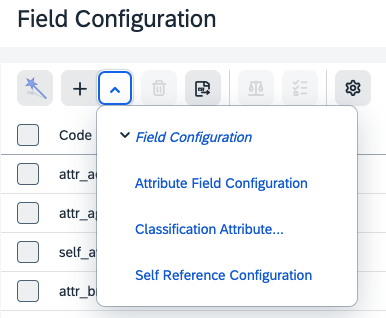
Once you add and set up all the needed attributes, go to Export Configuration and add the new attributes to the
idealandminimalconfigurations as needed.Proceed with Step 2 to export the new attributes to Productsup.
Use the SAP PCM (oData) data source
Tip
We recommend using the Productsup Connector instead of the SAP PCM (oData) data source unless there is a specific reason why the connector doesn't work for you. See Use the Productsup Connector to import data from SAP for the setup information.
Open Data Protocol (OData) is an open protocol for creating and consuming queryable and interoperable REST APIs in a standard way.
You can set up the SAP PCM (oData) data source in Productsup to import your data from SAP into Productsup. But use it only if you import a smaller number of products. Importing several thousands of products may take a long time as the OData connector doesn't work with delta files, and the platform imports all products every time you run an import.
Productsup supports the following versions of SAP PCM (OData):
19.05
20.05
Note
To use classification in PCM, you must have version 20.05.
Set up OData in the SAP PCM backoffice
To import data from the SAP PCM into Productsup with the help of the SAP PCM (oData) data source, you need to configure the integration in the SAP backoffice and set up a data source in Productsup.
Create a user in the SAP PCM as follows:
Select the status Employee for the user.
Add the user to [employeegroup].
Select the password type Plain and set a password.
Give the user permission to access the OData web services and relevant catalogs.
Note
Productsup uses the base64 encoding to generate an authentication token using the Employee User username and password.
Create three (3) mandatory OData Integration Objects:
Note
The entered values are case-sensitive.
Catalog Version – This Object lets Productsup read catalogs from the PCM system. You can select PCM catalogs for data import and export.
Create the Catalog Version Integration Object by entering the following values:
Name:
catalogVersionRoot Type:
CatalogVersionIntegration Type:
INBOUND
Language – This Object lets Productsup work with different languages.
Note
Productup recommends you have only one language per Productsup site. You can decide between two (2) options:
Create individual Productsup sites for each language to import data from PCM into Productsup.
Create separate Productsup exports for each language to export from Productsup into PCM.
Create the Language Integration Object by entering the following values:
Name:
languageRoot Type:
LanguageIntegration Type:
INBOUND
Endpoint – This Object is a custom endpoint, which lets Productsup read the available Integration Objects set up in PCM oData. You can decide which configuration or data model to use to populate the data.
Create the Endpoint Integration Object by entering the following values:
Name:
integrationObjectRoot Type:
IntegrationObjectIntegration Type:
INBOUND
Create an optional Integration Object called Productsup.
This Object lets you define which data attributes Productsup can edit. You can set up only a few attributes, such as description, title, or code. To set up the Productsup Object:
Create the Productsup Integration Object by entering the following values:
Name:
ProductsupRoot Type:
ProductIntegration Type:
INBOUND
Define the data attributes you want to export.
Note
Contact support@productsup.com if you need assistance with integration. See Creating and Viewing a Product Integration Object for more information.
Set up OData in Productsup
In the Productsup platform, take the following steps to import data from your SAP PCM:
Go to Data Sources from your site's main menu and select ADD DATA SOURCE.
Search for SAP PCM (oData) and select Add. Give it a custom name as desired and select Continue.
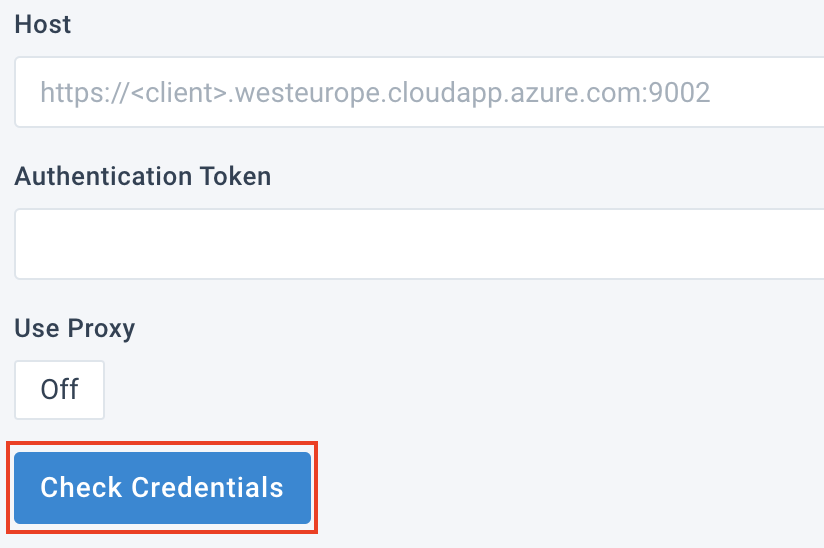
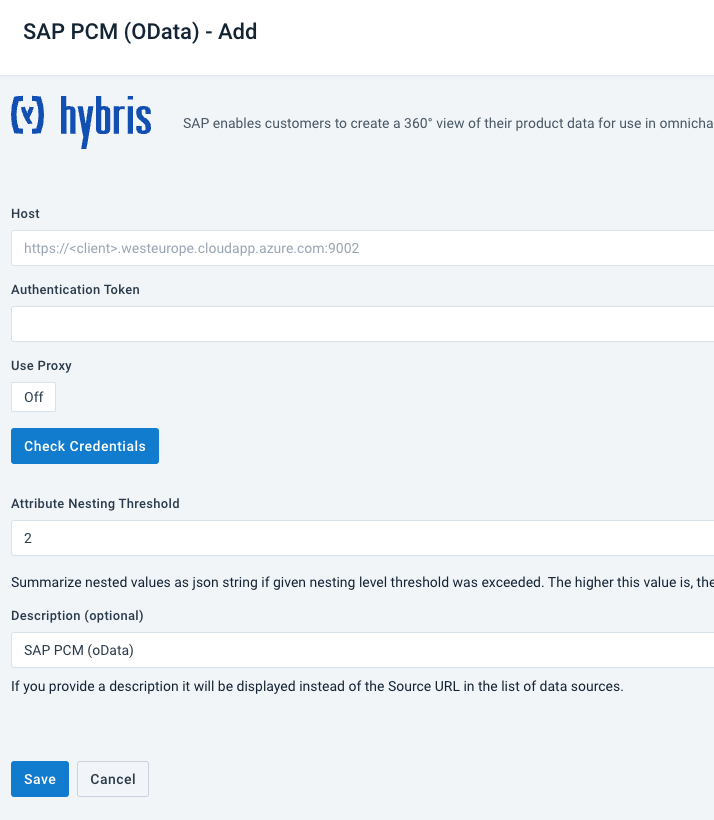
Enter the host link URL in Host and your PCM credentials in Authentication Token. You must encode your
usernameandpasswordcredentials using the following format:authenticationToken = base64_encode(username:password)
Note
If you have IP restrictions in your SAP system, you should enable a proxy and whitelist our IPs. You can find the list of the latest IPs in the Settings tab of your data source setup when you enable proxy. See Use proxy servers to whitelist Productsup IPs.

If you need help with finding IPs, reach out to your Customer Success Manager or contact support@productsup.com.
Select Check Credentials to validate your token.
Once SAP validates your credentials, you must configure extra settings to continue the data source setup:
Select your desired catalog version from the Catalog Versions drop-down list.
Select the Type Classes and Languages you wish to import from your SAP system and select Save.
Enter the desired level of Attribute Nesting Threshold to limit the saved product attribute records for product variations. Level
1is the lowest. The platform summarizes your nested values as JSON strings if your attribute records exceed the set threshold.In Description (optional), you can customize the data source name, which appears in your data source list. The customized description is the same name you entered in Step 2.
Select Save
Select Import in the top-right corner of the page. The data from PCM appears at the import stage in Data View and Dataflow in Productsup.