Rule box category Google Merchant Center
Use the rule box category Google Merchant Center to prepare your product data for the Google Merchant Center, Google Content API for Shopping, or Google Content API for Shopping (multi) exports in Productsup.
Introduction
The category Google Merchant Center contains all rule boxes that can help you prepare your product data for GMC. This category lets you set age groups, availability, conditions, gender, expiration dates, size types, and size systems to values accepted by Google.
Note
Some rule boxes in this category only apply to specific sales verticals. For example, the Set Size Type or Set Gender rule boxes mainly relate to clothing retailers.
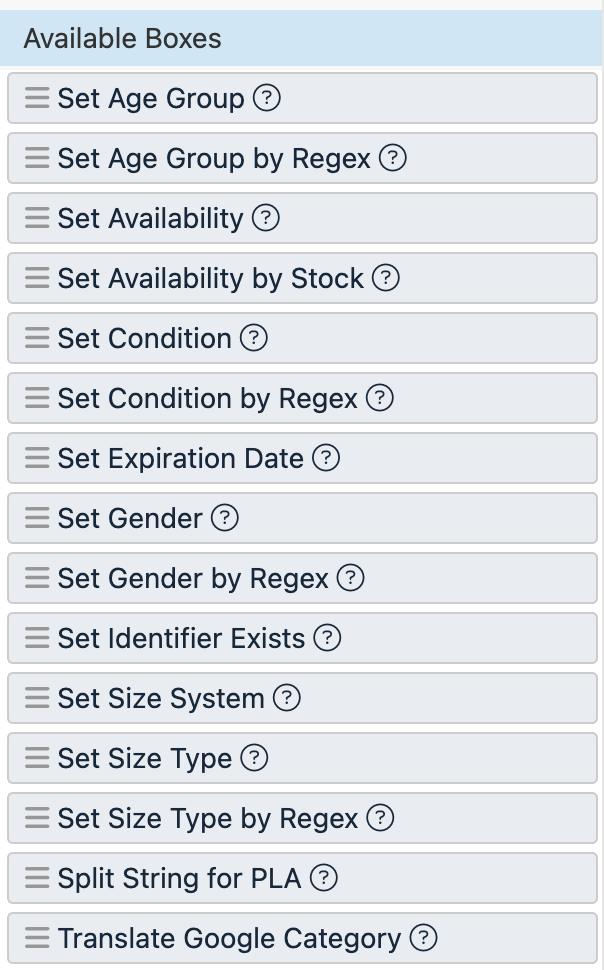
Select a link to go to the section describing the needed rule box:
Tip
Some rule boxes in this category use regular expressions (regex). See Rule box category Use regular expressions to learn about regex. You can use the Regex generator available in these rule boxes to get a regex suggestion that suits your use case:
Select a necessary rule box.
Select >_ in a rule box and describe the result you want to achieve in the Regex generator window.
Select Generate.
Select copy below the Answer field.
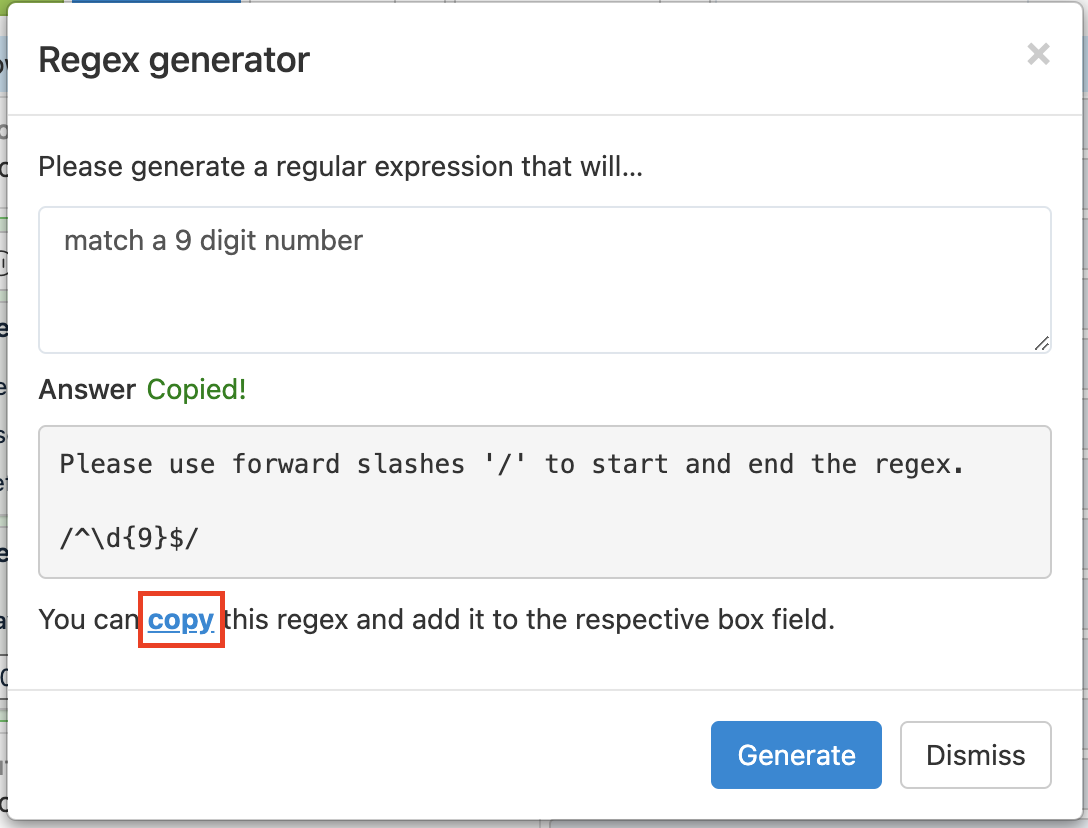
Paste the copied answer into the regex field of the rule box.
Set Age Group
Google accepts the following values for the age_group attribute:
adult
kids
infant
toddler
newborn
With the Set Age Group rule box, you can replace your current values with one of the valid age groups accepted by Google:
Take the steps from Add a rule box to add the Set Age Group rule box.

Select the needed age group value from the drop-down menu.
Select Save.
For example, you have varying non-valid values in the age_group attribute, and you want to change them all to the valid value toddler:
age_group (before) | age_group (after) |
|---|---|
children between 1 and 3 years old |
|
1-3 year olds |
|
toddlers |
|
Set Age Group by Regex
Google accepts the following values for the age_group attribute:
adult
kids
infant
toddler
newborn
With the Set Age Group by Regex rule box, you can use regular expressions to search your current values for matches and replace them with corresponding valid age groups accepted by Google.
Note
Once the Set Age Group by Regex rule box finds a regex match in a value, it changes the entire current value to the corresponding value accepted by Google. If one value contains multiple regex matches related to different age groups, the rule box assigns the age group related to the first regex match within the value.
If the rule box doesn't find a regex match in a value, it assigns the value adult to make sure your age_group attribute contains only valid entries.
Take the steps from Add a rule box to add the Set Age Group by Regex rule box.
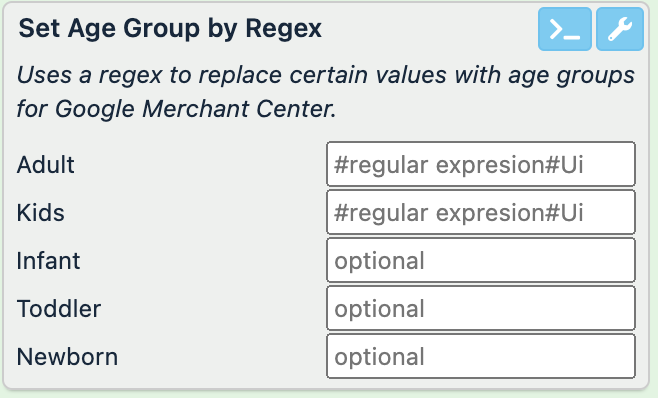
In Adult, Kids, Infant, Toddler, and Newborn, enter regular expressions to search your values and replace the matching parts with a relevant age group value.
Tip
Use the Regex generator by selecting >_ to get a regex suggestion.
Select Save.
For example, you have different non-valid values in the age_group attribute, and you need to assign a valid age group to each product based on its current value.
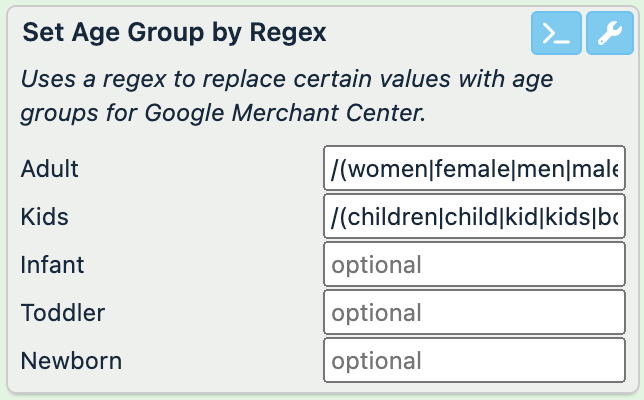
With the regular expressions /(women|female|men|male|adult|adults)/g and /(children|child|kid|kids|boy|girl|boys|girls)/, you can search your current values for the possible alternatives to the valid adult and kids values and then change the current values to the appropriate valid age group.
age_group (before) | age_group (after) |
|---|---|
women |
|
all ages |
|
children, men |
|
Set Availability
Google accepts the following values for the availability attribute:
in stock
out of stock
preorder
backorder
With the Set Availability rule box, you can replace your current values with one of the valid availability types accepted by Google:
Take the steps from Add a rule box to add the Set Availability rule box.

Select the relevant availability type from the drop-down menu.
Select Save.
For example, you have different non-valid values in the availability attribute, and you want to change them all to the valid value in stock:
availability (before) | availability (after) |
|---|---|
available |
|
available for purchase |
|
in stock |
|
Set Availability by Stock
Google accepts the following values for the availability attribute:
in stock
out of stock
preorder
backorder
With the Set Availability by Stock rule box, you can use your stock attribute to automatically set your availability attribute to one of the valid availability types accepted by Google:
Take the steps from Add a rule box to add the Set Availability by Stock rule box.
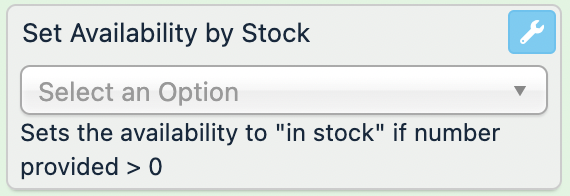
Select the attribute with the stock information from the drop-down menu. This menu shows the attributes of the previous stage.
Select Save.
For example, you have your stock levels in the stock attribute, and you want to set your availability attribute to in stock or out of stock based on the stock level.
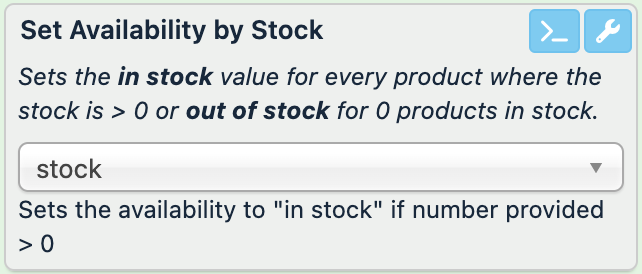
You add the Set Availability by Stock rule box to the availability attribute to let it change your current values in the following way:
stock (no changes) | availability (before) | availability (after) |
|---|---|---|
45 | available |
|
0 | no longer available |
|
2 | last items left |
|
Set Condition
Google accepts the following values for the condition attribute:
new
refurbished
used
With the Set Condition rule box, you can replace your current values with one of the valid conditions accepted by Google:
Take the steps from Add a rule box to add the Set Condition rule box.

Select the relevant condition type from the drop-down menu.
Select Save.
For example, you have varying non-valid values in the condition attribute, and you want to change them all to the valid value new:
condition (before) | condition (after) |
|---|---|
good as new |
|
signs of use |
|
new |
|
Set Condition by Regex
Google accepts the following values for the condition attribute:
new
refurbished
used
With the Set Condition by Regex rule box, you can use regular expressions to search your current values for matches and replace them with corresponding valid conditions accepted by Google.
Note
Once the Set Condition by Regex rule box finds a regex match in a value, it changes the entire current value to the corresponding value accepted by Google. If one value contains multiple regex matches related to different condition types, the rule box assigns the condition type related to the first regex match within the value.
If the rule box doesn't find a regex match in a value, it assigns the value new to make sure your condition attribute contains only valid entries.
Take the steps from Add a rule box to add the Set Condition by Regex rule box.
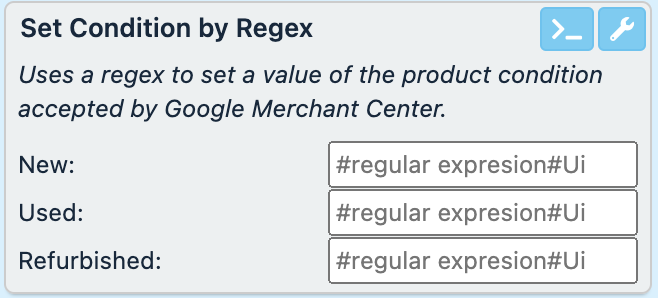
In New, Used, and Refurbished, enter regular expressions to search your values and replace the matching parts with a relevant condition value.
Tip
Use the Regex generator by selecting >_ to get a regex suggestion.
Select Save.
For example, you have different non-valid values in the condition attribute, and you need to assign a valid condition type to each product based on its current value.
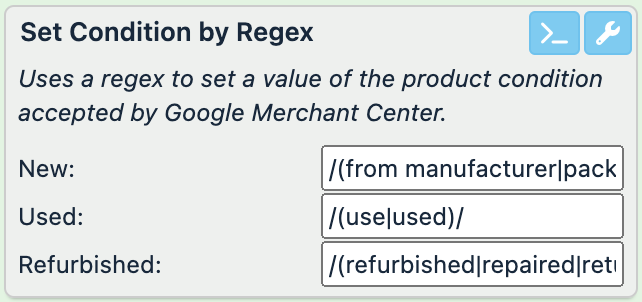
With the regular expressions /(from manufacturer|packaged|new)/, /(use|used)/, and /(refurbished|repaired|returned)/, you can search your current values for the possible variants of the valid new, used, and refurbished values and then change the current values to the appropriate valid conditions.
condition (before) | condition (after) |
|---|---|
returned, new |
|
signs of use |
|
brand new |
|
Set Expiration Date
With the Set Expiration Date rule box, you can add an expiration date to the expiration_date attribute as accepted by Google. In this rule box, you set the number of days left until the expiration date of an offer, and the rule box adds the corresponding date in the YYYY-MM-DD format to every product in the attribute.
Take the steps from Add a rule box to add the Set Expiration Date rule box.
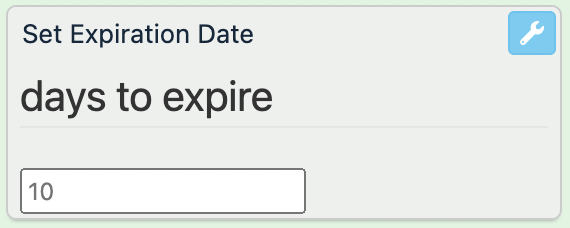
In Days to expire, enter the number of days left until the offer or product expires.
Note
You can enter no more than 31 days in the Set Expiration Date rule box starting from today. If you add 32 days or more, it results in an empty value.
Select Save.
For example, you have varying non-valid date formats in the expiration_date attribute, with all your products expiring at the same time (in 8 days). You can change all your expiration dates to the valid date format by entering 8 in Days to expire.
expiration_date (before) | expiration_date (after) |
|---|---|
July 9, 2024 |
|
09.07.2024 |
|
07/09/2024 |
|
Set Gender
Google accepts the following values for the gender attribute:
unisex
female
male
With the Set Gender rule box, you can replace your current values with one of the valid gender options accepted by Google:
Take the steps from Add a rule box to add the Set Gender rule box.

Select the relevant gender option from the drop-down menu.
Select Save.
For example, you have varying non-valid values in the gender attribute, and you want to change them all to the valid value unisex:
gender (before) | gender (after) |
|---|---|
men, women |
|
all |
|
women, men |
|
Set Gender by Regex
Google accepts the following values for the gender attribute:
unisex
female
male
With the Set Gender by Regex rule box, you can use regular expressions to search your current values for matches and replace them with corresponding valid gender options accepted by Google. You need to provide regex only for male and female gender options. Products with no matches of these regular expressions get the value unisex.
Note
Once the Set Gender by Regex rule box finds a regex match in a value, it changes the entire current value to the corresponding value accepted by Google. If one value contains multiple regex matches related to different gender options, the rule box assigns the gender option related to the first regex match within the value.
Take the steps from Add a rule box to add the Set Gender by Regex rule box.
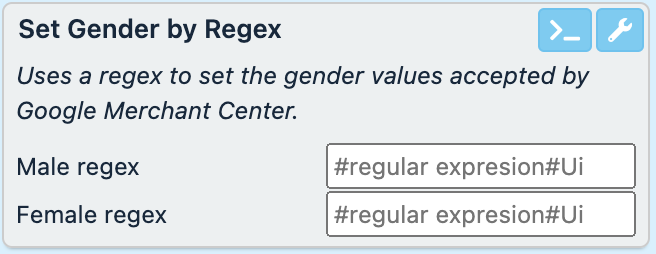
In Male regex and Female regex, enter regular expressions to search your values and replace the matching parts with a relevant gender option.
Tip
Use the Regex generator by selecting >_ to get a regex suggestion.
Select Save.
For example, you have different non-valid values in the gender attribute, and you need to assign a valid gender option to each product based on its current value.
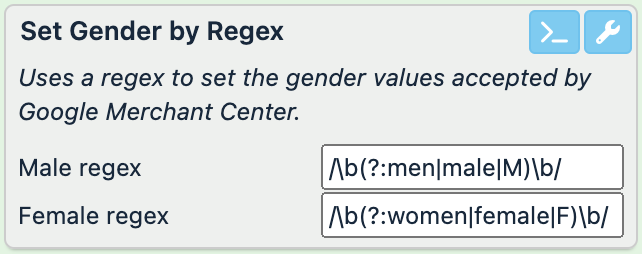
With the regular expressions /\b(?:women|female|F)\b/ and /\b(?:men|male|M)\b/, you can search your current values for the possible variants of the valid female and male values and then change the current values to the appropriate valid gender option. The products that don't contain regex matches get the value unisex.
gender (before) | gender (after) |
|---|---|
women |
|
men and women |
|
M |
|
all |
|
Set Identifier Exists
Google uses the identifier_exists attribute to see whether unique product identifiers (UPIs) are available for your product based on the values in the brand, gtin, mpn, and category attributes. See Identifier exists for more information.
With the Set Identifier Exists rule box, you can add the valid true or false values to your identifier_exists attribute based on the contents of your category value. If an identifier (a brand, MPN, or GTIN) exists for a product, the identifier_exists attribute stays empty, which equals true when exporting it to Google Merchant Center. If there is no identifier for a product, the attribute has the value false.
Take the steps from Add a rule box to add the Set Identifier Exists rule box.
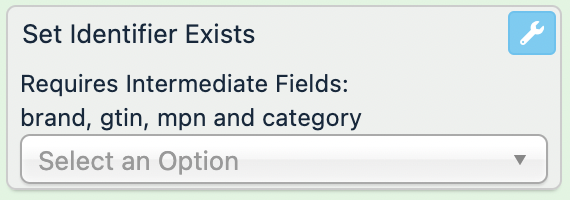
Select your category attribute from the drop-down menu. This menu shows the attributes of the previous stage.
Select Save.
Set Size System
Google accepts the following values for the size_system attribute:
US
UK
EU
DE
FR
JP
CN
IT
BR
MEX
AU
With the Set Size System rule box, you can replace your current values with one of the valid size system options accepted by Google.
Take the steps from Add a rule box to add the Set Size System rule box.

Select the relevant size system from the drop-down menu.
Select Save.
For example, you have varying non-valid values in the size_system attribute, and you want to change them all to the valid value UK:
size_system (before) | size_system (after) |
|---|---|
United Kingdom |
|
UK |
|
Britain |
|
Set Size Type
Google accepts the following values for the size_type attribute:
regular
petite
plus
big
tall
maternity
With the Set Size Type rule box, you can replace your current values with one of the valid size types accepted by Google.
Take the steps from Add a rule box to add the Set Size Type rule box.

Select the relevant size type from the drop-down menu.
Select Save.
For example, you have varying non-valid values in the size_type attribute, and you want to change them all to the valid value regular:
size_type (before) | size_type (after) |
|---|---|
regular fit |
|
usual |
|
|
|
Set Size Type by Regex
Google accepts the following values for the size_type attribute:
regular
petite
plus
big
tall
maternity
With the Set Size Type by Regex rule box, you can use regular expressions to search your current values for matches and replace them with corresponding valid size types accepted by Google.
Note
Once the Set Size Type by Regex rule box finds a regex match in a value, it changes the entire current value to the corresponding value accepted by Google. If one value contains multiple regex matches related to different size types, the rule box assigns the size type related to the first regex match within the value.
If the rule box doesn't find a regex match in a value, it assigns the value regular to make sure your size_type attribute contains only valid entries.
Take the steps from Add a rule box to add the Set Size Type by Regex rule box.
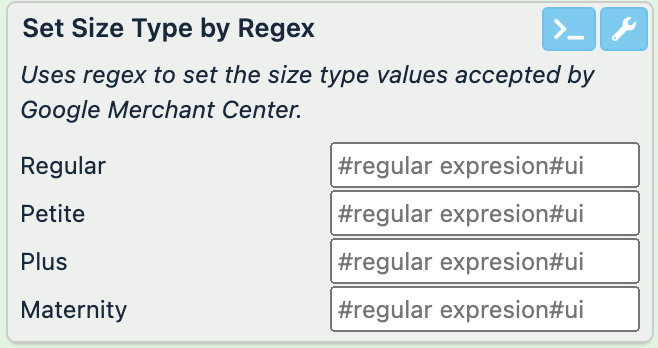
In Regular, Petite, Plus, and Maternity, enter regular expressions to search your values and replace the matching parts with a relevant size type.
Tip
Use the Regex generator by selecting >_ to get a regex suggestion.
Select Save.
For example, you have different non-valid values in the size_type attribute, and you need to assign a valid size type to each product based on its current value.
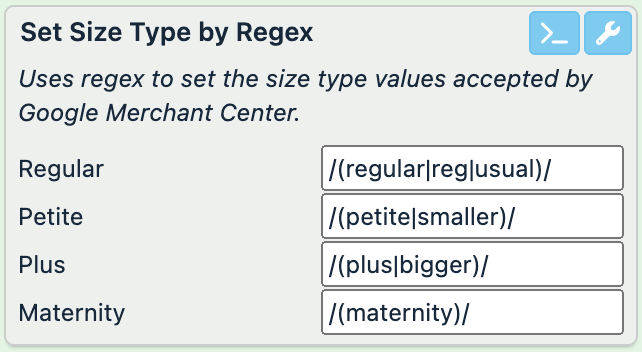
With the regular expressions /(regular|reg|usual)/, /(petite|smaller)/, /(plus|bigger)/, and /(maternity)/, you can search your current values for the possible variants of these valid size types and then change the current values to the appropriate valid size types.
size_type (before) | size_type (after) |
|---|---|
one size |
|
maternity clothes |
|
petite, regular |
|
Split String for PLA
See Extract specific parts of values with split string rule boxes for more information on split string rule boxes.
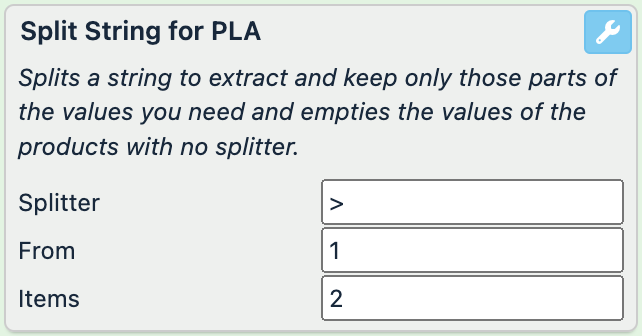
The Split String for PLA rule box uses delimiters and analyzes the values of an attribute to extract and save only those parts of the values you need. If the rule box finds no delimiter in a value, it empties the value to prevent you from sending incorrect data to your export channels.
Take the steps from Add a rule box to add the Split String for PLA rule box.
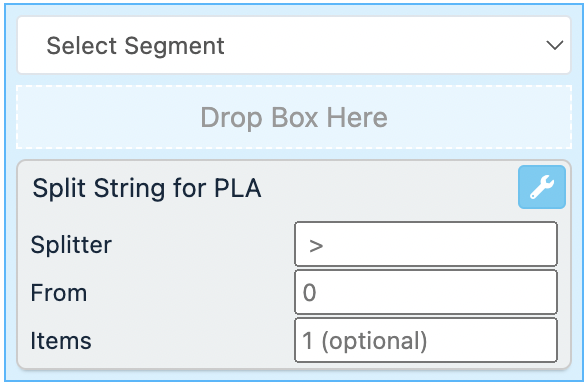
Enter the delimiter character that splits your string into multiple data points in Splitter.
Note
The platform never displays the splitter in the output if you extract only one data point from the value. To see the splitter in the output value, you need to extract at least two data points.
In From, enter the number of the data point from which the platform should start extracting information. The expected input format for this field is a digit.
See this numbering example to identify the number of your desired data point.
Note
If you enter
0in From, the platform starts extracting information from your first data point and, after finding no splitter character in the string, returns the entire string as if it consisted of one data point only.To have the Split String for PLA rule box empty the values that contain no splitter characters, specify any number in From but for
0and negative numbers.Enter how many data points you want the platform to extract from your values in Items.
The expected input format for this field is a digit. Only positive numbers are acceptable.
Note
If you leave Items empty, the platform extracts all data points of the string, starting with the data point specified in From.
Select Save.
Google accepts the following values for the gender attribute:
Rule box and setup | category (before) | category (after) |
|---|---|---|
 | Animals & Pet Supplies > Pet Supplies > Dog Supplies > Dog Beds |
|
Apparel & Accessories > Clothing > Activewear |
| |
Arts & Entertainment --- Event Tickets |
| |
 | Animals & Pet Supplies > Pet Supplies > Dog Supplies > Dog Beds |
|
Apparel & Accessories > Clothing > Activewear |
| |
Arts & Entertainment --- Event Tickets |
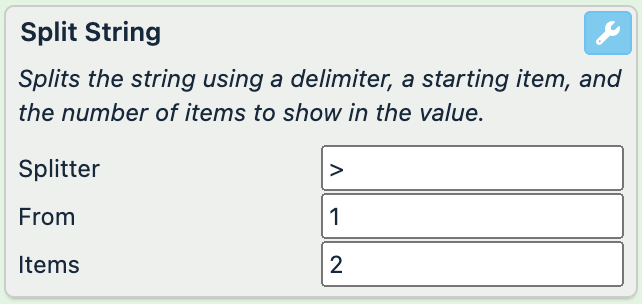
See Split String for more information.
Translate Google Category
Google accepts only a predefined list of values in the category attribute.
Tip
You can use a Partner Taxonomy Mapping list to ensure your category attribute contains values accepted by Google. See Replace attributes with Partner Taxonomy Mapping list for more information.
With the Translate Google Category rule box, you can translate your Google categories from one language to another. You can also change your Google categories in any language to the associated category IDs, which are the same for all languages. The rule box empties the values in those products that contain invalid categories.
Take the steps from Add a rule box to add the Translate Google Category rule box.

In Source Format, select the current language and country of your Google categories.
Choose id if your category attribute contains category IDs instead of spelled-out category names.
In Target Format, select the language and country you want to translate your Google categories into.
Choose id if you want to transform your spelled-out category names into category IDs.
Tip
You can remove all invalid categories from your category attribute without translating them by selecting the same languages in Source Format and Target Format.
Select Save.
For example, your category attribute contains valid Google categories for the US in English, and you need to translate them into valid Google categories in German.
category (before) | category (after) |
|---|---|
Apparel & Accessories > Shoe Accessories > Slippers |
|
Home & Garden > Linens & Bedding > Bedding > Blankets |
|
Apparel & Accessories > Clothing > Underwear & Socks |
|
If you select id in Target Format for the same use case, the rule box outputs the following:
category (before) | category (after) |
|---|---|
Apparel & Accessories > Shoe Accessories > Slippers | |
Home & Garden > Linens & Bedding > Bedding > Blankets |
|
Apparel & Accessories > Clothing > Underwear & Socks |
|