Add icons and clipart to your image template
Add an icon or clipart to your image template in Image Designer in Productsup.
Introduction
In Image Designer, you can add different elements to your existing product images and enhance the design of your image templates with an extensive collection of icons and clipart.
Add an icon
Go to Designer from your site's main menu.
Select the Insert tab.
Open the Icon Font section.
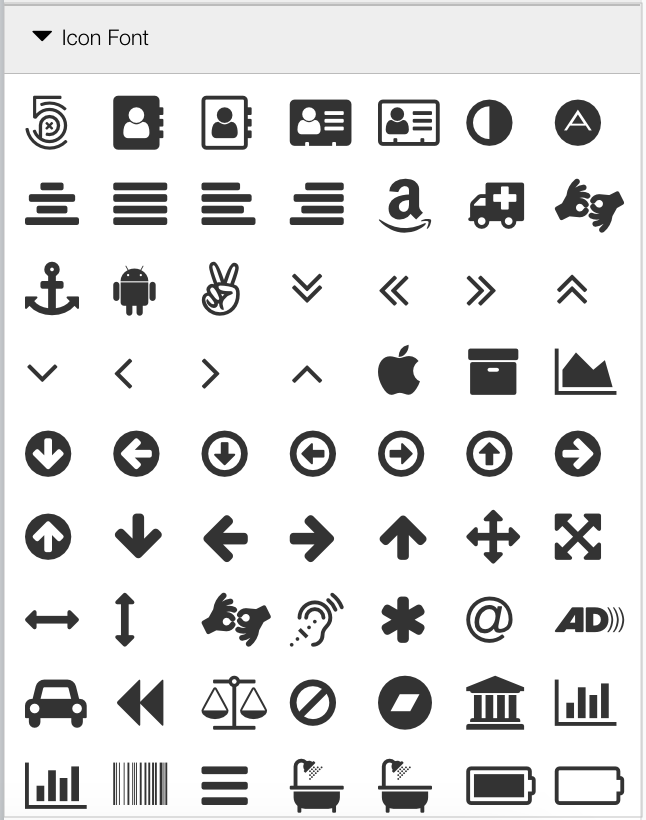
Drag a selected icon into the image preview area.
Customize the corresponding icon layer in the Layers tab as desired. See Icon layer settings.
Select the floppy disk icon in the upper toolbar to save the changes.
Icon layer settings
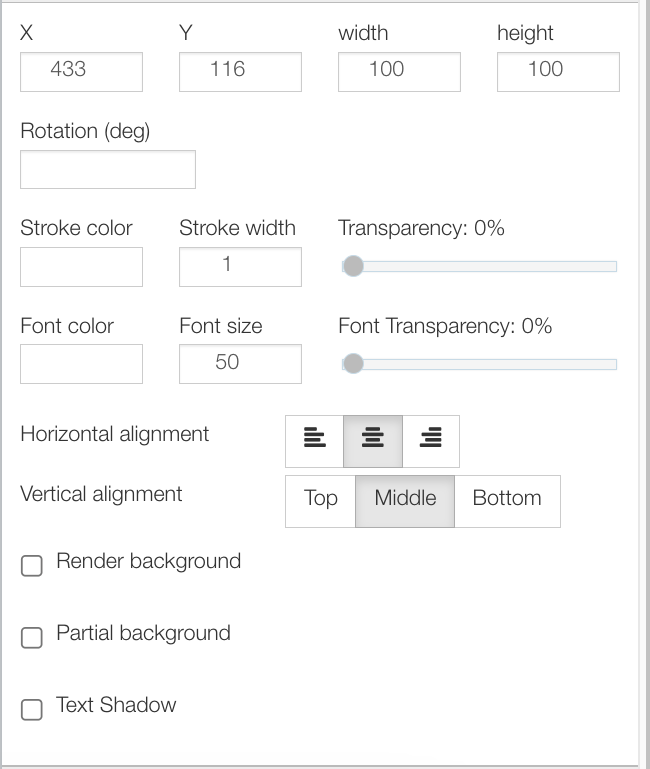
The Image Designer adds icons as Icon layers in the Layers tab. You can edit the icon with the following settings:
X and Y: Set icon coordinates to place your icon on the template. You can also drag the layer in the image preview area to achieve the same result.
width: Define the width of the output icon.
height: Define the height of the output icon.
Rotation (deg): Define the rotation degree of the output icon.
Stroke color: Choose the color of the icon borders in the color picker.
Stroke width: Define the width of the icon borders.
Transparency: Select the transparency of the icon borders on a scale from 0% to 100%, where 0% means no transparency and 100% means fully transparent icon borders.
Font color: Define the icon color in the color picker.
Font size: Define the icon size in pixels.
Font Transparency: Select the icon transparency on a scale from 0% to 100%, where 0% means no transparency and 100% means a fully transparent icon.
Horizontal alignment: Choose the type of horizontal alignment.
Vertical alignment: Choose the type of vertical alignment.
Render background: Add a background color to the whole icon layer.
Partial background: Add a background color to the inserted icon only.
Text Shadow: Add a shadow to your icon.
Add a clipart
Go to Designer from your site's main menu.
Select the Insert tab.
Open the Clipart section.
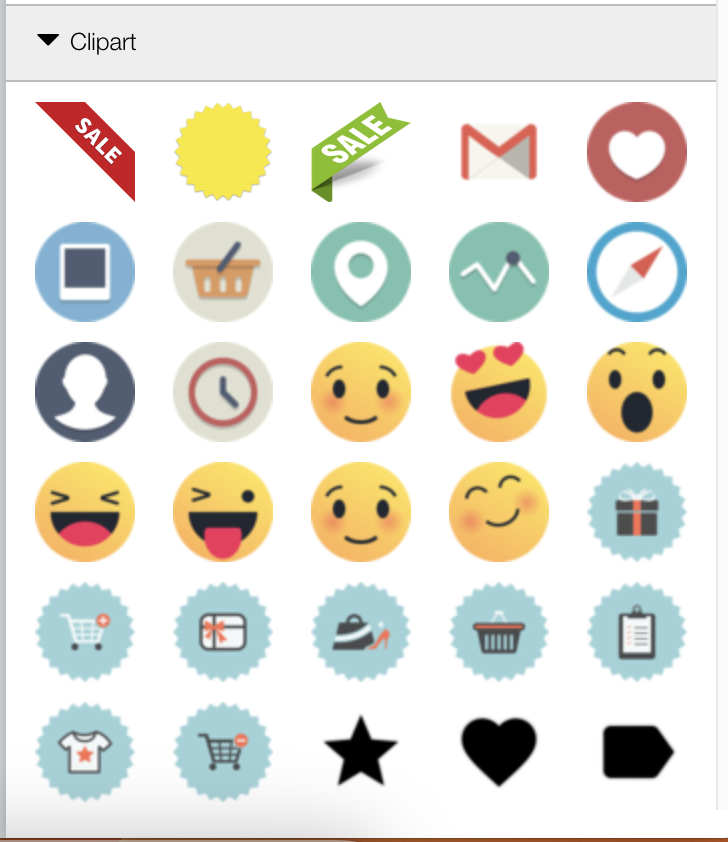
Drag a selected clipart element into the image preview area.
Customize the corresponding image layer in the Layers tab as desired. See Clipart layer settings.
Select the floppy disk icon in the upper toolbar to save your template.
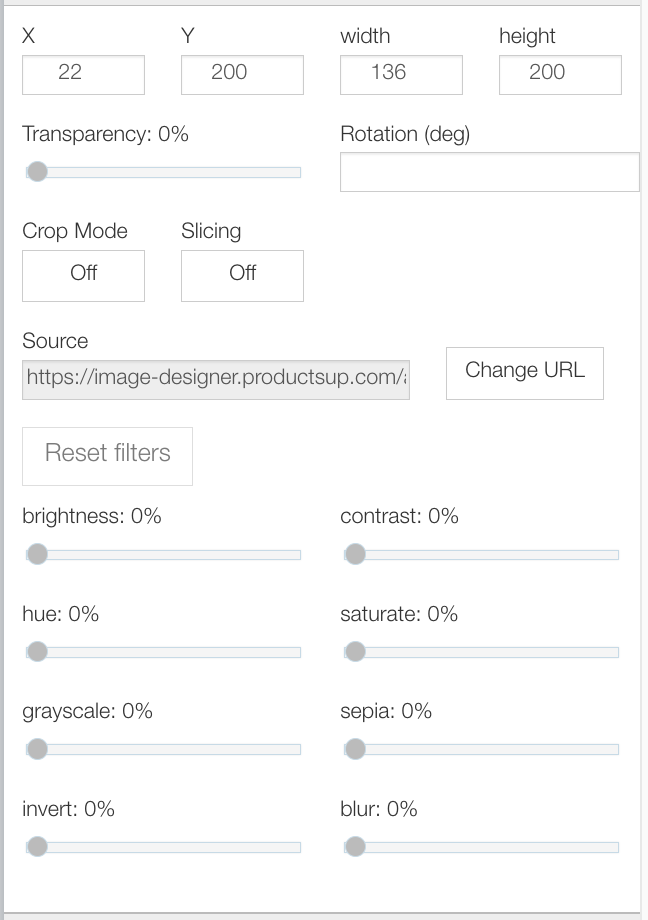
Clipart layer settings
The Image Designer adds clipart elements as Image layers in the Layers tab. You can edit the clipart with the following settings:
X and Y: Set image coordinates to place your clipart on the template. You can also drag the layer in the image preview area to achieve the same result.
width: Define the width of the output image.
height: Define the height of the output image.
Transparency: Change the transparency of the clipart image on a scale from 0% to 100%, where 0% means no transparency and 100% means a fully transparent clipart image.
Rotation (deg): Define the rotation degree of the output image.
Crop Mode: Cut off the sides, top, and bottom of the image.
Slicing: Activate Slicing to cut the image and then confirm the slicing.
Source: Insert an URL of the additional image from outside your feed.
Note
To change the URL, select the Change URL button and enter a new image URL.
Reset filters: Reset all your filter settings for a layer.
brightness: Increase the image brightness.
hue: Change the image coloring.
grayscale: Convert your image to black and white.
invert: Invert the colors by moving the slider to the right.
contrast: Increase the image shades.
saturate: Increase the image saturation.
sepia: Add a sepia filter to the image.
blur: Blur the image.