Work with the Dataflow toolbar
Dataflow: Discover how you can organize data with the help of the advanced features in Dataflow in Productsup.
Dataflow offers several advanced features that help you adjust this page for comfortable work. You can access these features from the upper ribbon above the Dataflow stages:

The features let you perform the following actions:
Export selection lets you select one of the exports added in Exports.
Preview unfolds a panel on the left-hand side of Dataflow and displays the values of the imported attributes.
Filter Columns unfolds the search fields of the import, intermediate, and export stages to let you search for needed attributes.
Automap connections lets you choose among the options for automapping the attributes between the stages.
Filter Boxes lets you look up certain rule boxes applied to your attributes while hiding those that don't match the search keywords.
Versions stares all versions of your Dataflow and lets you retrieve a necessary version in case of an issue.
View lets you hide or reveal specific attributes and specify the sorting order for attributes in the import, intermediate, and export stages.
More lets you remove rule boxes, custom attributes, or connections between attributes in bulk.
Rule Box Conditions lets you create and set up conditions to determine when the platform should apply rule boxes to an attribute.
The following sections describe each feature in detail.
Select an export
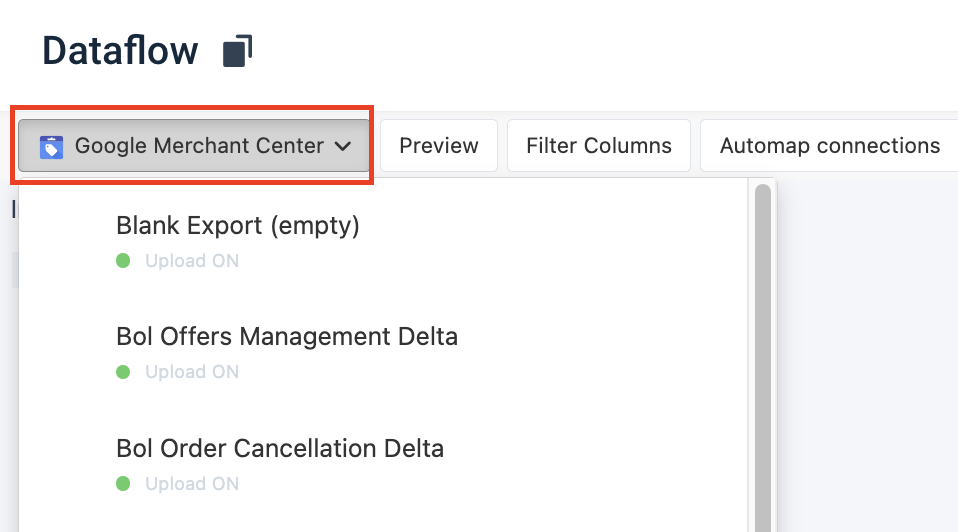
The export selection button lets you choose one of the exports you have already added in Exports.
To select an export:
Go to Dataflow from the site's main menu.
Select the export selection drop-down menu in the upper ribbon.
Select the export where you can map attributes or apply rule boxes.
Preview import data
The Preview button shows a preview of imported attribute values to help you map your attributes more accurately.
To open preview:
Go to Dataflow from the site's main menu.
Select the Preview button in the upper ribbon. An additional section with the attribute's values opens on the left of Dataflow.
Use arrows to switch between the items. Each page represents the attribute values of one item.
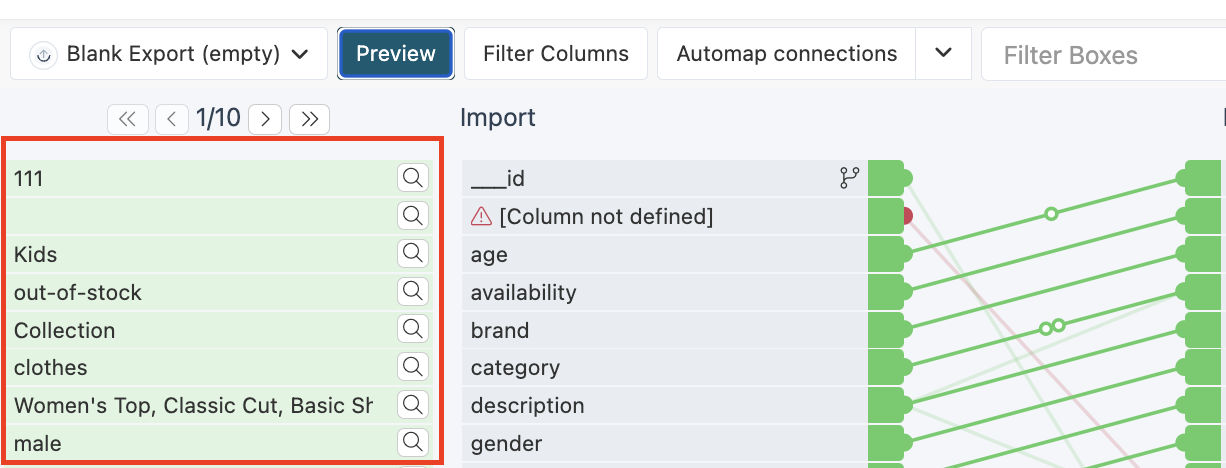
If your import stage contains many attributes intended for different exports, it can be challenging to map attributes. To ensure you are mapping the correct attribute, instead of switching between the pages, you can search for a known attribute's value to view the item associated with it and make a better mapping decision.
To search for an attribute's value:
Select Preview.
Select the magnifier icon
 next to the necessary value.
In the Attribute value search pop-up window, enter a value for an attribute in the Search value field.
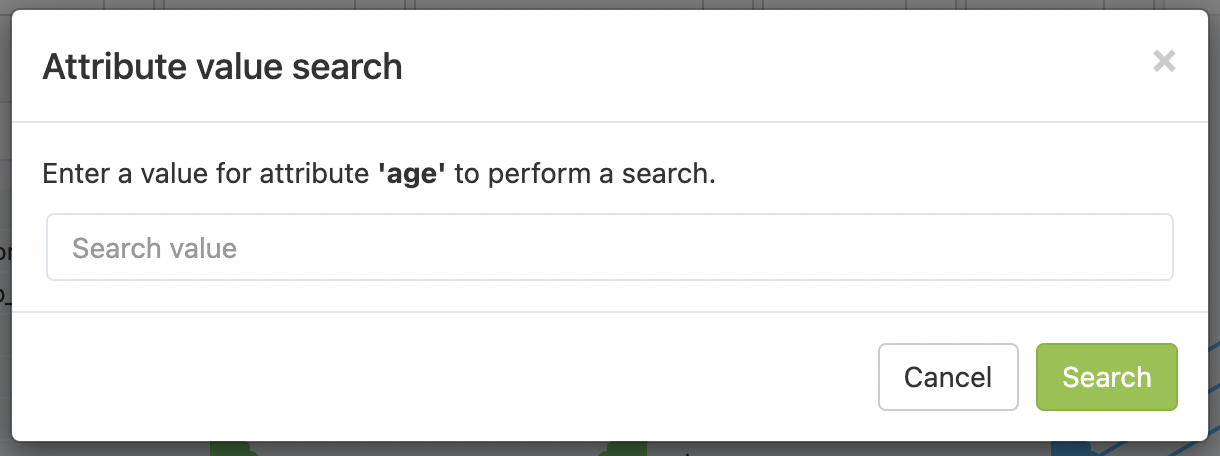
Select Search. The item page containing the search value opens.
To hide the Preview panel in Dataflow:
Select the Preview button in the upper ribbon again.
Find an attribute in the stage
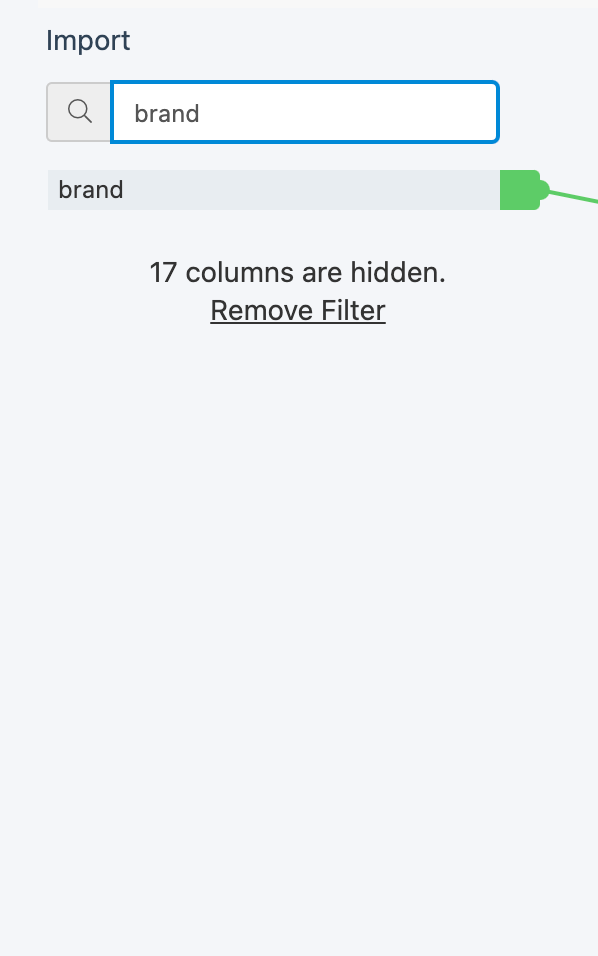
The Filter Columns button lets you find a specific attribute in the import, intermediate, or export stages.

To find a specific attribute in one or all stages:
Go to Dataflow from the site's main menu.
Select the Filter Columns button in the upper ribbon.
Enter the needed attribute name in the search field of the specific stage.
Map attributes with Automapper
You can connect attributes between stages individually, or you can use the Automapper feature to save time. Automapper connects attributes in seconds using the exact name matching, dictionary, or AI suggestions.
You can map attributes from import to intermediate and from intermediate to export.
Warning
Before using Automapper, we recommend saving your current version of Dataflow so that you can roll back to it in case of any issues. See Manage versions in Dataflow.
To use Automapper:
Go to Dataflow from the site's main menu.
Select Automap connections in the upper ribbon.
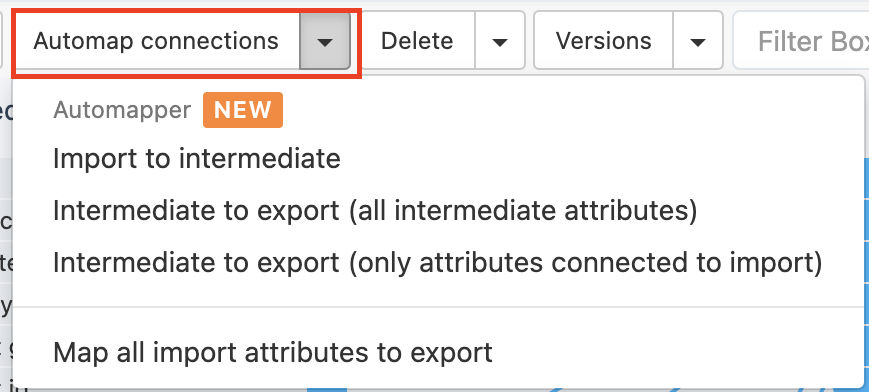
Choose an option from the drop-down menu:
Import to intermediate maps the attributes between the import and intermediate stages.
Intermediate to export (all intermediate attributes)maps all intermediate attributes between the intermediate and export stages.
Intermediate to export (only attributes connected to import) selects only the attributes mapped to import and maps them between the intermediate and export stages.
Map all import attributes to export maps the attributes from the import to export stage. If the names of the attributes don't match, the platform creates custom attributes at the relevant stage. The attribute order doesn't change in your export file, although the platform arranges the attributes alphabetically in your Dataflow view.
When you select one of the Automapper options, the AUTOMAPPER pop-up window opens to let you specify your mapping possibilities.
In step 1, select the automapping method:
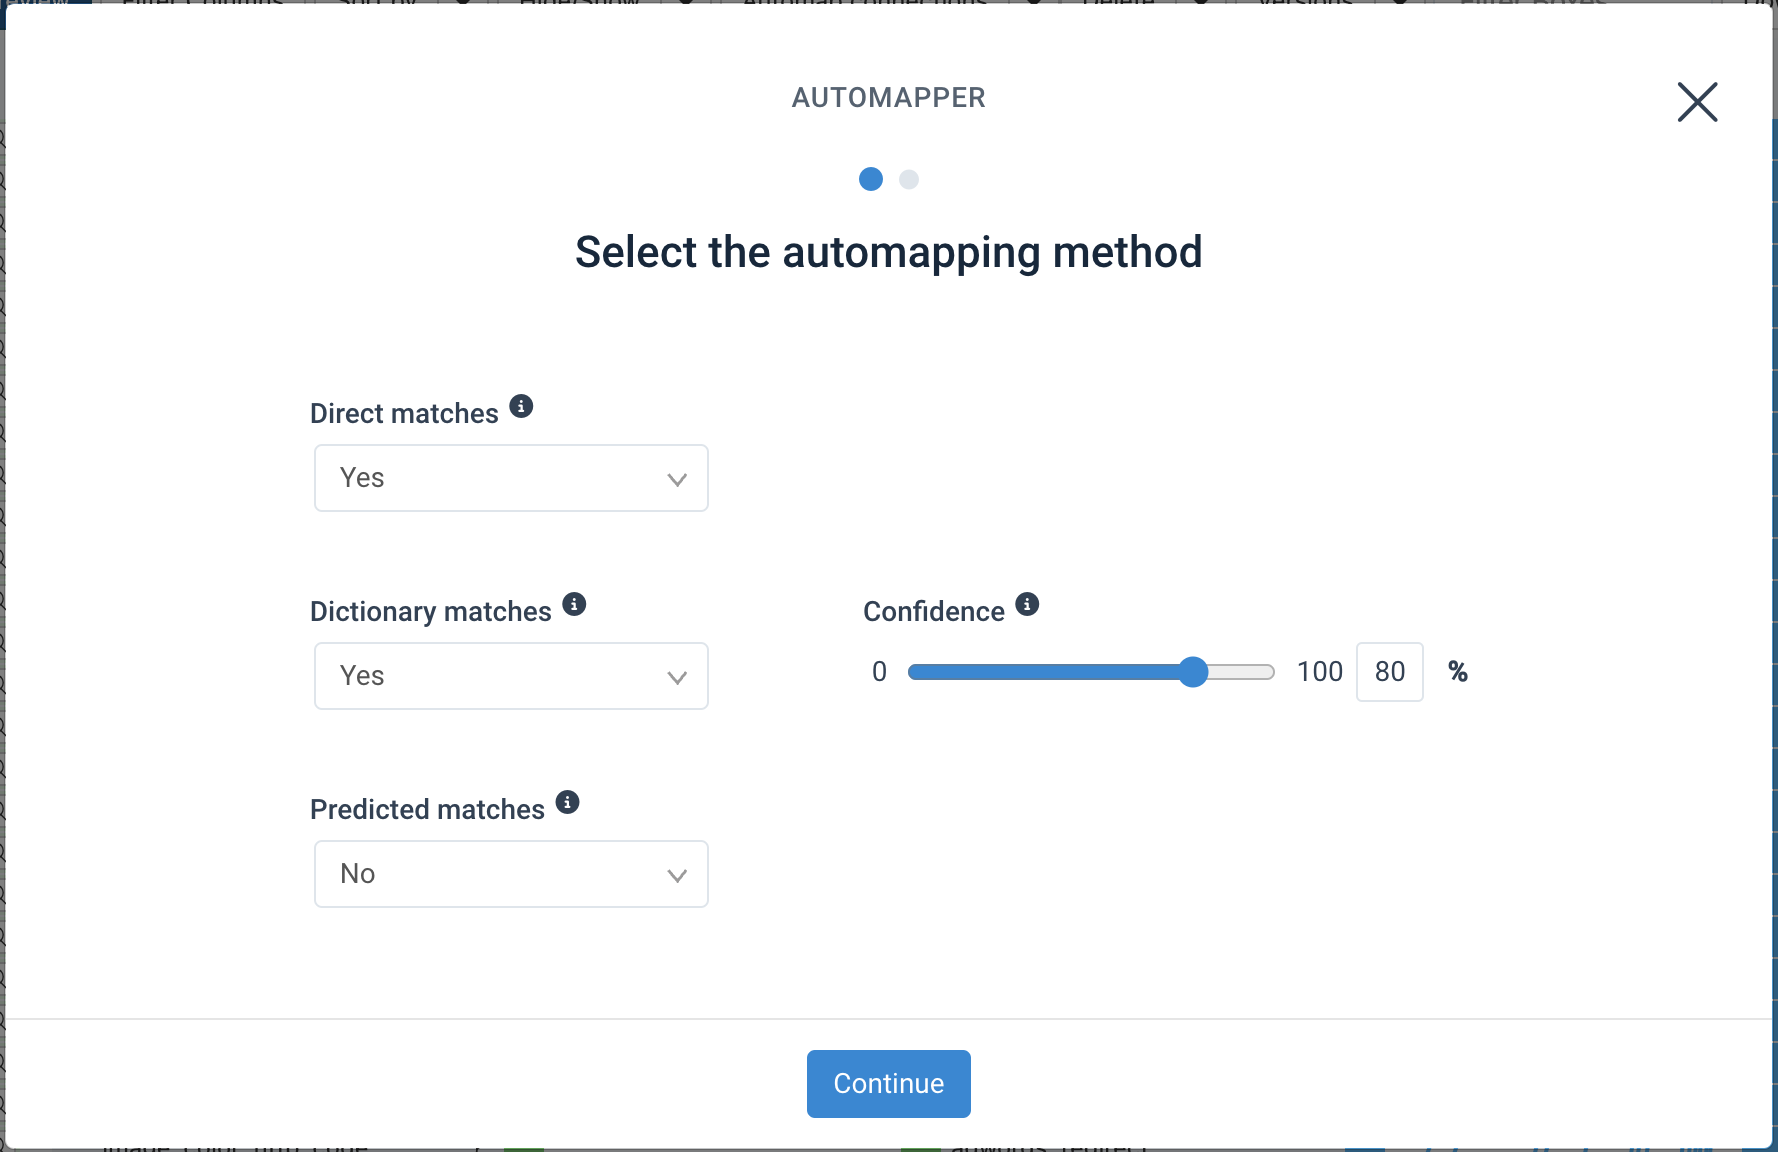
Direct matches maps attributes that are exactly the same in both stages. The matching is case-insensitive. For example, ProductTitle may match producttitle.
The drop-down has the following options:
Yes means that the direct matching is active. It is the default selection.
No means that the platform ignores the direct matches and uses other automapping methods.
Dictionary matches maps the attributes using our extensive internal dictionary.
The drop-down has the following options:
Yes means that the dictionary matching is active. It is the default selection.
When set to Yes, the Confidence scale becomes active and lets you change the matching accuracy. Set lower confidence rate to get more matches that are less accurate or set higher confidence rate to get fewer but more exact matches. By default, Confidence is 80%. You can see the results in the next step.
No means that the platform ignores the dictionary matches and uses other automapping methods.
Predicted matches maps the attributes with the help of an AI model. When selected, this method matches only the attributes that remain unmapped after the direct or dictionary matching.
The drop-down has the following options:
Yes means that the predicted matching is active.
If you select Yes, the Confidence scale becomes active and lets you change the matching accuracy. Set lower confidence rate to get more matches that are less accurate or set higher confidence rate to get fewer but more exact matches. By default, Confidence is 80%. You can see the results in the next step.
No means that the platform ignores prediction matches and uses other automapping methods. It is the default selection.
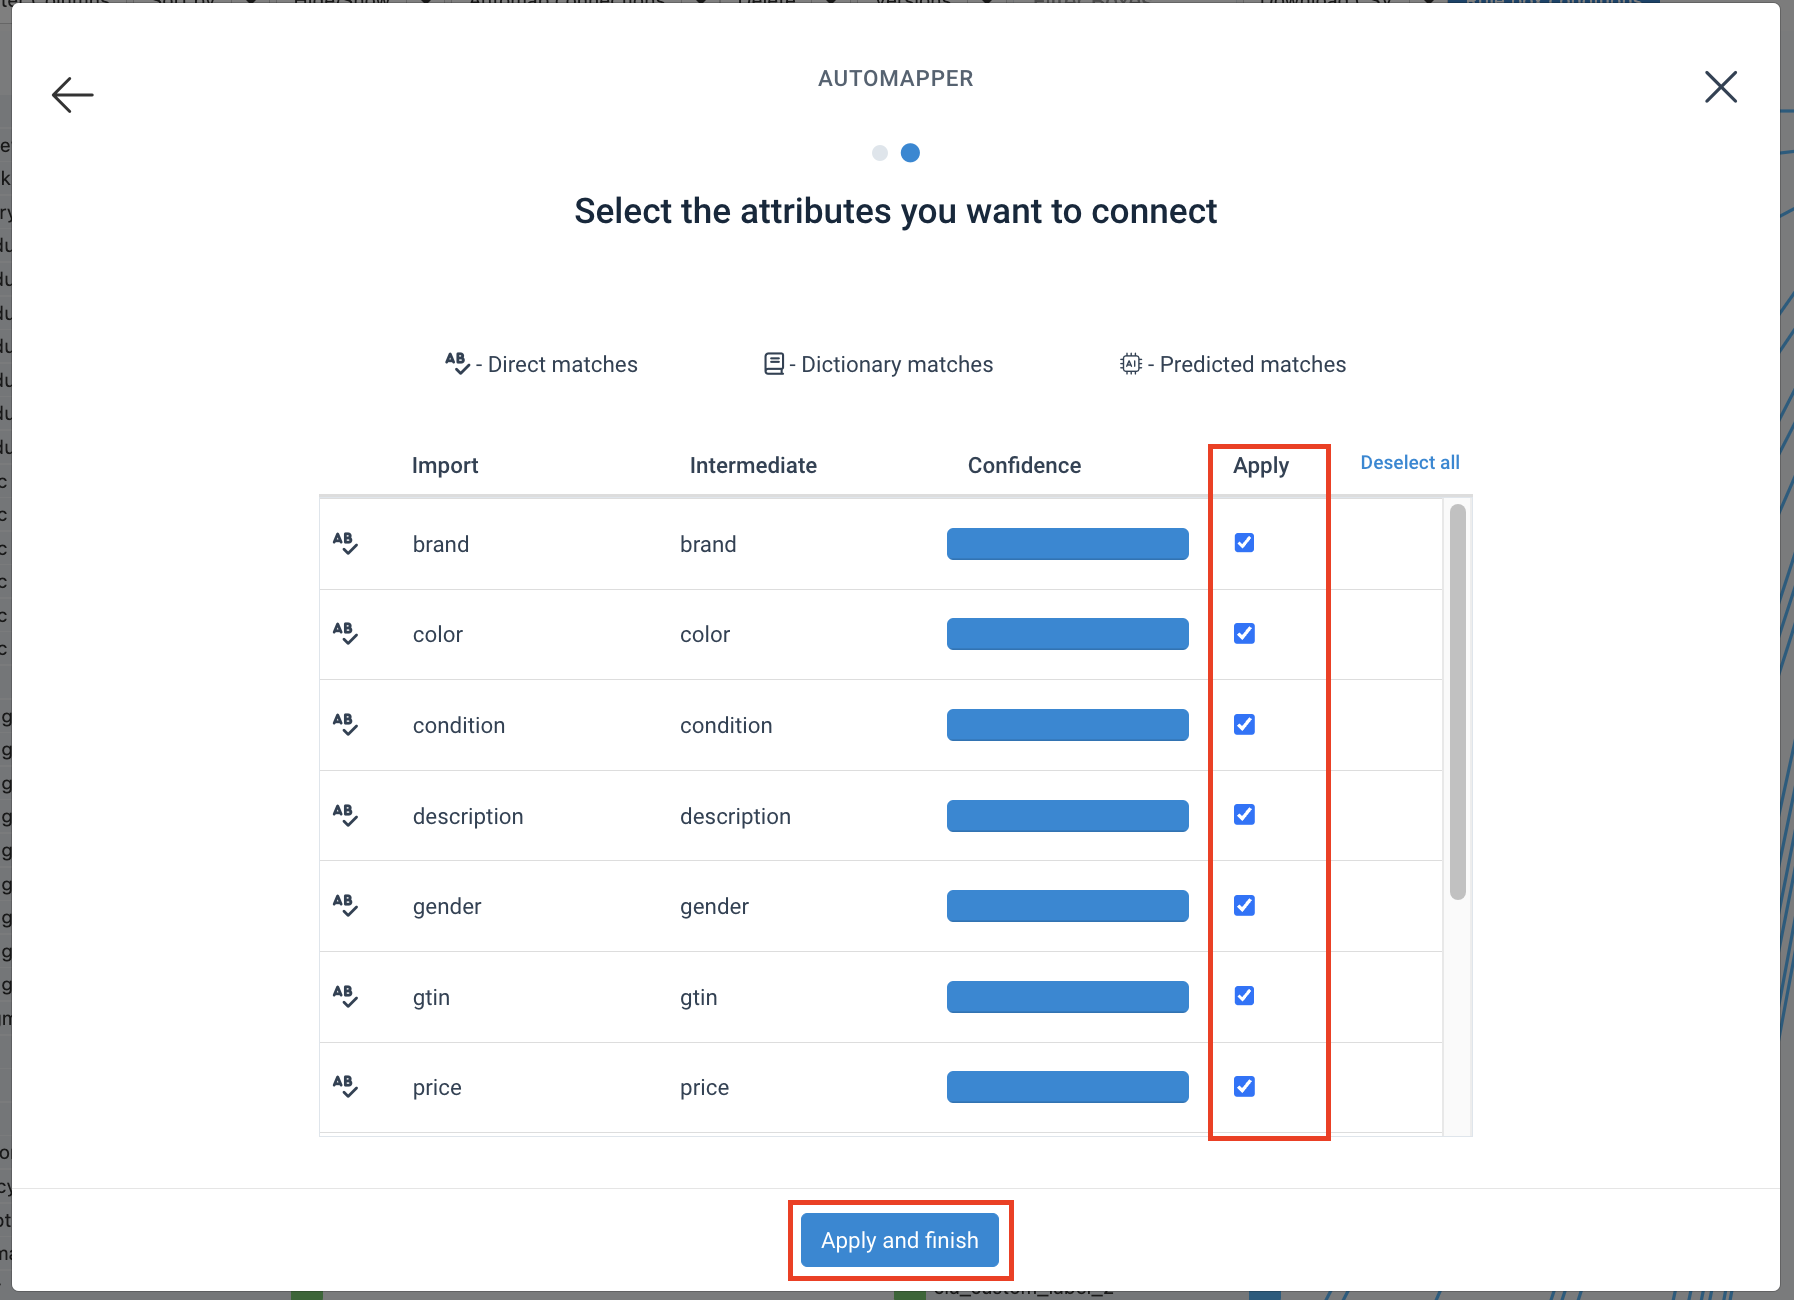
In step 2, you can see all mapping suggestions from the previously selected automapping methods. By default, the platform marks all the suggestions as selected, but you can deselect those that you think are irrelevant. When you are ready, select Apply and finish to confirm the mapping.
Find an applied rule box in Dataflow
The Filter Boxes search field lets you look up certain rule boxes applied to your attributes while hiding those that don't match the search keywords.

Find an applied rule boxes:
Go to Dataflow from the site's main menu.
Enter the name of the rule box you want to search for or a keyword associated with it in the Filter Boxes search field.
The platform hides all non-matching rule boxes from Dataflow, showing only those that match your search term.
Manage versions in Dataflow
As you edit and adjust elements in your Dataflow, it is helpful to save versions of your Dataflow before testing something or making major changes so that you can roll back to earlier versions in case of a problem.
Dataflow automatically saves versions before you commit significant changes, such as deleting all connections. But you can also save versions manually.
You can see the list of saved versions by selecting the Versions button in the upper ribbon.

To save a new version of Dataflow:
Go to Dataflow from the site's main menu.
Select Versions.
Select + Save Dataflow as New Version.

In the pop-up menu, enter the version's name and leave a comment (optional).
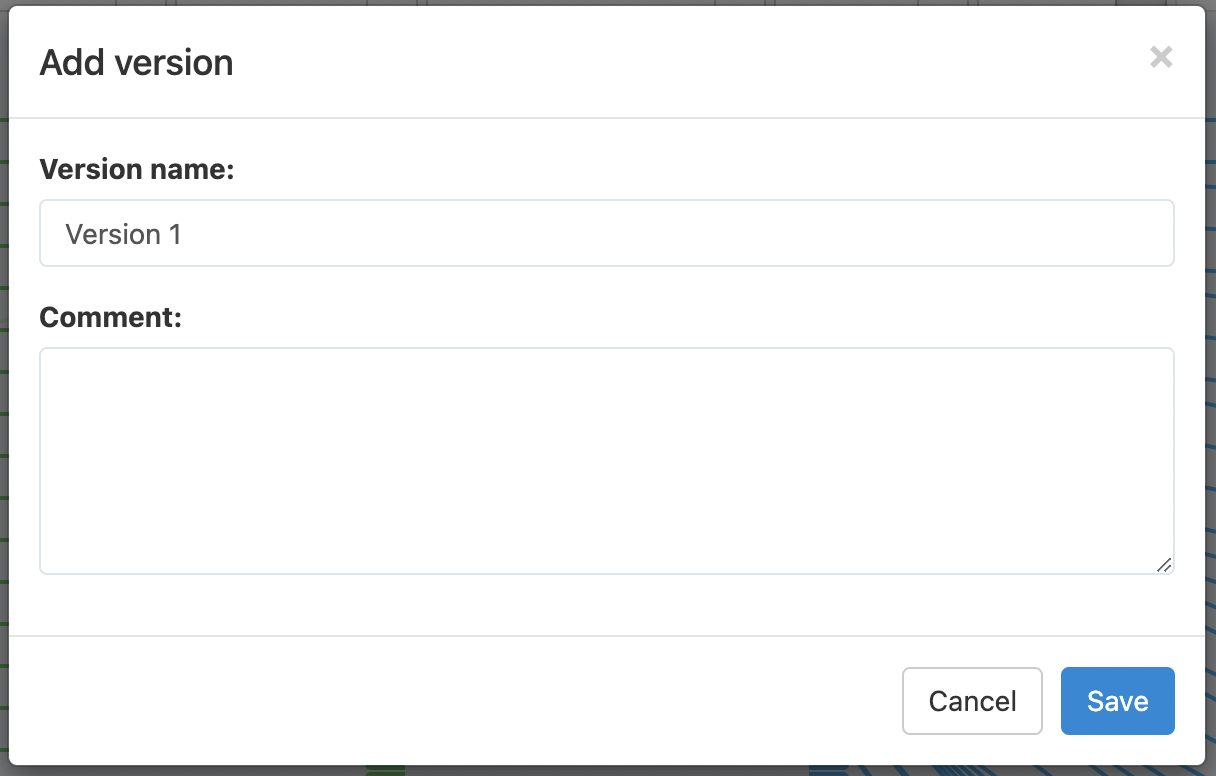
Select Save. The Versions drop-down menu now includes your saved version.
There are several icons to the right of each saved version.

These highlighted icons let you perform the following actions:
View a comment.
Edit a version name or comment.
Delete a version.
To retrieve a version of Dataflow:
Select Versions.
Select the version you wish to retrieve.
Select Yes to save your current Dataflow version before loading a previous version.
Warning
Loading one of the previous Dataflow versions overwrites the current version. If you continue without saving your current Dataflow version, you will lose all Dataflow changes for all exports in the current site performed since the last saved version.
Sort by attributes
The Sort by drop-down menu under the View button lets you define the order of attributes to appear in Dataflow. It doesn't affect the order of the attributes in the final export. It only customizes your view in Dataflow.
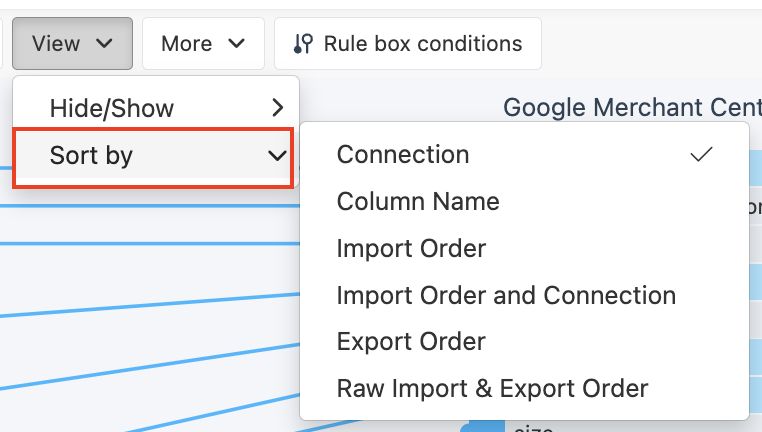
To access sorting options for attributes:
Go to Dataflow from the site's main menu.
Select the View button in the upper ribbon and select Sort by.
Choose your option from the drop-down list:
Connection shows connected attributes at the top.
Column Name makes attributes appear in alphabetical order, from A to Z.
Import Order makes attributes appear in the import stage in the same order they appear in your data sources.
Import Order and Connection makes attributes appear in the import stage in the same order they appear in your data source. The connected attributes come first.
Export Order make attributes appear in the export stage in the order they appear in the export file.
Raw Import & Export Order makes attributes appear in the import and export stages in the order they appear in the data source and exports.
Hide or show attributes
The Hide/Show drop-down menu under the View button lets you customize the Dataflow view by hiding irrelevant information to be able to focus on specific stages or attributes:
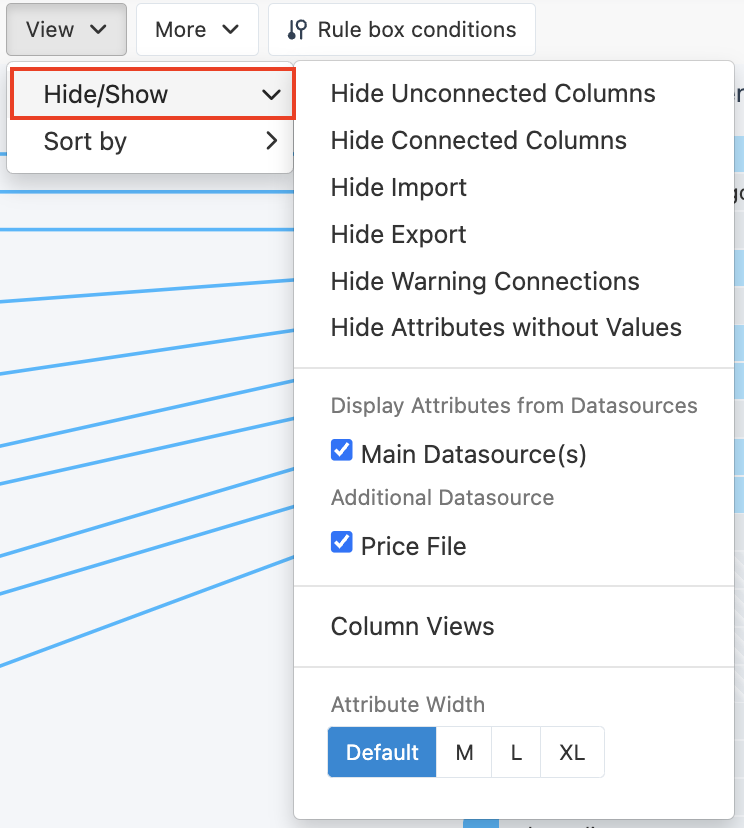
To hide or show the attribute data:
Go to Dataflow from the site's main menu.
Select View in the upper ribbon and select Hide/Show.
Select a type of data that you want to hide or show. Choose one of these options to have the following effect:
Hide Unconnected Columns hides all unmapped attributes.
Hide Connected Columns hides all mapped attributes.
Hide Import hides the entire import stage.
Hide Export hides the entire export stage.
Hide Warning Connections hides any red warning connections generated after importing data from another site.
Note
A warning connection is a red line between two stages in Dataflow.
A warning connection appears when there is an active connection between the attributes in the import and intermediate stages, but the connected attribute doesn't exist in the import stage. You can also see a warning connection if the rule box applied to this connection doesn't have the required attribute value.
Hide Attributes without Values hides all attributes with empty values.
Display Attributes from Datasources lets you choose the main or additional data sources whose attributes you want to see in Dataflow.
Column Views lets you select a custom Dataflow view previously created in Data View. See Save your customized visual settings.

Attribute Width lets you regulate the width of the stages to let you see the attribute names in full.
Delete attributes, rule boxes, or connections
The Delete button under the More drop-down menu lets you delete rule boxes, custom attributes, or connections between attributes in bulk.
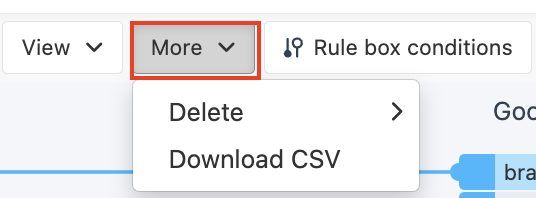
To delete multiple attributes, rule boxes, or connections:
Go to Dataflow from the site's main menu.
Select More in the upper ribbon and select Delete. In the drop-down menu, select the option you want to apply.
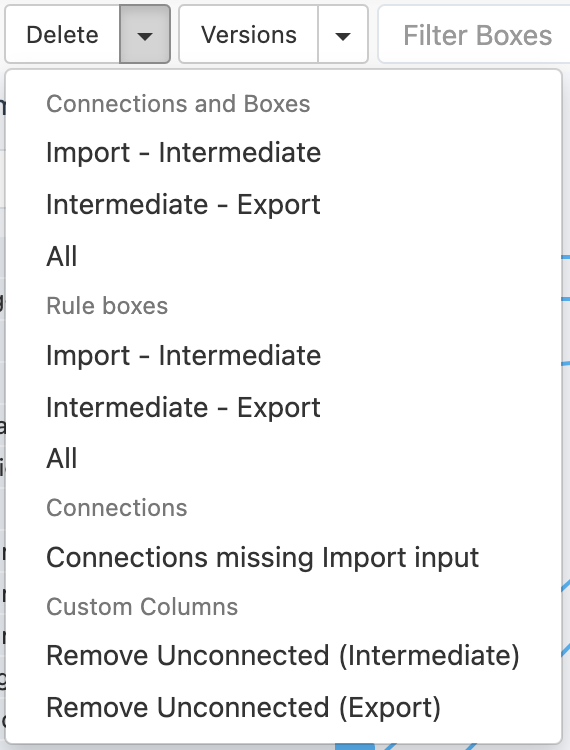
Section
Menu item
Explanation
Connections and Boxes
Import - Intermediate
Delete all connections between the import and intermediate stages.
Intermediate - Export
Delete all connections between the intermediate and export stages.
All
Delete all connections across all stages.
Rule boxes
Import - Intermediate
Delete all rule boxes for the attributes between the import and intermediate.
Intermediate - Export
Delete all rule boxes for attributes between intermediate and export stages.
All
Delete all rule boxes for all attributes across all stages.
Connections
Connections missing Import input
Delete all warning connections between import and intermediate if the import-stage attribute vanished from the data source.
Custom Columns
Remove Unconnected (Intermediate)
Delete all unconnected custom attributes at the intermediate stage.
Remove Unconnected (Export)
Delete all unconnected custom attributes at the export stage.