Image Designer
Image Designer is an effective way to create and save customized image templates in Productsup.
Introduction
The Image Designer is a quick and effective way to create and save highly customized image templates by providing many optimization possibilities. You can shift, resize and rotate fields by pulling and dragging and you can change color, transparency, font, etc. with specially designed editing tools.
The box has been thought for social channels such as Facebook, Instagram, etc. You can essentially enhance images for marketing channels as long as it accepts images with text.
Note
The Image Designer is an additional service and may require a contract amendment. However, you can test the functionalities of the designer and create templates. For questions about activating the Image Designer, contact support@productsup.com.
Locate Image Designer
In the platform, select Designer from the site's main menu.

Image Designer lets you:
Resize your images in a few steps
Trim your image borders
Add layers and texts with static or dynamic content
Add images or logos to your photos
Add filters to your images
Add and modify icons
Save your templates
Box input
Layers: Define how many layers the output image has.
Insert: Show the elements that could be added by grabbing and dragging them to your image.
Templates: Define all the templates created by our experts and your saved ones.
Settings: Define the setup for the output image, the possible grid, the color of the canvas, and the stage between Intermediate or Export/Channel.
Supported formats
Input: JPG, JPEG, and PNG
Output: JPG and PNG
Layers
In Image Designer, you can add design elements, such as text, graphics, additional images, or other effects on separate layers to create your ideal image. Layers are transparent sheets that let you manage several design elements separately. You can combine several layers to produce one final image or combining several images used on multiple layers. Then choose to hide or show layers as you wish for additional possibilities. For example, you can add an image to the first layer, create a second layer that contains text, and a third layer containing colorful shapes.
Using layers helps you specify which design elements you want to change separately and puts you in control of all design possibilities.
The several different layer types are:
Rectangular
Text
Image from URL
Dynamic Image
Dynamic Text
Rating

Edit and move layers
You can edit a layer name by selecting the pen icon.
If you want to move a layer around, select and drag the layer by the left handle. You can move several layers together by selecting their link icons on the right. Select the link for each layer that neighbors another layer. In other words, you can only move two or more layers at once when they are next to each other, either above or below. Once you have a grouped several layers together by selecting their link icons, move the layers by selecting and dragging a linked layer's left handle.

Hide a layer with the eye icon to reveal the layer beneath it. Layers are transparent, so if a layer exists beneath another layer, it is visible when you select to hide it. You can unhide any layer that you have hidden.
Rect: Layer (Rectangular)

Settings
X-Y: Move the image to the left, right, high above or below
Width: Define the width of the output image
Height: Define the height of the output image
Fill color: Choose the color of the internal part of the rectangular by clicking on the colored field
Fill transparency: Select the transparency on a scale from 0 (no transparency) to 100 (fully transparent)
Stroke color: Choose the color of the borders by clicking on the colored field
Stroke width: Choose the width of the borders
Stroke transparency: Select the transparency of the borders on a scale from 0 (no transparency) to 100 (fully transparent)
Radius X-Y: Define the shape of the output image
Rotation: Define the rotation degree of the output rectangular
Text: Layer

Settings
X-Y: Move the text layer to the left, to the right, high above or below
Rotation: Define the width of the output text section
Color: Choose the color of the text
Stroke color: Choose the color of the borders of the text by clicking on the colored field
Stroke Width: Define the width of the borders of the text
Transparency: Select the transparency of the borders on a scale from 0 (no transparency) to 100 (fully transparent)
Font color: Define the color of the text by clicking on the colored field
Font Size: Define the size of the text in pixel
Font Transparency: Select the transparency of the text on a scale from 0 (no transparency) to 100 (fully transparent)
Line height (px): Define the height of the line in pixels
Text: Here you can manually add the static text
Font Family: Choose between 800 different fonts from the Google Fonts project
Font Decorations: Define the suitable decorations of the font
Horizontal alignment: Choose the horizontal alignment by clicking on it
Vertical alignment: Choose the vertical alignment by clicking on it
Multiline: Activate that button by clicking on it to write text in more than one row
Word Spacing (px): Change the spacing between the words by filling in the number of pixels
Character Spacing (px): Change the spacing between the characters by filling in the number of pixels
Render background: Add a background color to the whole text layer
Partial background: Add a background color to the inserted text
Text Shadow: Activate this option by ticking it to add shadow to your text

Image: Layer - Image from URL

Settings
X-Y: Move the image to the left, right, high above or below
Width (%): Define the width of the output image
Height (%): Define the height of the output image
Transparency: Select the transparency of the added image on a scale from 0 (no transparency) to 100 (fully transparent)
Rotation: Define the rotation degree of the output image
Crop Mode: Choose to cut off the sides and top/bottom of the image
Image slice properties, appear when you switch Slicing to On. Customize your dynamic image in slice mode
Source: Enter the image URL of the additional image here if it is a static input from outside your feed
Filters
Brightness: Adjust the tonal values and expand image highlights by moving the brightness slider to the right
Hue: Change the hue (colors) of your image to fine-tune your image to add special effects or to change the range of colors
Grayscale: Convert your image to a black and white image by moving the slider to the right
Invert: Change the brightness value of each pixel to the inverse value by moving the slider to the right-most position
Contrast: Move the slider to the right to increase the number of shades in the image
Saturate: Adjust the saturation (purity) of your image
Sepia: Use this filter to convert an image to a sepia tone image
Blur: This filter softens the image by averaging the pixels
Easily reset the filters by selecting Reset filters.
Dynamic Image: Layer

Settings
Input: Select the appropriate column that contains the value you want to use as a dynamic image
Note
If the attribute you choose from the Input drop-down menu has an ex (✘) before its name, it means the product you are currently editing in Image Designer has an empty value in that attribute.
If the attribute chosen in the Input drop-down menu has a checkmark (✔) before its name, it means the product has a relevant value in the attribute.
X/Y: Move the image to the left, right, high above or below
Width: Define the width of the output image
Height: Define the height of the output image
Transparency: Select the transparency of the added image on a scale from 0 (no transparency) to 100 (fully transparent)
Rotation: Define the rotation degree of the output image
Crop Mode: Choose to cut off the sides and top/bottom of the image
Image slice properties, appears when you switch the Slicing to On. Customize your dynamic image in slice mode
Filters
Brightness: Adjust the tonal values and expand image highlights by moving the brightness slider to the right
Hue: Change the hue (colors) of your image to fine-tune your image to add special effects or to change the range of colors
Grayscale: Convert your image to a black and white image by moving the slider to the right
Invert: Change the brightness value of each pixel to the inverse value by moving the slider to the right-most position
Contrast: Move the slider to the right to increase the number of shades in the image
Saturate: Adjust the saturation (purity) of your image
Sepia: Use this filter to convert an image to a sepia tone image
Blur: This filter softens the image by averaging the pixels
Easily reset the filters by selecting Reset filters.
Dynamic Text: Layer

Settings
Input: Select the appropriate column that contains the value you want to use as dynamic text
Note
If the attribute you choose from the Input drop-down menu has an ex (✘) before its name, it means the product you are currently editing in Image Designer has an empty value in that attribute. If you choose an attribute with an empty value, Image Designer displays the warning text
DYNAMIC TEXT - NO VALUE IN SELECTED COLUMN
in the product's image preview. However, if you send an image with an empty value to an export channel, the platform removes the warning text and displays a blank value instead.If the attribute chosen in the Input drop-down menu has a checkmark (✔) before its name, it means the product has a relevant value in the attribute.
Max length: Define the max length of the text
X-Y: Move the text layer to the left, to the right, high above or below
Rotation: Define the width of the output text section
Color: Choose the color of the text
Stroke color: Choose the color of the borders of the text by clicking on the colored field
Stroke Width: Define the width of the borders of the text
Transparency: Select the transparency of the borders on a scale from 0 (no transparency) to 100 (fully transparent)
Font color: Define the color of the text by clicking on the colored field
Font Size: Define the size of the text in pixel
Font Transparency: Select the transparency of the text on a scale from 0 (no transparency) to 100 (fully transparent)
Line height (px): Define the height of the line in pixels
Text: Here you can manually add the static text
Font Family: Choose between 800 different fonts from the Google Fonts project
Font Decorations: Define the suitable decorations of the font
Horizontal alignment: Choose the horizontal alignment by clicking on it
Vertical alignment: Choose the vertical alignment by clicking on it
Multiline: Activate that button by clicking on it to write text in more than one row
Word Spacing (px): Change the spacing between the words by filling in the number of pixels
Character Spacing (px): Change the spacing between the characters by filling in the number of pixels
Render background: Add a background color to the whole text layer
Partial background: Add a background color to the inserted text
Text Shadow: Activate this option by ticking it to add shadow to your text
Rating: Layer

Settings
Rating type: Select the type of rating you want to use. Choose between stars, circles, a progress bar, and the Tripadvisor-branded rating.
Default: Static Value for the rating score
Dynamic Input: Enter the column that contains your rating on product level here to assign dynamic rating scores
Note
If the attribute you choose from the Input drop-down menu has an ex (✘) before its name, it means the product you are currently editing in Image Designer has an empty value in that attribute.
If the attribute chosen in the Input drop-down menu has a checkmark (✔) before its name, it means the product has a relevant value in the attribute.
X: Set the rating symbol's height
Y: Set the rating symbol's width
Width: Set the width of the entire widget
Height: Set the height of the entire widget
Stroke color/width/transparency: Define the look of the rating symbol's outlines
Full Star color/Transparency: Define the look of the rating symbol's inner part
Empty Star color/Transparency: Define the look of the empty rating symbols
Don't fill empty: In case you want to have transparent empty stars, activate this checkbox
Inner Radius/Rotation (deg): Define the radius and the rotation in degrees if you want the widget to be angled
Insert
Elements
In this section, you can find the elements that could be added by grabbing and dragging them to your image. You can find a "Rectangular" box, a "Text" box, an "Image from URL" box, a "Dynamic Text" box, and a "Dynamic Image" box

Clipart
Choose from multiple pre-configured Clipart. You can add them to your image by dragging them to the desired position. It will be added as a new layer.

Icon Font
Choose from multiple pre-configured icon fonts. You can add them to your image by dragging them to the desired position. It will be added as a new layer.

Your Custom Images
In case you use the same custom image on multiple templates and don't want to add it via the "Image from URL" layer over and over, you can upload it in this section. It will then be available for all templates within the site.

Shortcuts
Copy and paste items by using Strg+C/Strg+V or Cmd+C/Cmd+V.
Move single items with the keyboard arrows and holding Strg/Cmd.
Remove items with the delete key of your board.
Templates
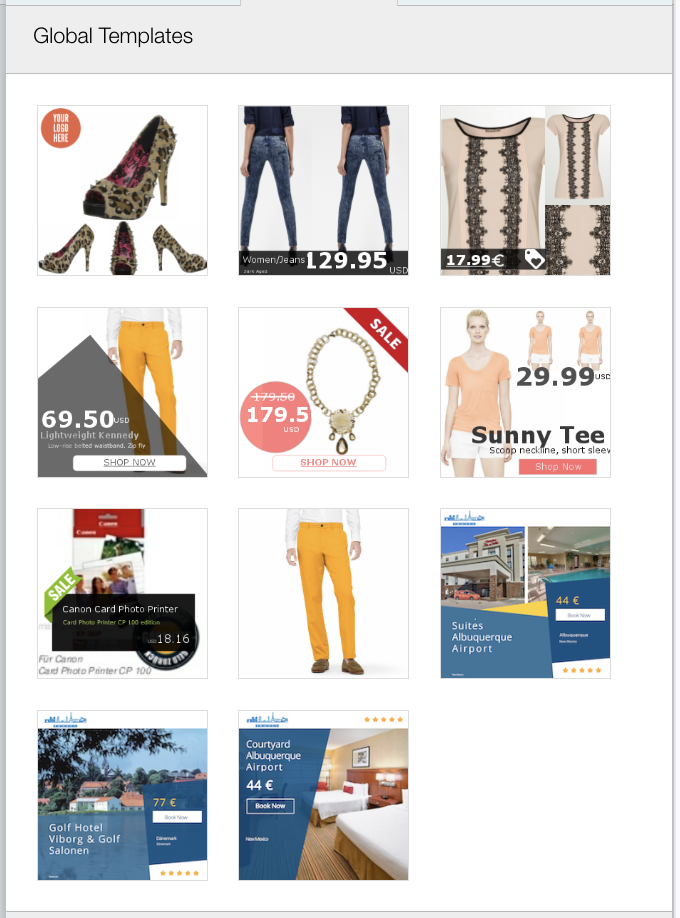
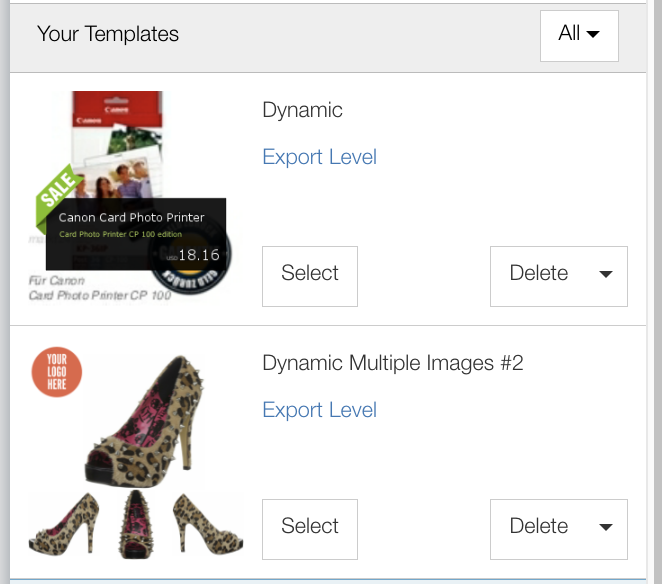
In the Templates section, you can access the default Global Templates, which are available to all clients, and Your Templates. You can see if a template is used for the Export or Intermediate level and if it is shared with any other sites.

Input
Global Templates: Our experts already created some templates ready to be used. Feel free to choose and customize them in the Layers section. As soon as you have chosen your favorite one-click on load to apply it.
Your Template: Once the image template has been created it will automatically be saved under "Your Templates". You will see this section scrolling down. You can rename the template, load it or delete it.
Settings

Input
Grid: Choose the grid (None, 10, 60) that helps you adding elements to your pictures in the correct alignment The grid will just show up while editing and be removed in the final picture.
Background Color: Choose the background color of your output image in the color picker.
Template Size: Define the size of your template in pixels to make sure the format meets the requirements of the export channel.
Other: Select the stage you want to use this template in. This will define the inputs for your dynamic attributes. By choosing Intermediate you will get values from the Import stage and by choosing Export/Channel values from the Intermediate will be used.
SVG Filters

Brightness: Adjust the tonal values and expand image highlights by moving the brightness slider to the right
Hue: Change the hue (colors) of your image to fine-tune your image to add special effects or to change the range of colors
Grayscale: Convert your image to a black and white image by moving the slider to the right
Invert: Change the brightness value of each pixel to the inverse value by moving the slider to the right-most position
Contrast: Move the slider to the right to increase the number of shades in the image
Saturate: Adjust the saturation (purity) of your image
Sepia: Use this filter to convert an image to a sepia tone image
Blur: This filter softens the image by averaging the pixels
General
Undo/Redo
You can undo and redo your changes by clicking the buttons on the top of the designer to revert/repeat your last changes or open the drop-down to pick a specific change.

Zoom
To check the quality of your images in different sizes you can use the Zoom functionality on top of the image.

Share/Copy templates
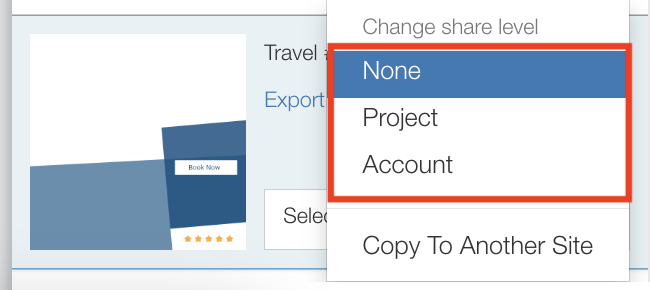
When selecting the drop-down next to "Delete," you will find the option to share the template over the project or the entire account.
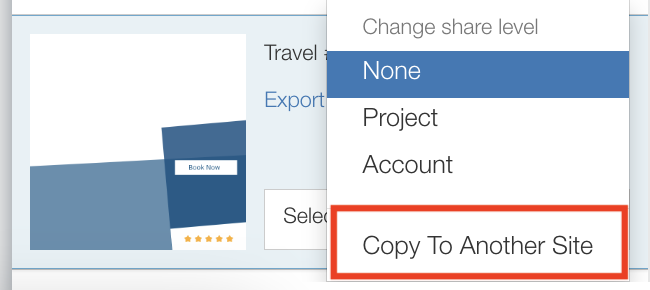
By clicking "Copy to Another Site" you can copy the template over to any other site within your account.

Apply templates to your feed
Once you have created your output image using Image Designer, go to Edit and select the image column that you want to optimize using your existing image. Select the box Use Image Designer Template (limited) and drag it to the connection. This rule box lets you test the functionality with a limited amount of images. In the drop-down, you can find the list of the saved Templates. Choose your favorite one and amaze your customers.
Important
Remember, when you modify an image(s), they are redirected through Productsup image servers.
Each time you make a change to the template and the used column input within the templates changes, the URL changes. The URL is no longer is static.