Set up ETIM Classes exports
Set up the ETIM Classes exports in Productsup to transform your data to comply with the ETIM standards for different industries. Productsup supports the latest ETIM versions.
Introduction
ETIM is an international classification standard for technical products of different industries, such as electrical, HVAC, and construction. When every manufacturer uses the same classification for attributes and values to describe similar products, it makes it easier for buyers to compare and choose products.
The ETIM hierarchy looks as follows:
ETIM class is the lowest level category.
Each ETIM class consists of a list of attributes, called ETIM features, to describe any category product.
Each ETIM feature should include valid ETIM values.
Each ETIM class, feature, and value use ETIM codes as a description. For example, to describe a brass water tap, you need the following codes:
ETIM сlass: EC011375
ETIM feature for material: EF020791
ETIM value for brass: EV000149
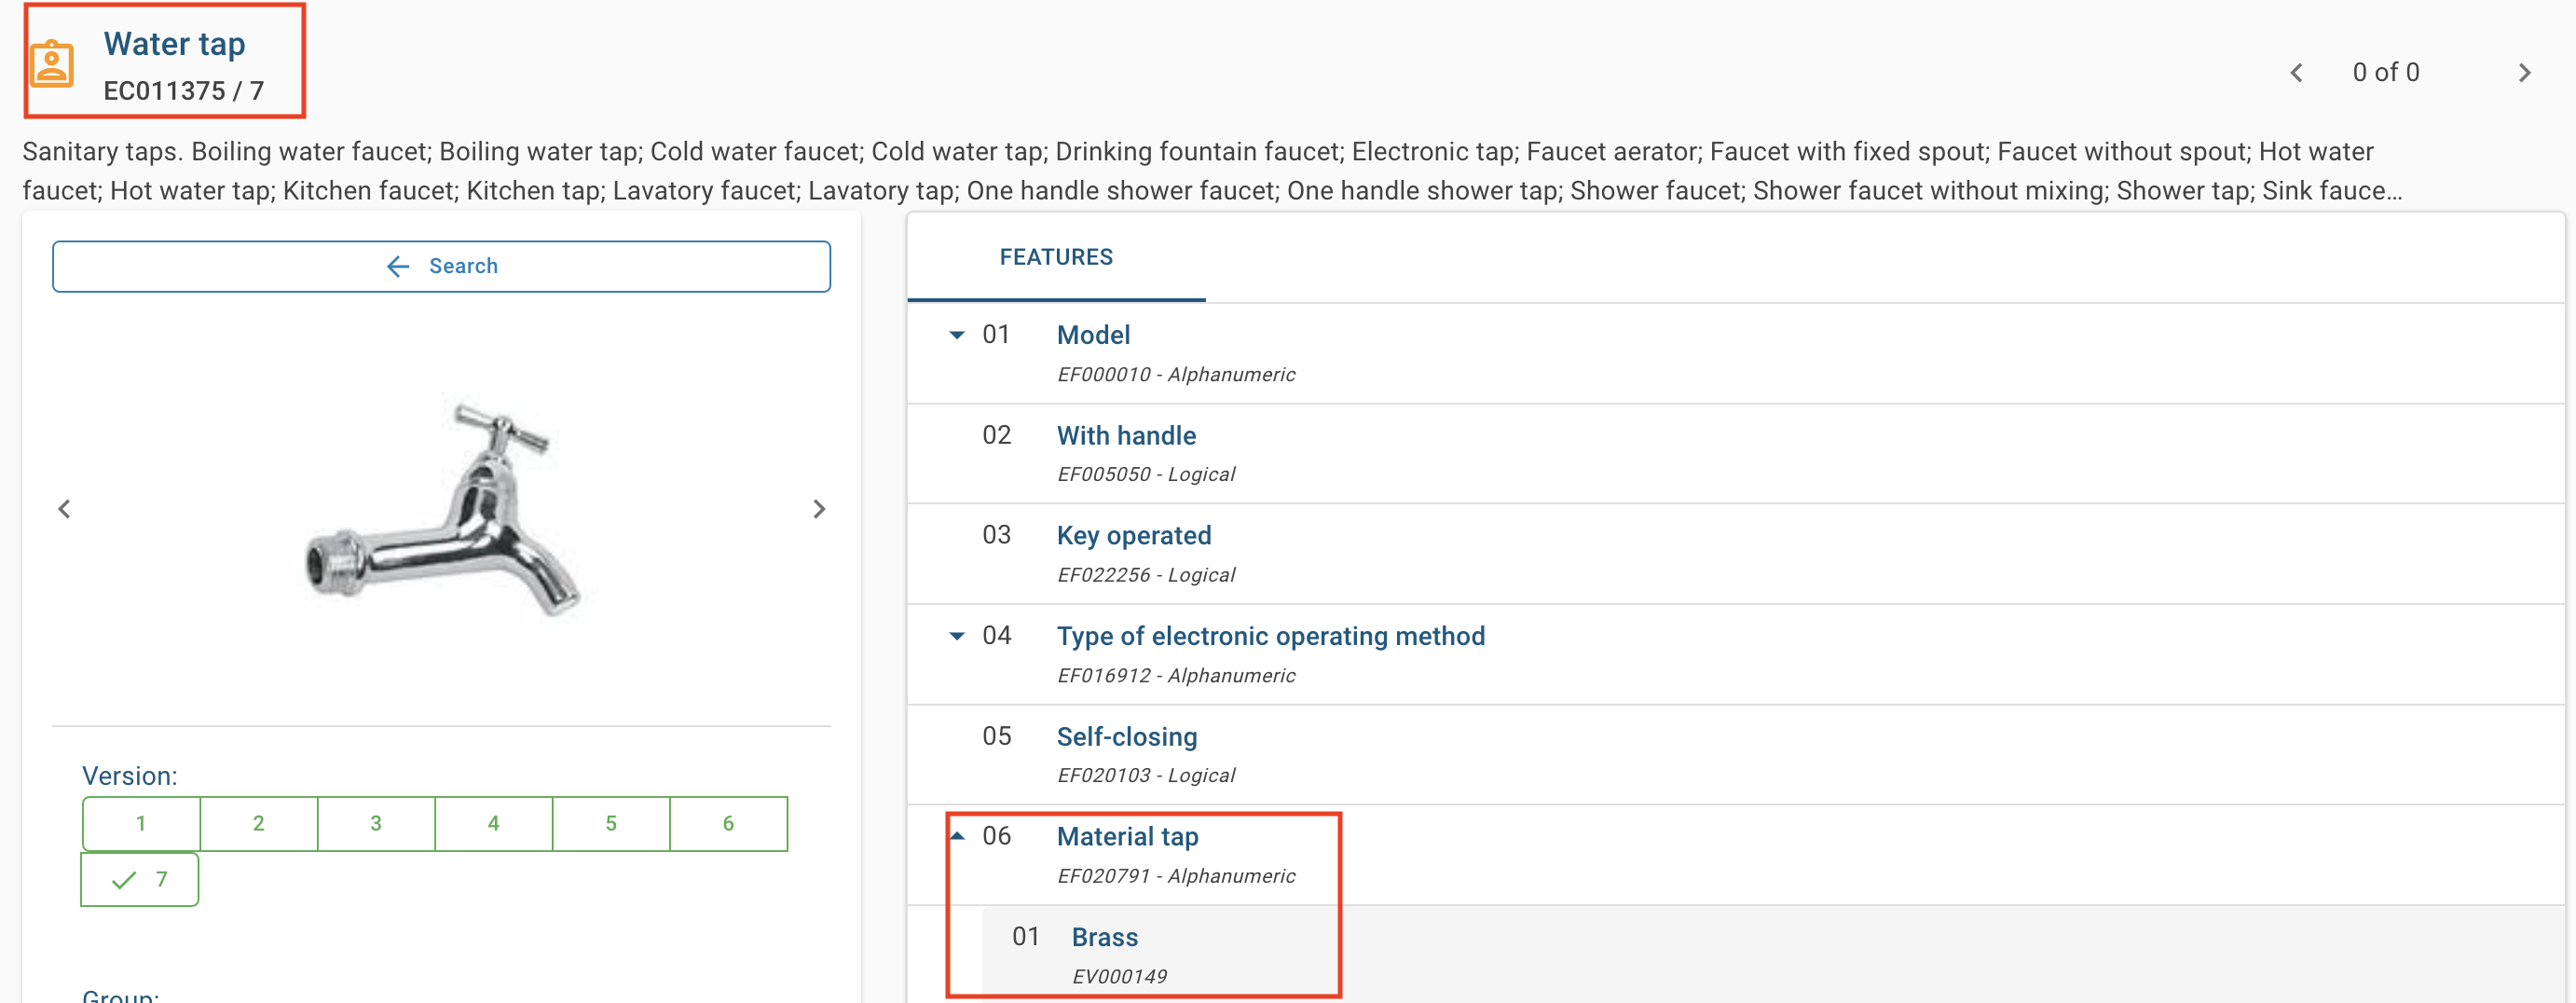
See ETIM Model Information for more details.
Productsup supports ETIM versions 8.0 and 9.0 and provides exports that help you transform your data to comply with the ETIM standards. Depending on your ETIM version, you need to choose a corresponding classification list and export in the platform:
ETIM version | Classification list | Export |
|---|---|---|
ETIM 8.0 | ETIM-8.0 Classes – choose this list for an already existing mapping ETIM Classes – choose this list for a newly created mapping | ETIM-8.0 Classes |
ETIM 9.0 | ETIM Classes | ETIM-9.0 Classes |
Note
Use the ETIM Classes classification list for any new ETIM export setup. The ETIM Classes classification list is version-independent and includes code classes of ETIM versions 8.0 and 9.0. We will maintain this classification list by adding new codes for the following ETIM versions.
Tip
Learn more about ETIM on our Academy website by taking the video course Distribution PX - Export Data or find detailed guidance in the sections below.
Migrate from ETIM 8.0 to ETIM 9.0
If you currently use the ETIM 8.0 version and want to migrate to ETIM 9.0, you should do the same steps as for setting up the export from scratch. See Set up ETIM Classes export.
You can either migrate to a new version from your existing ETIM 8.0 site, or you can create a new site for ETIM 9.0. See Create or copy a site.
Set up ETIM Classes export
To set up the ETIM Classes export in Productsup, take the following steps:
Map imported product categories to ETIM classes with lists. This step is optional and you can skip it if your data feed already has the ETIM class codes. See Map imported product categories to ETIM Classes with Lists.
Add and set up ETIM Classes export. See Add and set up ETIM-8.0 or ETIM-9.0 Classes export.
Map imported product attributes to ETIM features. See Map product attributes to ETIM features.
Confirm whether the mapped ETIM features contain the correct ETIM values and make the necessary adjustments. See Check and correct ETIM values.
Map imported product categories to ETIM Classes with Lists
Note
Skip this step if the ETIM class codes are already in your imported data feed.
Go to Lists from your site's main menu.
Select ADD LIST.
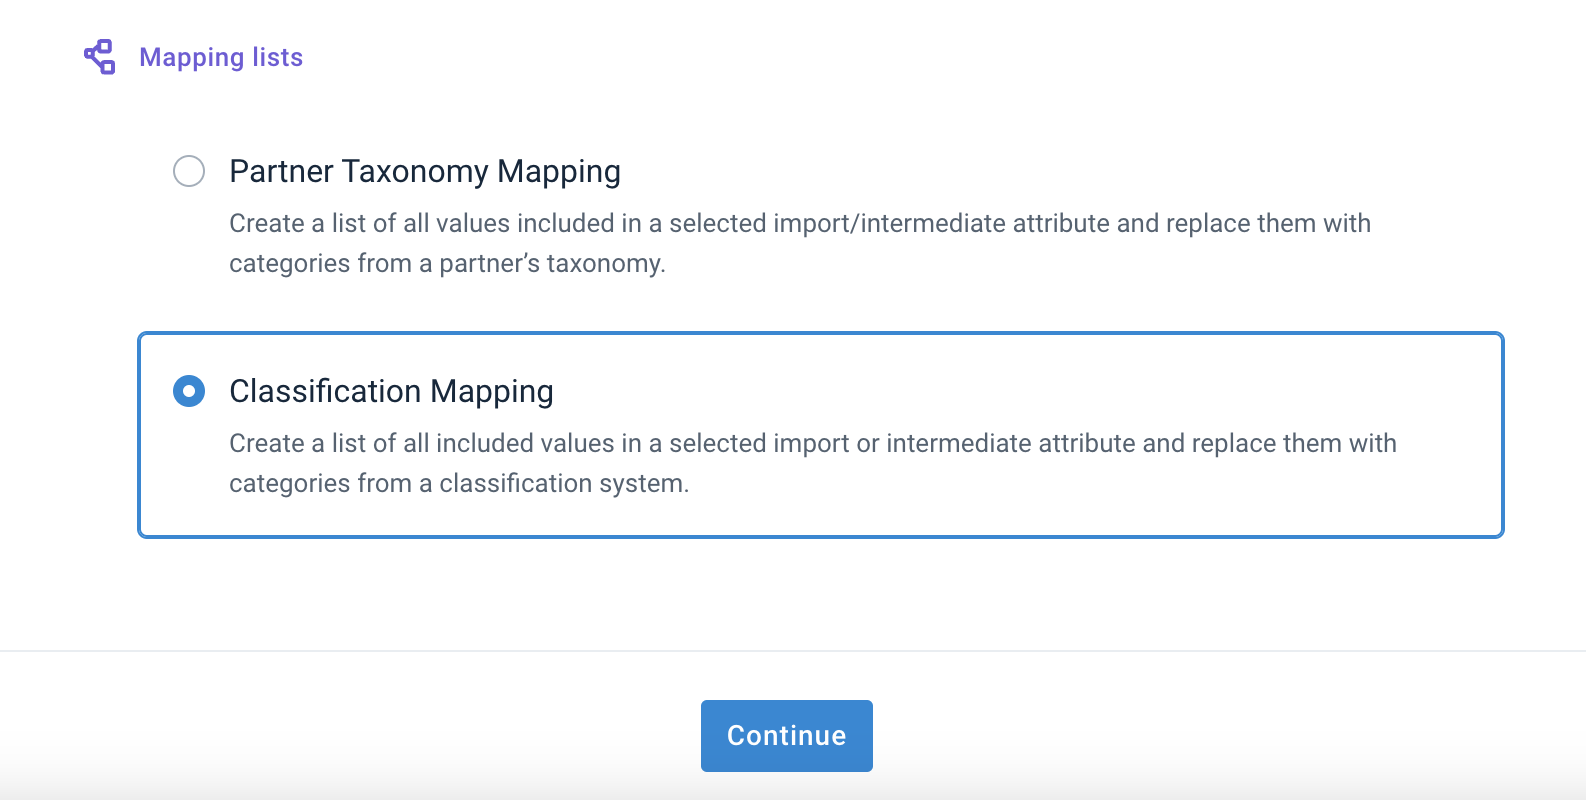
In Choose a list type, choose Classification Mapping and select Continue.
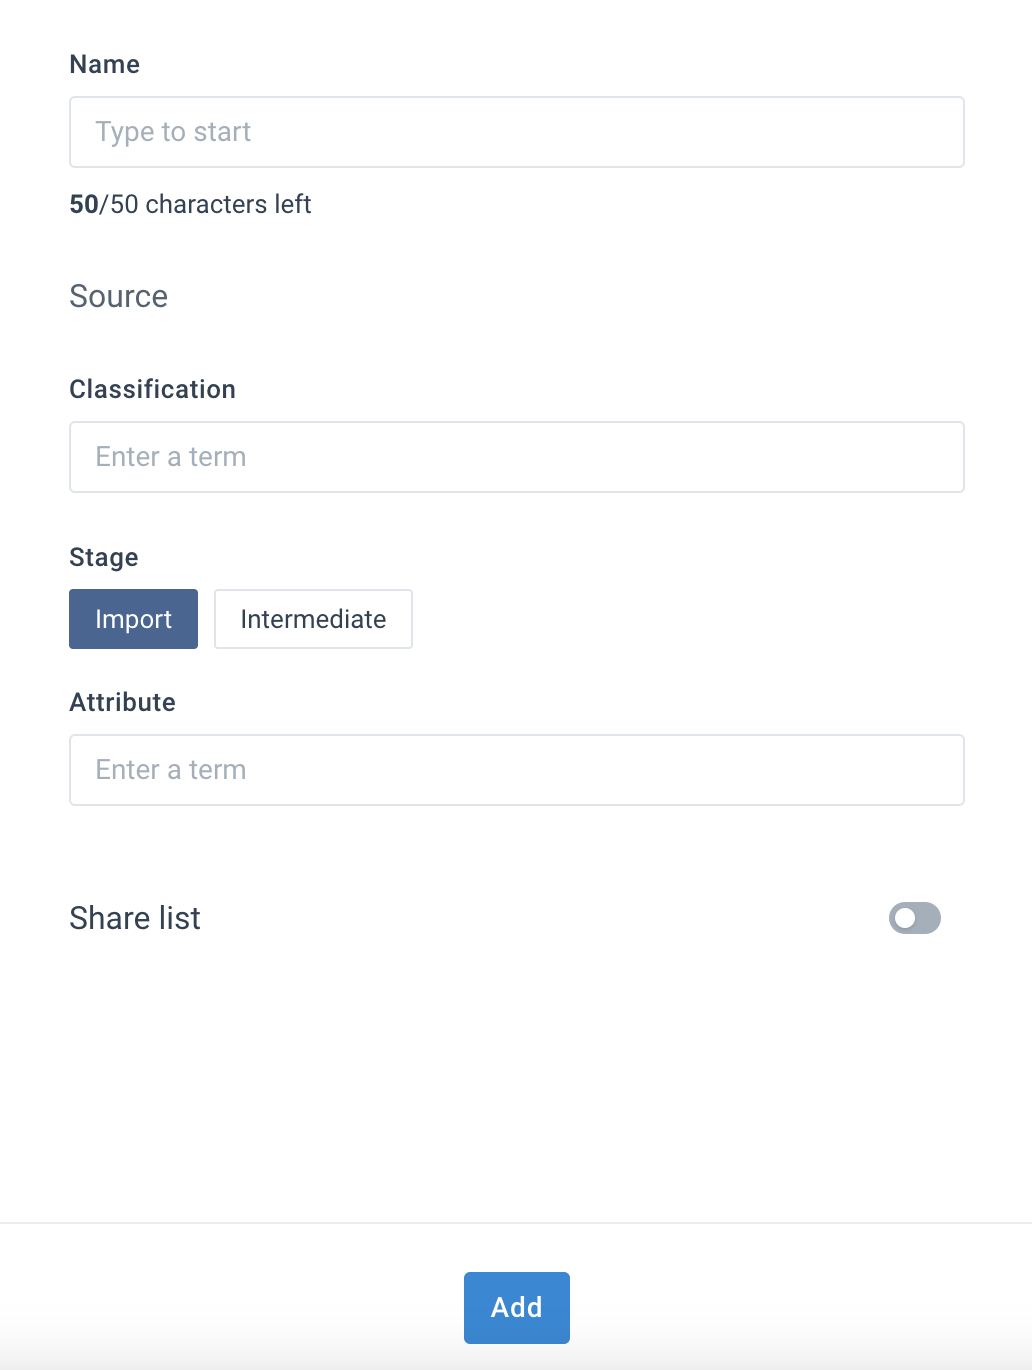
In Configure the Classification Mapping list, do the following:
In Name, give your list a desired name.
In Classification, choose the ETIM Classes classification standard.
In Stage, select Import.
In Attribute, select the attribute of your data feed that contains the product categories. For example, the
categoryattribute.Optionally, toggle Share list if you want to share the list within the organization or project.
Select Add.
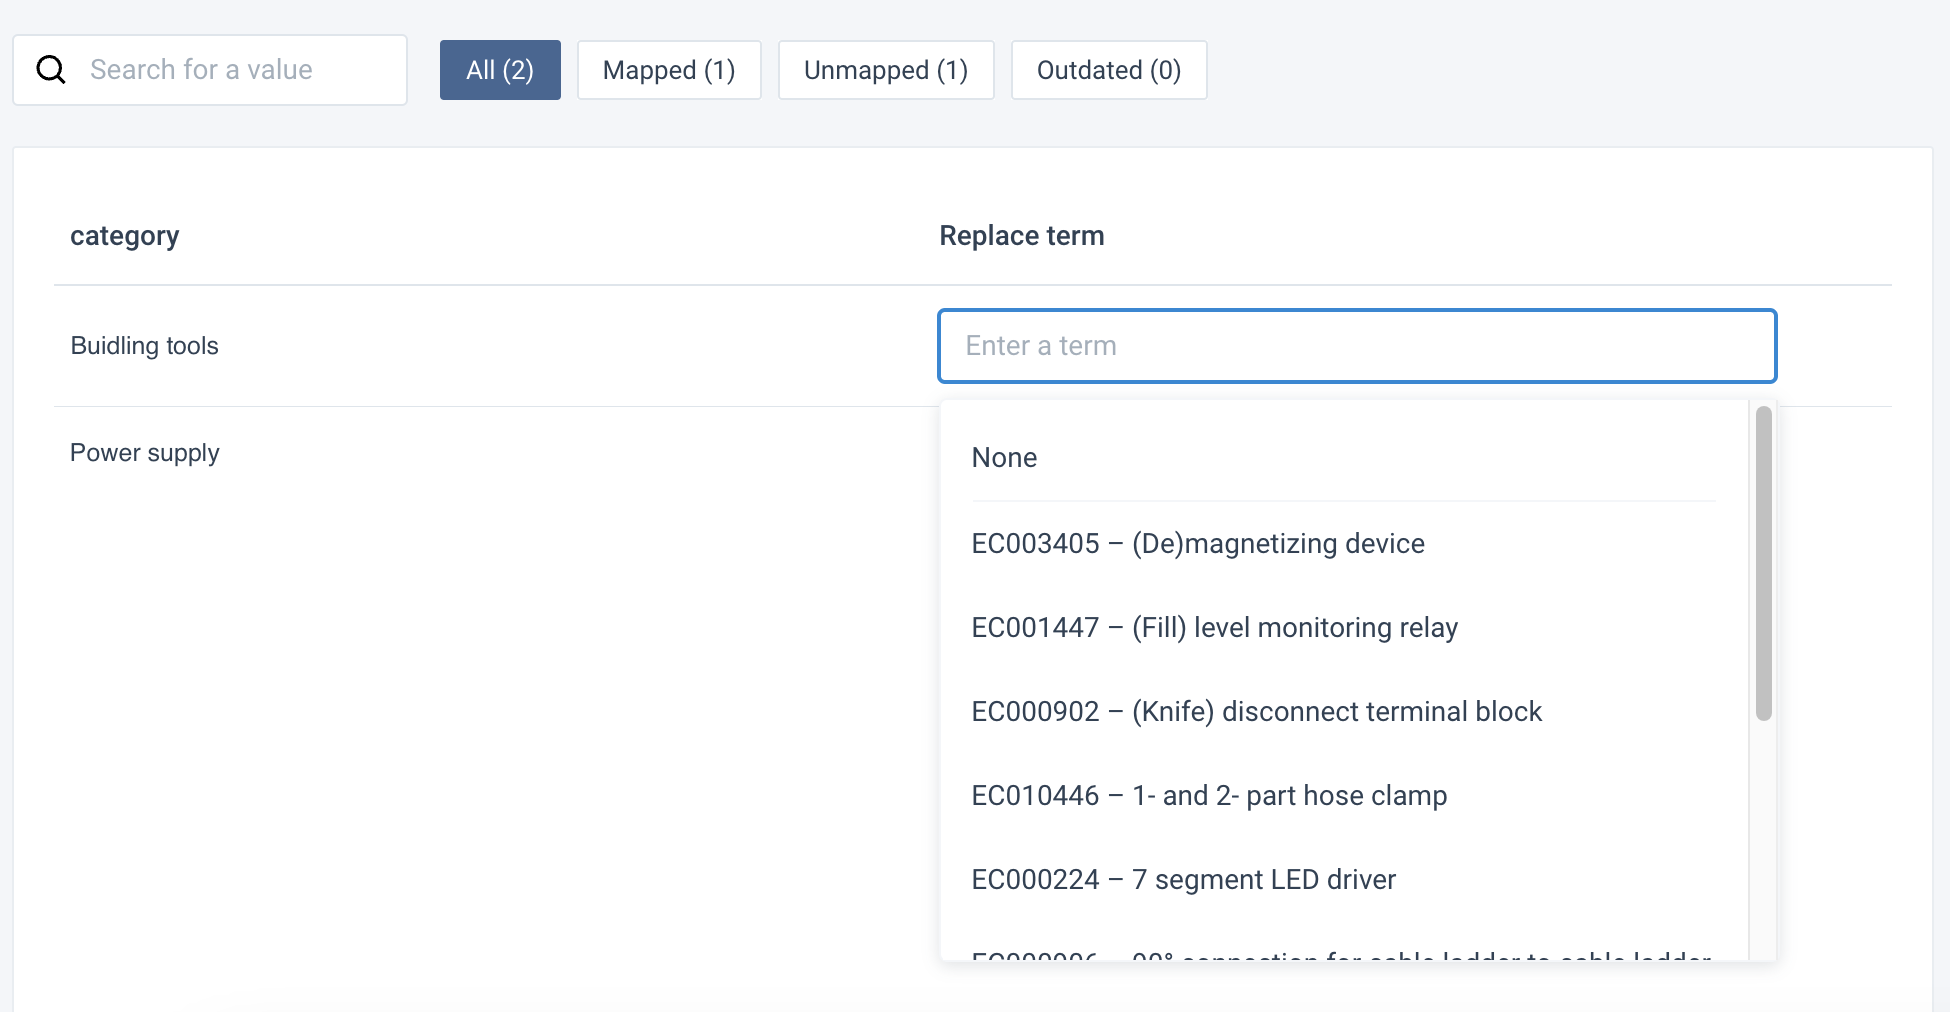
Map your product categories by choosing the corresponding ETIM classes from the Replace term drop-down menu.
Add and set up ETIM-8.0 or ETIM-9.0 Classes export
Depending on the ETIM version supported by your system, you can choose the needed export:
ETIM-8.0 Classes for version 8.0
ETIM-9.0 Classes for version 9.0
The export lets you map your product attributes to the ETIM features for all the relevant ETIM classes in your catalog and validate or correct the attribute values. The values should correspond to the ETIM values.
To add an export:
Go to Exports from your site's main menu and select ADD EXPORT.
Search for a needed export and select Add.

In Exports, select the export's name link.

Select the pen icon at the top of the page and give your export a custom name as desired.
Select Add Destination and choose your destination. Give it a name as desired and select Save.
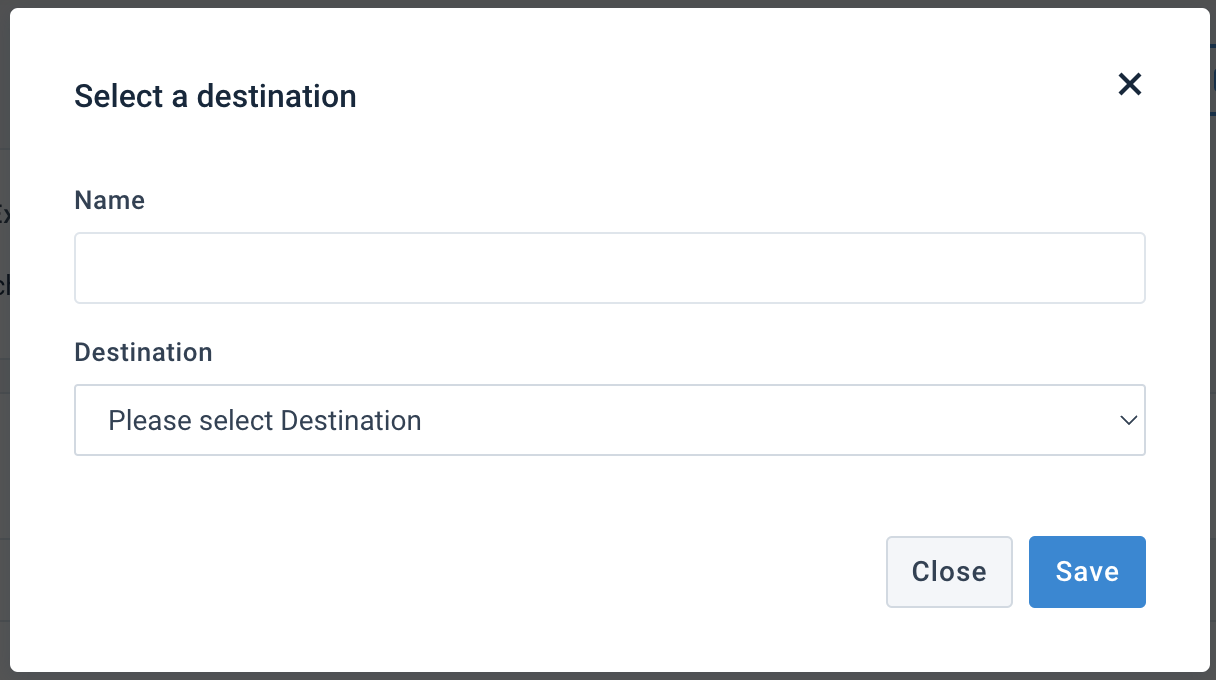
The platform creates an XML file and exports it to the selected destination. Later, you can use the product data that you previously mapped to ETIM for other exports, such as BMEcat or FabDis. Use the output file from the ETIM export you set up as a data source for the BMEcat or FabDis site.
Go to Dataflow from your site's main menu.
Select your export from the drop-down menu on the left in the top ribbon.
Map the attributes from the intermediate to export stage. For example, connect the
categorytoClass code.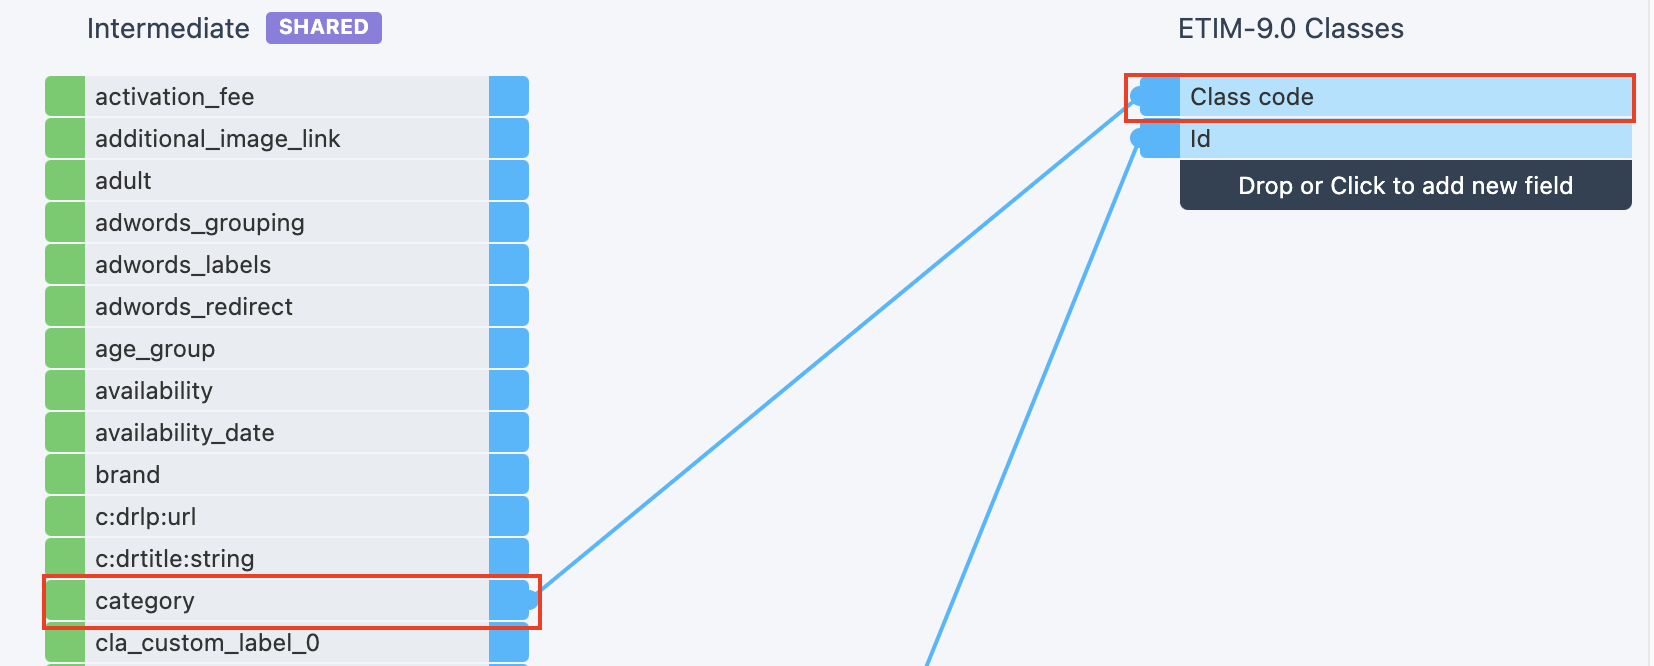
Hover over the Class code attribute in the export stage and select the arrow on the right.
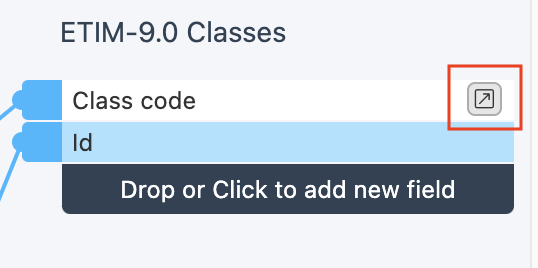
Search for the
Classification Mappingrule box and drag it to the blue area.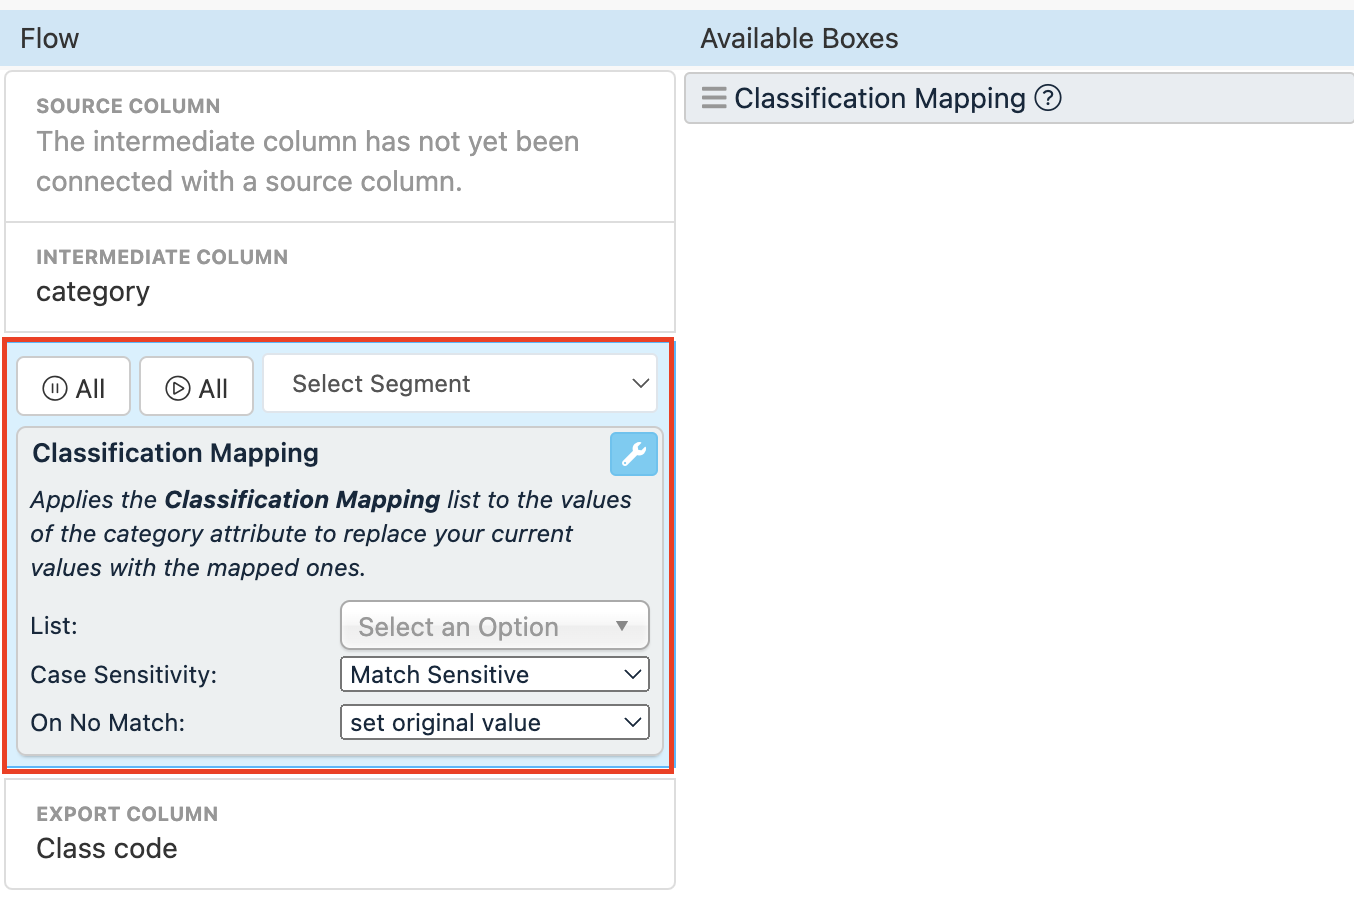
In the List drop-down menu, select the Classification Mapping list you set up in Map imported product categories to ETIM Classes with Lists.
Select Save.
Select Run in the top right corner to import the ETIM class features. Wait for the run to finish and refresh your page. The Classifications drop-down menu appears in the top ribbon. If you open it, you can see the ETIM classes that are present in your data feed.

Map the product attributes to each class feature as described in the next section.
Map product attributes to ETIM features
The export consists of a set of classes, such as EC003867 - Towel Hook. Each class has a specific list of attributes, called ETIM features, that describe any product in a specific category.
To map product attributes to ETIM features:
In Dataflow, select a class you want to map by opening the Classifications drop-down menu in the top ribbon. The platform refreshes the view and shows the class attributes in the export column.
Map the attributes for the selected class to the intermediate stage. Repeat the same steps in all ETIM classes.
Note
Some export attributes appear twice: with their standard name and with
[details]at the end of their name. For example:
The meaning of the repeated attributes is the following:
The
Materialattribute contains a correct ETIM value.The
Material [details]attribute lets you add product details as text. Use it if you want to offer more information about your product than ETIM requires or if an ETIM value doesn’t fit your case.
Once you finish mapping the attributes for your ETIM classes, go to Data View and check whether your export attributes contain valid ETIM values, as described in the following section.
Check and correct ETIM values
Each ETIM feature should have a valid ETIM value in the form of code, such as Value Code: EV000149 - Brass. To check if all the values are present in your feed:
Go to Data View from your ETIM site.
Select your ETIM Classes export from the channels drop-down menu in the top ribbon.
Select the ETIM class you want to check from the Classification drop-down menu.
Select the Analyze button for the attribute you want to check.
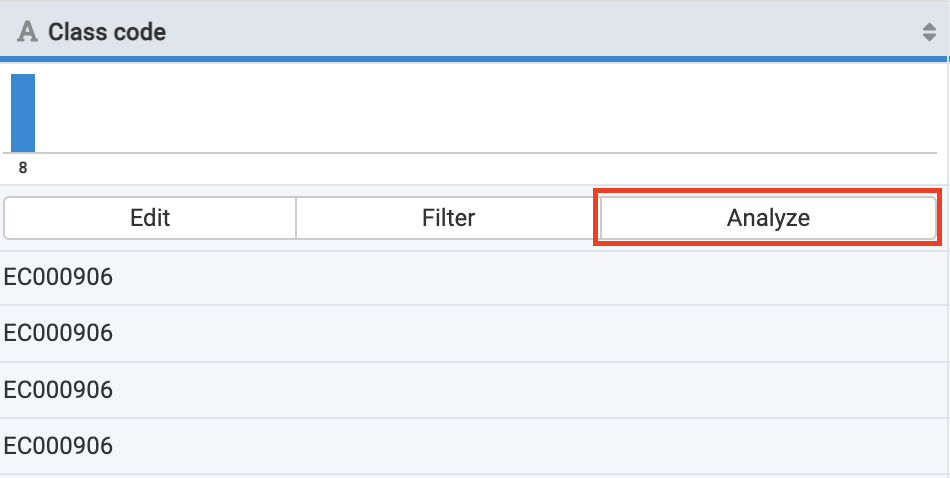
The side panel opens and shows whether your attribute contains valid ETIM values and suggests possible actions to correct them. See Analyzer for more information on the Analyzer feature.
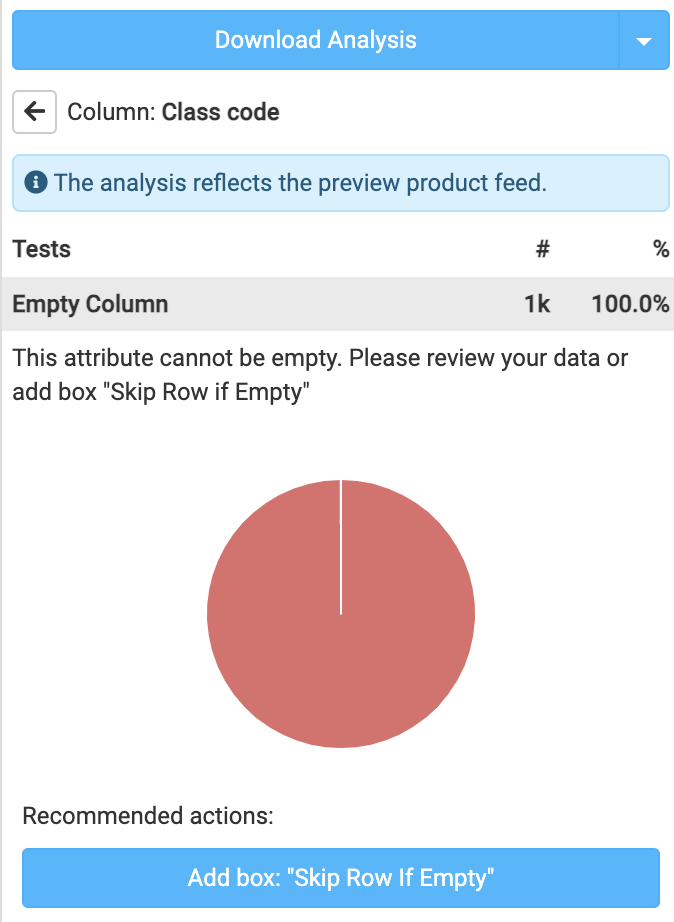
Use rule boxes to edit the values if necessary.