Rule box category Clean up values
Clean your product data using the Clean up values rule box category in Productsup.
Introduction
The category Clean up values contains all rule boxes that can help you detect and remove irregularities in your data. For example, you can filter GTINs, separate words, decode HTML and Base64, translate colors, remove consecutive whitespace, or remove whitespace at the beginning and end of the value. Besides that, you can detect and extract values using the rule boxes in this category.
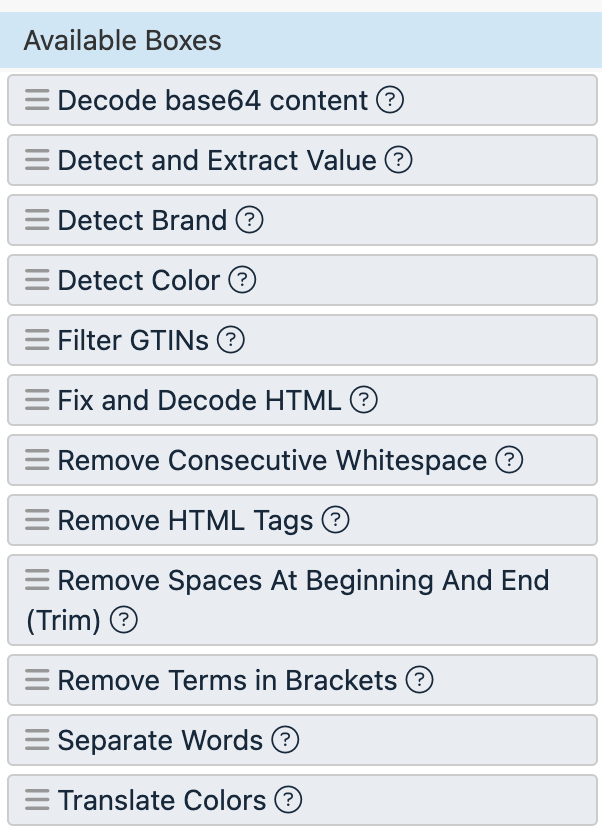
This category can be divided into several subgroups. In the following sections, you can find how to use the rule boxes of the Clean up values category:
Detect and extract information from an attribute
The rule box category Clean up values contains the rule boxes Detect and Extract Value, Detect Brand, and Detect Color. Using this rule box category, you can extract product information, such as brand or color, from one attribute into another. You can also detect and extract other desired values using lists.
Detect and Extract Value
You can find desired values in an attribute and extract them into another attribute. Using a Standard Inclusion/Exclusion list, the Detect and Extract Value rule box finds a match in a product's value and adds it to the attribute where you apply the rule box.
The platform goes through the terms on your list in the order you added them to the list. First, the platform looks for a match of the first term. If it finds a match for this term in a product's value, it extracts the match to the attribute where you apply the Detect and Extract Value rule box. Then, the platform moves on to the next product. Once it scans all products for a match of the first term, it moves on to the second term on your list to see if the products with no match of the first term contain a match of the second term. This process finishes when the platform has scanned all terms on your list. It may finish earlier if the platform finds matches for all your products before reaching the end of the list.
Note
Before adding and setting up this rule box, you must go to Lists from your site's main menu and create a Standard Inclusion/Exclusion list with the values you want to extract. See Exclude products with the Standard Inclusion/Exclusion list.
The order of the values in your list determines which values the platform adds to the attribute where you apply the rule box.
Take the steps from Add a rule box to add the Detect and Extract Value rule box to the attribute where you want to add the extracted values.
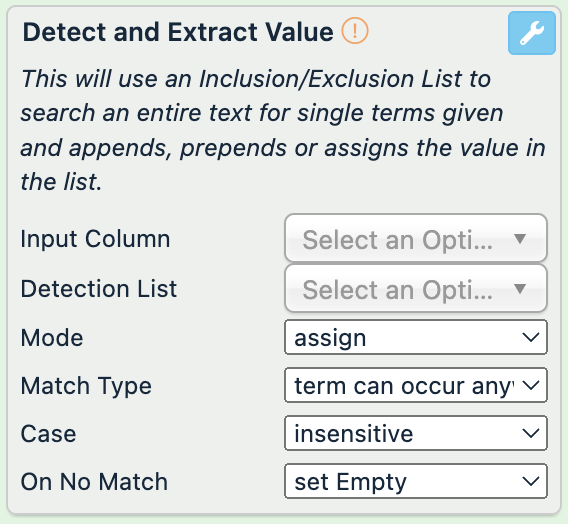
In Input Column, select the attribute where you want to search for matches. This drop-down list shows attributes available at the previous stage.
In Detection List, select the Standard Inclusion/Exclusion list you created for the values you want to detect and extract.
In Mode, select how you want to add the extracted values in your current attribute:
assign completely overwrites the current value with the extracted value.
append adds the extracted value at the end of the current value.
prepend adds the extracted value at the beginning of the current value.
In Match Type, select how the platform should extract the values from your list:
term can occur anywhere takes the detected match from any place within the selected attribute's values, even if it is part of a word.
just entire word takes the detected match only if it matches an entire word within the selected attribute's values.
content starts with takes the detected match if it is at the start of the selected attribute's values, even if it is part of a word.
content starts with entire word takes the detected match only if it matches an entire word at the start of the selected attribute's values.
In Case, select whether the matches should be case-sensitive:
insensitive ignores the case of text values when matching them to the values on the list.
sensitive checks if the case of the text values in the current attribute matches the case of the values on the list and extracts values only if the case matches.
In On No Match, select what should occur if there is no match:
set Empty empties the value.
set Original Value doesn't change the current value.
Select Save.
For example, you have a Standard Inclusion/Exclusion list with the following values:
purses
shoes and socks
sock
If a term on the list matches an entire word in the short description attribute values in the import stage, you want to extract it into the description_keywords attribute in the intermediate stage.
You add the Detect and Extract Value rule box to the description_keywords attribute and set it up as follows:
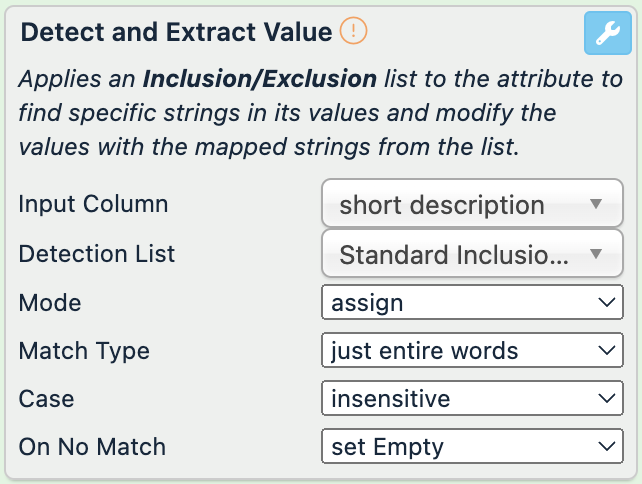
Here is the data in your attributes after applying the rule box:
short description (no changes) | description_keywords (before) | description_keywords (after) |
|---|---|---|
socks, shoes | ||
shoes and socks here |
| |
it is a set of socks, pants, and shoes |
The values socks, shoes and it is a set of socks, pants, and shoes match the value sock from the list, but the rule box doesn't extract them into the attribute description_keywords because they match a part of a word instead of an entire word.
Detect Brand
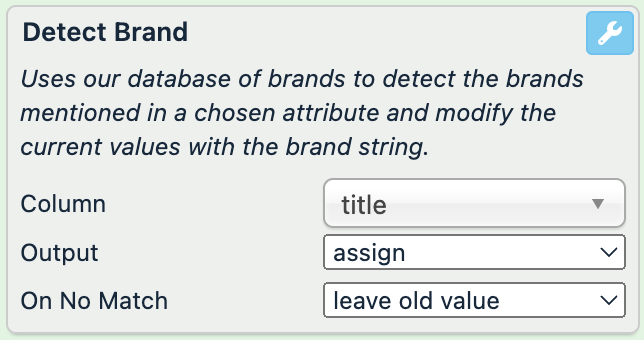
The Detect Brand rule box detects brands in one attribute and extracts them into another attribute. This rule box scans an attribute's values for a match of brand names stored in our database and adds the matches into the attribute where you apply the rule box.
Take the steps from Add a rule box to add the Detect Brand rule box.
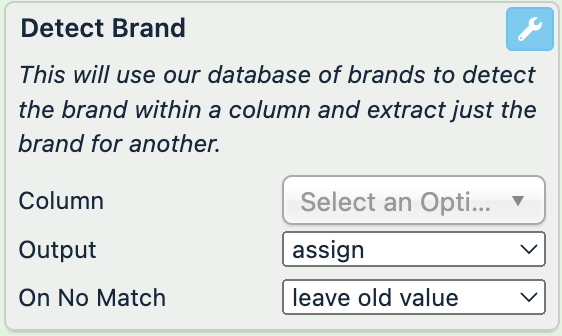
Select the attribute that contains the brand information in the Column drop-down list.
In Output, select what you want to do with the extracted brand values in your current attribute:
assign completely overwrites the current value with the detected brand value.
append adds the detected brand value at the end of the current value.
prepend adds the detected brand value at the beginning of the current value.
remove deletes the detected brand value from the current value.
In On No Match, select what should occur if there is no brand match in your values:
leave old value doesn't change the current value.
set empty empties the value.
Select Save.
For example, you have the following values in your title attribute and want to extract the brands mentioned in the titles into the brand attribute. You can achieve this with the following setup of the Detect Brand rule box:
title (no changes) | brand (before) | brand (after) |
|---|---|---|
Nike sneakers |
| |
acer laptop | Asus |
|
Gucci suit | Prada |
|
Detect Color
The Detect Color rule box detects colors in one attribute and extracts them into another attribute. This rule box scans an attribute's values for a match of color names stored in our database and adds the matches into the attribute where you apply the rule box.
Take the steps from Add a rule box to add the Detect Color rule box.
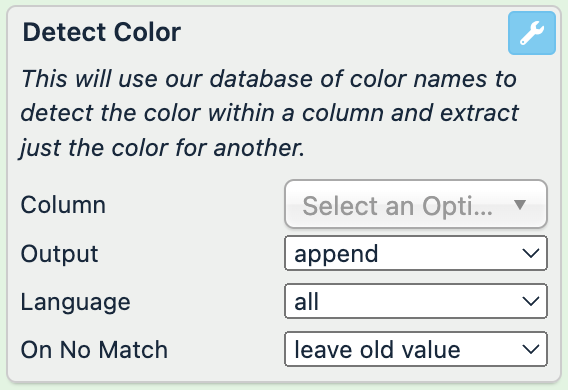
Select the attribute that contains the color information in the Column drop-down menu.
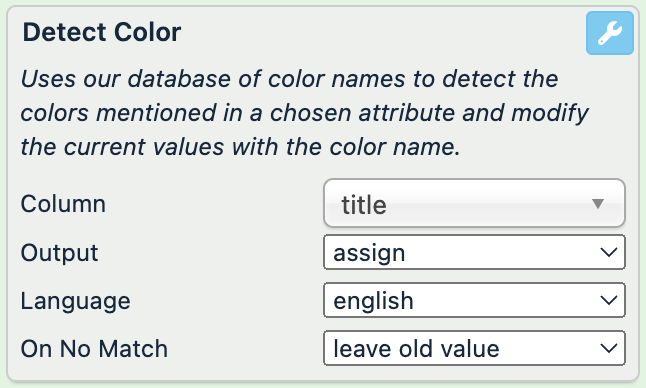
In Output, select what you want to do with the extracted color values in your current attribute:
append adds the detected color value at the end of the current value.
prepend adds the detected color value at the beginning of the current value.
assign completely overwrites the current value with the detected color value.
remove deletes the detected color value from the current value.
In Language, select which language your colors are in. The options are German, English, Spanish, French, Italian, Dutch, and Thai. If you select all, the rule box detects color names matching colors in any of these languages.
In On No Match, select what should occur if there is no color match in your values:
leave old value doesn't change the current value.
set empty empties the value.
Select Save.
For example, you have the following values in your title attribute and want to extract the colors mentioned in the titles into the color attribute. You can achieve this with the following setup of the Detect Color rule box:
title (no changes) | color (before) | color (after) |
|---|---|---|
Nike sneakers blue |
| |
acer laptop silver | gray |
|
Gucci suit black | dark |
|
Filter GTINs
Most exports require each product to have a valid product identifier, such as Global Trade Item Number (GTIN). GTIN is a unique and internationally recognized product identifier. The Filter GTINs rule box detects invalid GTINs via a checksum digit and deletes them.
Take the steps from Add a rule box to add the Filter GTINs rule box.
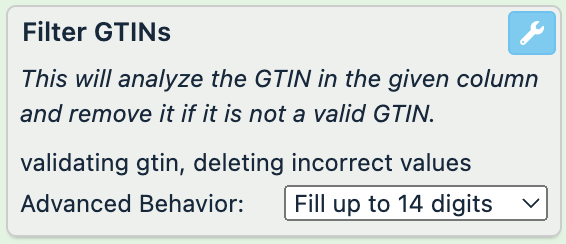
Select one of the options in the Advanced Behavior drop-down menu to fix your values and make them valid GTINs:
Fill up to 14 digits adds one or more zeros at the beginning of the value until the value length reaches 14 digits.
Fill up to 13 digits adds one or more zeros at the beginning of the value until the value length reaches 13 digits.
Trim leading zeroes removes all zeros from the beginning of the value.
Leave unchanged keeps the original value.
Select Save.
For example, you have the following values in your GTIN attribute. You want to remove all invalid GTINs and ensure all valid GTINs are 14 digits long. You can achieve this with the Filter GTINs rule box by selecting Fill up to 14 digits as the advanced behavior:
GTIN (before) | GTIN (after) |
|---|---|
811571013579 |
|
198002236142 |
|
194743857492 |
The rule box checks if the GTINs are valid and adds zeros at the beginning of a value if the length of a valid GTIN is less than 14 characters. If a GTIN is invalid, the rule box empties the value.
Decode special characters and remove HTML tags
The rule box category Clean up values contains the rule boxes Fix and Decode HTML, Decode base64 content, and Remove HTML Tags. If you have pieces of code or HTML tags left in your data, you can convert them into readable text using these rule boxes.
Fix and Decode HTML
If your values have broken or encoded HTML tags, such as & or ß instead of & or ß, the Fix and Decode HTML rule box converts them into regular text characters.
Take the steps from Add a rule box to add the Fix and Decode HTML rule box.
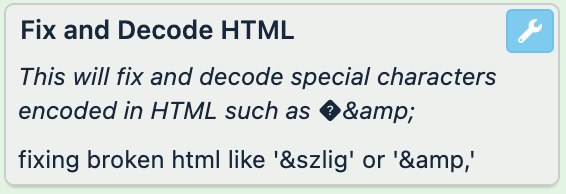
Select Save.
For example, you have the following values in your category attribute and want to fix the broken characters. You can achieve this with the Fix and Decode HTML rule box:
category (before) | category (after) |
|---|---|
Home & Garden > Linens & Bedding > Bedding > Blankets |
|
Apparel & Accessories > Clothing > Activewear |
|
Apparel & Accessories > Clothing > Underwear & Socks |
|
Decode base64 content
If your values have broken or encoded base64 tags, the Decode base64 content rule box converts them into readable text. For example, you can convert VGV4dCBFeGFtcGxl into Text Example.
Note
To use the Decode base64 content rule box, you first should prepend the values in your attribute with base64:. See Append/Prepend Value.
Take the steps from Add a rule box to add the Decode base64 content rule box.
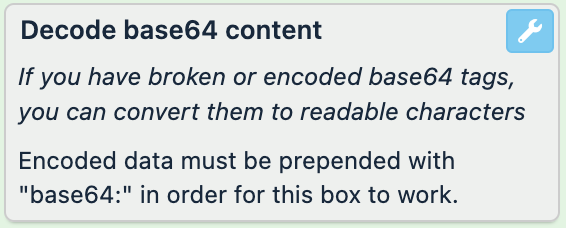
Select Save.
For example, you have the following values in your category attribute and want to decode them from base64 into regular text. You can achieve this with the Decode base64 content rule box:
category (before) | category (after) |
|---|---|
base64:SG9tZSAmIEdhcmRlbiA+IExpbmVucyAmIEJlZGRpbmcgPiBCZWRkaW5nID4gQmxhbmtldHM= |
|
base64:QXBwYXJlbCAmIEFjY2Vzc29yaWVzID4gQ2xvdGhpbmcgPiBBY3RpdmV3ZWFy4oCL |
|
QXBwYXJlbCAmIEFjY2Vzc29yaWVzID4gQ2xvdGhpbmcgPiBVbmRlcndlYXIgJiBTb2Nrcw== |
|
Remove HTML Tags
The Remove HTML Tags rule box removes any leftover HTML tags, such as <h3> or <\br>, from your attributes.
Take the steps from Add a rule box to add the Remove HTML Tags rule box.

Select Save.
For example, you have the following values in the description attribute and want to extract text from these HTML bodies. You can achieve this with the Remove HTML Tags rule box:
description (before) | description (after) |
|---|---|
<div id="productName" class="align-top product-name-container">
    <h1 class="product-name title"> Flat leather sandals with a bow</h1>
</div> |
|
<div id="productName" class="align-top product-name-container">
    <h1 class="product-name title"> High-heel sandals with a buckle</h1>
</div> |
|
<h4 class="text">Power Smoothie - Start the day with an energy boost. </h4> <br/> 5 reasons to buy it:<ul class="text"> <li>Gluten free,</li> <li>Vitality,</li> <li>Iron and Calcium,</li> <li>100% organic,</li> <li>Brazilian fruits: Acai (29%), Grape (25%), Mango (18%), Banana (17%), Pineapple (11%).</li> </ul> <br/> |
|
Add or remove spaces
The rule box category Clean up values contains the rule boxes Remove Consecutive Whitespace, Remove Spaces At Beginning and End (Trim), and Separate Words. If your attribute values have more or less space than necessary, you can use these rule boxes to clean up the text.
Remove Consecutive Whitespace
If you have more than one consecutive space character between words, the Remove Consecutive Whitespace rule box removes excessive space. The words should remain separated with only one space.
Tip
You can also remove or replace space using the Text Replace rule box. See Text Replace.
Take the steps from Add a rule box to add the Remove Consecutive Whitespace rule box.

Select Save.
For example, you have the following values in your category attribute and want to remove the extra spaces. You can achieve this with the Remove Consecutive Whitespace rule box:
category (before) | category (after) |
|---|---|
Home & Garden > Linens & Bedding > Bedding > Blankets |
|
Apparel & Accessories > Clothing > Activewear |
|
Apparel & Accessories > Clothing > Underwear & Socks |
|
Remove Spaces At Beginning And End (Trim)
The Remove Spaces At Beginning and End (Trim) rule box removes unnecessary space characters at the beginning or end of your attribute's values.
Take the steps from Add a rule box to add the Remove Spaces At Beginning And End (Trim) rule box.
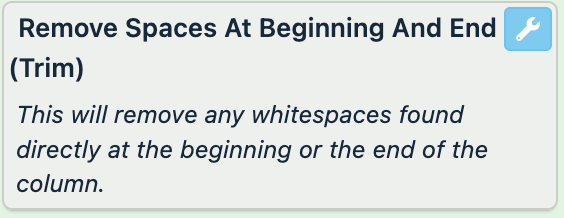
Select Save.
For example, you have the following values in your description attribute and want to remove the extra spaces. You can achieve this with the Remove Spaces At Beginning and End (Trim) rule box:
description (before) | description (after) |
|---|---|
The manufacturer uses only natural and hypoallergenic materials to produce these dog beds. Colors available: black, gray, white, green, yellow, and lilac. Size range: XS, S, M, L, XL, and XXL |
|
The manufacturer uses only natural and hypoallergenic materials to produce these dog blankets. Colors available: brown, gray, green, and blue. Size range: XS, S, L, and XXL NoteThere is additional whitespace at the beginning and end of this value. |
|
Separate Words
If the text in your values uses the camel case, where the second word starts with a capital letter without a space to separate it from the first word, such as brownShoes, the Separate Words rule box removes the camel case.
Take the steps from Add a rule box to add the Separate Words rule box.
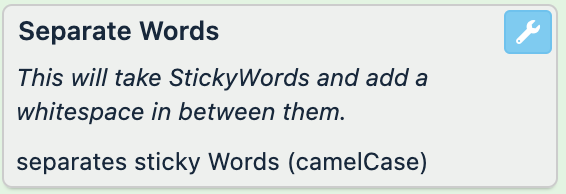
Select Save.
For example, you have the following values in your description attribute and want to separate the words in the camel case. You can achieve this with the Separate Words rule box:
description (before) | description (after) |
|---|---|
TheManufacturerUsesOnlyNaturalAndHypoallergenicMaterialsToProduceTheseDogBeds. |
|
ColorsAvailable: black, gray, white, green, yellow, and lilac. |
|
Remove parentheses and translate colors
The rule box category Clean up values contains the rule boxes Remove Terms in Brackets and Translate Colors to let you remove all terms in brackets from your texts and translate your color values into different languages.
Remove Terms in Brackets
The Remove Terms in Brackets rule box deletes text in parentheses from your values. It removes the text in brackets and the brackets themselves.
Take the steps from Add a rule box to add the Remove Terms in Brackets rule box.
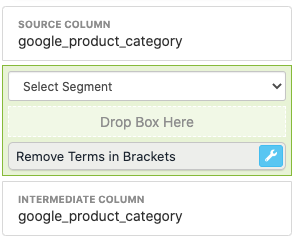
Select Save.
For example, you have the following values in your description attribute and want to remove all text in brackets. You can achieve this with the Remove Terms in Brackets rule box:
description (before) | description (after) |
|---|---|
This is a great T-shirt, the very best (endorsed by world-famous jazz saxophonist Joshua Redman) one there is. |
|
All reviewers note the high quality of the material (). |
|
Tip
If unneeded spaces remain in the value after applying this rule box, you can remove them with the Text Replace rule box by, for example, searching for . or , preceded with a space character and replacing them with . or ,. See Text Replace.
Translate Colors
The Translate Colors rule box detects colors in your values and translates them into English, German, French, Italian, Spanish, or Dutch.
Tip
If you need to translate more than just color values, you can use a dedicated data service. See Translate your feed with the Google Translate and Google Translate (Advanced) data services.
Take the steps from Add a rule box to add the Translate Colors rule box.

In Source Language, select the language of your current values:
English
German
French
Italian
Spanish
Dutch
In Target Language, select the language you want to translate your colors into.
English
German
French
Italian
Spanish
Dutch
Select Save.
For example, you have the following values in your title attribute and want to translate the colors mentioned in the values into German. You can achieve this with the Translate Colors rule box by selecting relevant source and target languages:
title (before) | title (after) |
|---|---|
Sandals - green - size 39 | Sandals - |
Sneakers - white - size 40 | Sneakers - |
Clogs - purple - size 44 | Clogs - |