Add Bol export
Send your product, offer, and order data to Bol.
Introduction
Bol is an online retail platform and one of the largest e-commerce websites in the Netherlands and Belgium. It’s an online marketplace where customers can buy a wide range of products, including books, electronics, clothing, and home goods.
Note
Currently, we support only nl and nl/be languages and a specific list of categories.
To let you sell your products on Bol, Productsup has built an ecosystem that sends products and offers data to Bol and imports order data from Bol into Productsup.
The ecosystem consists of four (4) exports and two (2) data sources to let you manage your products and orders on Bol:
Bol Products Delta API (NL, BE)
This export creates and sends products to your Bol account. Usually, first, you send the products to Bol and then, for those placed products, you send the offers. But if your products are already on Bol, you can only send the offers and skip this export. When setting up this export, you also need to use multiple category-specific exports that contain category-specific product attributes (CSA). Also, this product creation export is a delta-based export that sends only the new, changed, or deleted products to Bol instead of exporting the entire product catalog during every site run.
Bol Offers Management Delta
This export creates and sends new offers to Bol, updates existing ones, and deletes the ones that are no longer in the import feed. An offer is your individual product listing on Bol where you offer a certain product for a certain price with certain shipment conditions. Use this export after sending the products to Bol. It is a delta-based export that sends only the new, changed, or deleted product listings to Bol instead of exporting the entire catalog during every site run.
Bol Order Shipment Delta
This export updates shipment-related data on Bol.
Bol Order Cancellation Delta
This export lets you acknowledge order cancellation from a buyer on Bol.
Bol Offers
This data source lets you upload your offers from Bol to Productsup to use them for Bol Offers Management Delta.
Bol Orders
This data source lets you upload the orders from Bol to Productsup to use them for Bol.com orders cancellation delta export and Bol Order Shipment Delta.
Prerequisites
To set up the Bol ecosystem in Productsup, you need to:
Create a project in your Productsup organization and, in this project, create separate sites for each Bol import: products, offers, and orders.
Note
This is a recommended option. If a separate Bol project doesn't fit your overall organization structure, ignore this recommendation.
Create a retailer account on Bol, if you don't have one. See the guide to working with Bol’s Retailer API for more information on registering as a retailer on Bol.
Have login and password for your Bol retailer account.
Prepare a list of the Bol categories you want to sell the products in.
Note
This integration has category-specific channels. Productsup supports only some categories by default. But we can add missing categories on request. It may take around two weeks to add support for your request. To request the necessary categories, countries, or languages for this integration, contact your Customer Success Manager or support@productsup.com and provide the following information:
List of categories.
Region or language. We currently support NL, NL/BE. You can request FR, FR/BE.
Import your products to Productsup as the main data source. The feed should contain the category differentiator to map your categories to the Bol's categories.
Set up a Classification Mapping list for categories.
Set up a Classification Mapping list for Bol
If you use specific category names, you must map them to the Bol categories with the help of the Classification Mapping list so that Productsup knows which sub-channels should be available to you, and Bol would receive the correct category names.
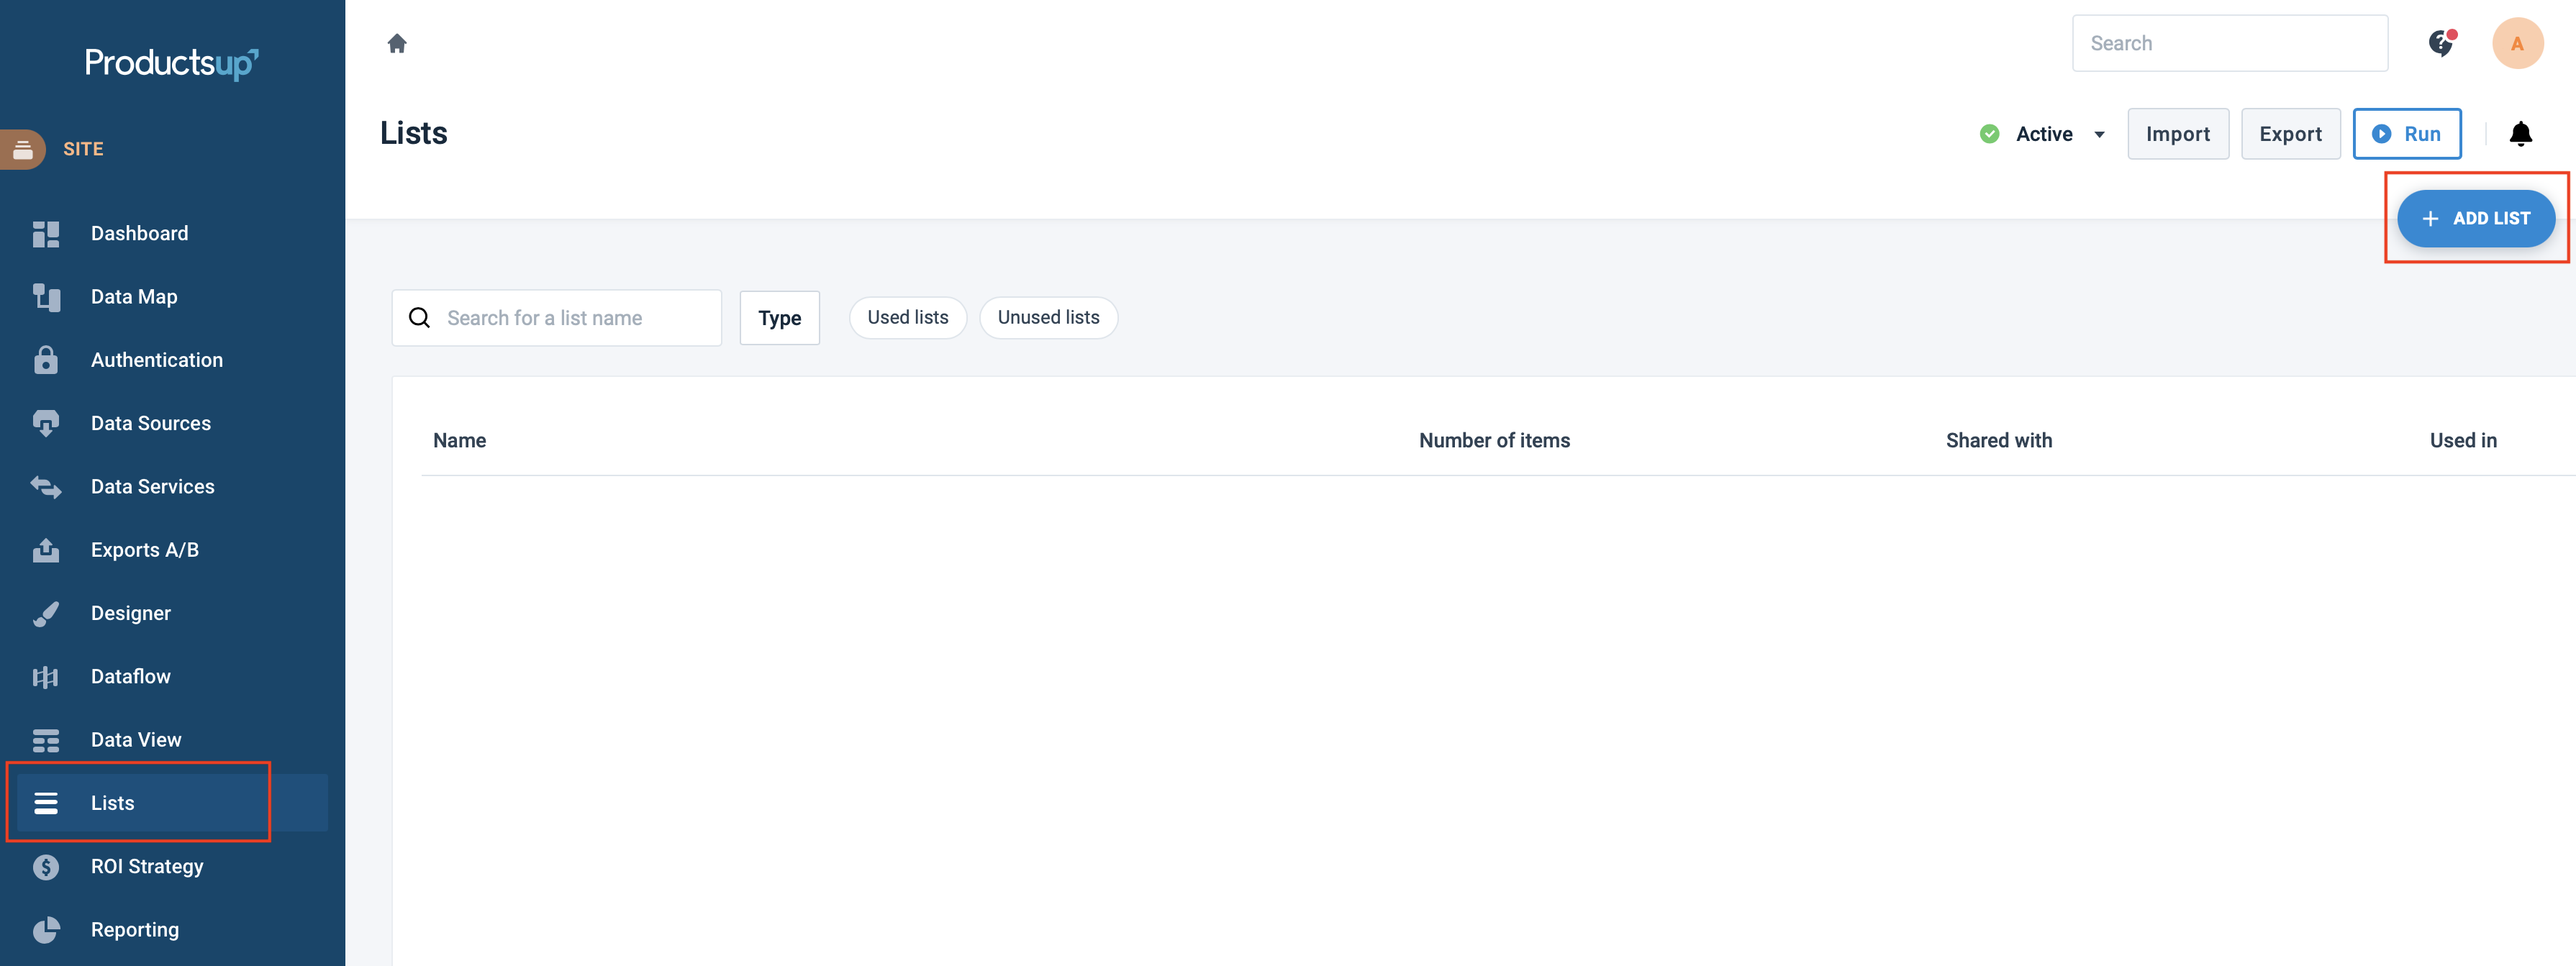
Go to Lists from your site's main menu and select ADD LIST.
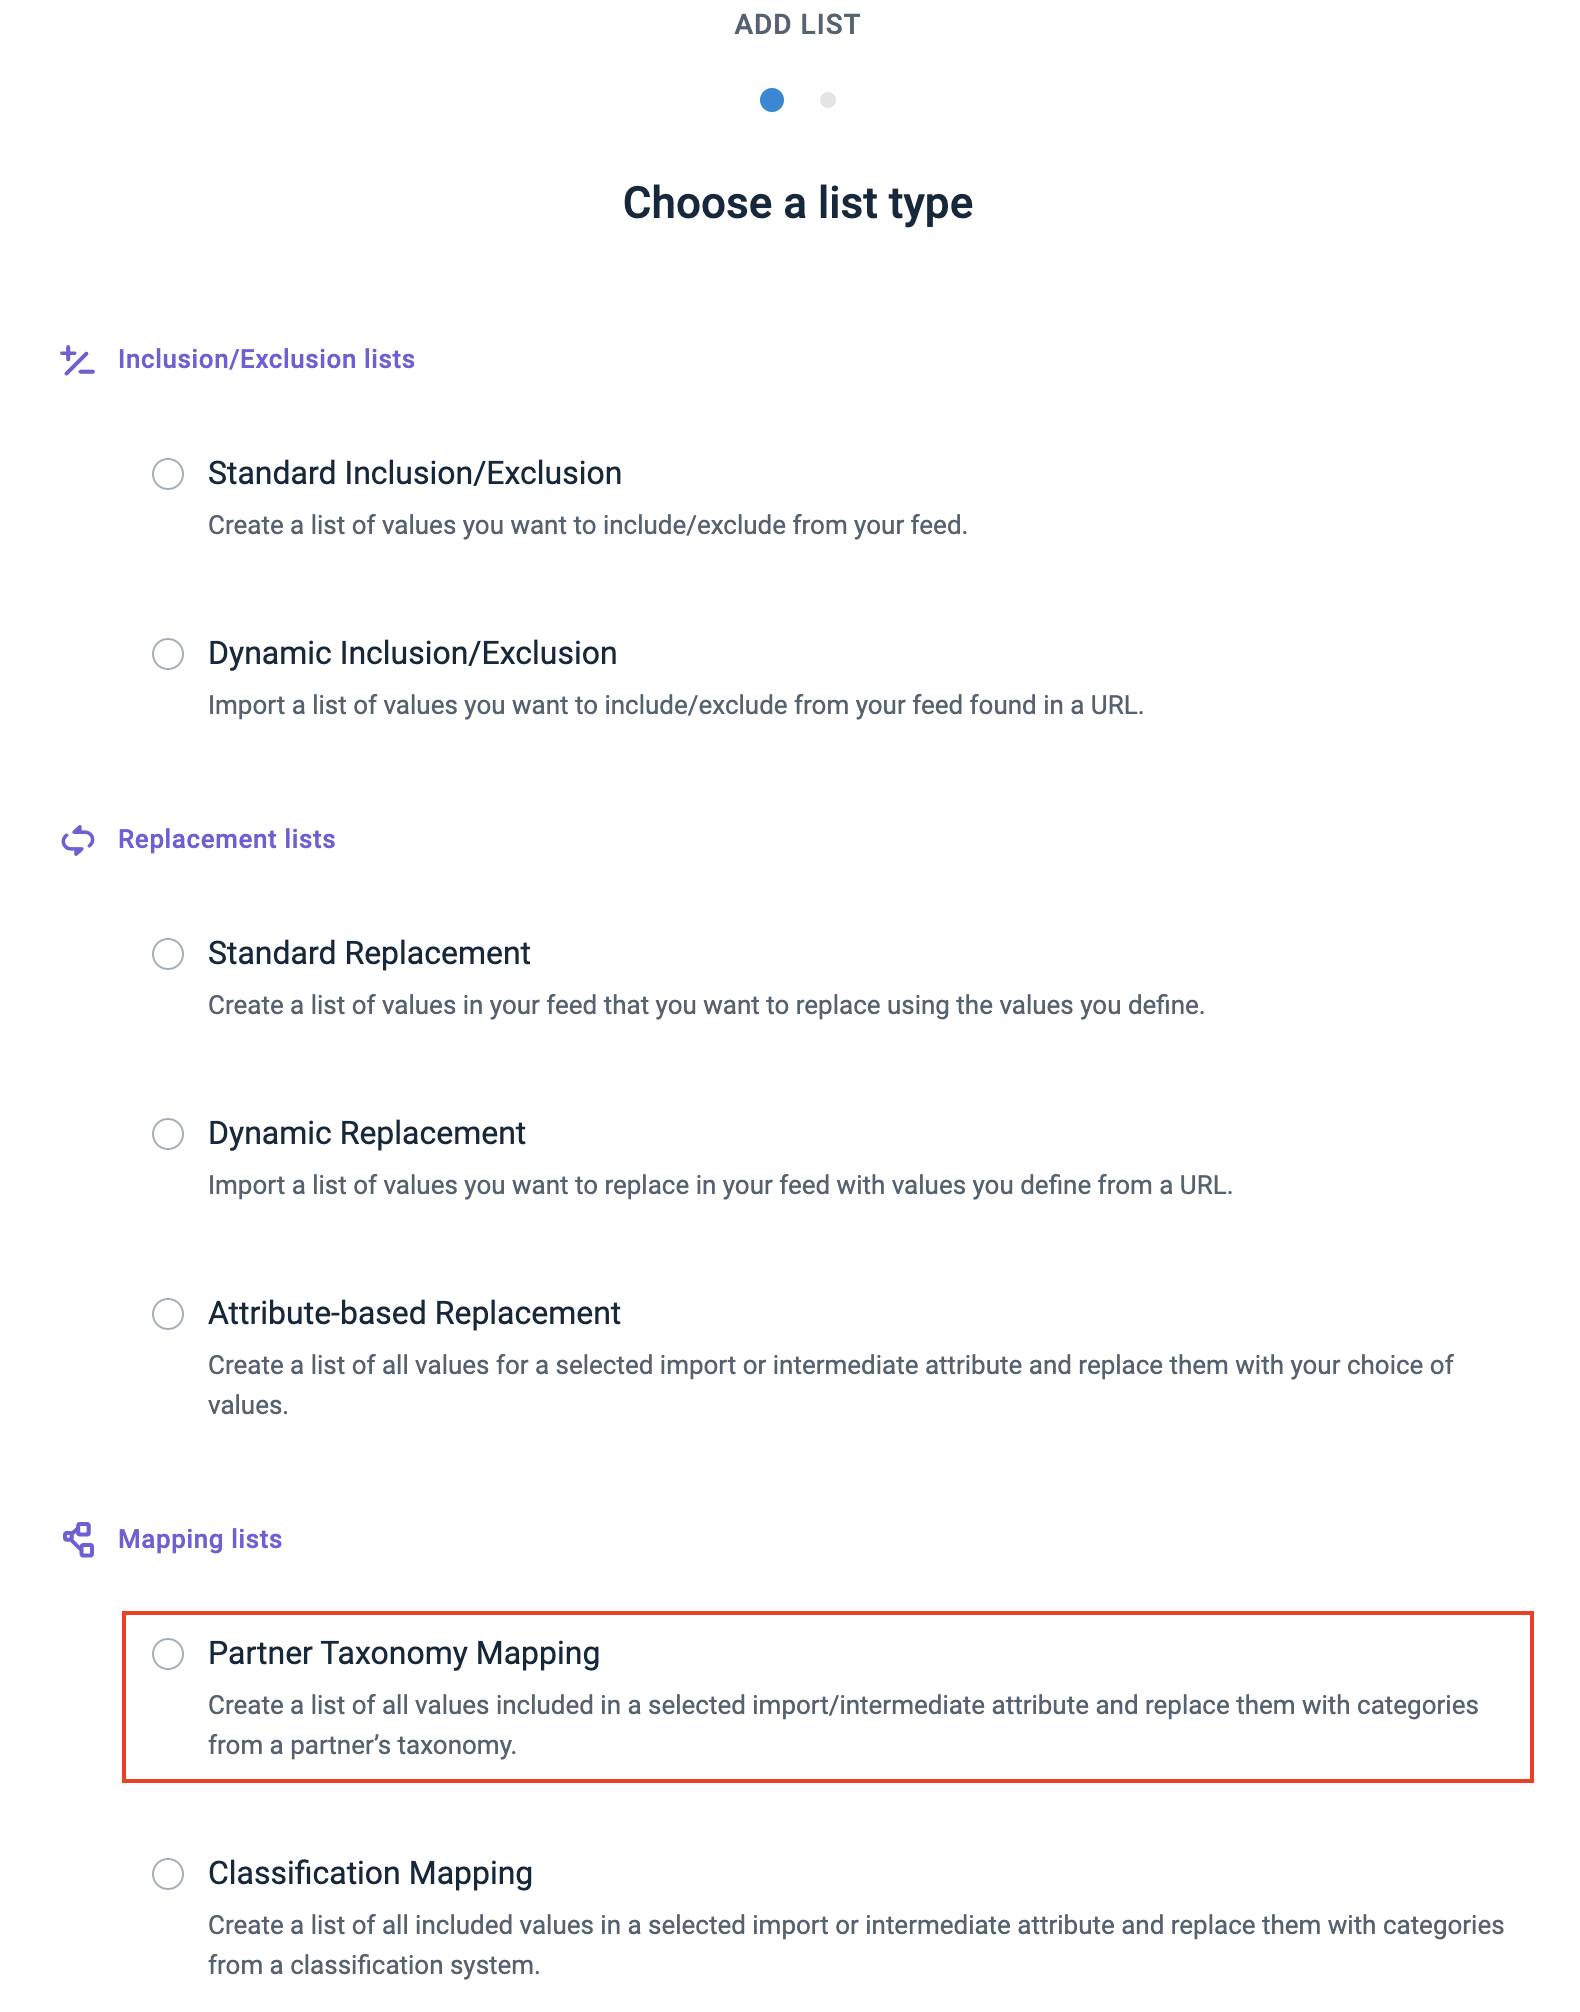
Choose Classification Mapping and select Continue.
In Name, give your list a custom name to help you identify it among others. You can later edit it.
In Classification, select Bol Products Delta API (NL, BE).
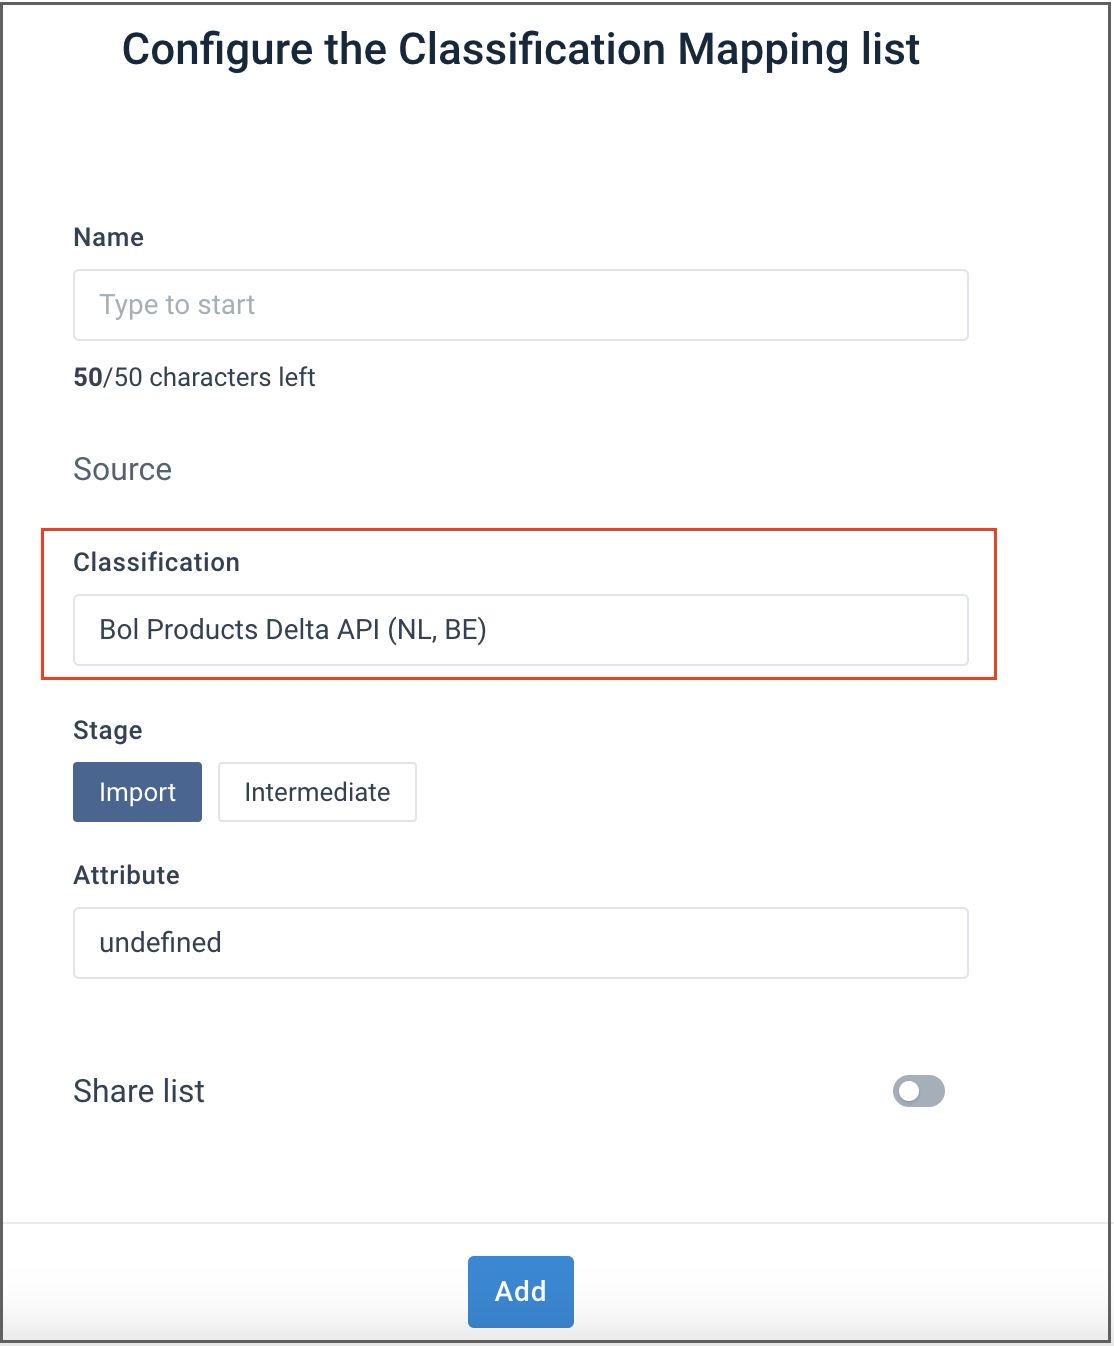
In Stage, choose the Import stage to replace values with the classification categories.
In Attribute, enter and select attributes from the list of pre-defined values from your selected import attribute's column. The platform later populates the list with the values of this attribute to let you choose and map the needed category values.
Optionally, toggle on the Share list button and choose one of the following:
Account level shares this list with all sites across all projects under this organization.
Project level shares this list with all sites under this project.
Note
If you share the list at the organization or project level, the platform updates the list during an import from the original site where you created the list.
Select Add.
Map your categories to the Bol categories. Go through all the values of your category attribute in the column on the left and select the corresponding Bol categories in the Replace term column.
Note
You must create and set up a new Classification Mapping list every time you modify the chosen category attribute in your data source and import its new values into your site. Otherwise, the already existing list can't upload your new values, and you can't map them to the corresponding Bol categories. Once you create a new Classification Mapping list, you need to choose it in the related rule box.
After setting up the export as explained in the next section, you can map the attributes and apply the Classification Mapping list with the rule boxes.
Send your products to Bol
In the site dedicated to sending your products to Bol, add and set up the export Bol Products Delta API (NL, BE):
Go to Exports from your site's main menu and select ADD EXPORT.
Search for Bol Products Delta API (NL, BE), hover over it, and select Add.

On the Exports page, select the name of the added export to set it up.
Select Add Destination, choose Bol.com Product Delta Export (NL/BE) from the drop-down list, give it a name as desired, and select Save.
In Authentication selection, select an existing one or select the Add New Authentication button. The platform redirects you to the Bol retailer account.
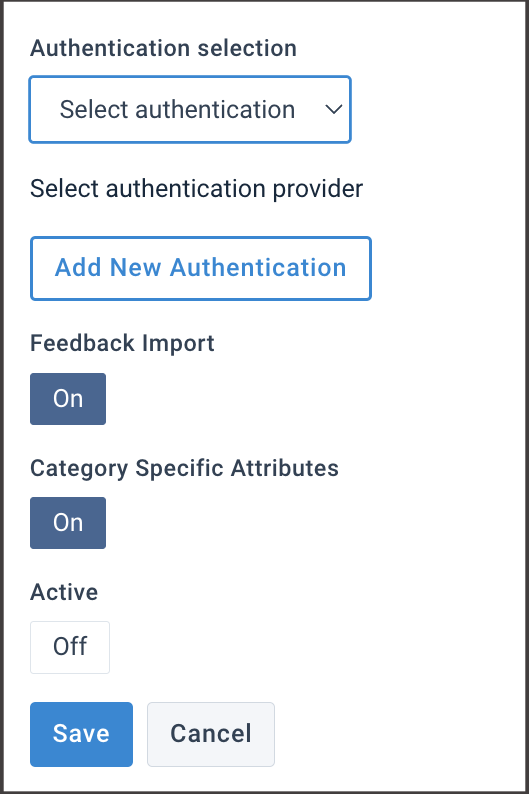
Leave the Feedback Import button On to let Productsup receive a feedback file from the Bol API in case of export errors. This helps troubleshoot the setup.
Leave the Category Specific Attributes button On to map category-specific attributes in Dataflow.
Toggle the Active button to On to activate the destination.
Select Save.
Go to Dataflow and select Bol Products Delta API (NL, BE) from the drop-down menu on the left.
Set up the main channel:
Map the
categoryattribute in the import level to__gpc_codeandgpc_code_namein the intermediate stage.
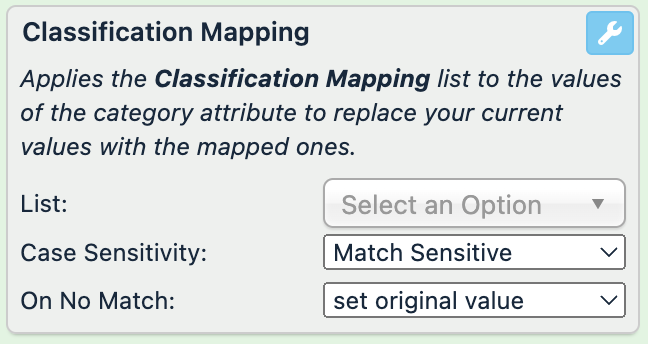
For both __gpc_code and gpc_code_name, on the intermediate level, add the Classification Mapping rule box and choose the list created in Set up a Classification Mapping list for Bol.
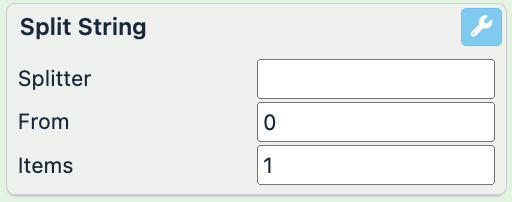
For __gpc_code, on the intermediate stage, add the Split String rule box below the Classification Mapping rule box and enter the following values:
Splitter: a single space without the quotation marks
From:
0Items:
1
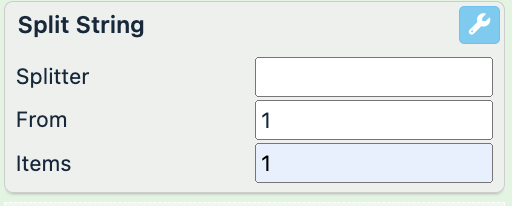
For gpc_code_name, on the intermediate stage, add the Split String rule box below the Classification Mapping rule box and enter the following values:
Splitter: a single space without quotation marks
From:
1Items:
1
Note
Ensure you saved all changes.
Map these and other necessary attributes from the import to the export stage.
To let the site display your category-specific attributes in Dataflow, select Run or Import in the top-right corner of your view.
Warning
This run will fail because you haven't yet mapped all the mandatory attributes, so no data export occurs at this stage. The aim of the run is to import the needed categories and attributes into Dataflow.
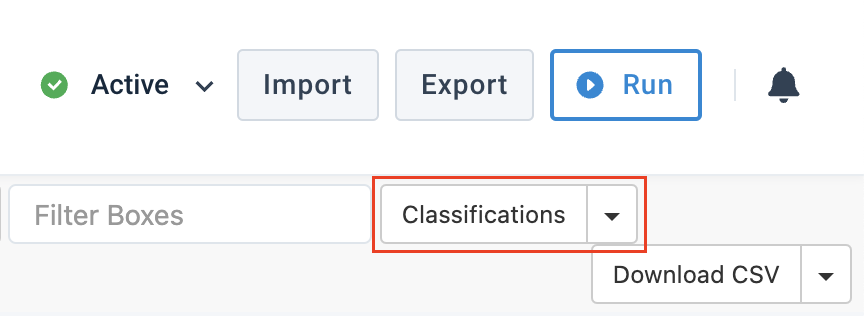
Once the site run finishes, the Classifications drop-down menu appears in the upper ribbon in Dataflow. Select each category in this drop-down menu to let Dataflow display the relevant category-specific attributes in the export stage. Map all the needed attributes from import to export.
Tip
If you can't see the Classifications drop-down menu when the site run is complete, refresh your page.
Note
If some attributes are missing on the intermediate stage, add them manually.
Go to Data View from the same site's main menu and choose Bol Products Delta API (NL, BE) from the drop-down menu on the top left-hand side.
For each attribute, select Analyze to ensure your data is compliant with the Bol expectations. Alternatively, select the Overview drop-down and choose Readiness.
Once your data is ready, select Run in the top-right corner of your view to send your products to Bol.
Import your offers to Productsup
After you have exported your products, you can import your offers to Productsup as an additional data source and map them by EAN (European Article Number) to the products. This allows Productsup to identify which EANs the platform has already placed as offers on Bol and which it should send as new offers. To import your offers:
Go to Data Sources from the main menu of the site dedicated to the Bol offers.
Select ADD DATA SOURCE.
Add your products as the main data source. For example, you can use the Google Sheets data source. It should be the same product feed that you used in the site dedicated to product creation.
Go back to the Data Sources page, search for Bol Offers in the Search bar, and select Add. Give your data source a custom name as desired, then select Continue.
Set up your data source:
In Authentication selection, select an existing one or select the Add New Authentication button. The platform redirects you to the Bol retailer account.
Optionally, add a description.
Select Save.
After the platform redirects you to Data Sources, select the cogwheel icon (⚙) next to your newly added data source.
Scroll down to the Content Mode panel and select Additional Data Source.
In the Additional Data Source Types section, leave Additional Data Source Values Always (Default) selected by default. This option lets you replace the main data source values with the additional data source values, even if the additional data source values are empty.
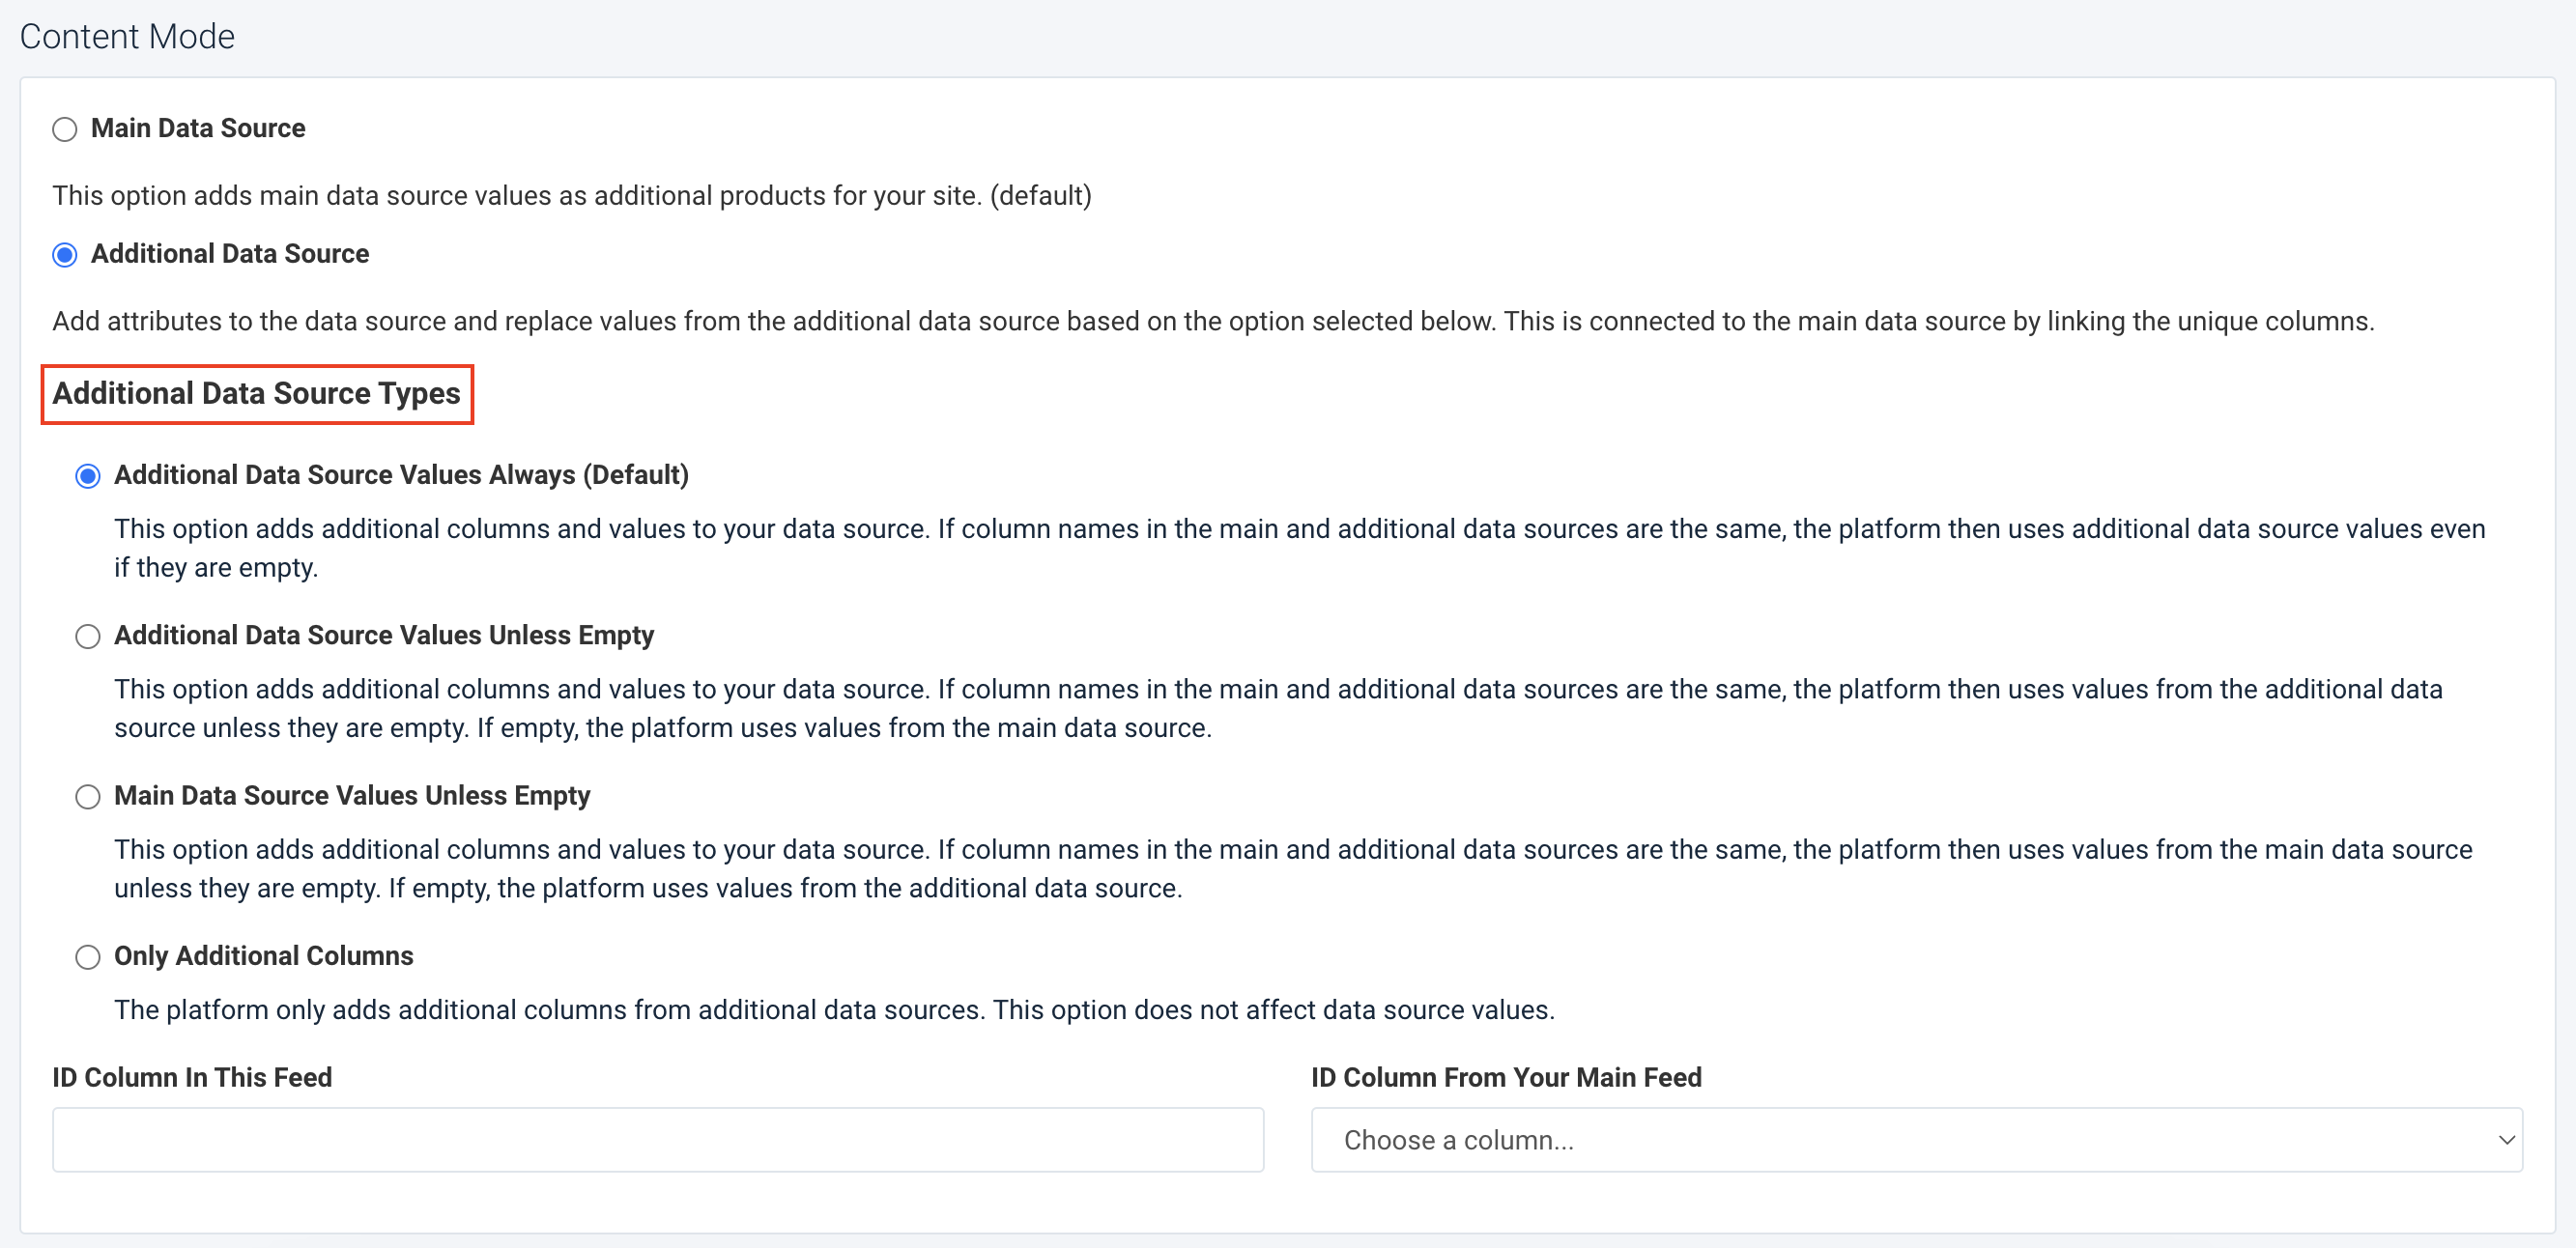
In ID Column In This Feed, enter the column's name within your additional data source that contains the products EANs. This field is case-sensitive.
In the ID Column From Your Main Feed drop-down menu, select a column in your main data source that Productsup should map to the products EANs.
Note
The platform updates the offers for the products with the same EANs in the main and additional data sources, instead of creating new offers.
The platform creates new offers for the products with EANs that don't match between the main and additional data sources.
The platform deletes the offers related to EANs that aren’t in the feed anymore.
Select Save.
Select Import to import your offers to Productsup.
Tip
If your fulfilment.method attribute contains FBR, you must provide the number of delivery days in the deliveryCode attribute.
If your fulfilment.method attribute contains FBB, you must set null in the deliveryCode attribute.
See Update an offer for more information about specific attribute settings.
Send your offers to Bol
After you have imported the offers, you can add and set up Bol Offers Management Delta in the site dedicated to offers:
Go to Exports from your site's main menu and select ADD EXPORT.
Search for Bol Offers Management Delta, hover over it, and select Add.

On the Exports page, select the name of the added export to set it up.
Select Add Destination, choose Bol Offers Management Delta from the drop-down list, give it a name as desired, and then select Save.
In Authentication selection, select an existing one or select the Add New Authentication button. The platform redirects you to the Bol retailer account.
Leave the Feedback Import button On to let Productsup receive a feedback file from the Bol API in case of export errors. This helps troubleshoot the setup.
Toggle the Active button to On to activate the destination.
Select Save.
Go to Dataflow and map the attributes from import to export.
Important
The economic_operator_id attribute is mandatory now for creating a valid offer. To get the ID:
Add the economic operator manually in the Bol. seller’s account.
Import the ID via API using Postman or similar tool. See Economic Operator API - V1 (1.0.4) for more information. Add the ID of the created operator to the economic_operator_id attribute.
Ensure you map economic_operator_id attribute from import to export in Dataflow.
Contact your Customer Success Manager or support@productsup.com if you need help with adding your economic operator ID.
Once your data is ready, select Run in the top-right corner of your view to send your offers to Bol.
Warning
Running the offers export in less than 15 minutes after the previous run results in retrieving the same export file. You need to wait at least 15 minutes after the previous export run to send the new, updated, or deleted offers.
Import orders from Bol
To let Productsup import your orders from Bol, do the following in the site dedicated to the Bol orders:
Go to Data Sources from your site's main menu and select ADD DATA SOURCE.
Search for Bol Orders, select Add, give it a name as desired, and choose Continue.
Set up your data source:
In Fulfilment method, select the fulfillment option that Productsup should import:
FBR imports only orders fulfilled by the retailer.
FBB imports only orders fulfilled by Bol.
ALL imports both FBR and FBB.
In Status, select the order status that Productsup should import:
OPEN imports only open orders excluding shipped and canceled orders.
SHIPPED imports only shipped orders.
imports both open and shipped orders.
Set either Change interval minute or Latest change date that are mutually exclusive:
In Change interval minute, you can set how many minutes passed since the latest change on an ordered product. You can enter the values from
1to60.In Latest change date, you can select the date when the latest change happened on an ordered product. You can select the date in the period of up to three (3) months.
Note
Bol recommends using Change interval minute. See Bol's Best practices - order process.
In Authentication selection, select an existing one or select the Add New Authentication button. The platform redirects you to the Bol retailer account.
Optionally, add a description.
Select Save.
Select Import to import your orders.
Tip
During the time between retrieving an open order and shipping it, a customer can still request cancellation. If there is a long time between retrieving an open order and shipping, we recommend retrieving all the open orders again before shipping to check for possible cancellation requests from the customers.
Send order cancellation updates to Bol
To change the status of your orders on Bol and inform your customers about order status changes, after importing the orders from Bol to Productsup, you can add and set up Bol Order Cancellation Delta in the site dedicated to orders:
Go to Exports from your site's main menu and select ADD EXPORT.
Search for Bol Order Cancellation Delta, hover over it, and select Add.

On the Exports page, select the name of the added export to set it up.
Select Add Destination, choose Bol Order Cancellation Delta from the drop-down list, give it a name as desired, and select Save.
In Authentication selection, select an existing one or select the Add New Authentication button. The platform redirects you to the Bol retailer account.
Leave the Feedback Import button On to let Productsup receive a feedback file from the Bol API in case of export errors. This helps troubleshoot the setup.
Toggle the Active button to On to activate the destination.
Select Save.
Once your data is ready, select Run in the top-right corner of your view to send your data about cancellations to Bol.
Note
If a customer only cancels a single item within an order, you only need to cancel this one item and ship the other ordered items.
To confirm the cancellation of a single ordered item within an order, assign the value REQUESTED_BY_CUSTOMER to the reasonCode attribute.
Warning
Don't use the reason REQUESTED_BY_CUSTOMER without a customer cancellation. For example, when the item is out of stock, as it negatively impacts your performance scores.
Send shipment notification updates to Bol
To change the status of your shipment at Bol and inform your customers about it, you can add and set up Bol Order Shipment Delta in the site dedicated to orders after importing the orders from Bol to Productsup.
Note
Bol supports shipment in three (3) different ways:
LVB/FBB means that Bol handles the order from start to end. Therefore, the shipment export doesn't include FBB orders.
FBR with own shipping labels means that you process these orders by yourself and must provide the information about them with tracking numbers and transporter codes to Bol. See Transporters.
FBR with shipping labels purchased via Bol isn't supported by Productsup.
If you haven't handled the order within three (3) days of the expected delivery date, Bol automatically cancels such FBR orders and this negatively impacts your performance score.
An order can consist of one or more items. All mutations in the API depend on an item. This means you ship or cancel every item separately using its orderItemId. Even if you ship them in one box, the API needs separate confirmations or cancellations per item. The order remains open until you shipped all items. It stays open also for the already shipped items from the same order.
Correspondingly, there are two ways of setting up the shipment or cancellation export:
Set up shipping or cancellation per orderItem
Bol prefers this approach. This setup gives you full control over each item in an order. For example, it lets you ship one (1) order in multiple parcels if needed or to confirm the customer's cancellation of a specific item from the order.
Note
You must import trackingNumber and careerCode per orderItemId to Productsup.
Go to Data Sources from your site's main menu and select ADD DATA SOURCE.
Add your order management system as the main data source and set it up.
Go to Exports from your site's main menu and select ADD EXPORT.
Search for Bol Order Shipment Delta, hover over it, and select Add.

Note
You may also choose to add the Bol Order Cancellation Delta export instead.
On the Exports page, select the name of the added export to set it up.
Select Add Destination, choose Bol Order Shipment Delta from the drop-down menu, give it a name as desired, and select Save.
In Authentication selection, choose an existing authentication or select the Add New Authentication button. The platform redirects you to the Bol retailer account.
Leave the Feedback Import button On to let Productsup receive a feedback file from the Bol API in case of export errors. This helps you troubleshoot the setup.
Toggle the Active button to On to activate the destination.
Select Save.
Go to Dataflow and map the attributes from import to export.
Once your data is ready, select Run in the top-right corner of the page to send your shipment notifications to Bol.
Set up shipping or cancellation of the entire order in one package per orderId
This approach doesn't let you control the shipment or cancellation of individual items in an order. If a customer cancels only one (1) item of an order, you must handle this manually to prevent a negative impact from Bol.
This setup lets you ship or cancel orders without storing and managing orderItemIds in your main order management system. It is enough to import trackingNumber and careerCode per orderId to Productsup.
To set up this type of the shipping or canceling export:
Add Bol Orders as a main data source as described in Import orders from Bol.
Add your order management system as an additional data source. See Enhance your data with additional data sources.
Map the main and additional data sources by orderId in the ID Column In This Feed and ID Column From Your Main Feed.
Go to Exports from your site's main menu and select ADD EXPORT.
Search for Bol Order Shipment Delta, hover over it, and select Add.

Note
You may also choose to add the Bol Order Cancellation Delta export instead.
On the Exports page, select the name of the added export to set it up.
Select Add Destination, choose Bol Order Shipment Delta from the drop-down menu, give it a name as desired, and select Save.
In Authentication selection, select an existing authentication or select the Add New Authentication button. The platform redirects you to the Bol retailer account.
Leave the Feedback Import button On to let Productsup receive a feedback file from the Bol API in case of export errors. This helps you troubleshoot the setup.
Toggle the Active button to On to activate the destination.
Select Save.
Go to Dataflow and map the attributes from import to export.
Once your data is ready, select Run in the top-right corner of your view to send your shipment notifications to Bol.