Add and edit a catalog in Content Portal
Learn how to add and edit catalogs in the Productsup Content Portal.
As an Admin of the Content Portal, you can add catalogs and manage access to them for the existing users.
To view an existing or add a new catalog:
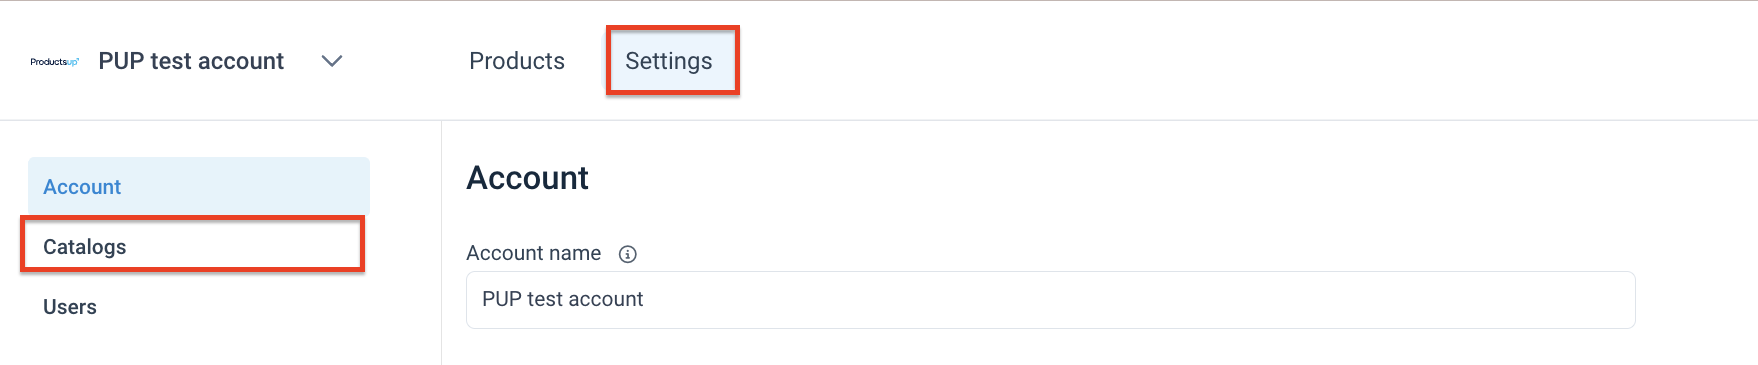
Go to the Settings tab.
Select Catalogs in the left menu.
In the Catalogs tab, you can view the list of all available catalogs, create new catalogs, and edit the existing catalogs.
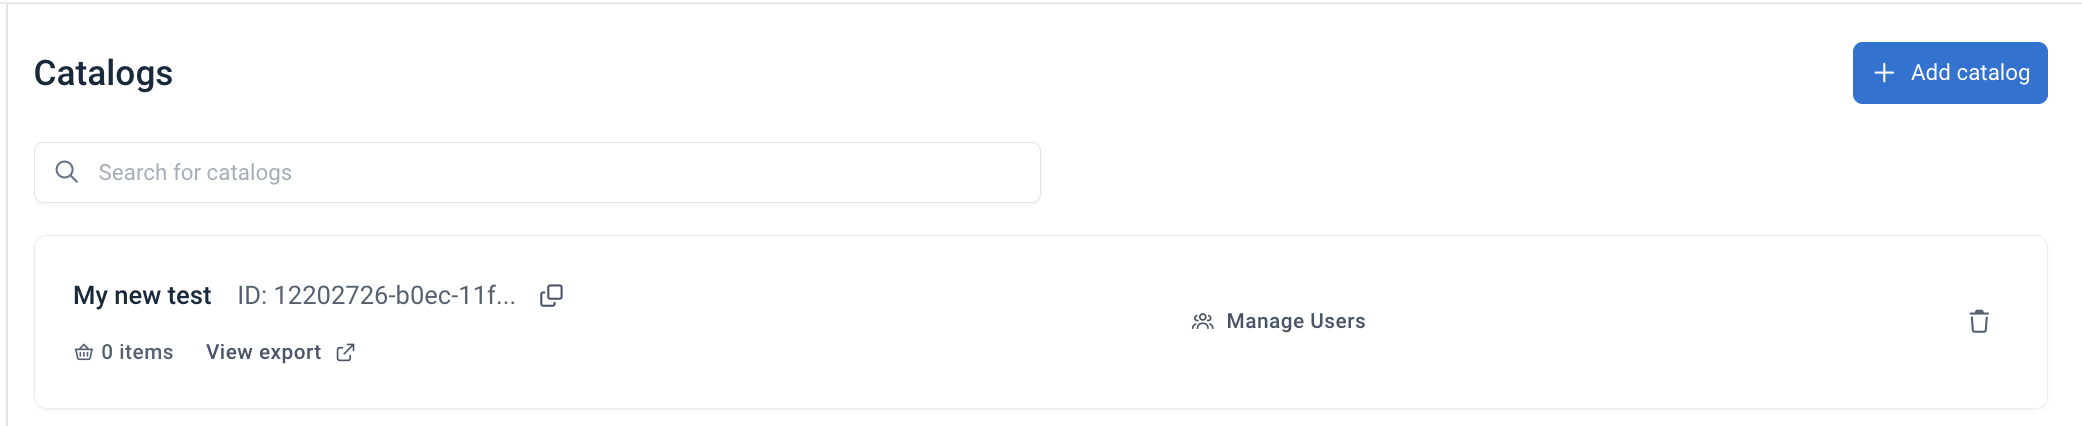
Each catalog line shows the following information:
The catalog's name.
The catalog's ID. You must copy this ID to use for setting up the Content Portal Catalog export. See Set up the Content Portal Catalog export.
The number of products in the catalog.
The Manage users button that lets you view, add, or remove users who have access to this catalog.
The trash bin icon
 that lets you remove the catalog.
Add a catalog in Content Portal
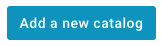
Go to Settings in your Content Portal, select Catalogs on the left, and select Add Catalog.
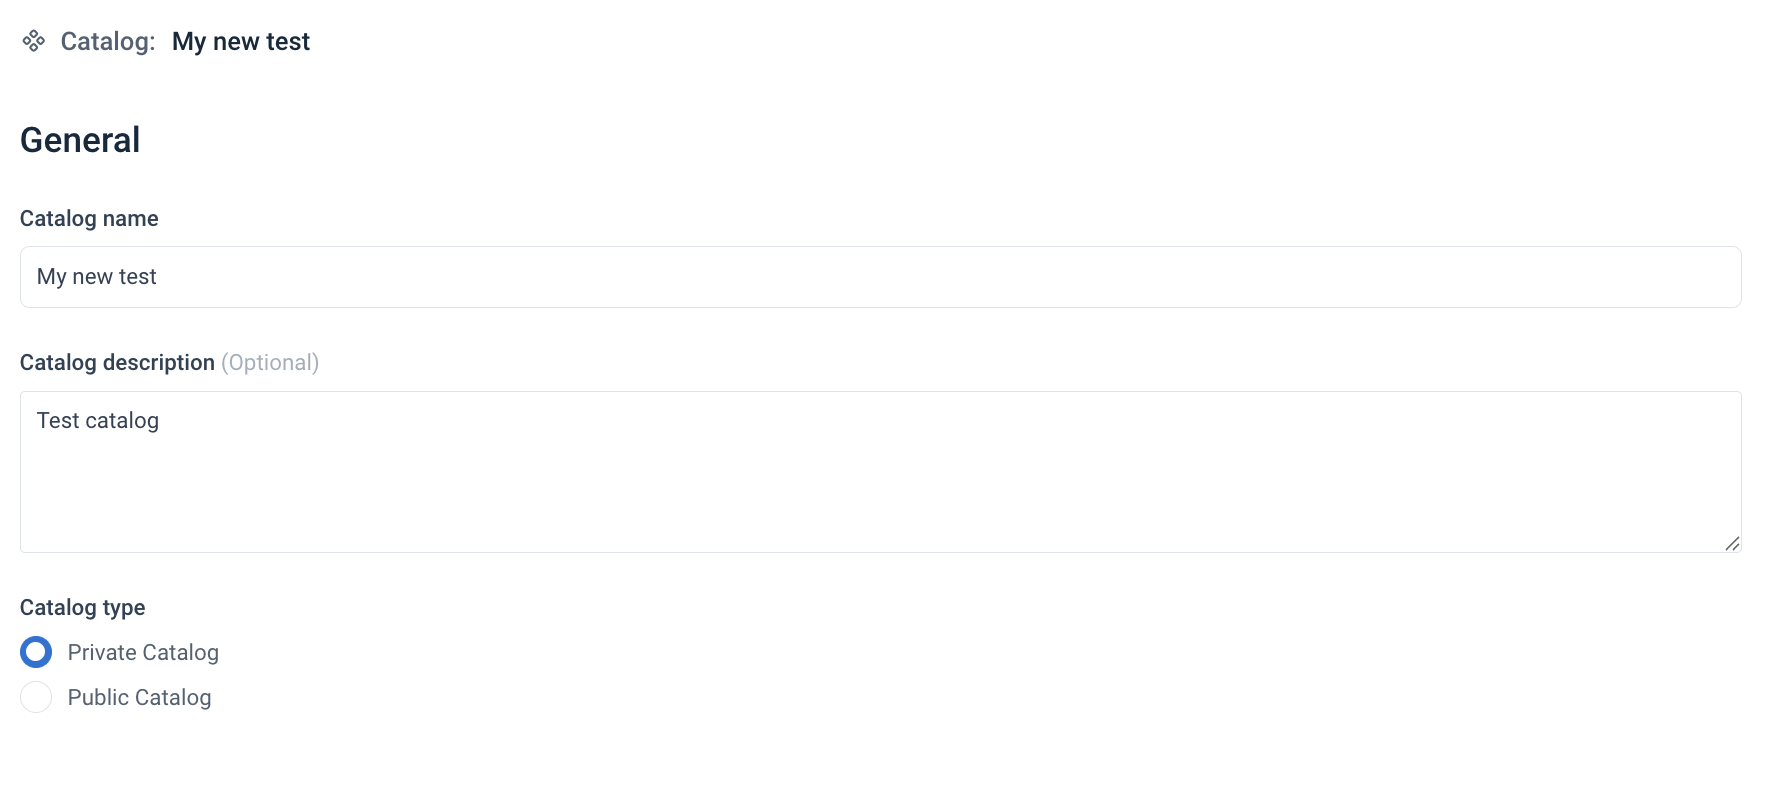
Enter a catalog name in Name and a description in Description, and select Save. You can later make your catalog public to let everyone access it without credentials.

The added catalog appears in the Catalogs page, and you can export your product data to it using a dedicated export template. See Set up the Content Portal Catalog export.
Modify catalog settings
Once the Content Portal Catalog export is complete, you can modify your catalog access and general settings.
The catalog settings help you effectively present product information and tailor the user experience during catalog browsing.
Go to Settings, select Catalogs on the left, and search for the needed catalog.
Select the catalog. The General section opens.
If needed, edit the name in Catalog name.
Edit the description in Catalog description (Optional).
Change the catalog type from public to private or vice versa in Catalog type:
Select Private Catalog to let only authorized users access to the catalog.
Select Public Catalog to let everyone access the catalog without logging in. Anonymous users can also download assets and products from public catalogs in the Content Portal.
Go to Users on the left to view, add, or remove users who can access the catalog.
To add a new user to the catalog:
Select Add users.
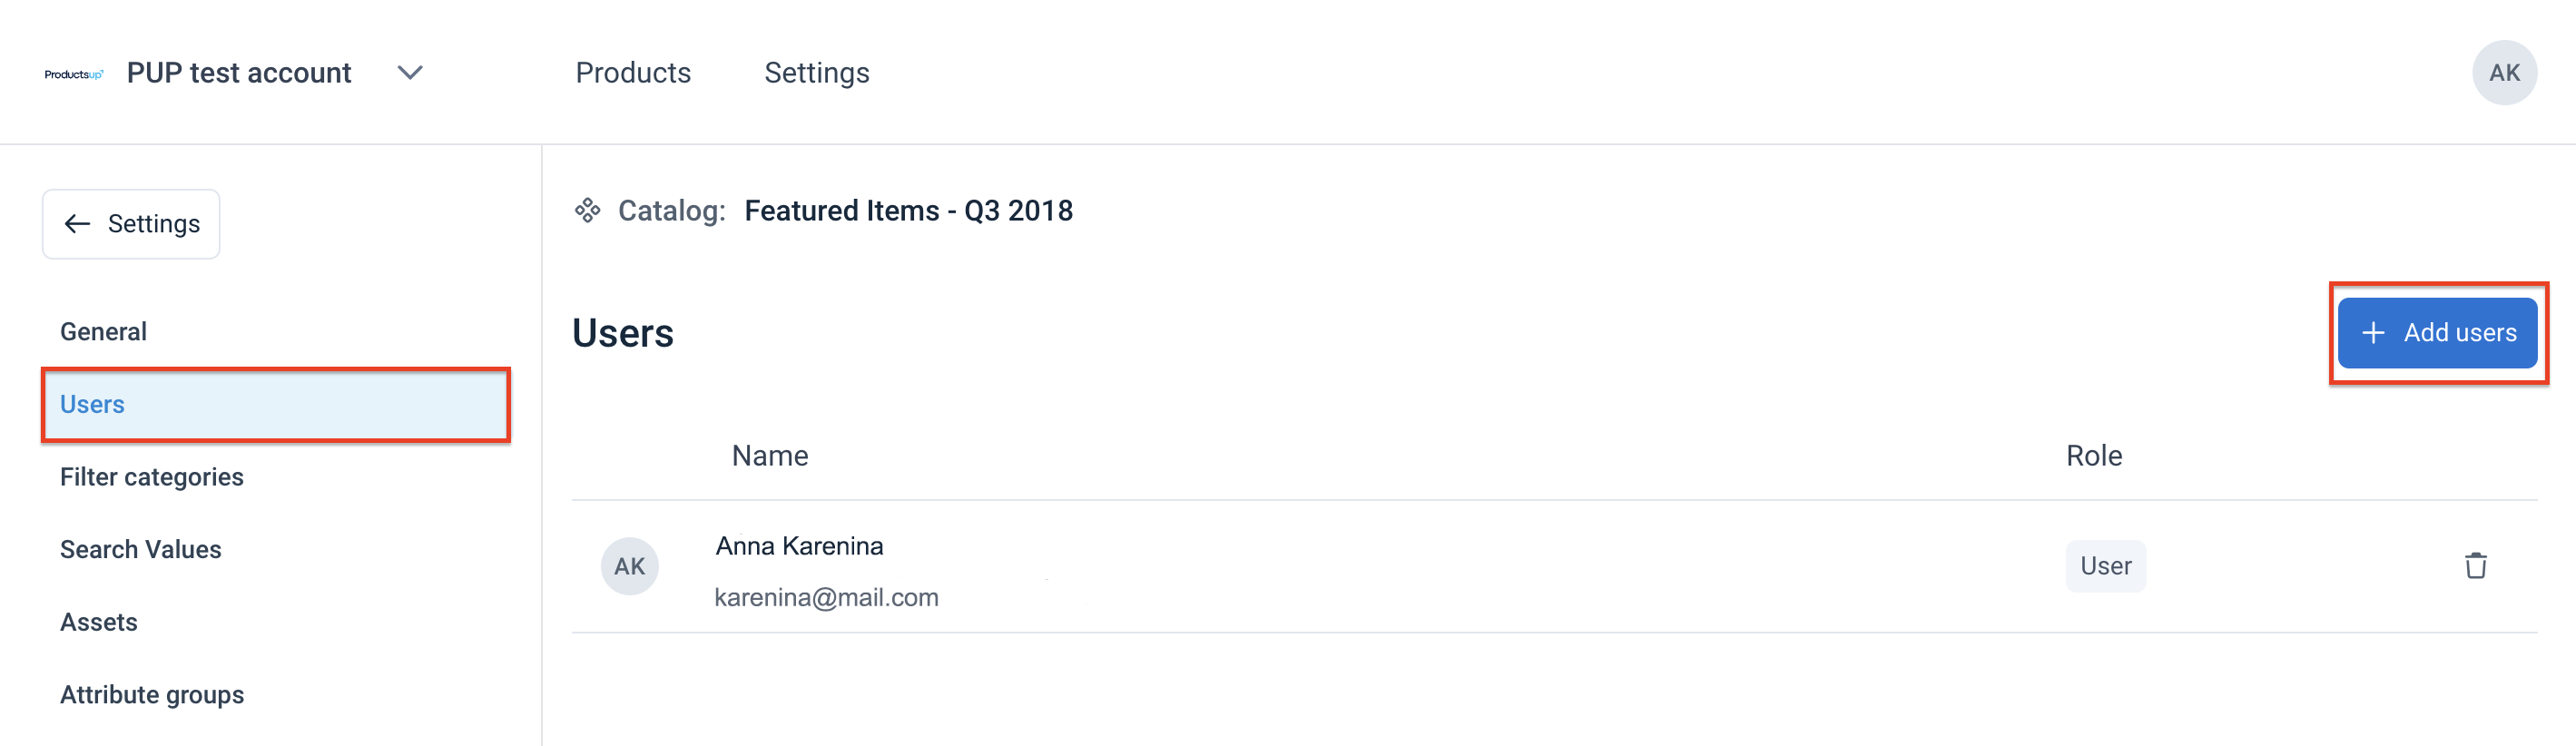
Start typing the user name and then select the needed user name from the dropdown.
Select Add.
Note
To remove a user from the catalog, select the trash bin icon
.Define what users can see:
Important
You can only use these settings after exporting the catalog at least once. See Set up the Content Portal Catalog export.
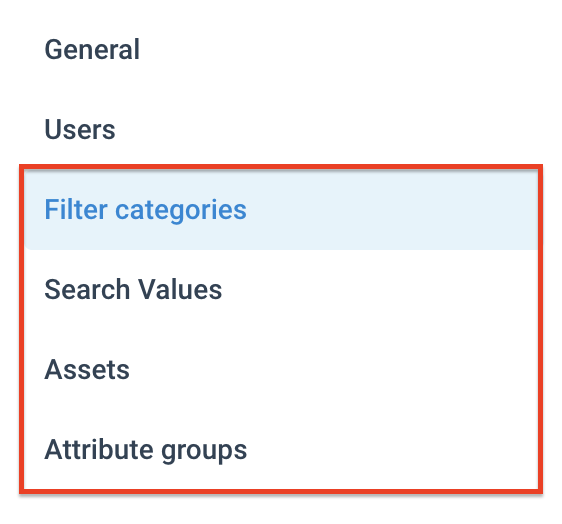
Filter categories lets you select the attributes you want to display as filter categories.
Search Values lets you select the attributes by which users can search the products.
Assets lets you select which attributes to show as product assets.
Attribute Groups lets you select which attributes you want to present as a group.
Add filter categories
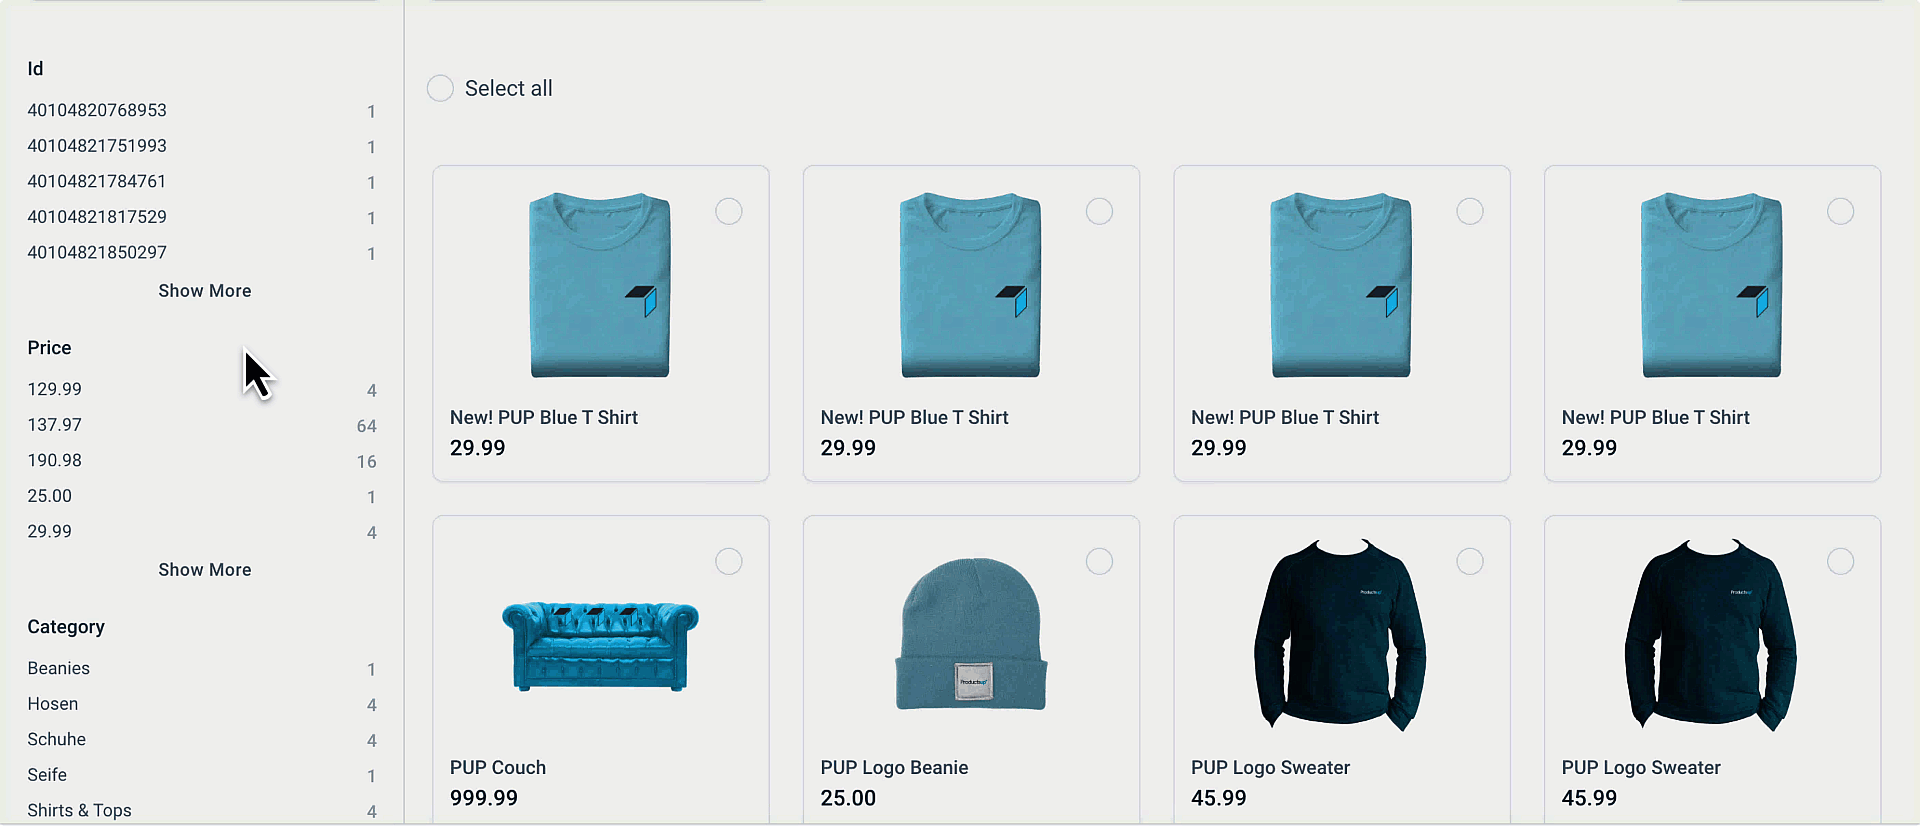
In the Filter categories page, you can view, add, or remove categories that users can use to filter products. These categories appear on the left-hand side of the catalog, letting users select one or more filters to find the desired product.
To add filter categories:
Go to Filter categories on the left.
Select Add filter categories.
Select the arrows next to the attributes in the Available attributes that should be used as filter categories.
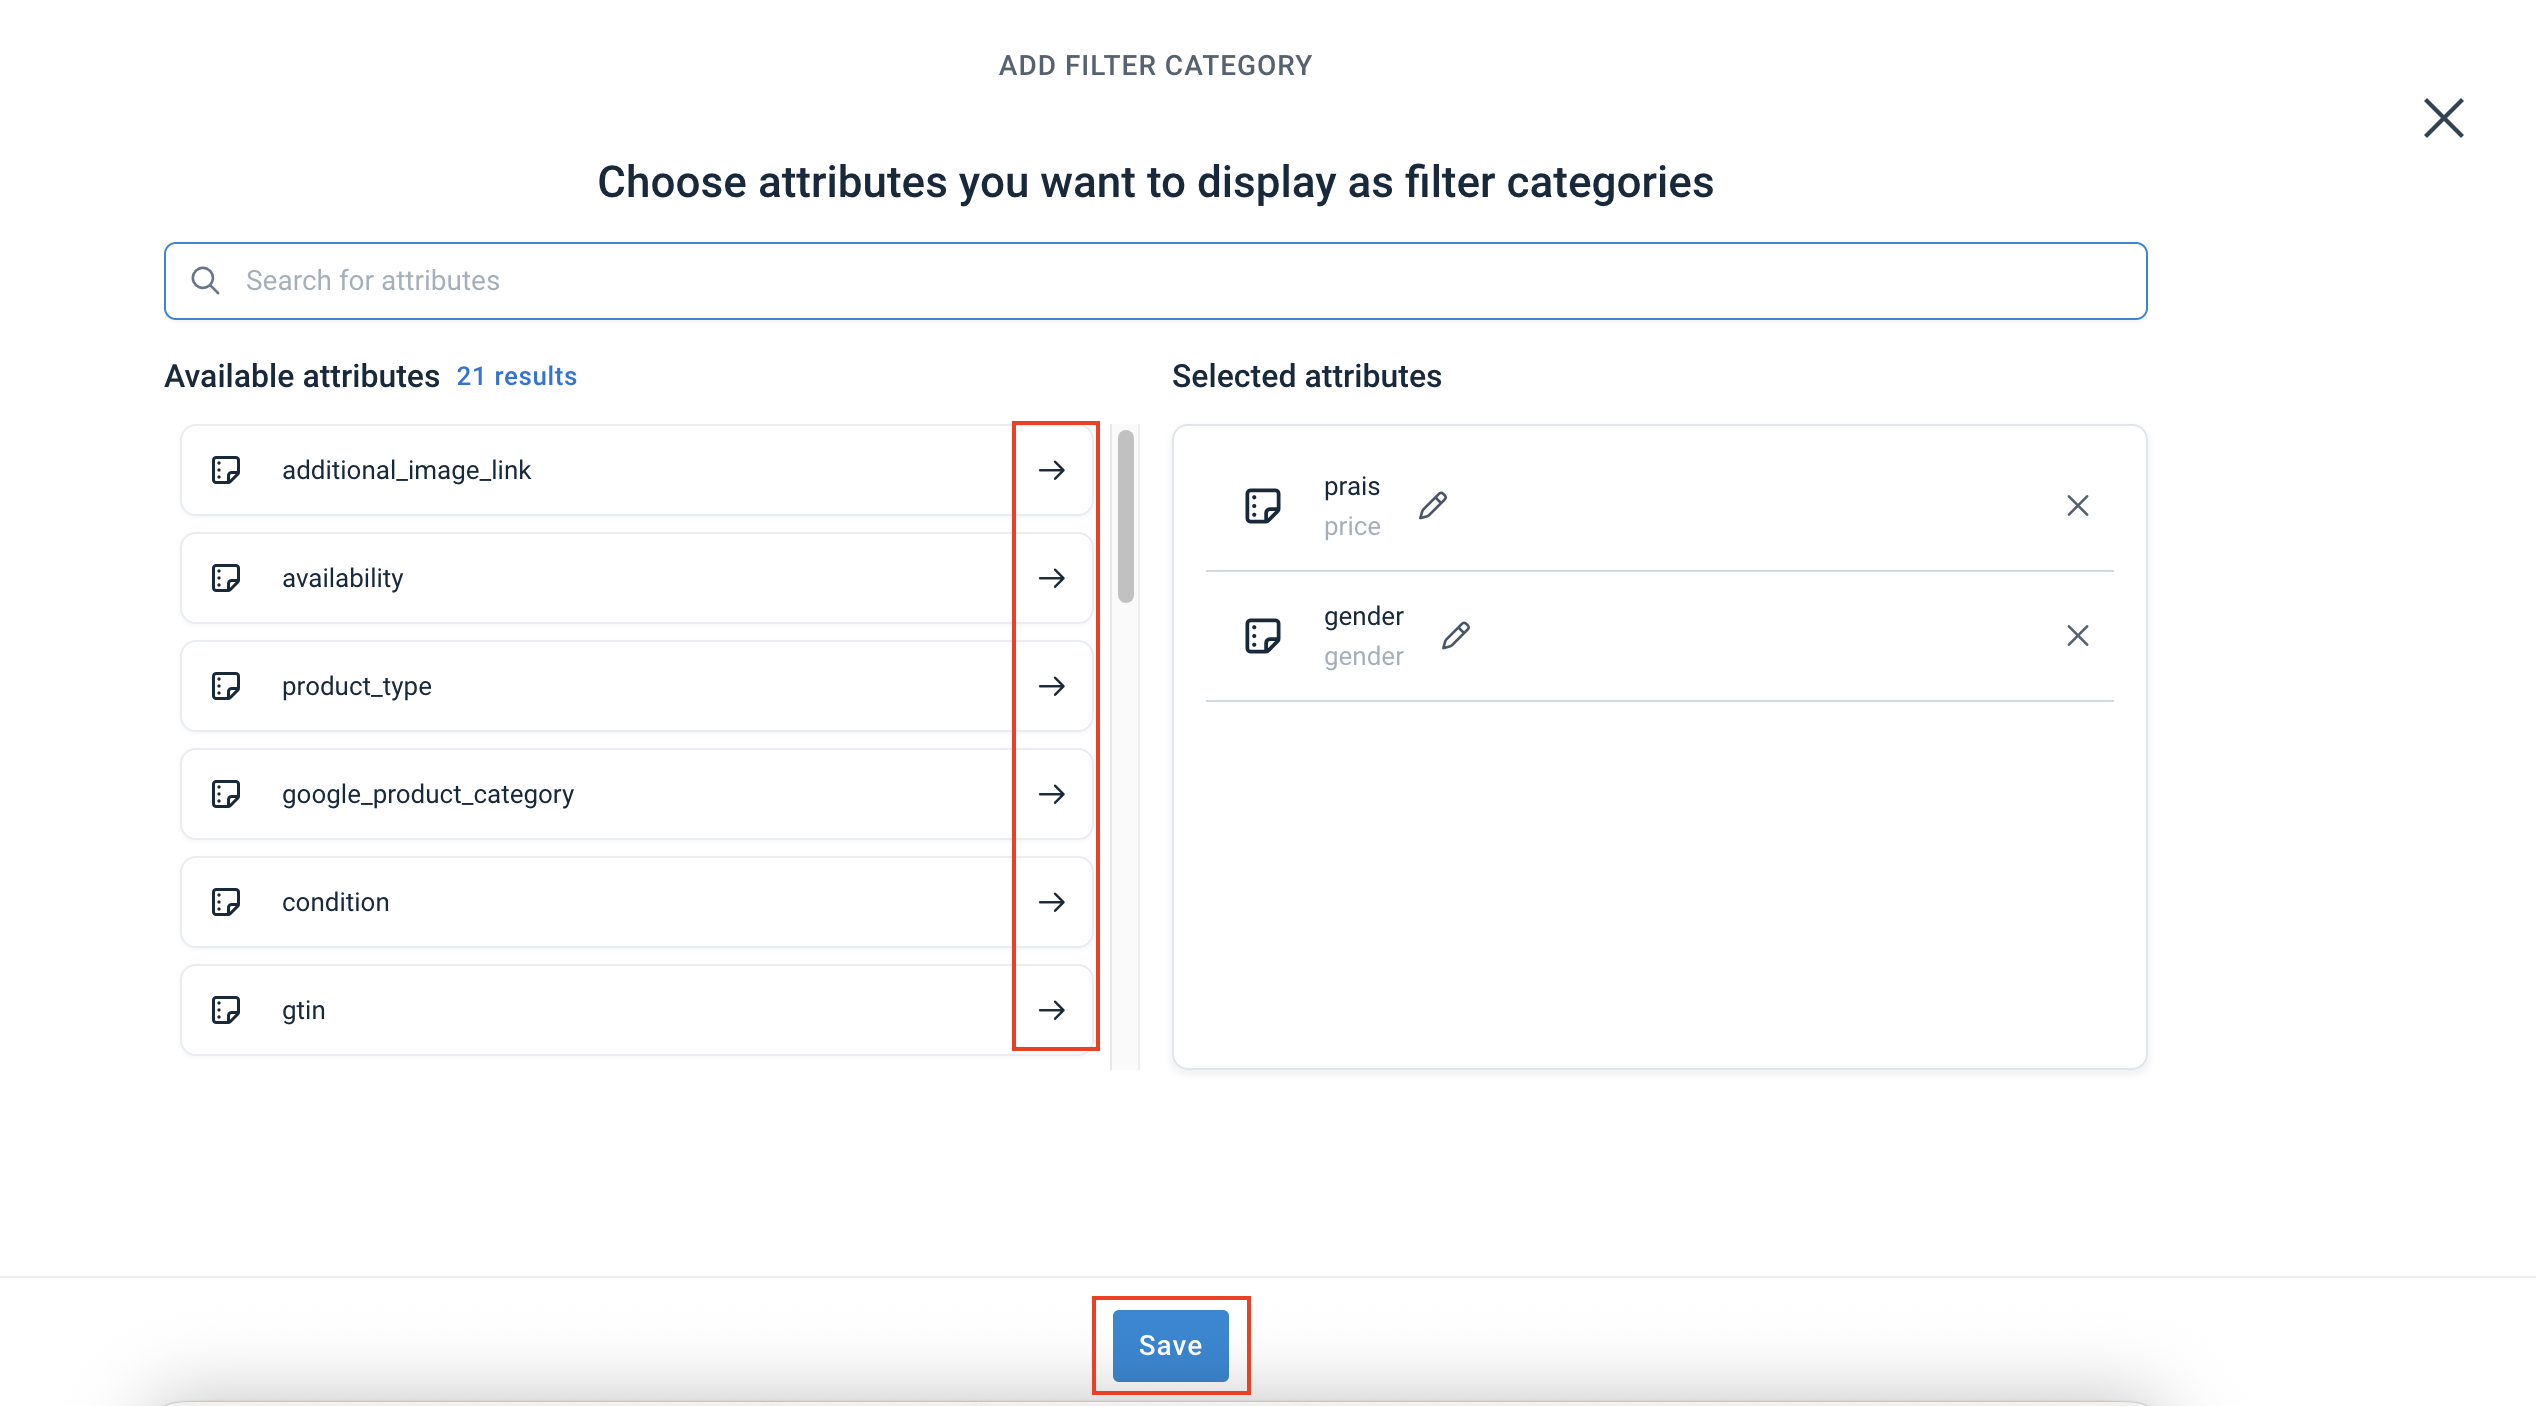
Select Save.
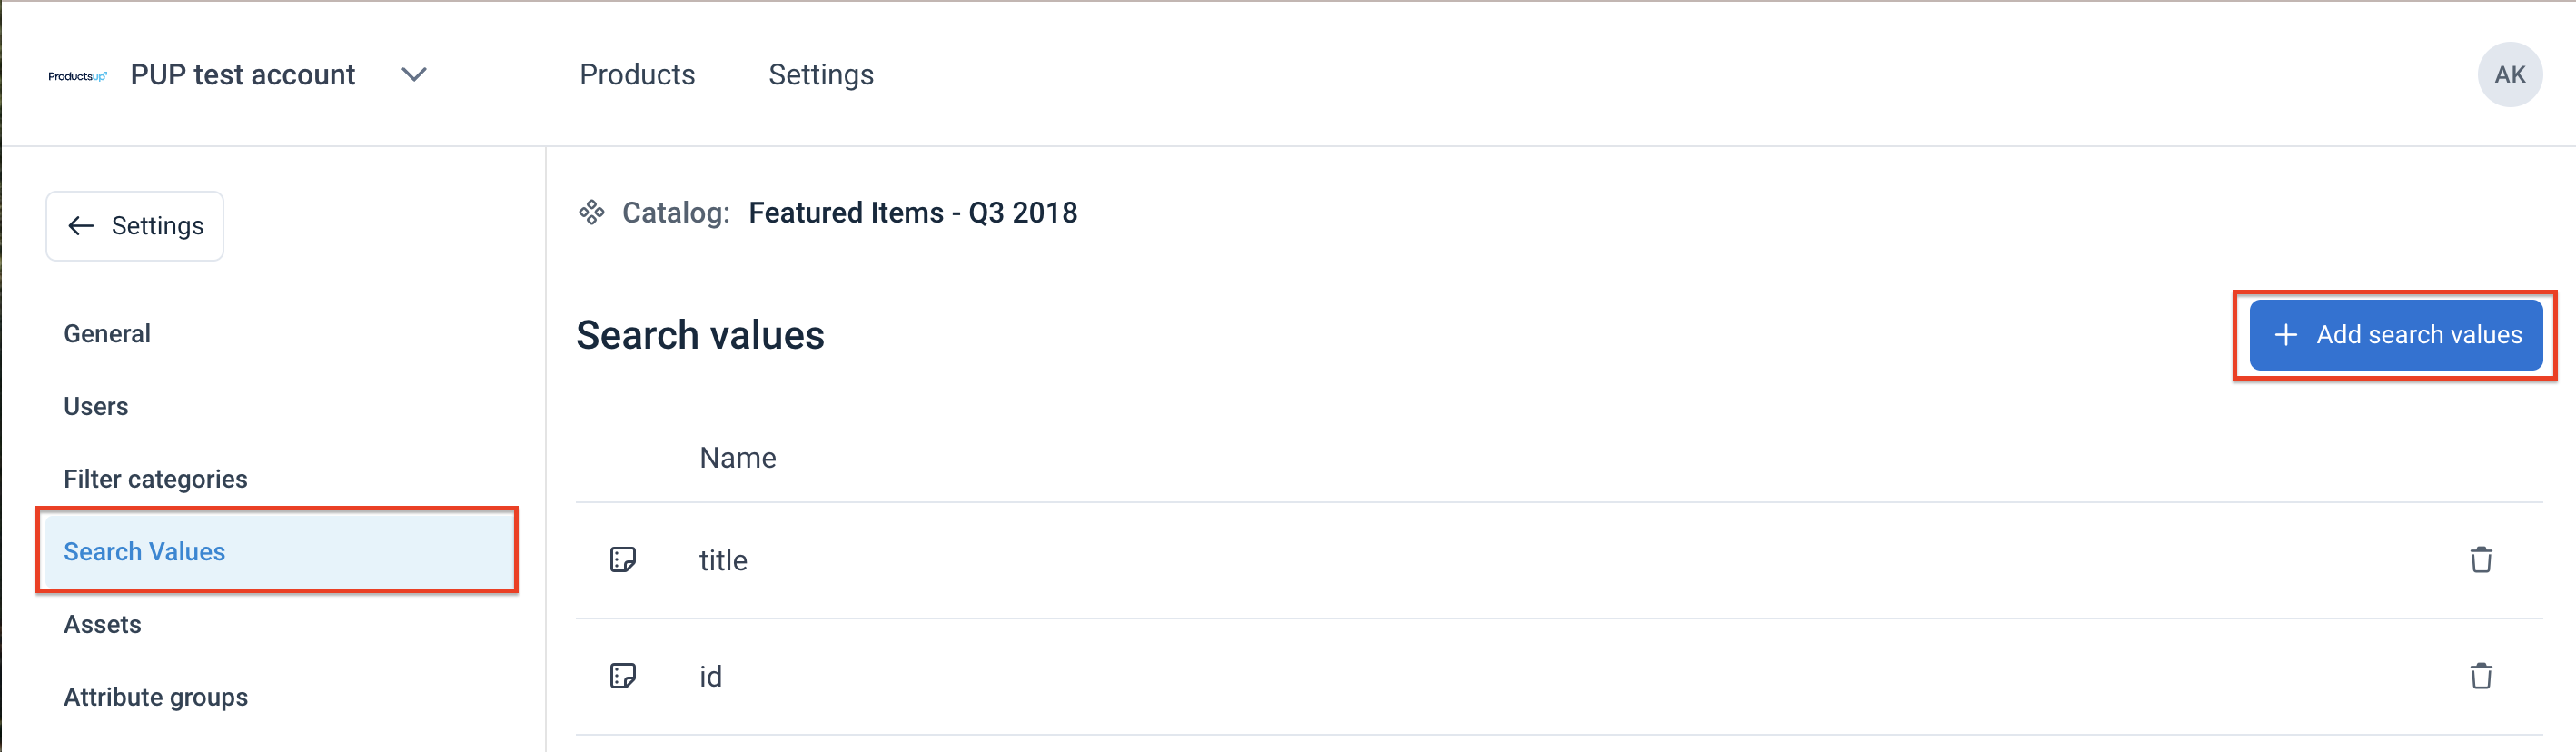
Add search values
In the Search Values page, you can view, add, or remove the values that users can use to search for products.
To add search values:
Go to Search Values in the left menu.
Select Add search values.
Select the arrows next to the attributes you want to make searchable from the Available attributes.
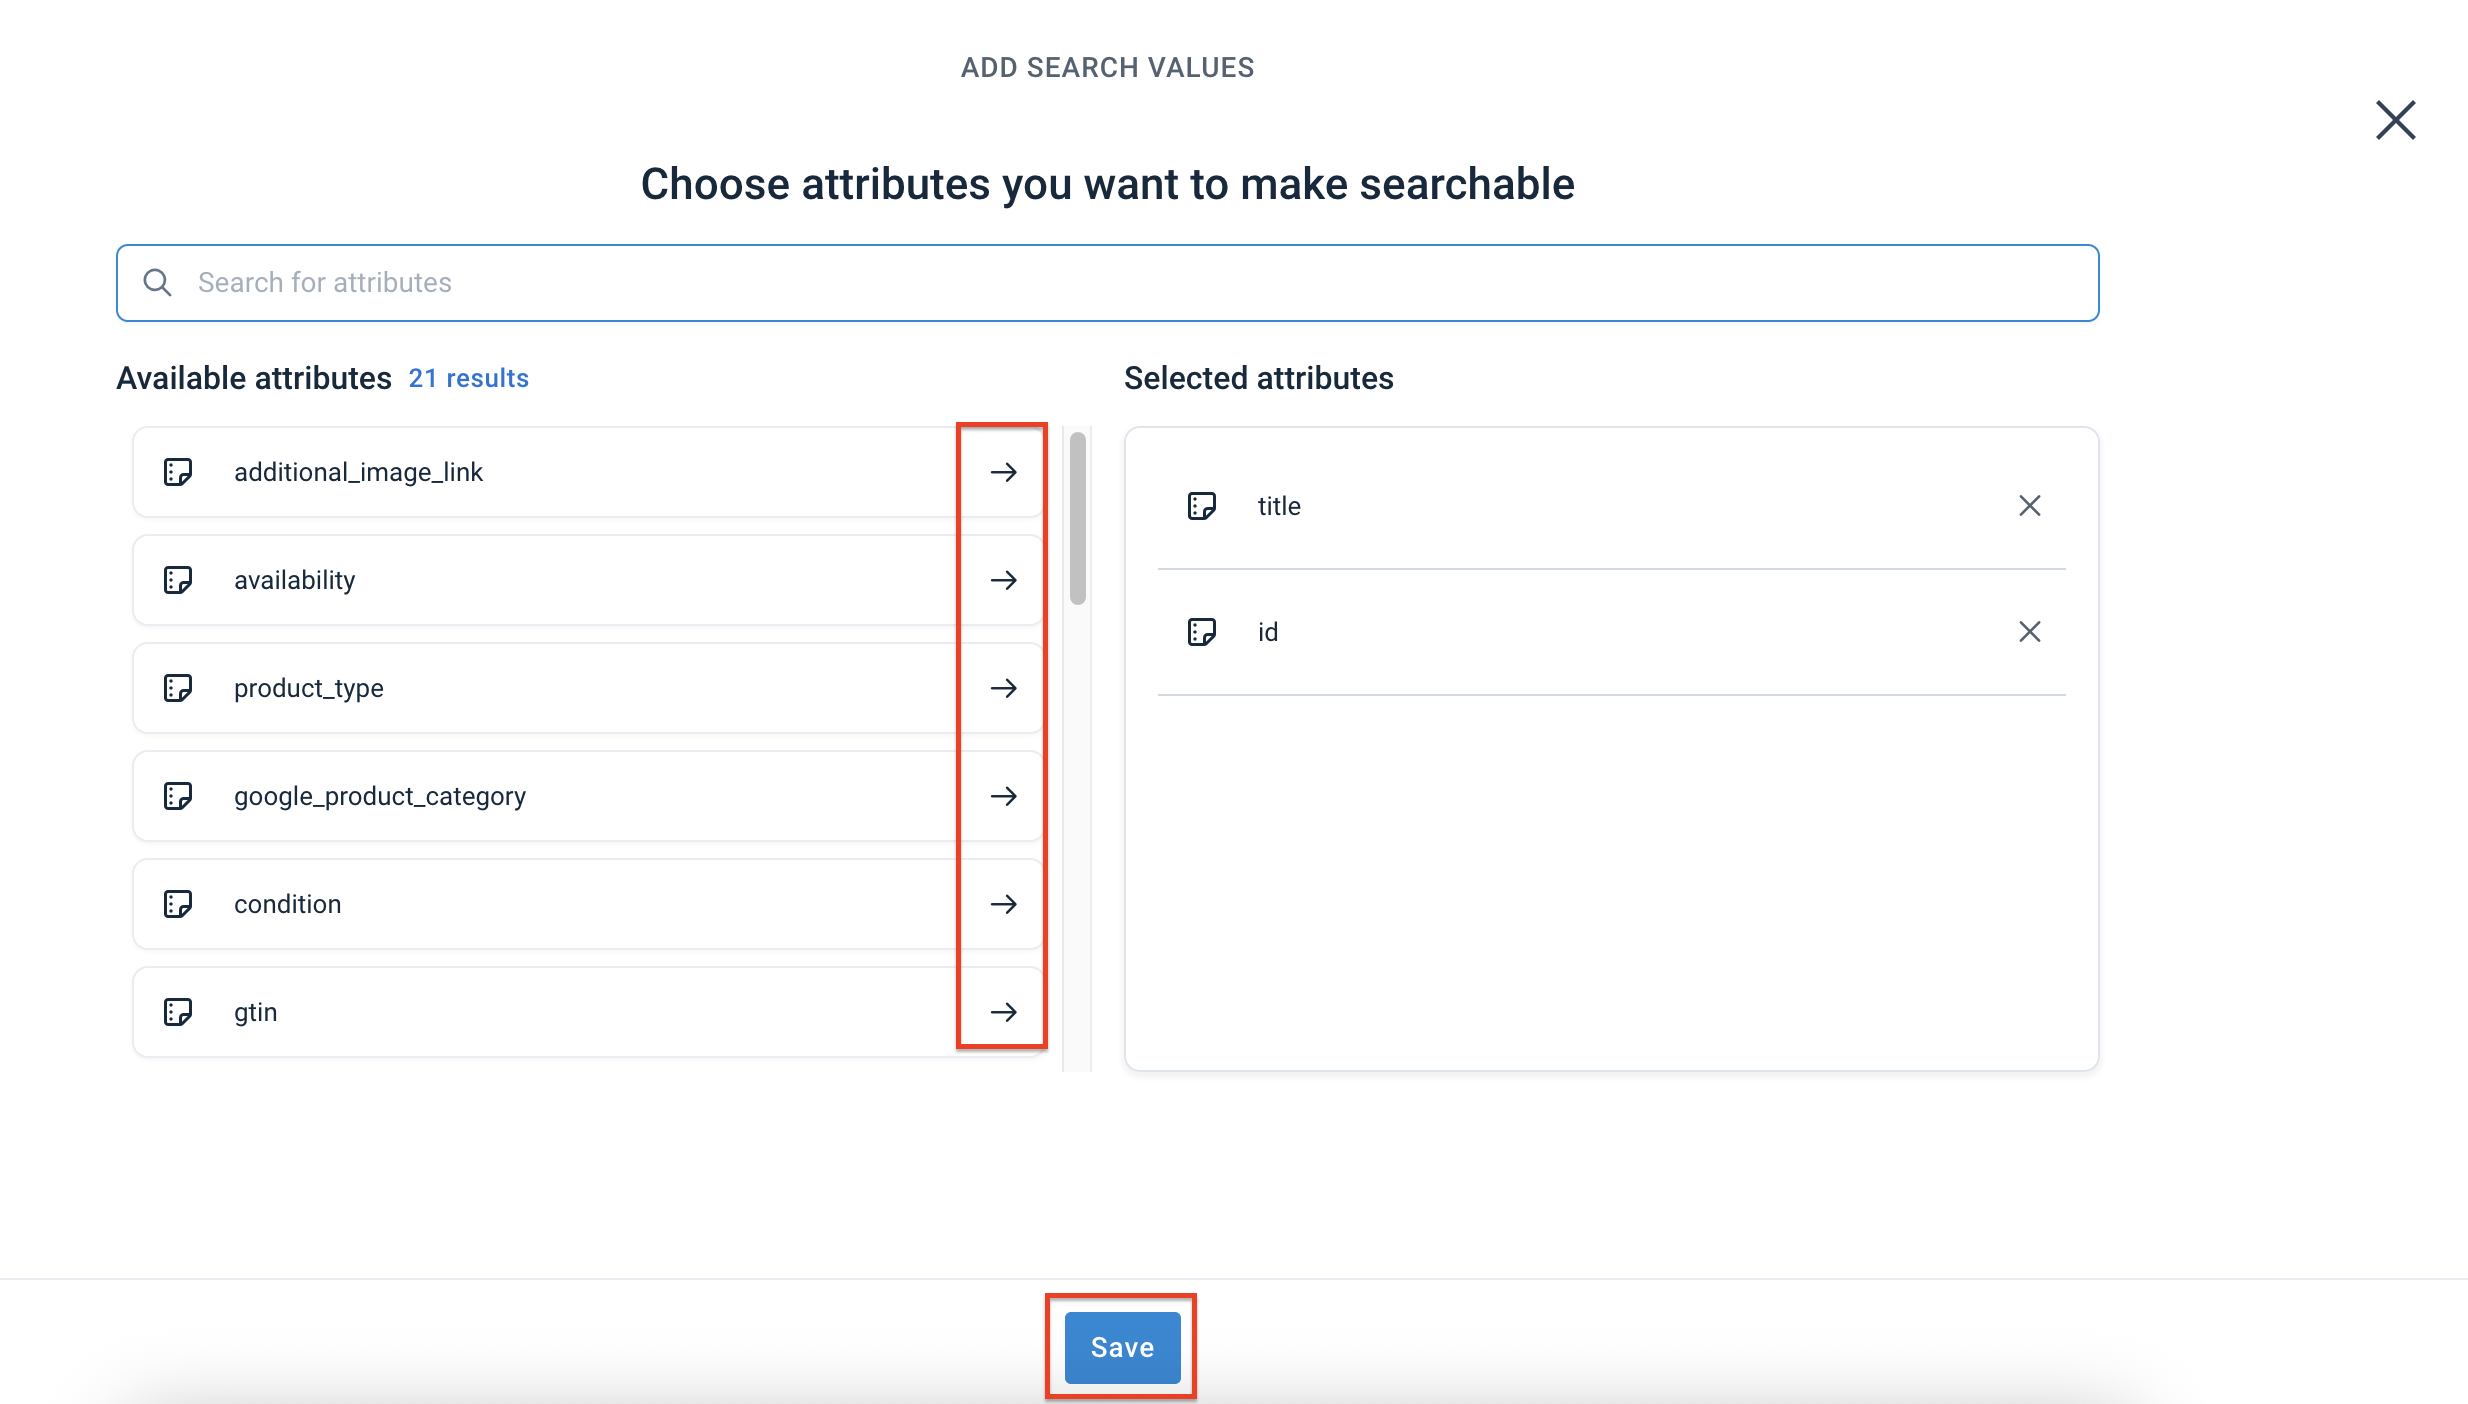
Select Save.
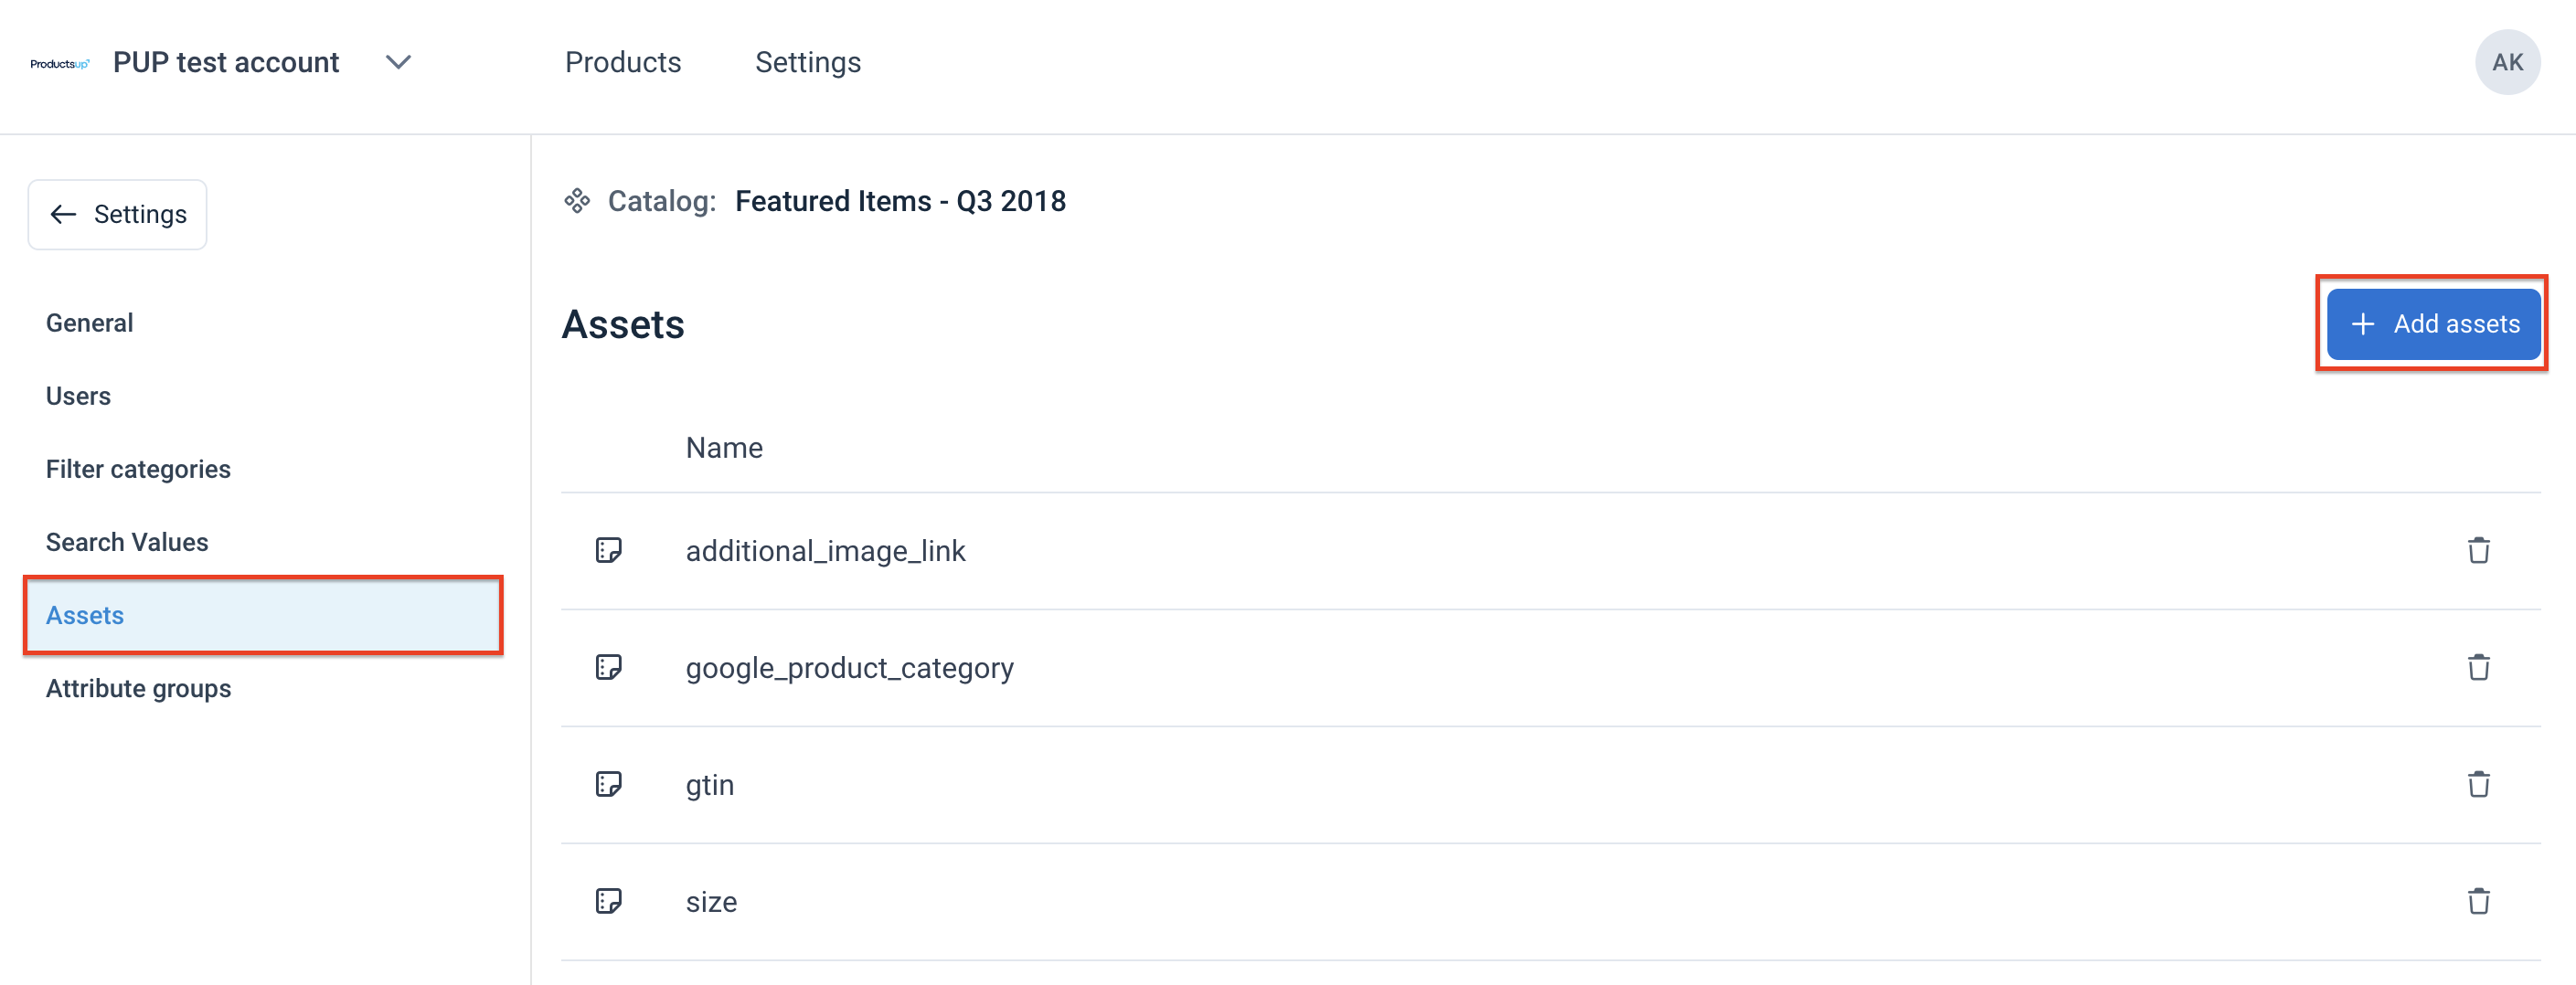
Add assets
In the Assets page, you can view, add, or remove product assets, such as images or documents. The assets appear in the product details page, and you can scroll through them.
To add assets:
Go to Assets in the left menu.
Select Add assets.
Select the arrows next to the attributes you want to display as assets from the Available attributes.
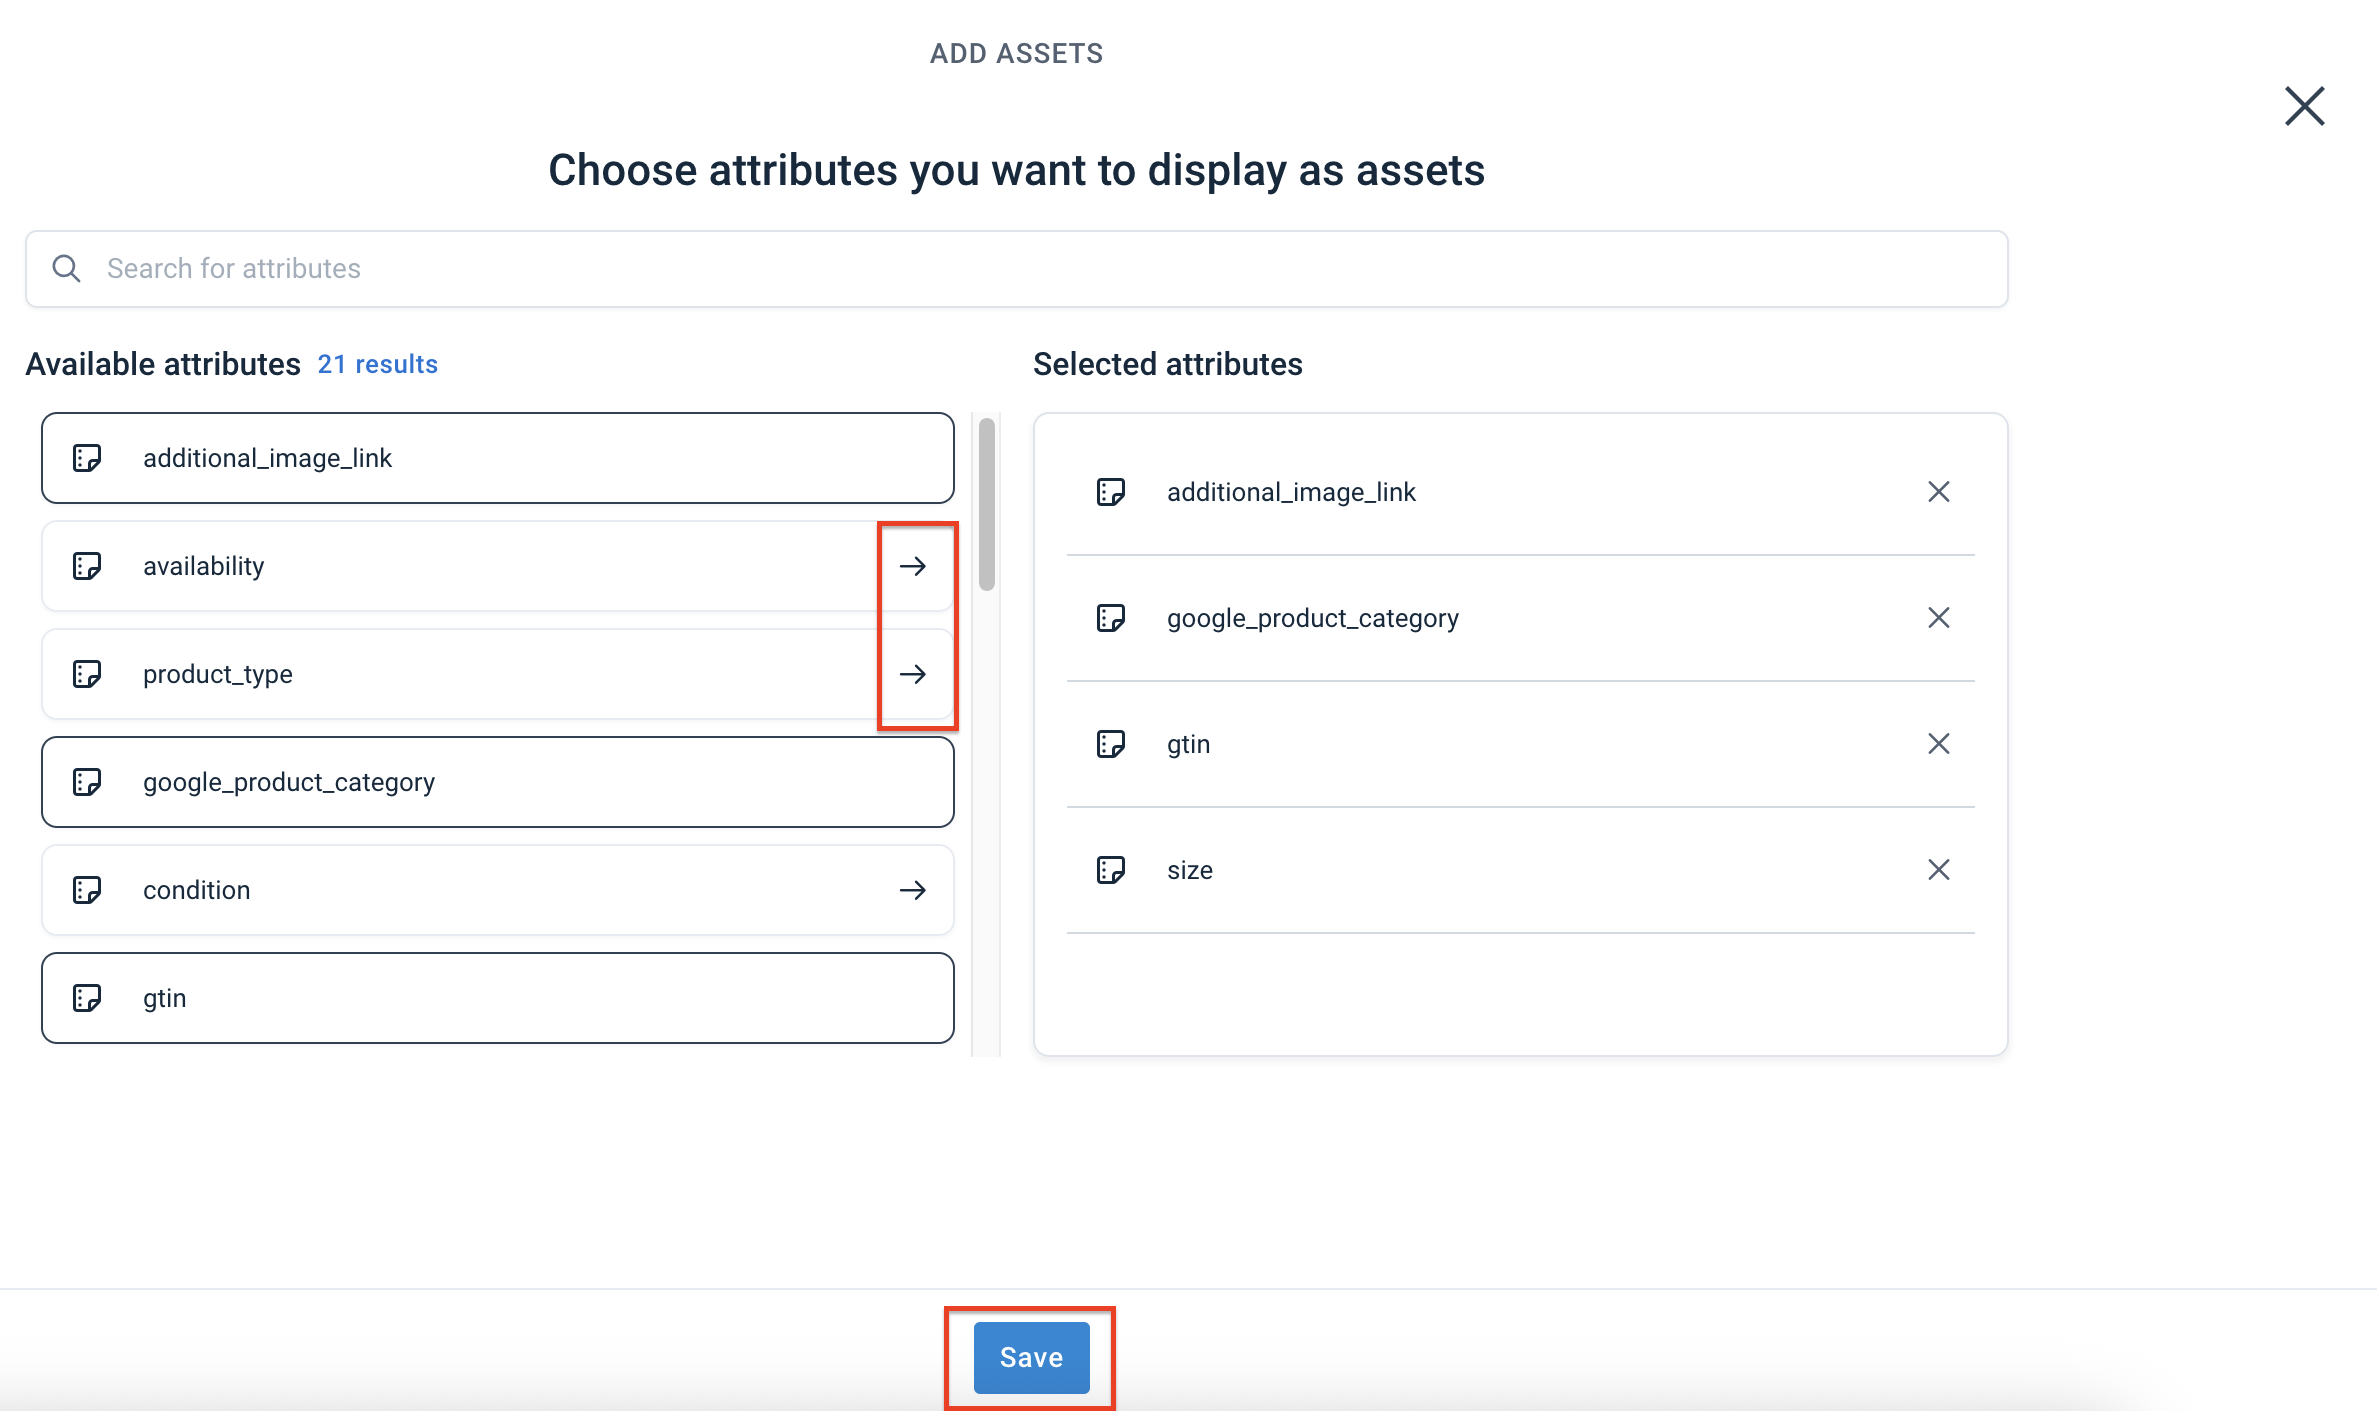
Select Save.
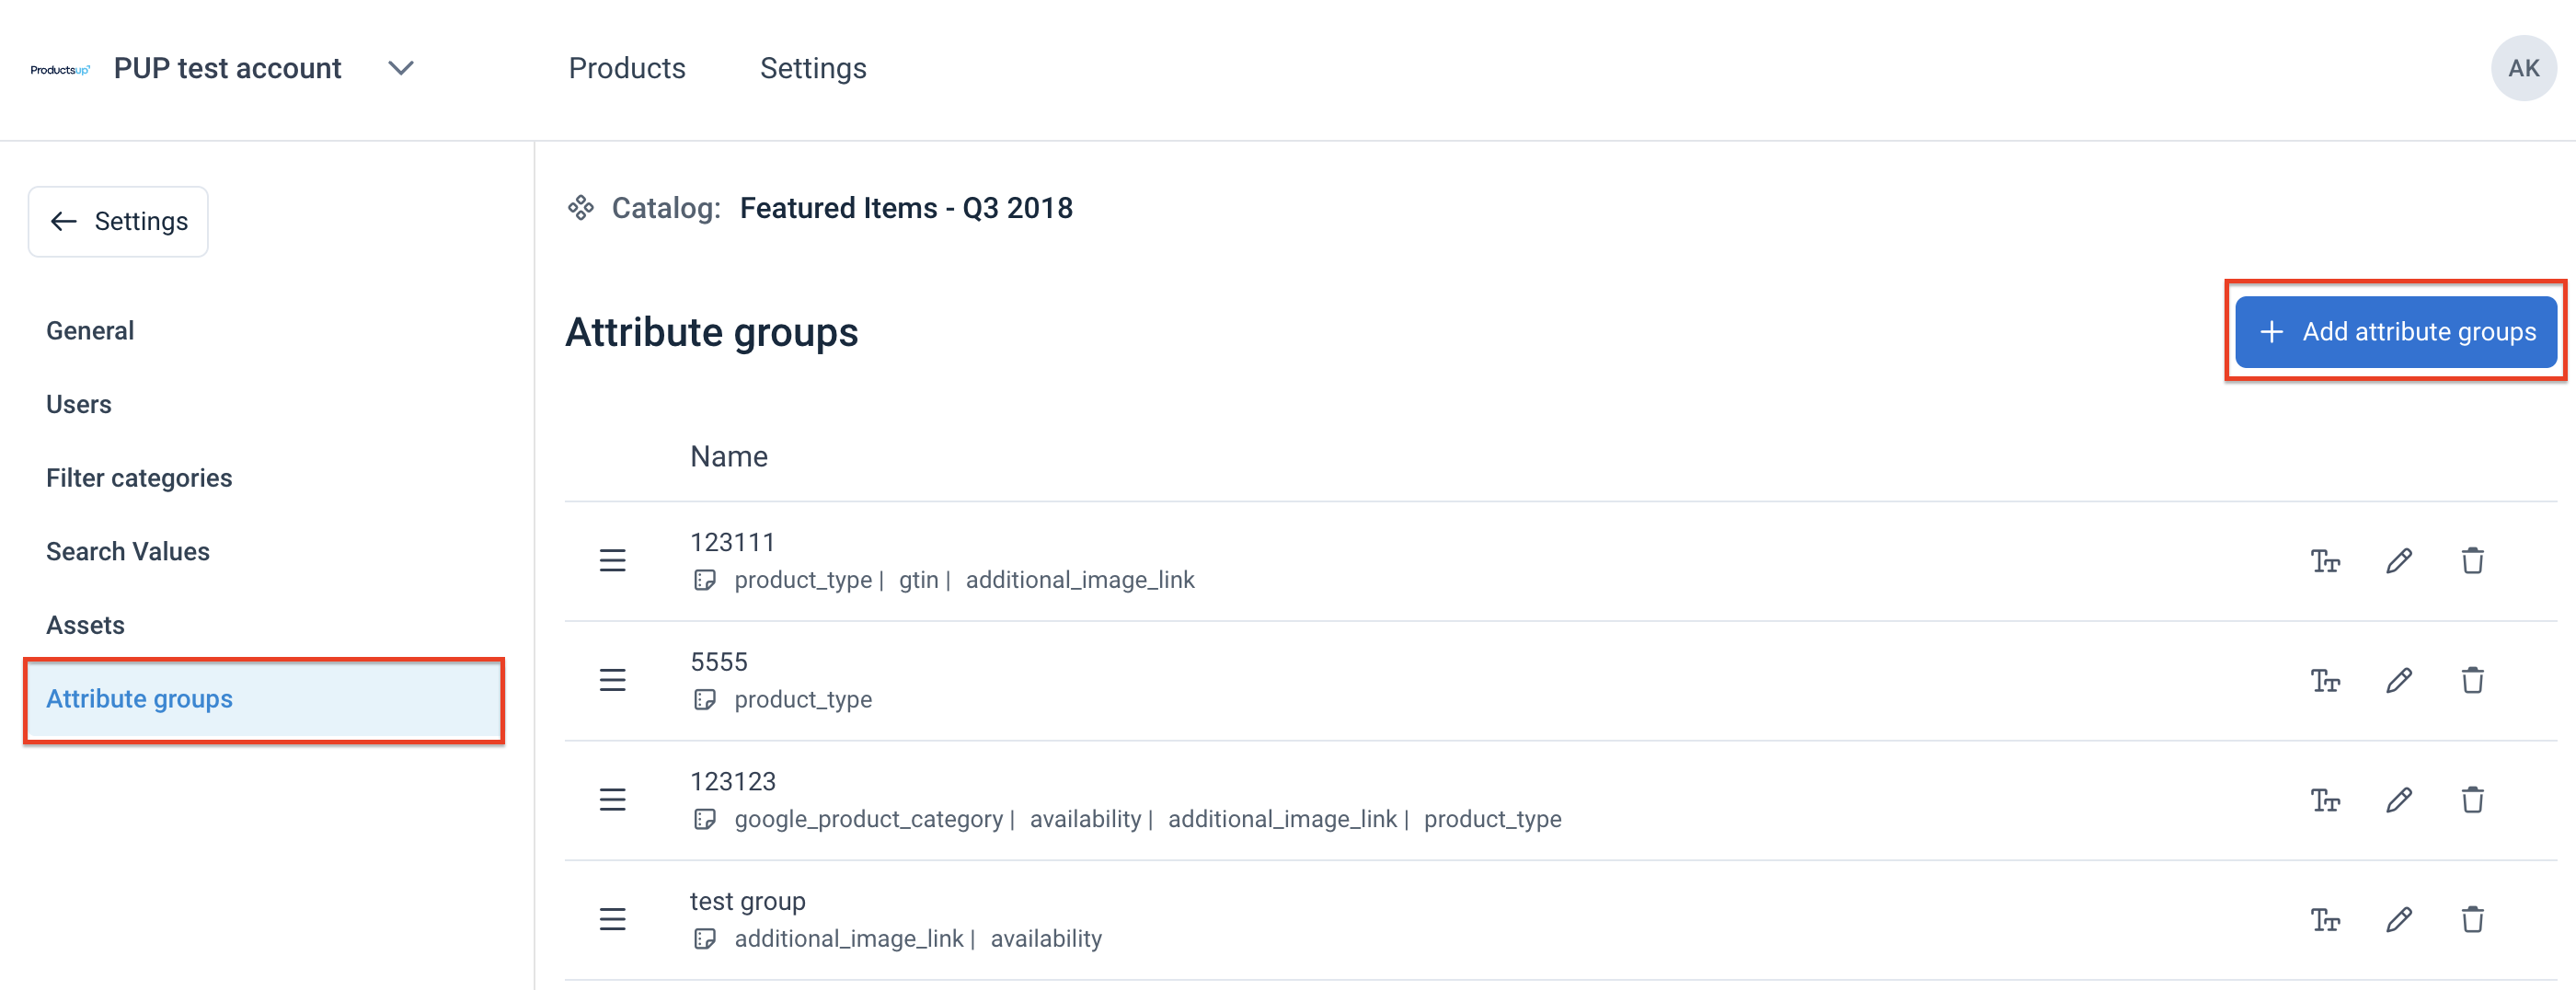
Add attribute groups
In the Attribute groups page, you can view, add, edit, reorder, or remove the attribute groups. The attribute groups will appear in the product details page under the product image. The attributes that aren't in the attribute groups will appear in the Other attributes section below the groups.
To add attribute groups:
Go to Attribute groups in the left menu.
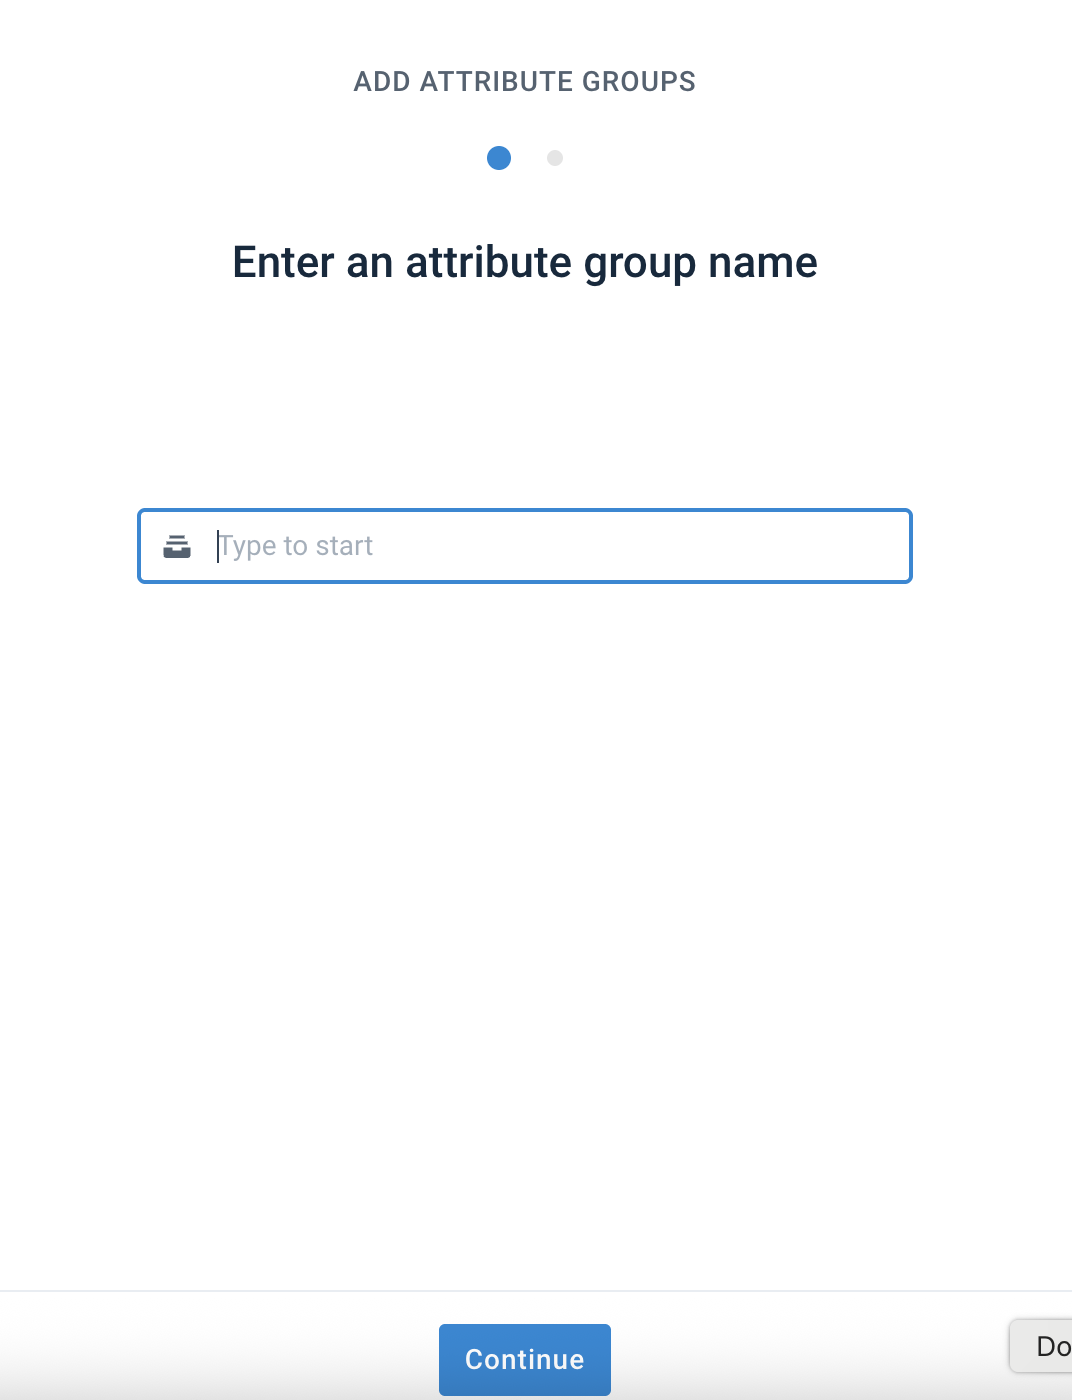
Select Add attribute groups.
Enter the group name and select Continue.
Select the arrows next to the attributes you want to add to the group from the Available attributes.
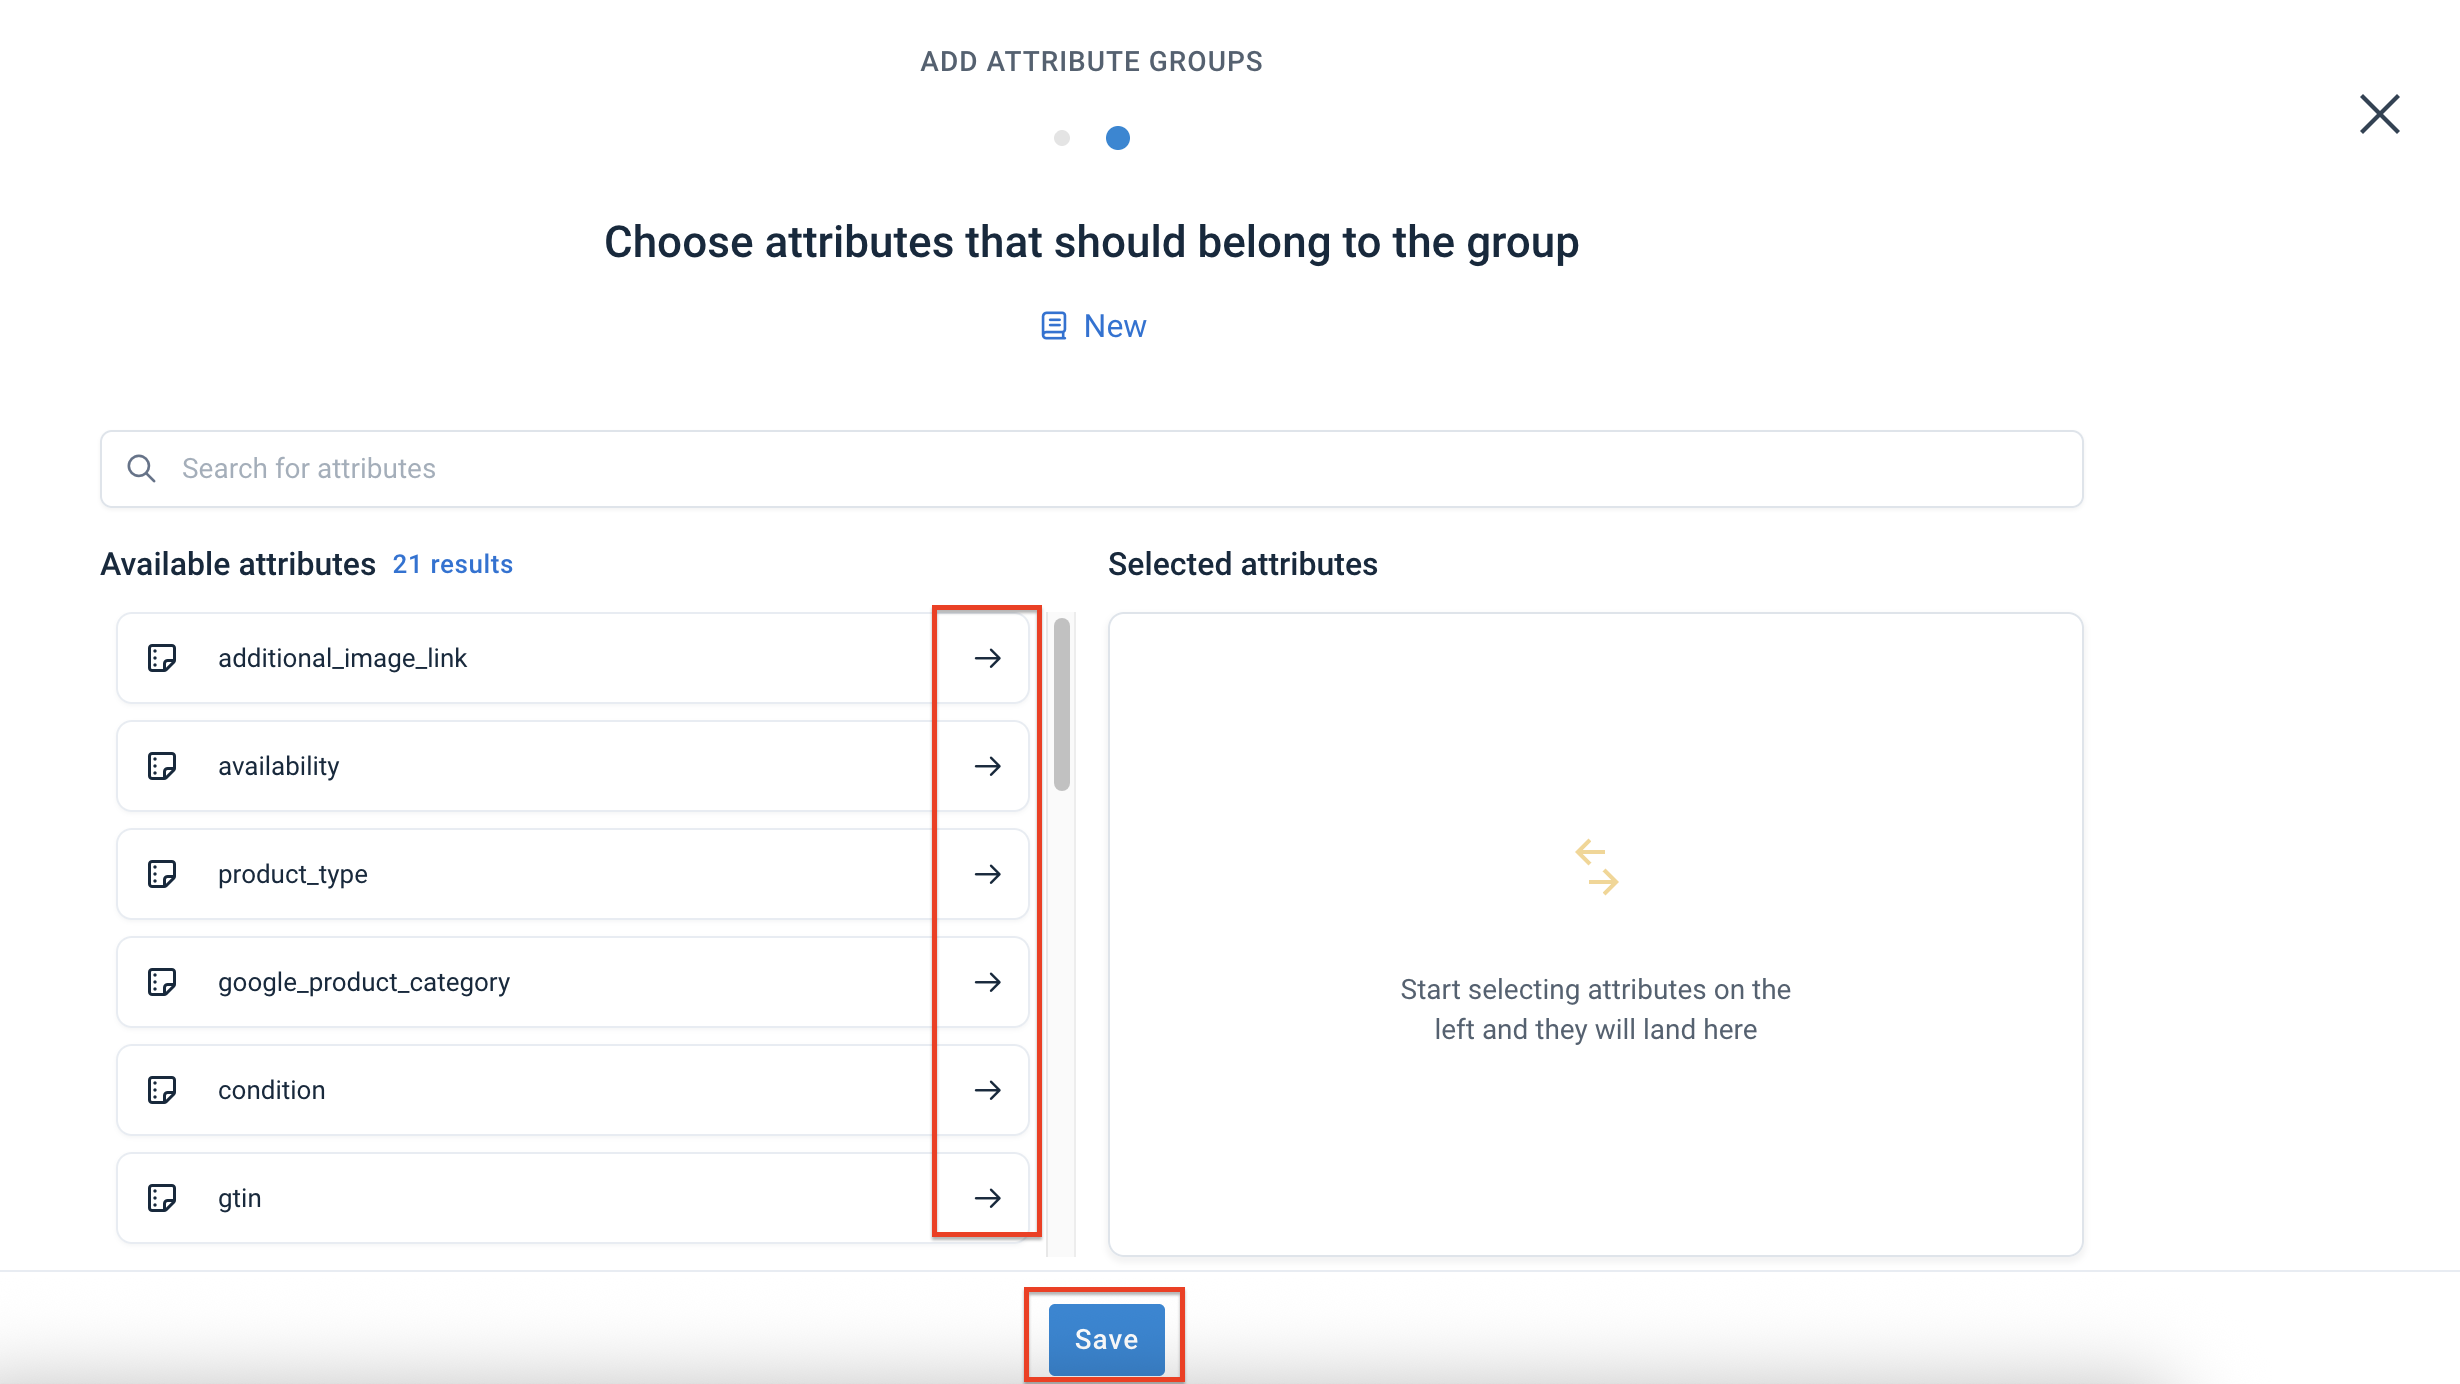
Select Save.
You've set up all catalog settings.