Apply rule boxes based on conditions
Learn how to apply rule boxes to your data based on whether certain attributes in your Productsup site meet the needed conditions.
Introduction
Rule Box Conditions is a feature in Dataflow and Data View that lets you create and set up conditions to determine the cases when the platform should apply rule boxes to an attribute.
A condition consists of two elements:
Condition statements
Rule boxes
If the configured condition statements are true, the platform applies a set of THEN rule boxes to your data. Optionally, you can choose which ELSE rule boxes the platform should apply to your data if the condition statements are false.
Now, the Rule Box Conditions feature supports Shared Dataflow. You can create and set up a rule box condition, add it to an attribute in a site with a shared dataflow, and thus apply the rule box condition to this attribute in all sites that use this dataflow. See Share dataflow with other sites for more information.
Note
In case of a shared dataflow, you can edit rule box conditions only in the source site.
You can use all rule boxes in the Rule Box Conditions feature. See Find the needed rule box category for information on available rule boxes.
Rule box conditions use case
Here is a simple example of how the Rule Box Conditions feature works.
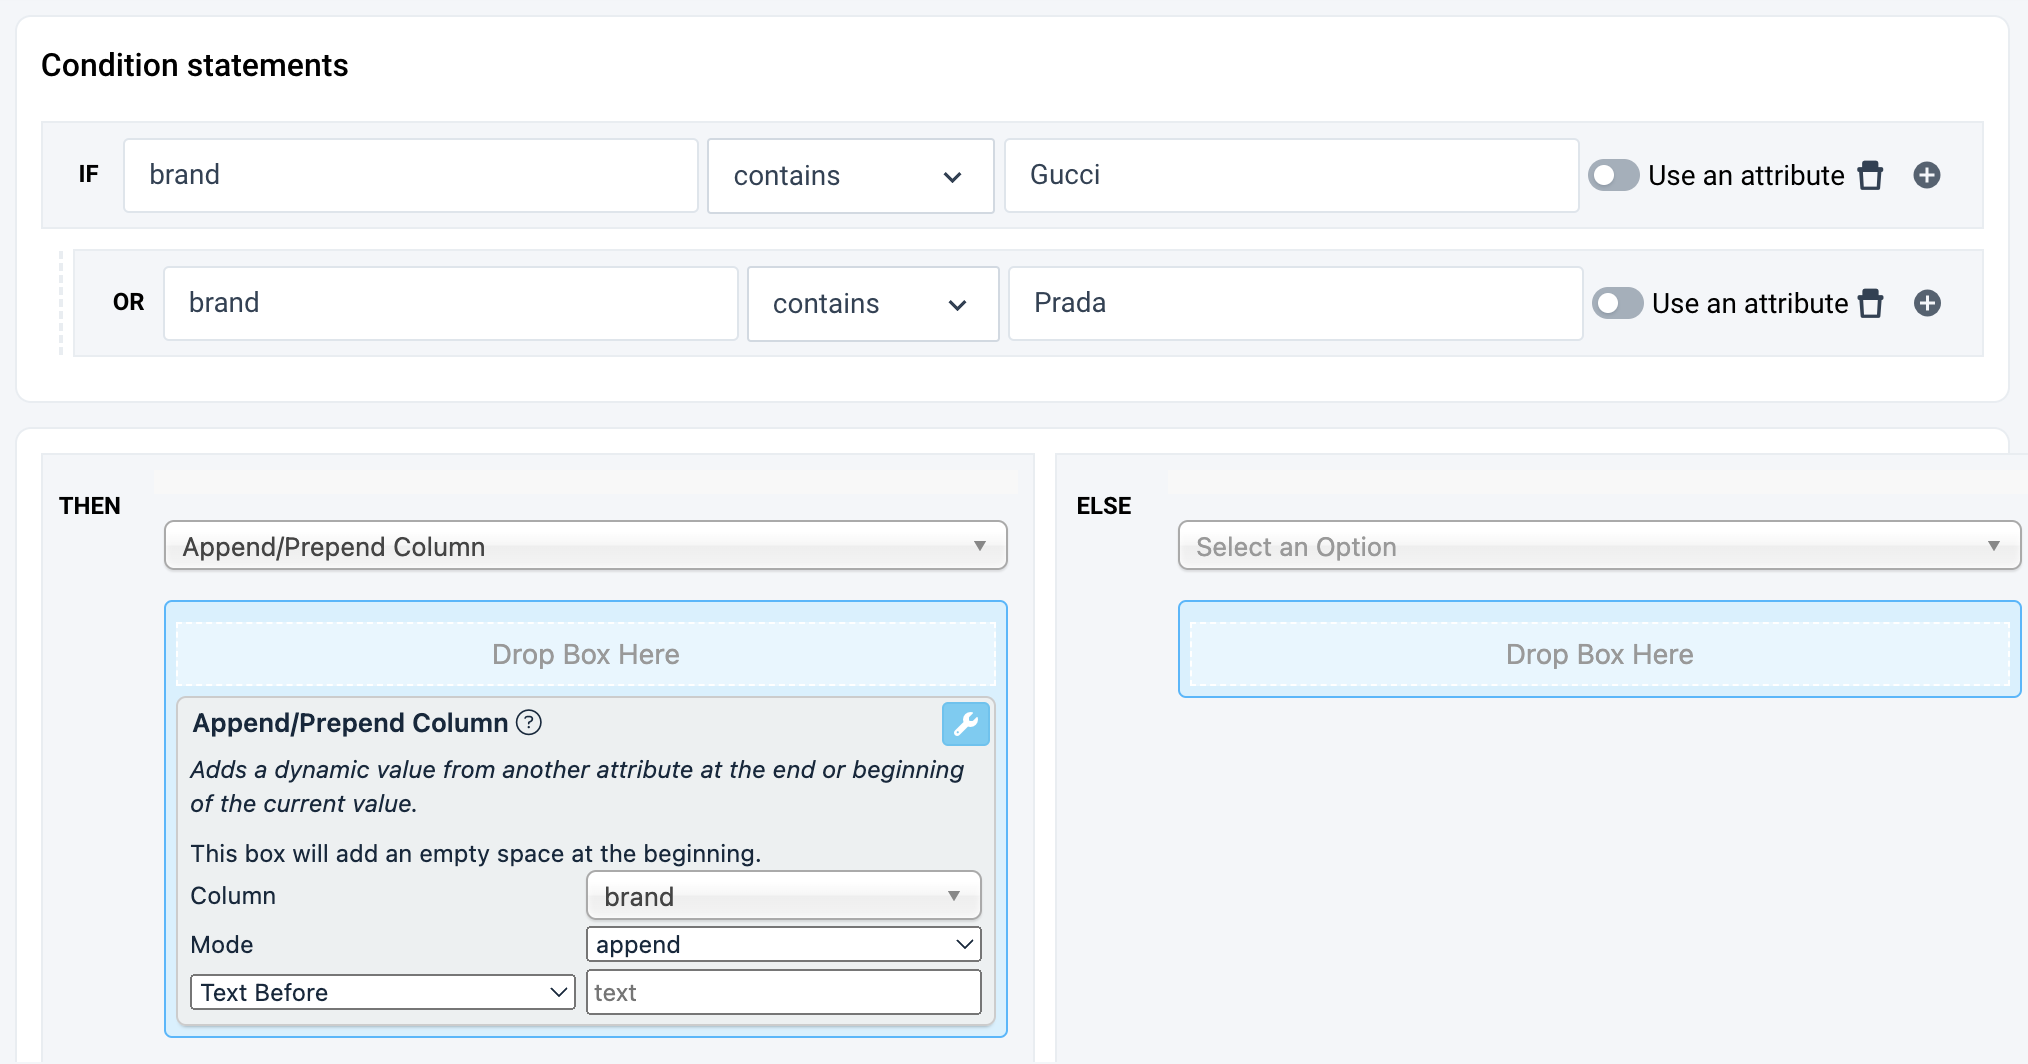
If you want your title attribute to feature the name of the brand only if it is a luxury brand, you can create a condition in Rule Box Conditions and then add it to the title attribute.
To implement this logic, the condition you create uses its condition statements to check whether the brand attribute contains such values as Gucci or Prada. If it finds these values in your brands, the platform applies the Append/Prepend Column rule box to the title attribute and adds the brand name at the end of your titles.
Both rule box conditions and segments serve the same purpose. These features let you apply rule boxes to an attribute if this or another attribute contains a certain value.
Segments provide bare-bones functionality with only one operator for one attribute per segment, while rule box conditions are more versatile. Rule box conditions offer a more visual interface and let you set up more elaborate logic. Using rule box conditions, the platform can apply rule boxes to an attribute based on the content of multiple attributes and consider different scenarios based on whether your desired condition statements are true or false.
See Use segments to apply rule boxes to specific product groups for more information on segments.
Create a rule box condition
Go to Dataflow or Data View from your site's main menu.
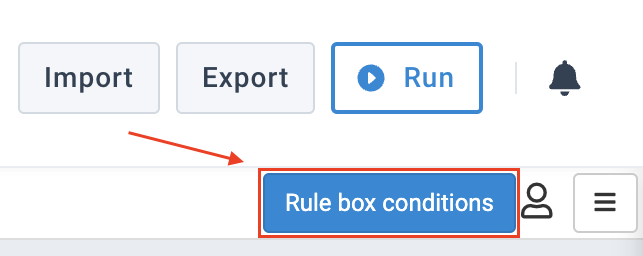
Select Rule box conditions in the top ribbon.
In Dataflow, you can find the button here:
In Data View, you can find the button here:

Choose where you want to create a condition in Stage:
To apply a condition to an attribute at the intermediate stage, select Intermediate.
To apply a condition to an attribute at the export stage, select Export.
Select Add a condition, give it a name and description as desired, and select Create.
When the platform creates your condition, you can see its description by hovering over the condition name. You can also see the description when you apply a condition to an attribute. See Step 5.
Tip
You can edit the name and description of your condition at any time by selecting the marker icon
 next to the condition name above the Condition statements panel.
To start configuring your condition, set up the IF condition statement first:

In Type to search columns, search for and select an attribute that the platform should scan for values.
In the contains drop-down list, select the operator that the platform should use to see if the values of the selected attribute meet a desired condition:
Standard operators:
contains applies rule boxes if the selected attribute contains the provided value. This is the default option.
not contains applies rule boxes if the selected attribute doesn't contain the provided value.
equals applies rule boxes if a value in the selected attribute completely matches the provided value.
is not equal to applies rule boxes if a value in the selected attribute doesn't completely match the provided value.
like applies rule boxes if a value in the selected attribute matches a pattern. You can use regex to define a pattern.
For example, the description attribute contains the values This product is available in cosmo black and grass green and This product is available in cosmo black. If you use the like operator with the entry
This product%green, the platform finds all values that start withThis productand end withgreento apply the chosen rule boxes to the value This product is available in cosmo black and grass green without changing anything in This product is available in cosmo black.not like applies rule boxes if a value in the selected attribute doesn't match a pattern. You can use regex to define a pattern.
greater than applies rule boxes if a value in the selected attribute is greater than the provided value.
greater than or equal to applies rule boxes if a value in the selected attribute is greater than or equal to the provided value.
less than applies rule boxes if a value in the selected attribute is less than the provided value.
less than or equal to applies rule boxes if a value in the selected attribute is less than or equal to the provided value.
is empty applies rule boxes if the selected attribute contains an empty value.
is not empty applies rule boxes if the selected attribute doesn't contain an empty value.
List operators:
Note
To use list operators, you must first create at least one inclusion or exclusion list in your site. See Exclude products with the Standard Inclusion/Exclusion list.
contains any of applies rule boxes if a value in the selected attribute contains at least one of the values present in the chosen list.
not contains any of applies rule boxes if a value in the selected attribute doesn't contain at least one of the values present in the chosen list.
All operators except is empty and is not empty require additional input, such as a static value, an attribute with dynamic values, or a list.
Choose the suitable option:
To use a static value, enter the value in Type to start.
To use dynamic values, select the toggle Use an attribute and then choose the needed attribute in the field Type to search columns next to it.
To use a list, select the needed list in Type to search lists.
If you want a more elaborate set of condition statements, you can select the plus icon
 to add more condition statements and set them up as described in Step 5.
IF and AND condition statements can have multiple OR condition statements.
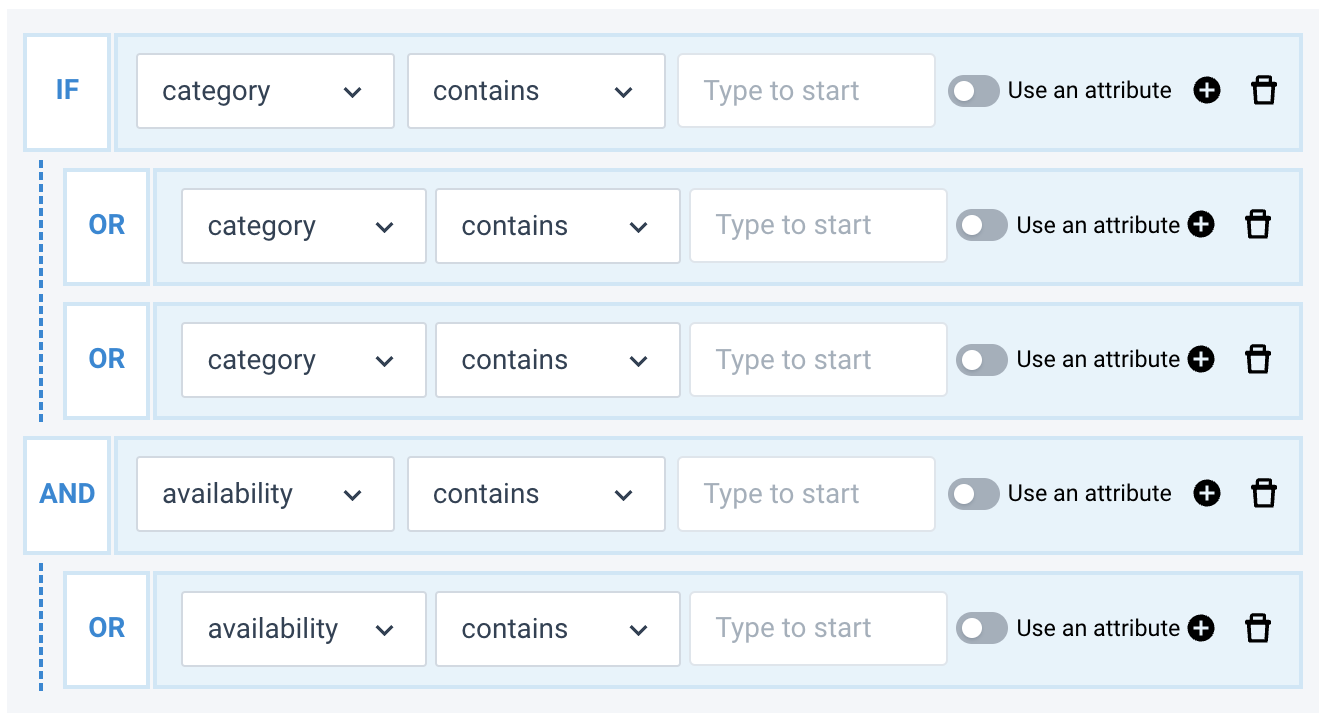
Choose AND to let the platform apply rule boxes if both IF and AND condition statements are true. You can add an AND condition statement only from an IF or another AND condition statement.
Choose OR to add more options to the existing IF and AND condition statements.
In THEN, choose Select an Option to add and set up the rule boxes you want the platform to apply to your data if your conditions statements are true.
See Find the needed rule box category to find a document about the needed rule box type.
Optionally, in ELSE, you can choose Select an Option to add and set up the rule boxes you want the platform to apply to your data if your condition statements are false.
You can leave the ELSE panel empty and skip adding any rule boxes there. Rule box conditions can work without ELSE rule boxes.
When your condition statements and rule box setups are ready, select Save changes in the top-right corner.
See Apply a rule box condition to an attribute to proceed.
Tip
Learn more about applying rule boxes based on conditions by taking a video course Optimization: Rule boxes for platform.productsup.com on our Academy website.
Apply a rule box condition to an attribute
To let a condition apply the needed rule boxes to your data, you should add it to a desired attribute.
Go to Dataflow or Data View from your site's main menu.
Open the Edit menu:
To open it in Dataflow, select any attribute at the needed stage.
To open it in Data View, use the drop-down menu on the left to go to the intermediate stage or the export where you want to add a rule box condition. Then, select Edit under the name of the needed attribute.
Note
The attribute where you apply a rule box condition must be in the same stage where you created the condition. See Step 3.
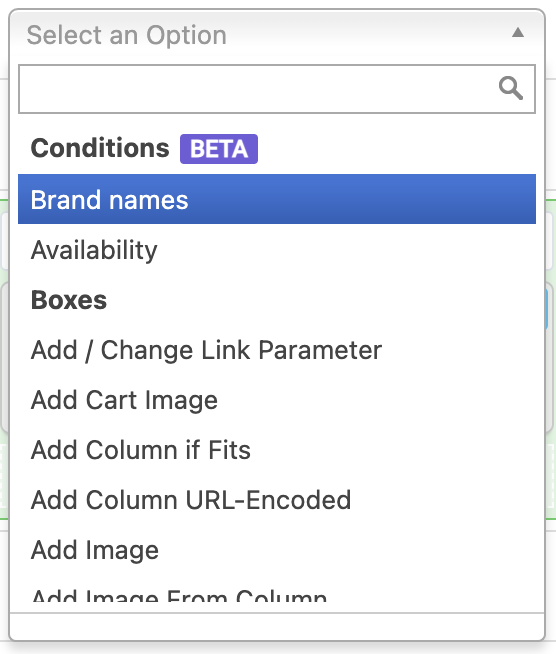
In the Edit panel on the right, choose Select an Option.
In the Conditions section, select your desired condition and choose Save.
If the attribute where you added a condition has other conditions or rule boxes, you can drag and drop the new condition to a desired place. This way, you can arrange the order of data optimizations in this attribute.
If you want to check the settings of an added condition, select Go to condition.
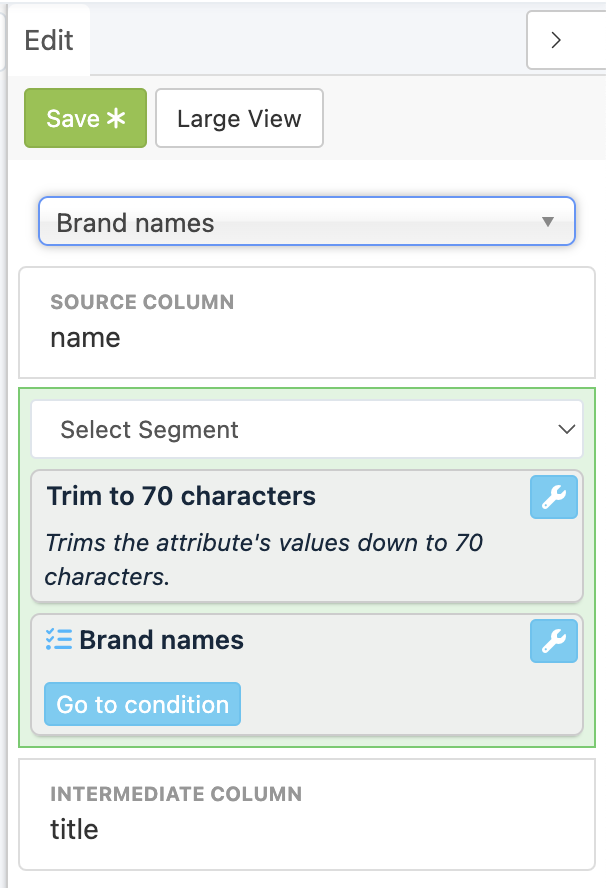
Congrats! You have added a condition to a desired attribute. In Dataflow, the number of bubbles you see on the connection of this attribute with a previous stage corresponds to the number of rule boxes and conditions added to this attribute.
Edit a rule box condition
If you want to change the settings of a rule box condition, you can edit it:
Go to Dataflow or Data View from your site's main menu.
Select Rule box conditions in the top ribbon.
In Dataflow, you can find the button here:
In Data View, you can find the button here:


In Stage, choose the stage where you want to change a condition.
Change the desired settings of a condition by adding, editing, or removing condition statements and rule boxes. See Create a rule box condition to do so.
To remove a condition statement, select the trash icon
 next to it and then select Delete.
To remove a rule box, select the wrench icon
 and then select the trash icon
  .
.Tip
If you accidentally deleted all condition statements, you can add a new IF condition statement by selecting Add a condition statement.
When finished, select Save changes.
Delete a rule box condition
If you no longer need a rule box condition, you can delete it:
Go to Dataflow or Data View from your site's main menu.
Select Rule box conditions in the top ribbon.
In Dataflow, you can find the button here:
In Data View, you can find the button here:


In Stage, choose the stage where you want to delete a condition.
Select the trash icon
 next to the name of the condition you want to delete and confirm the action by choosing Delete.
Note
If any attribute in your site uses this condition, this action removes the deleted condition from that attribute. It means that the site stops applying the related data optimizations to this attribute, which may affect your export data.